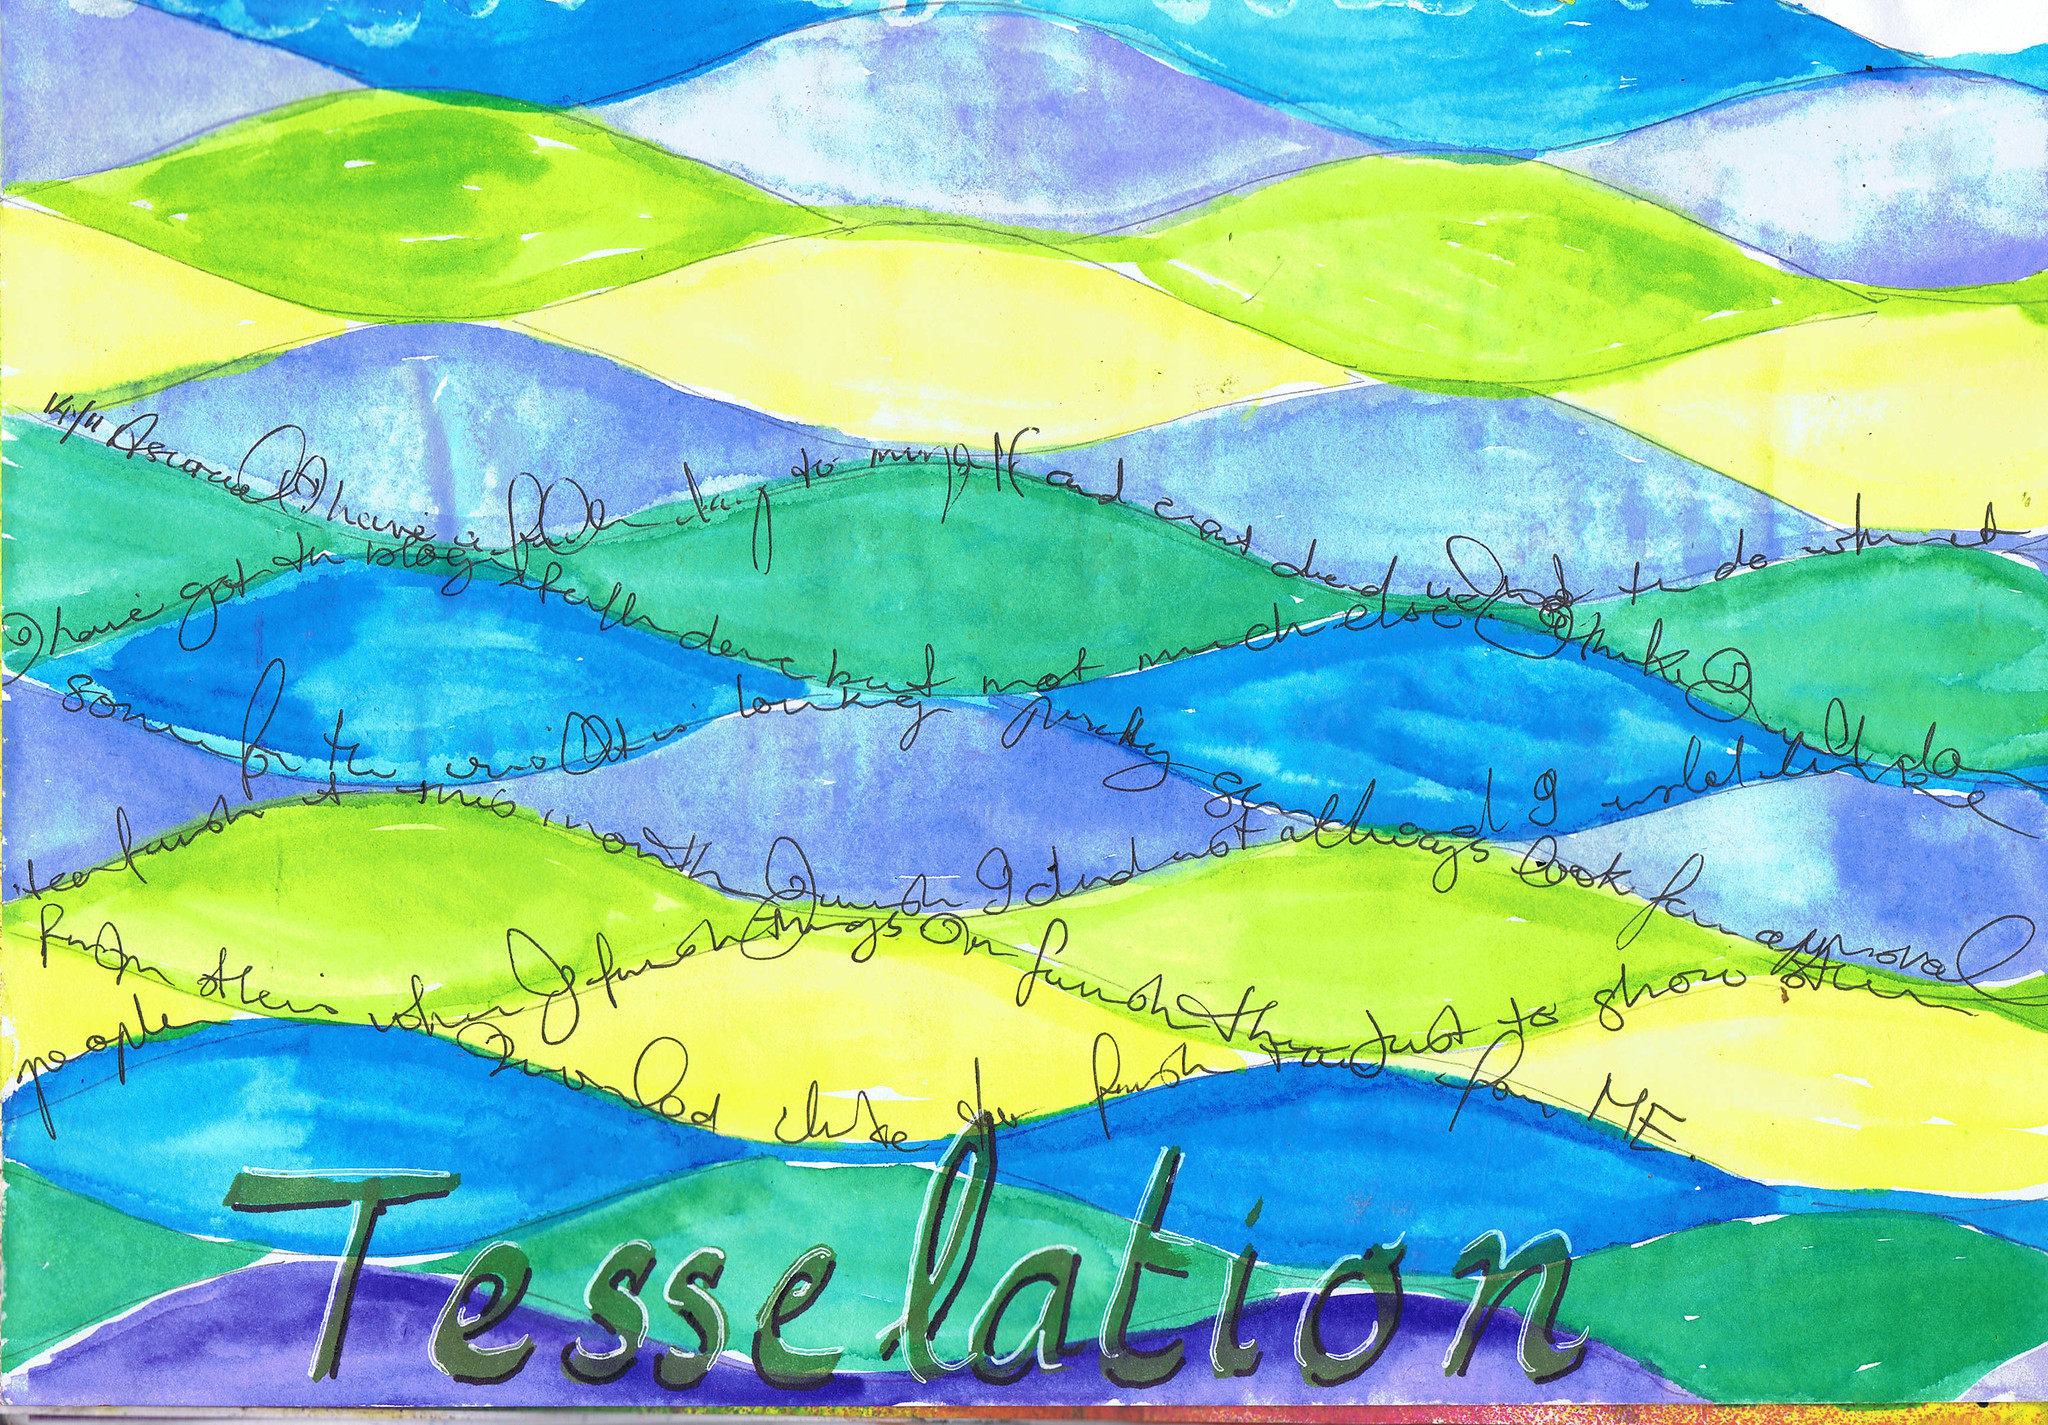
Saturday, November 30, 2013

Just having fun

Today is the final day of AEDM!
Another face today.

I started this one with paint a few days ago, but ended up finishing with pencil.
I was experimenting with eye shapes and this experiment did not quite work.  The eyes themselves are good and I love the hair and the shading and lots of other parts, but one of the eyes seems crooked and her mouth is a bit pouty,  and I repainted several sections over and over, but overall, I learned a lot and know where not to go next time.

Happy creating!

Friday, November 29, 2013

Fabric Fix

Day 29 of AEDM!
It has been a while since I posted any textile work.  I have been working, but not anything finished to show.
So today I had my fifteen minute fix.  It was one of those pieces that came together quickly, perhaps a bit more than fifteen minutes, but not much.
I do find that this often happens when I have nothing in mind; the ideas seem to come quickly when I throw away the rules.

And here is what I have put together.  Not finished yet, but perhaps you can help me with that!
I decided to look at some textile videos (I always have videos running in my studio) and the first which came up was Pokey Bolton's Needlefelting video.  So I got out the embellisher.
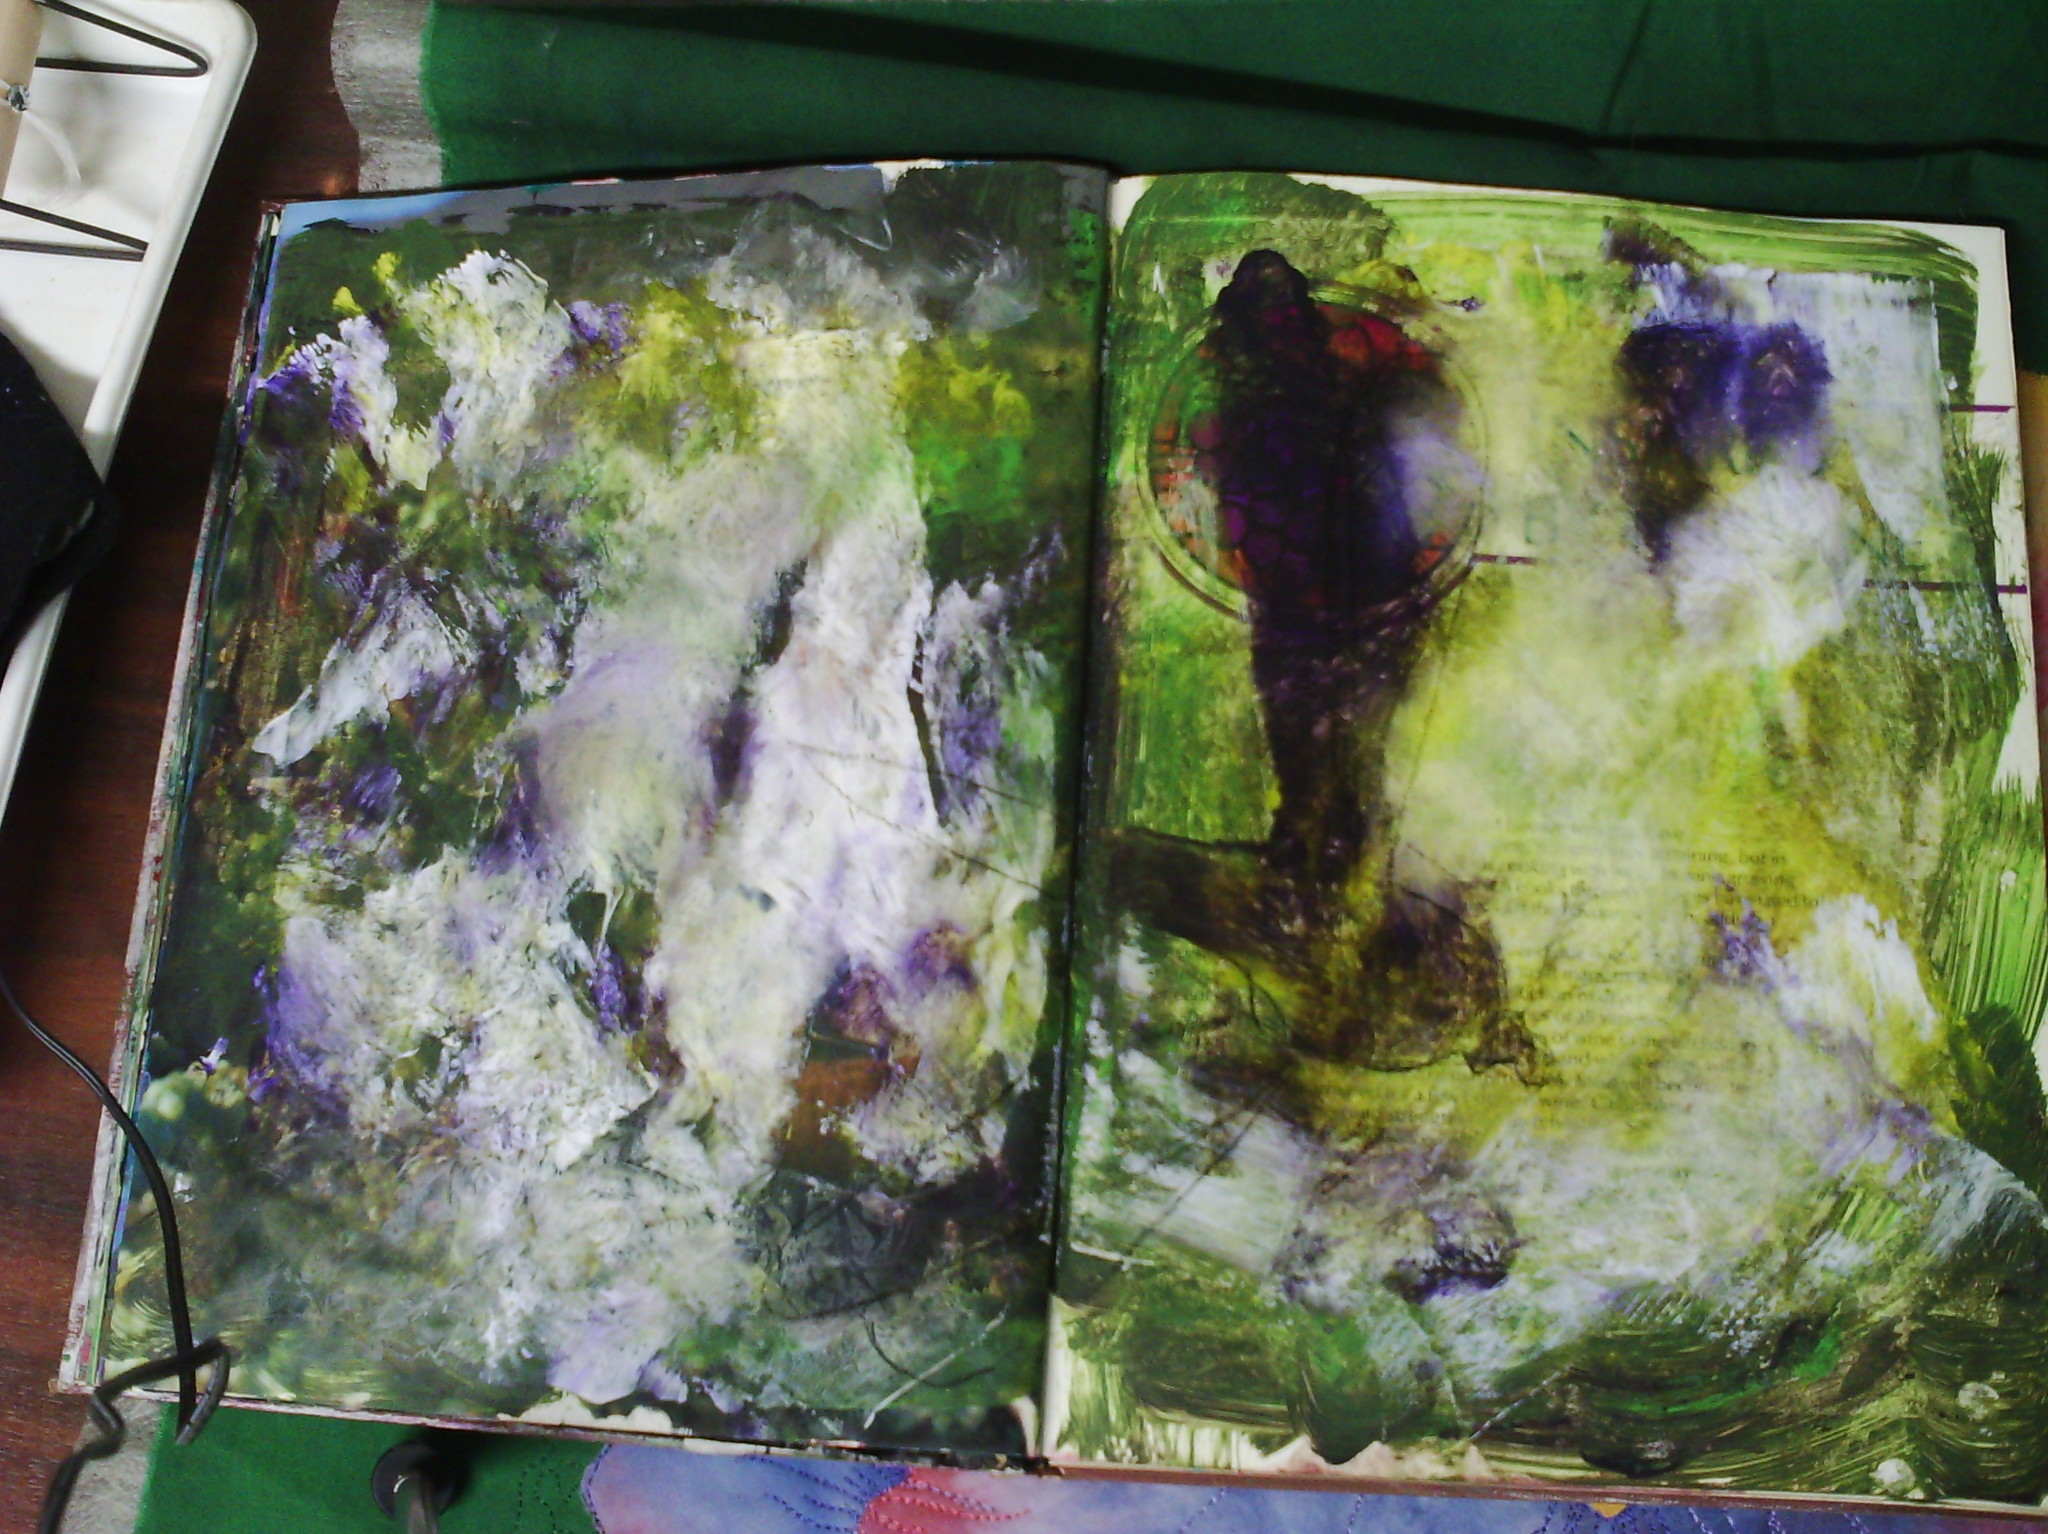
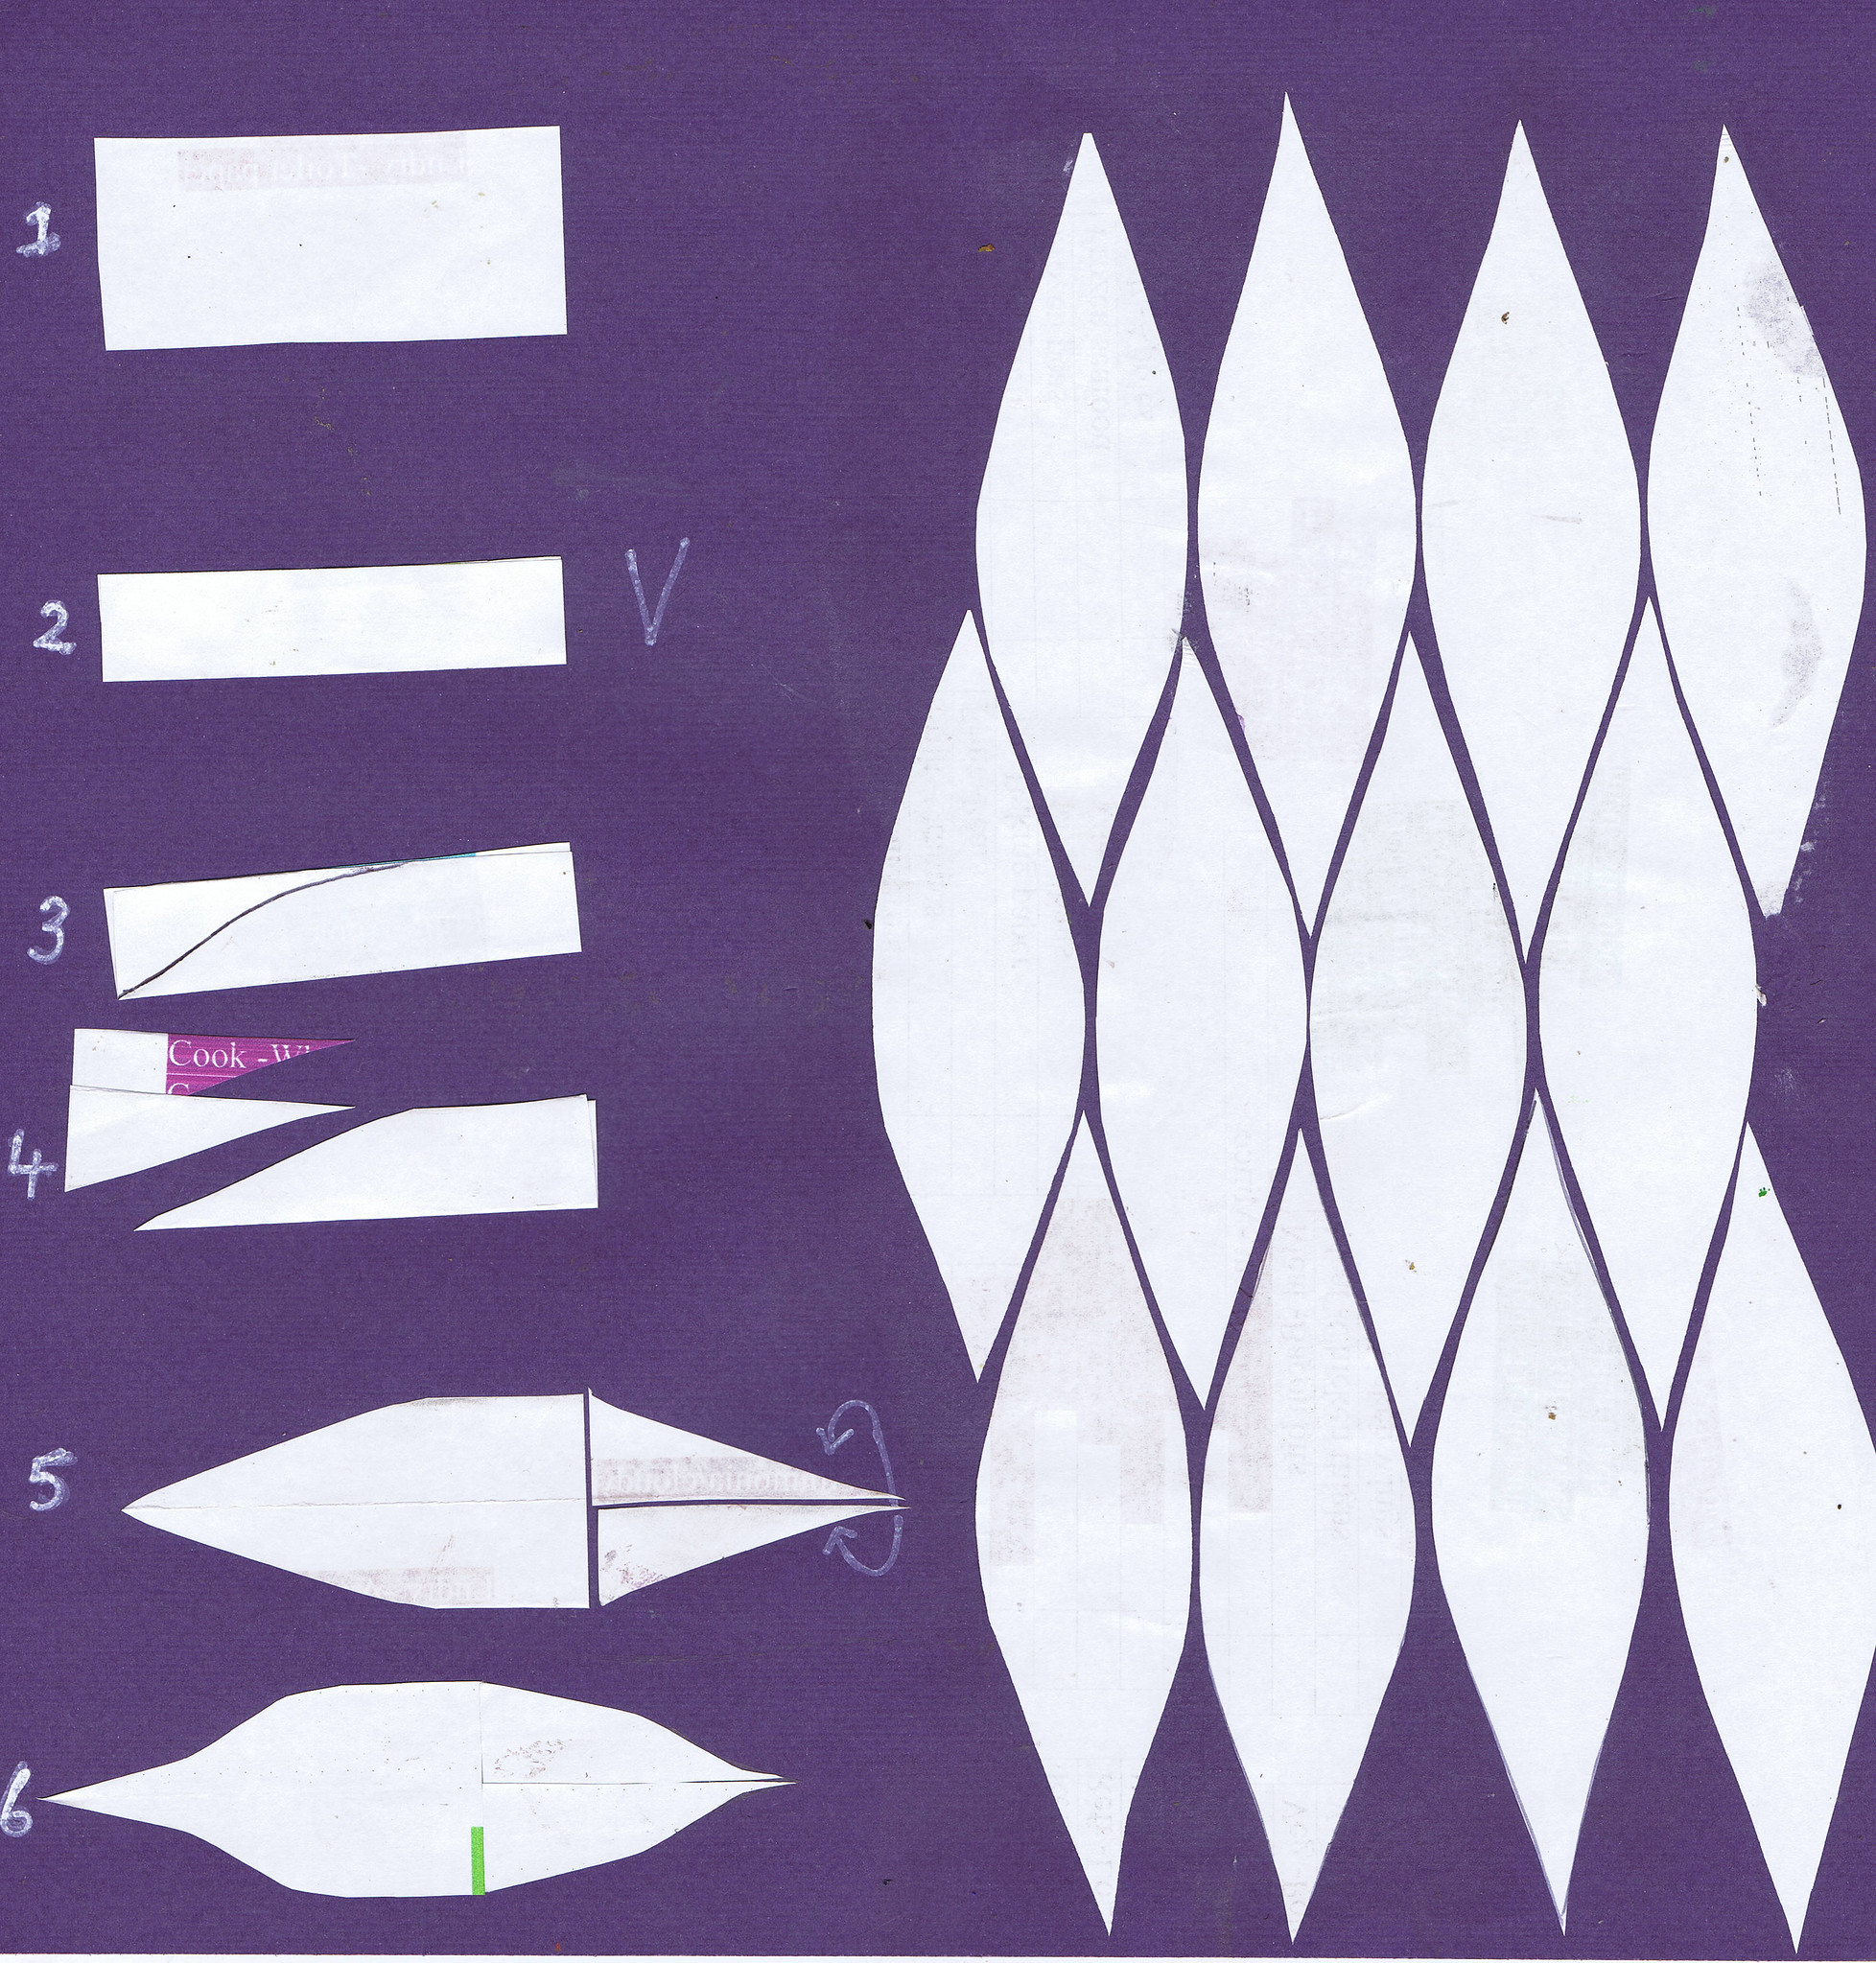
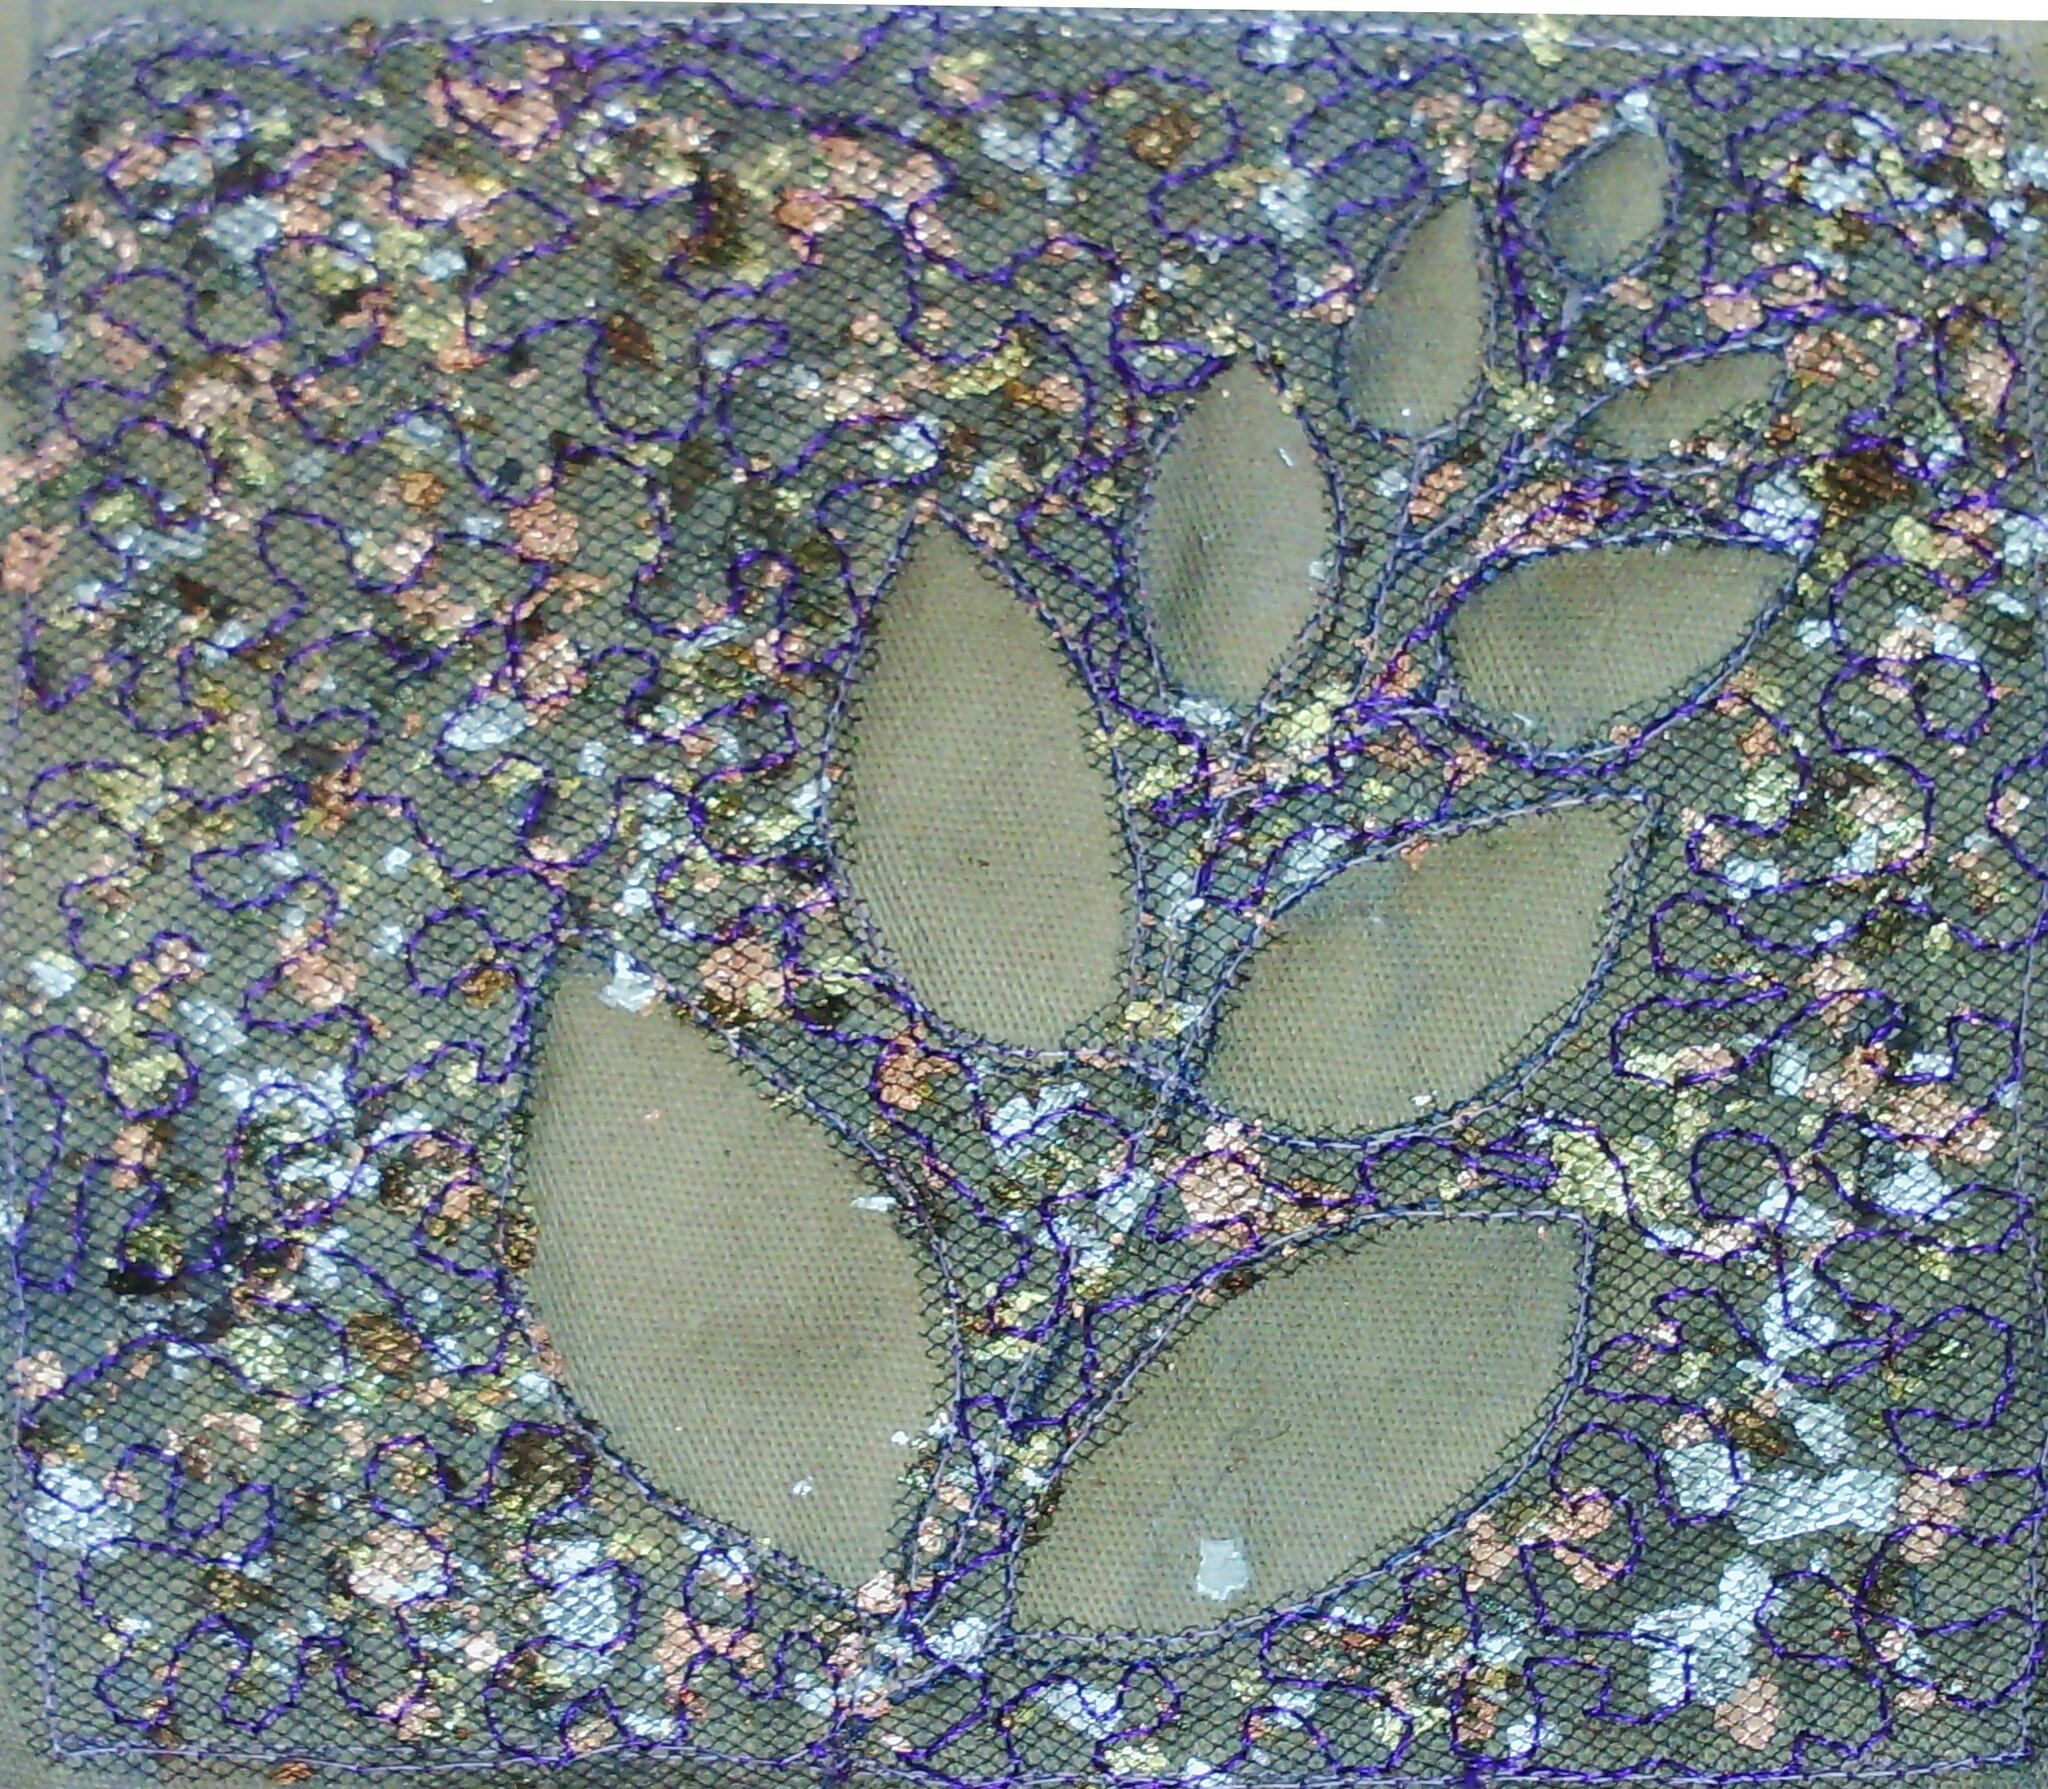
I thought a tiny bit about what to do and feathers came into my mind (all those journal pages with feathers came to me) and I had a few ideas in mind, but when I went down to the machine, I saw a scrap of felt.  My original idea was to use yarns to make the feathers (and I still might do that), but on the shelf nearby was some gorgeous silk weave that a friend had given me (saying " You'll think of something to do with it")
Perfect!
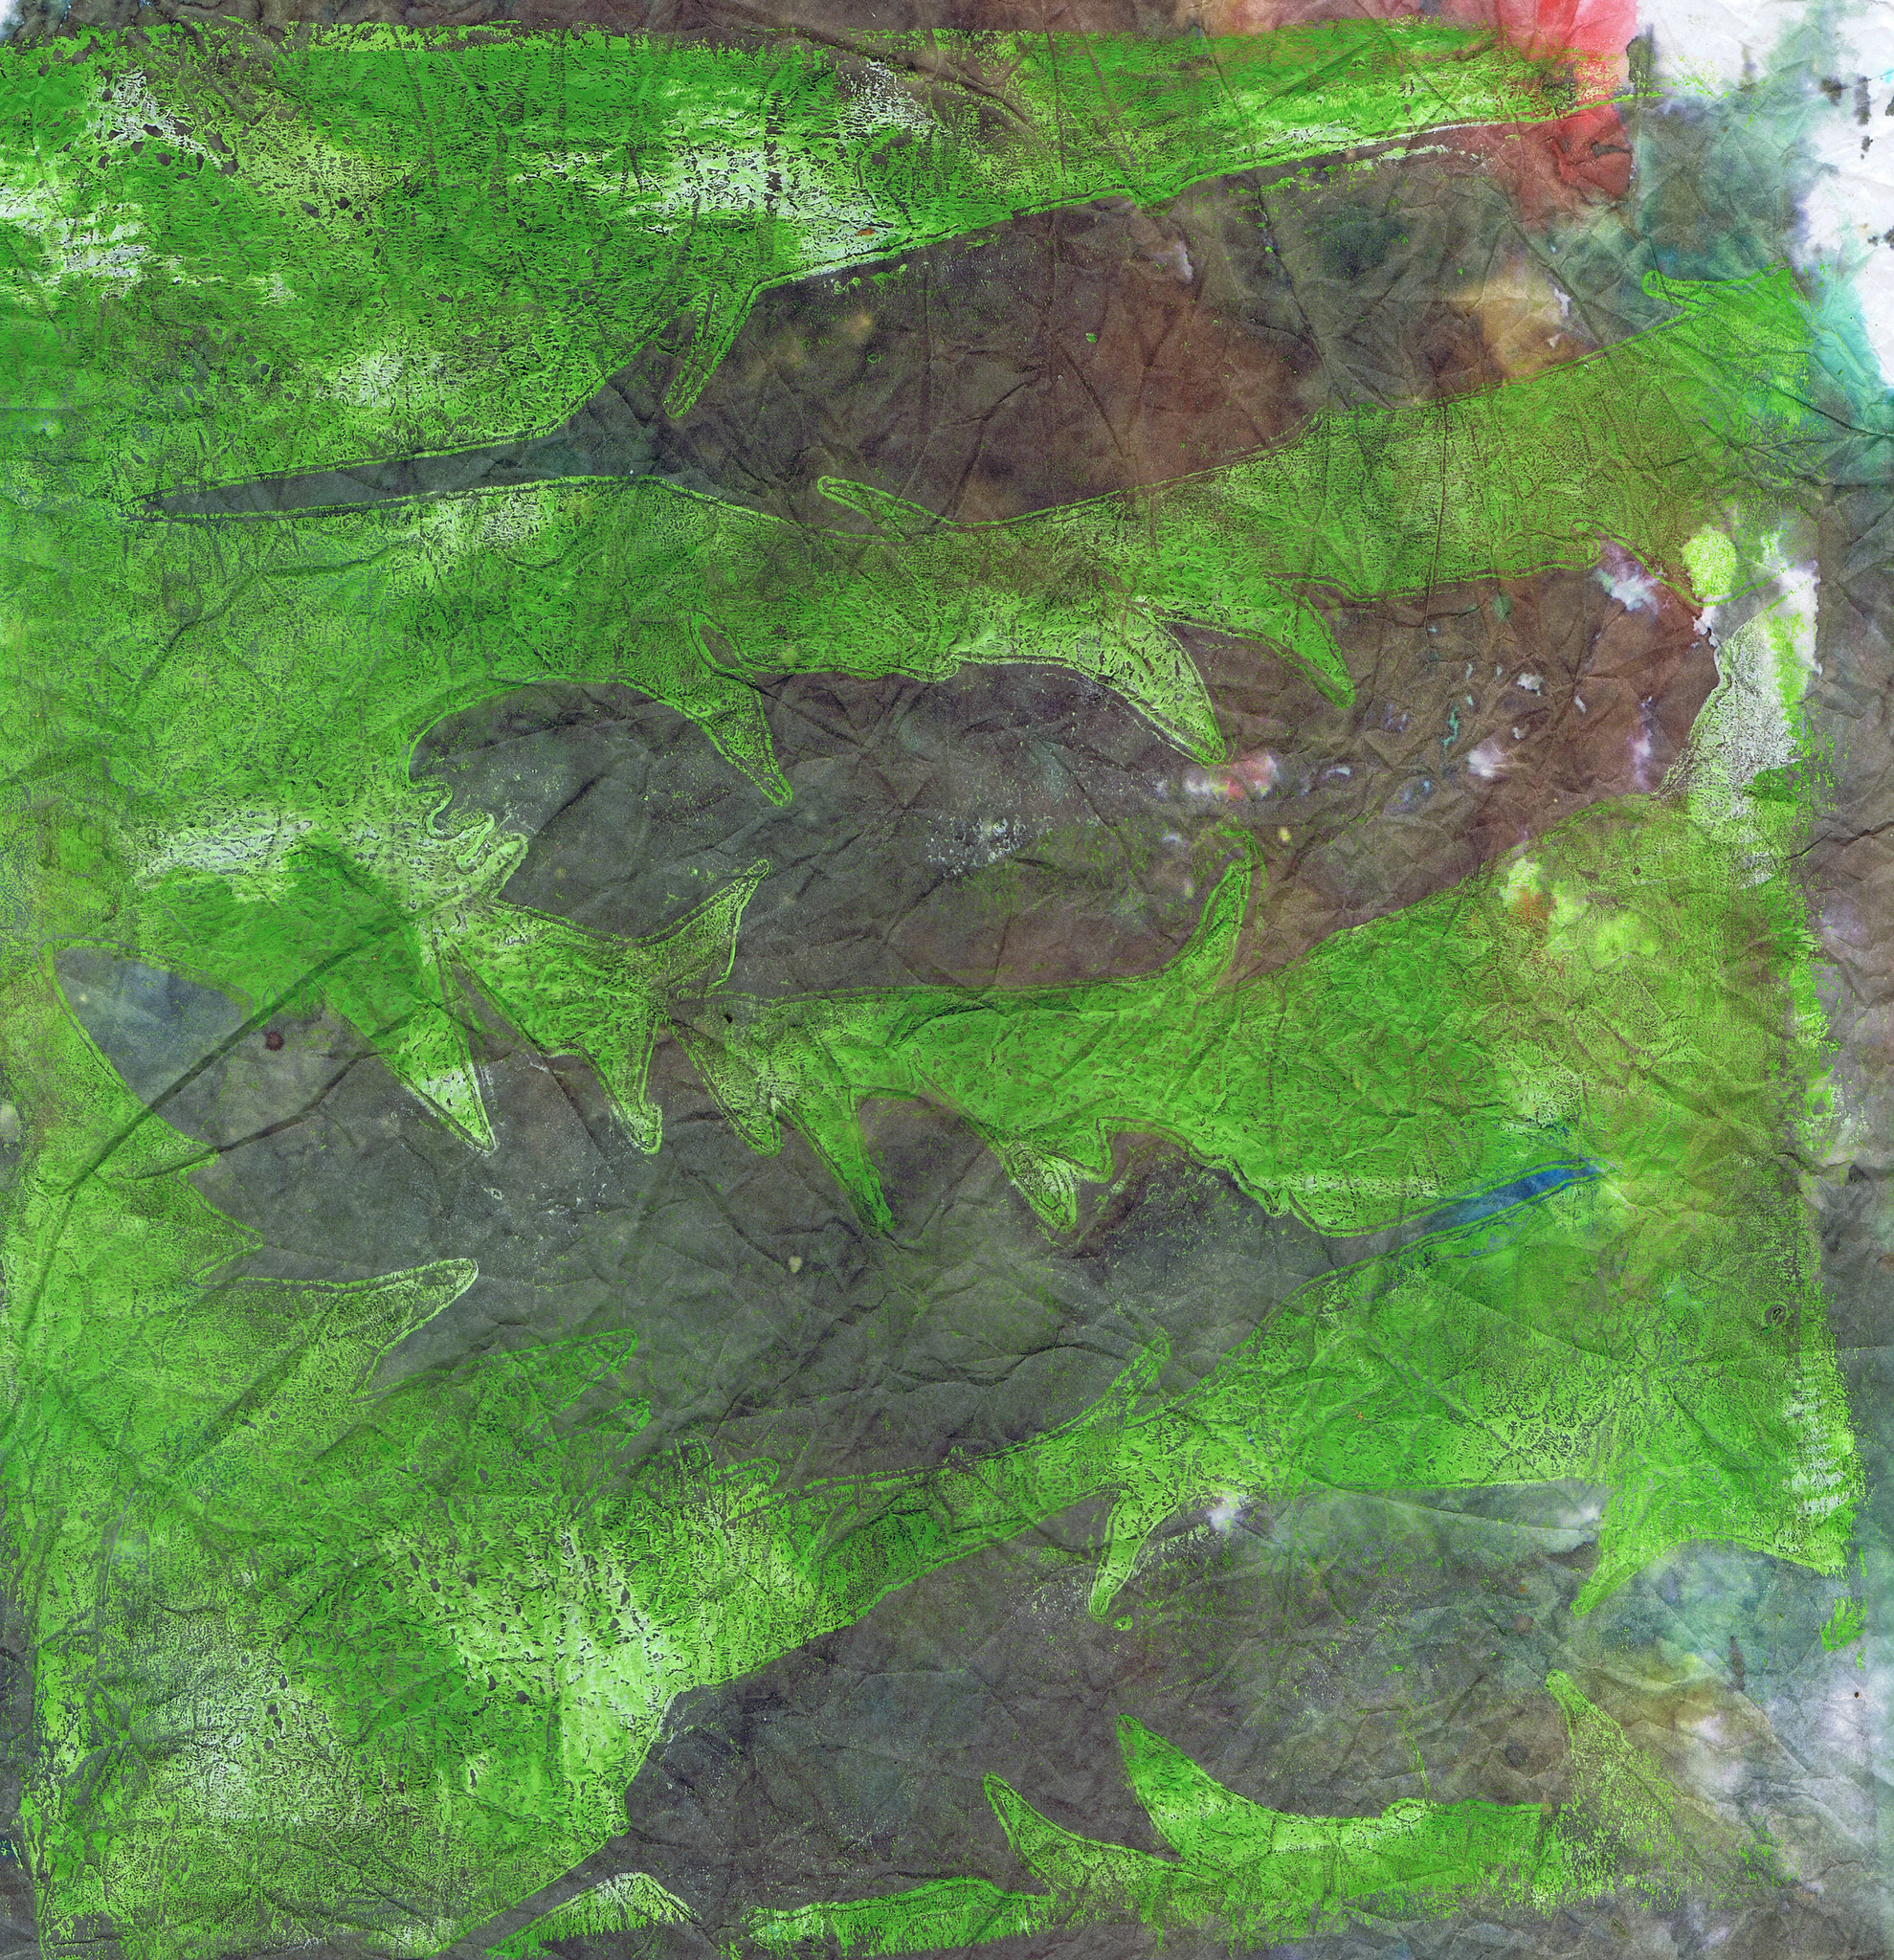
So I cut some feather shapes out and just needlefelted them down with the embellisher.
You can see the gorgeous woven texture of the silk in this picture.  I paid a lot of attention to the edges when I was needlefelting, which made them fray nicely.
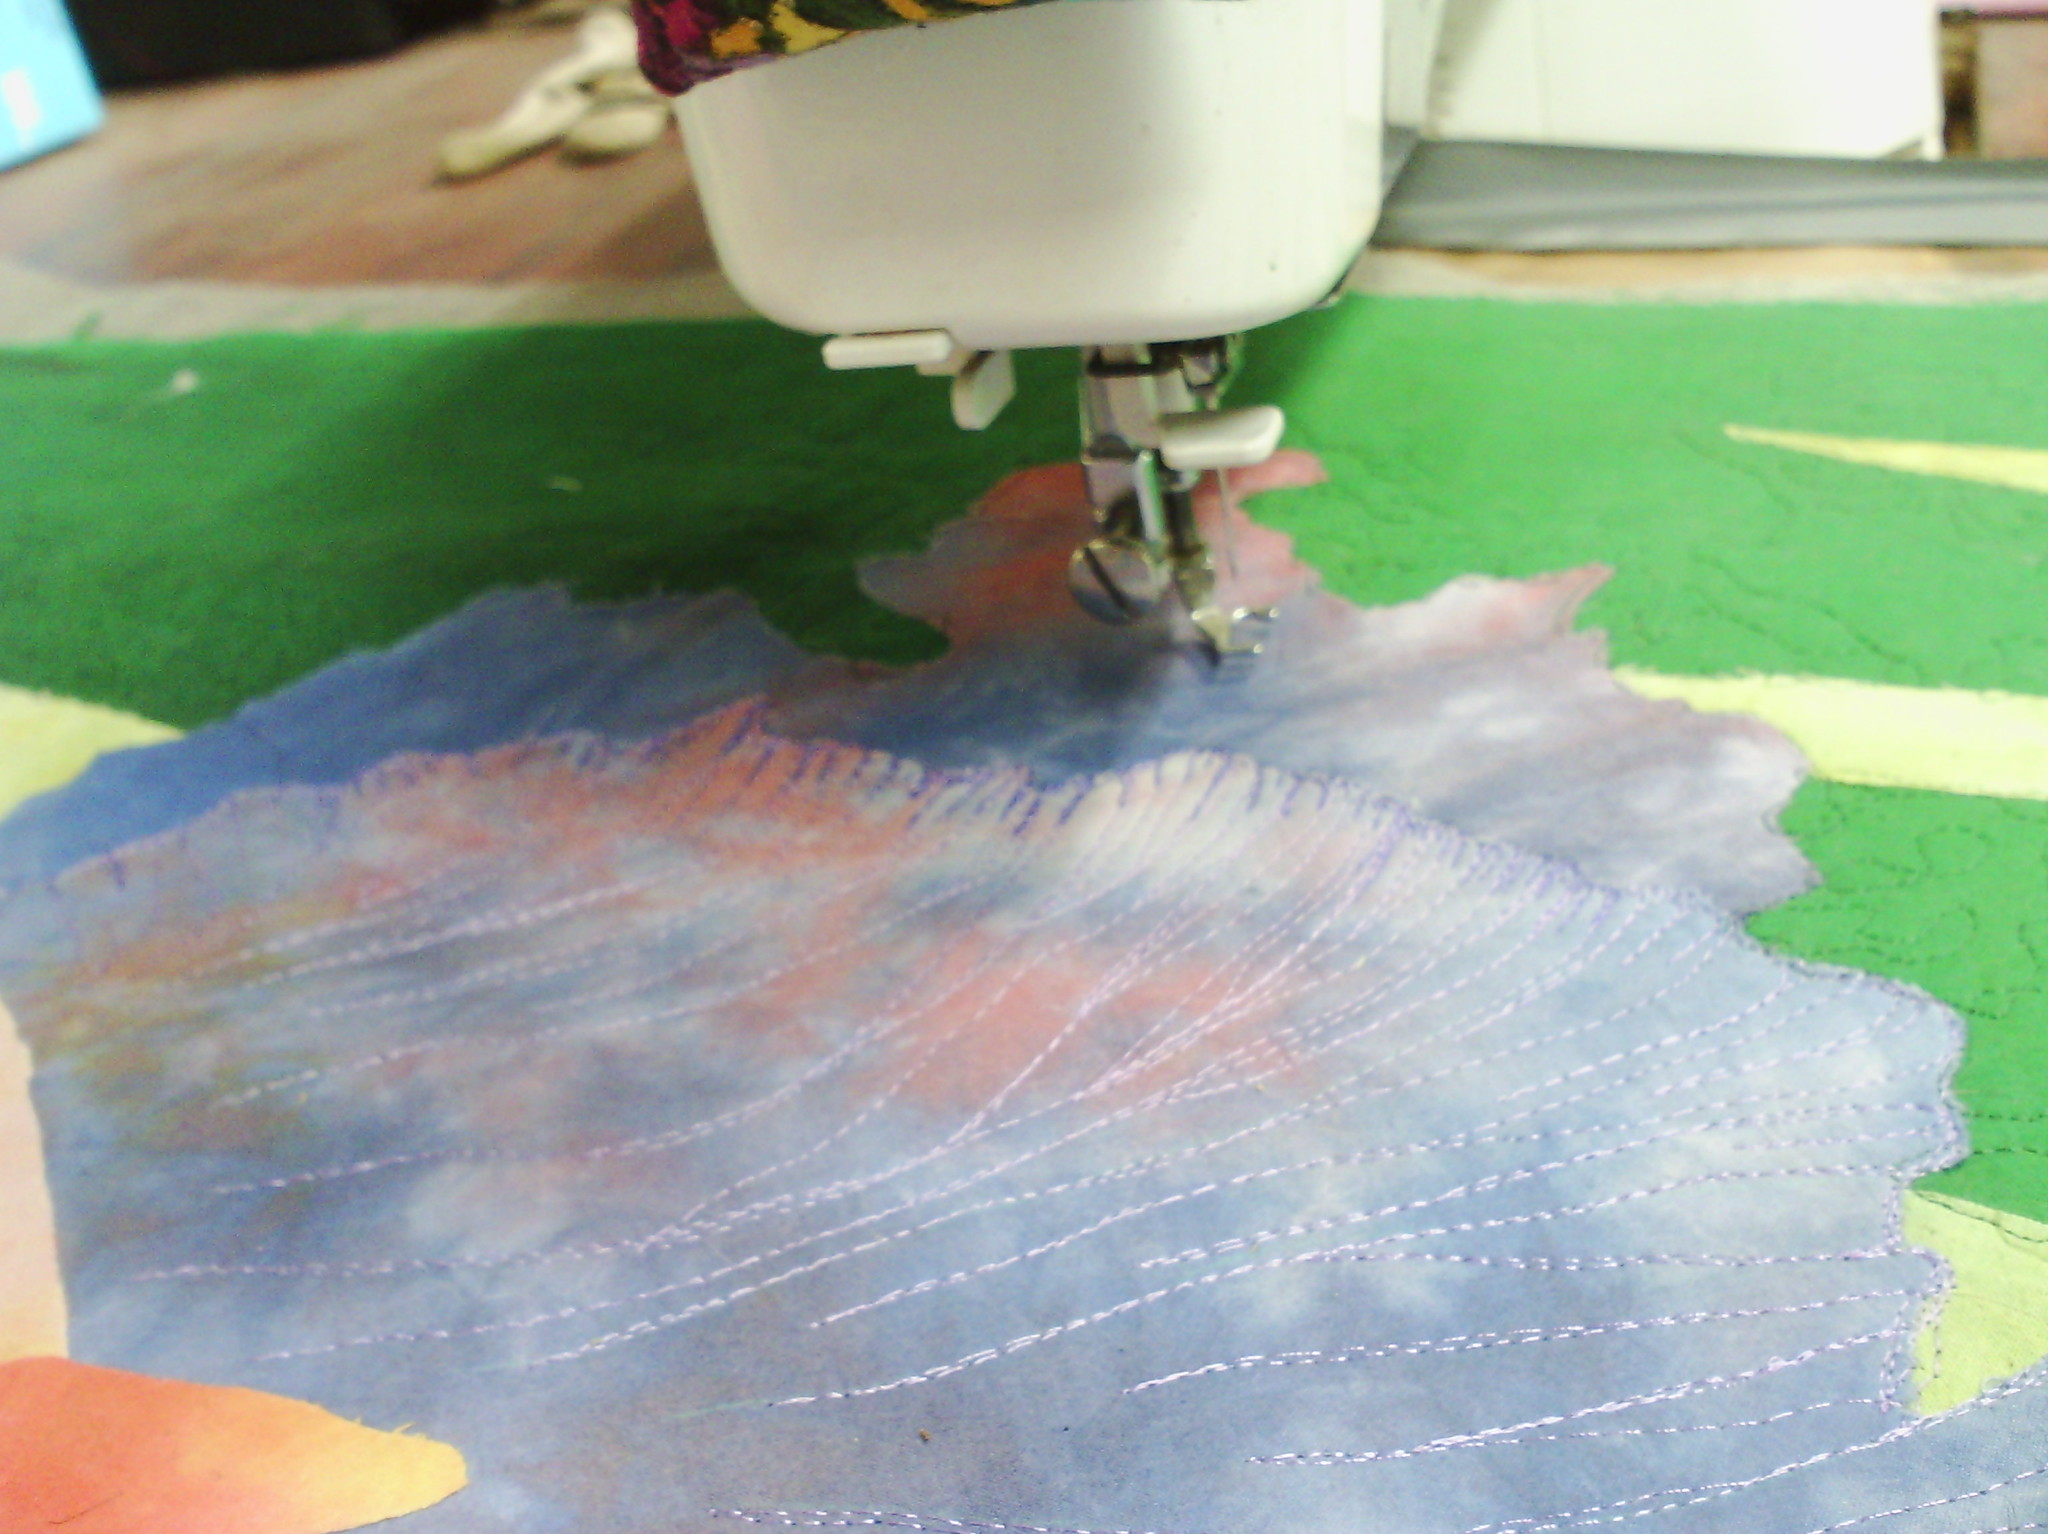
When I had done that, I threaded up with Black thread and free motioned over them to make the stems and some side branches.
At this stage, I knew I needed more, and indended to do some sheer raw edge applique, but all my sheers were all still in the car from teaching a class and since it is 42 steps down and 42 steps back, I was too lazy to go and get it.
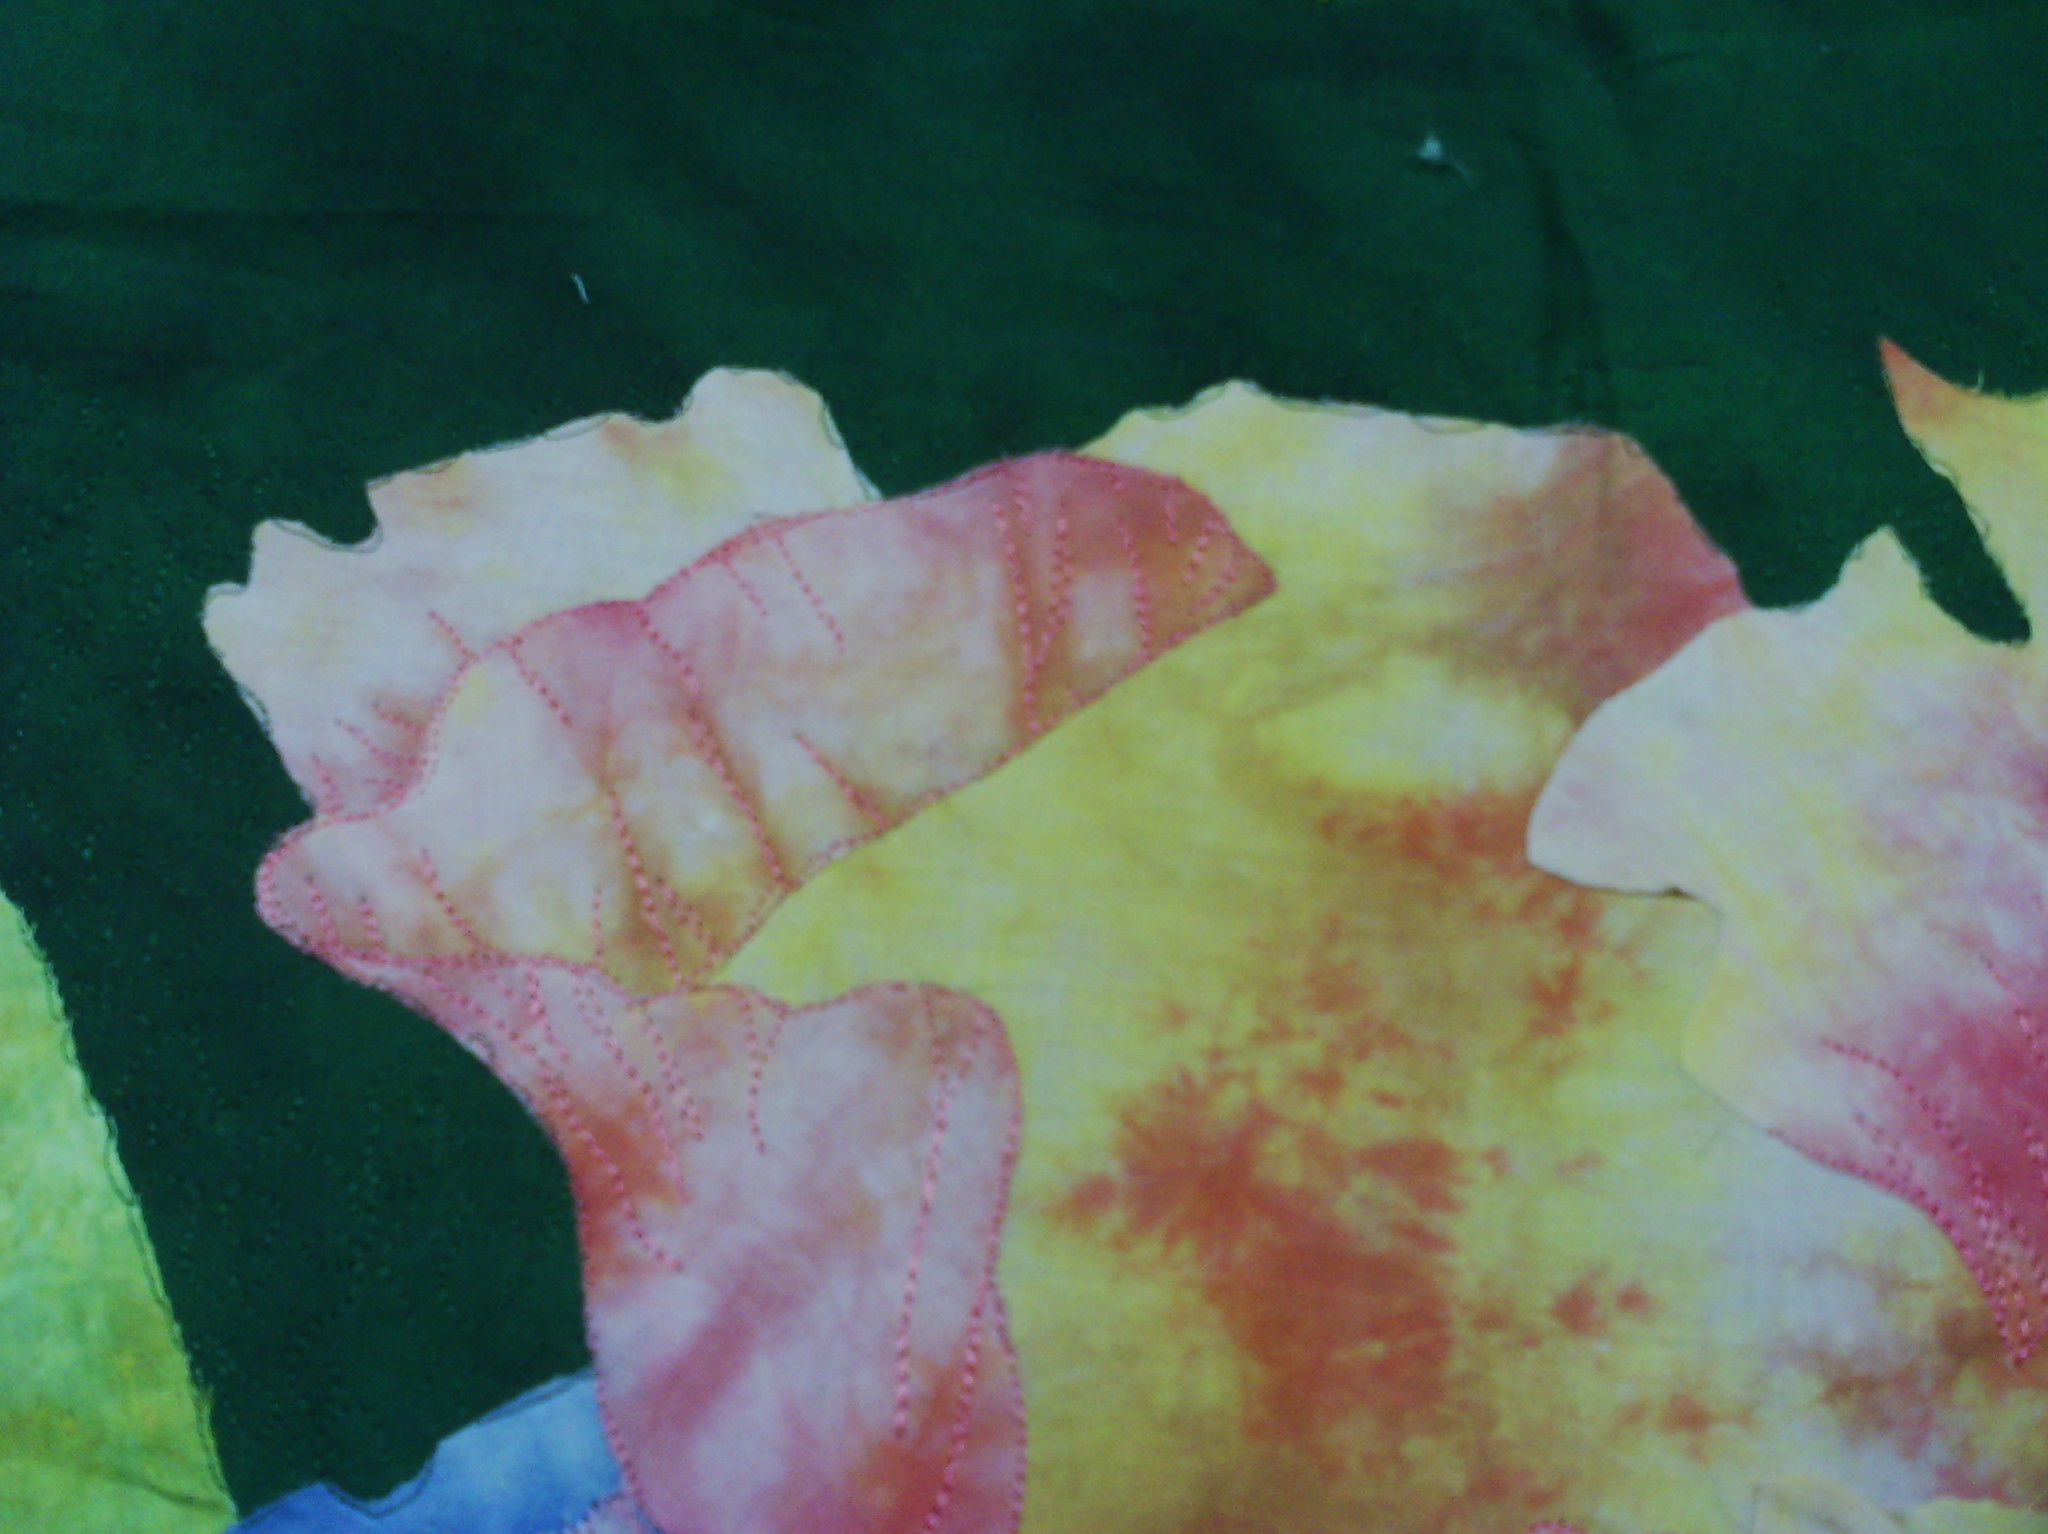
Opportunity!  I saw a feather stencil sitting on my journaling table and thought, let's add some stencilling.  The lumiere paints were just there so I used them, intending to add a bit of bling.
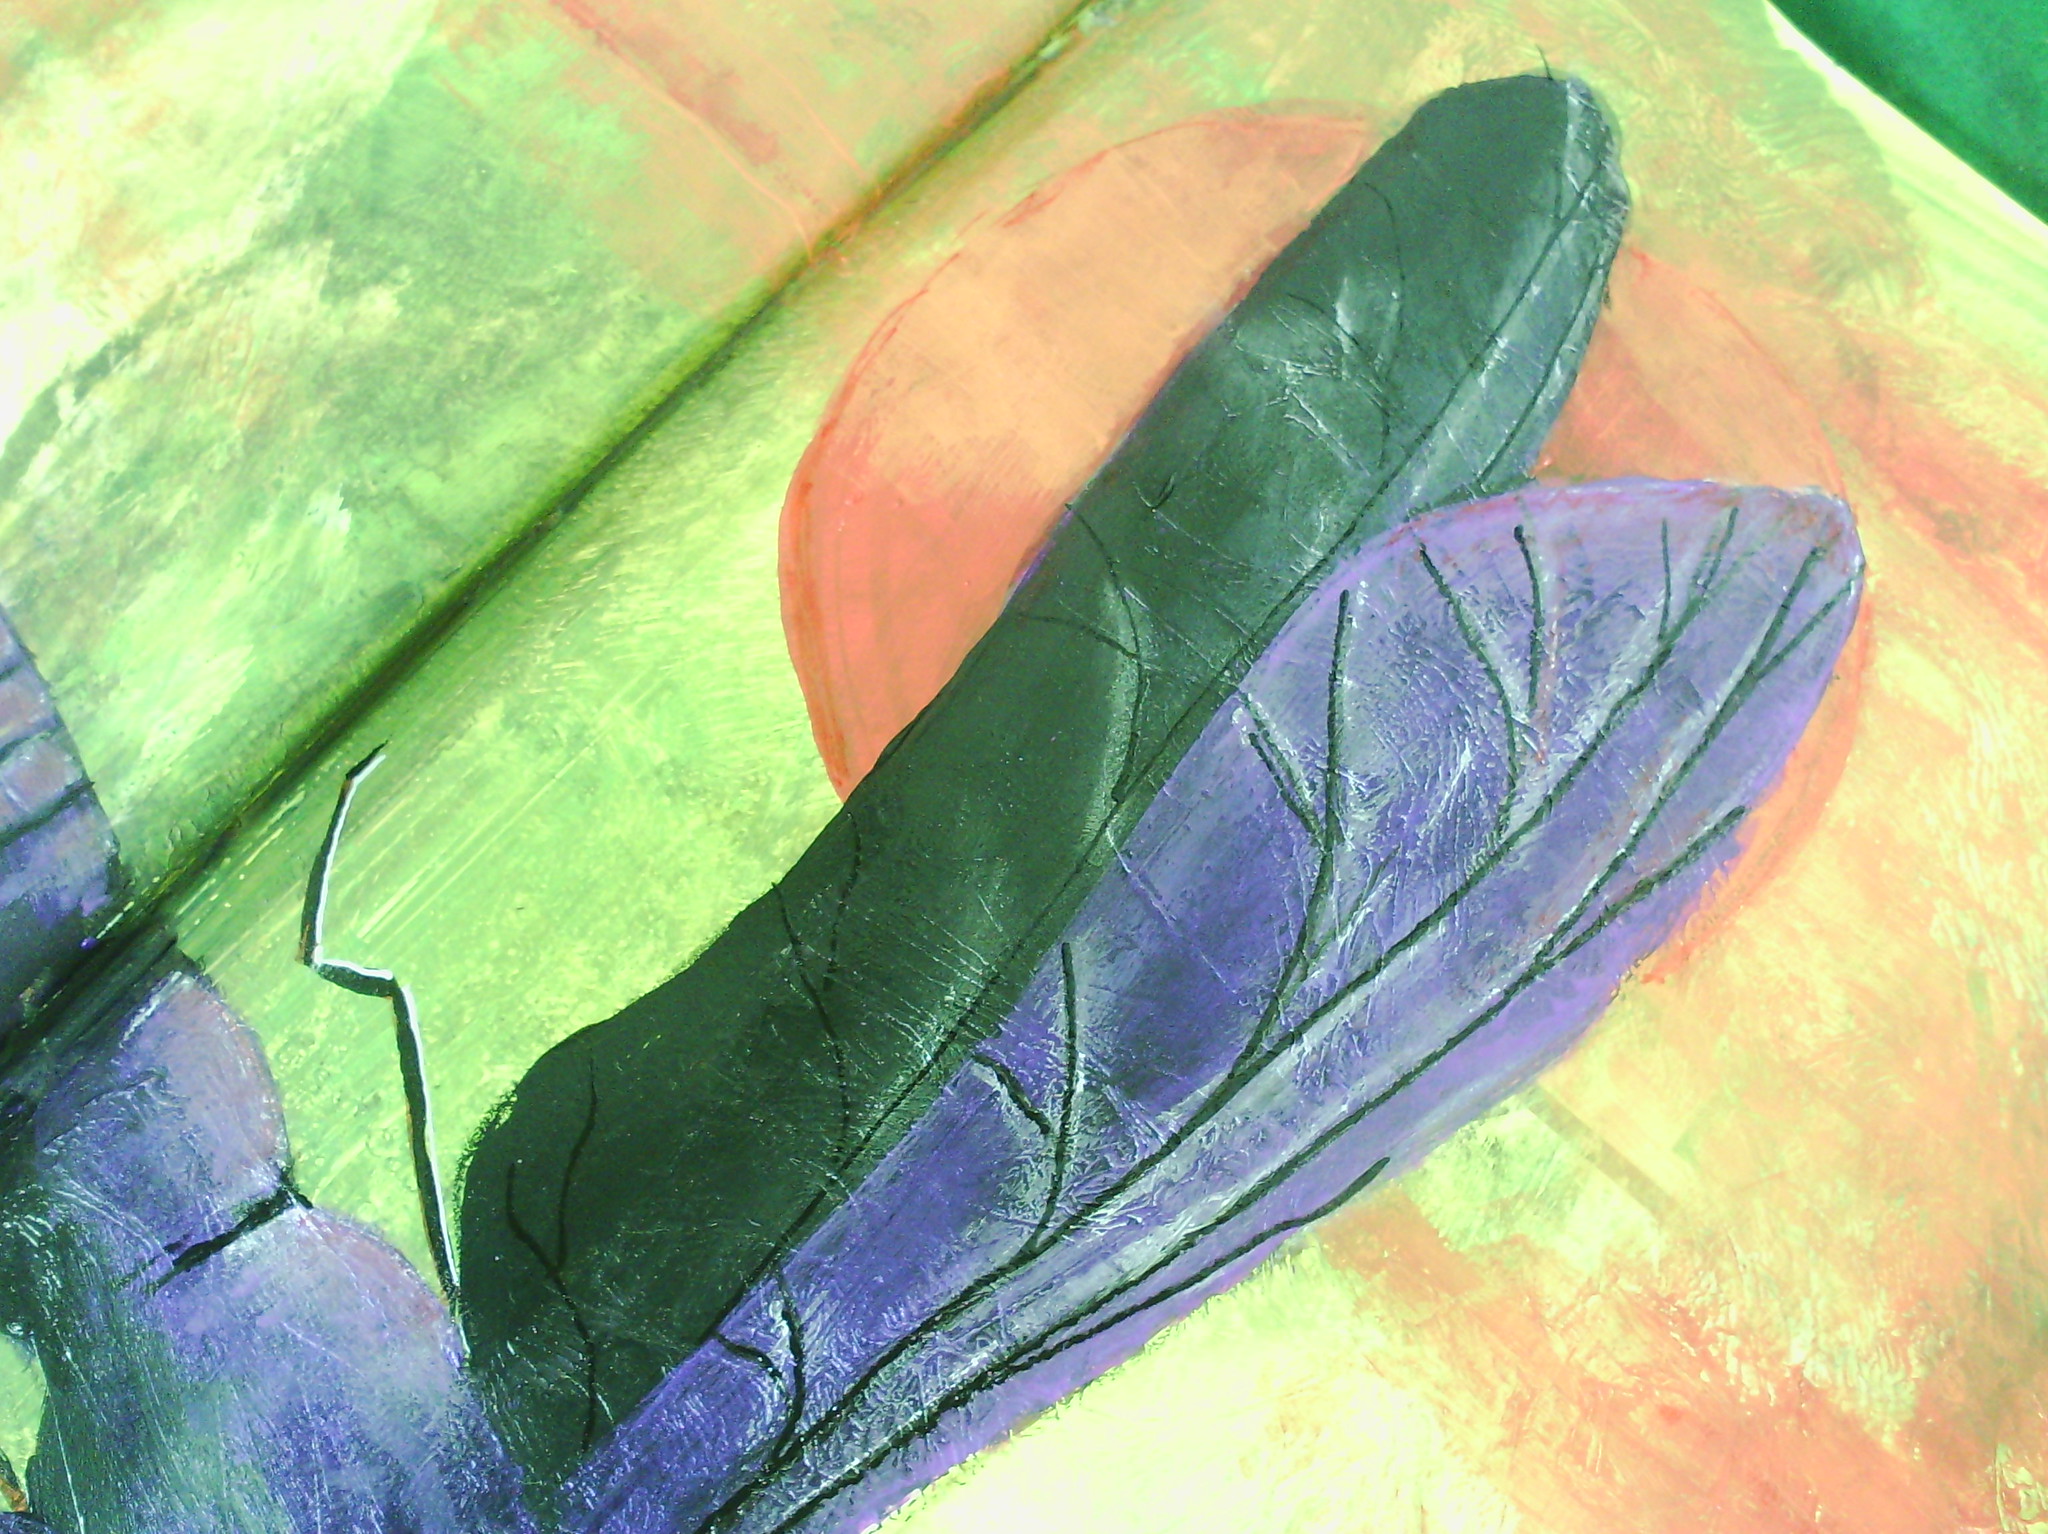
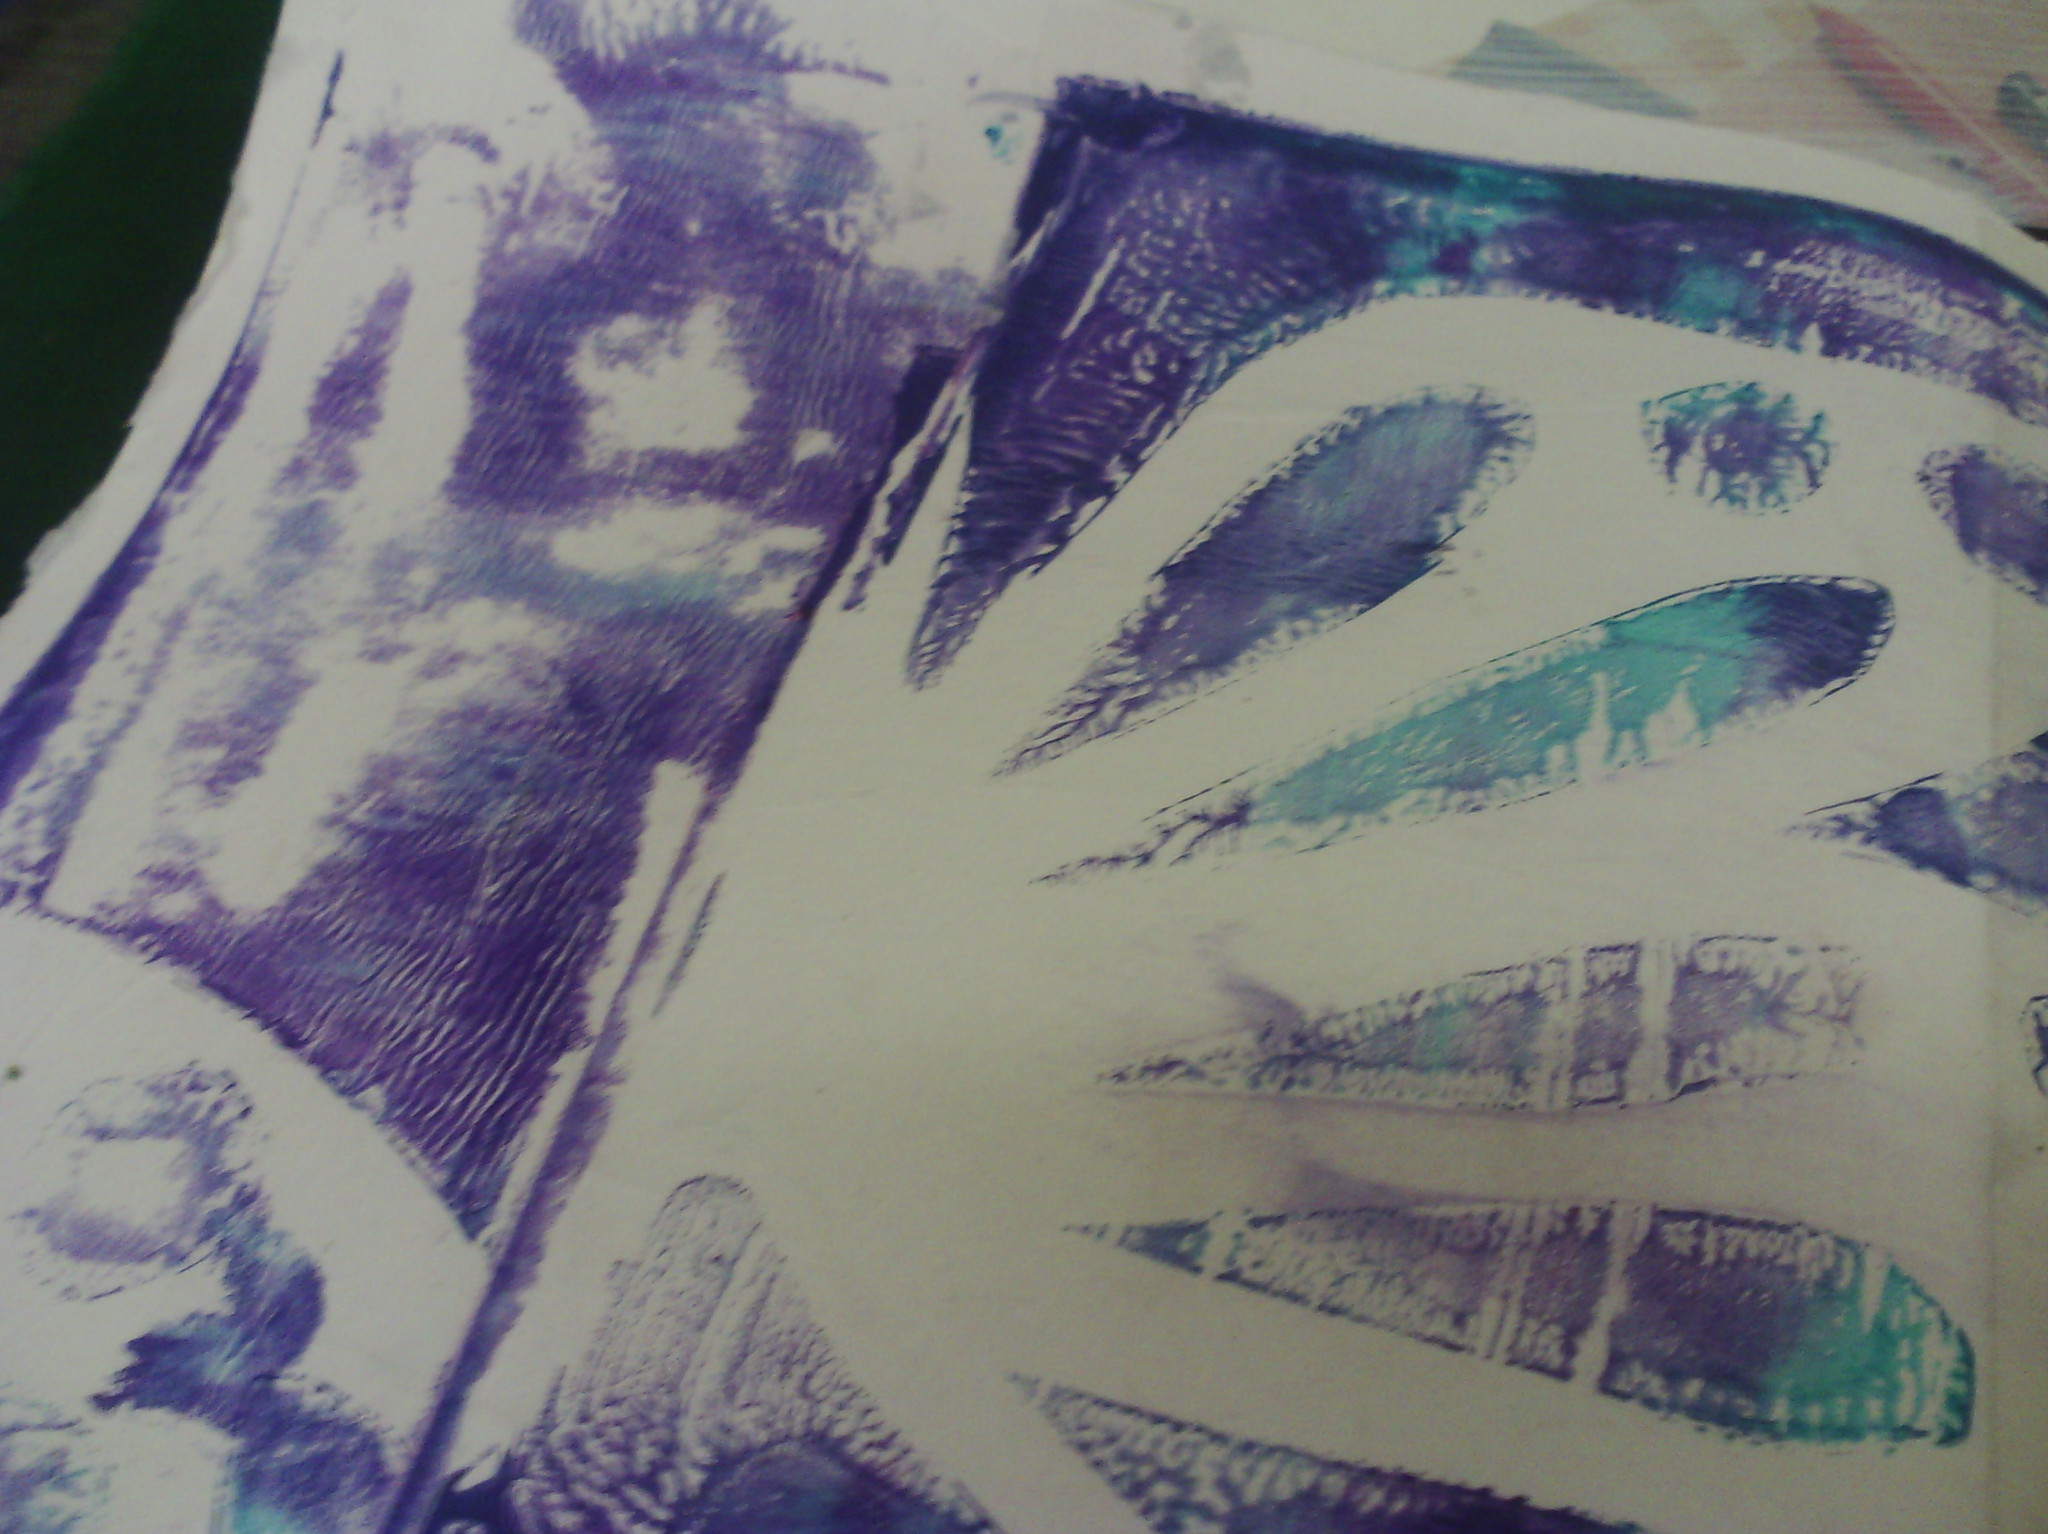
You can see in the photo above that a strange thing happened.  In the felt, the paint took on the base colour (this was rose gold) and the silk took on more of the metallic part of the paint.
WOW!  I loved that, so I tried a few more colours.
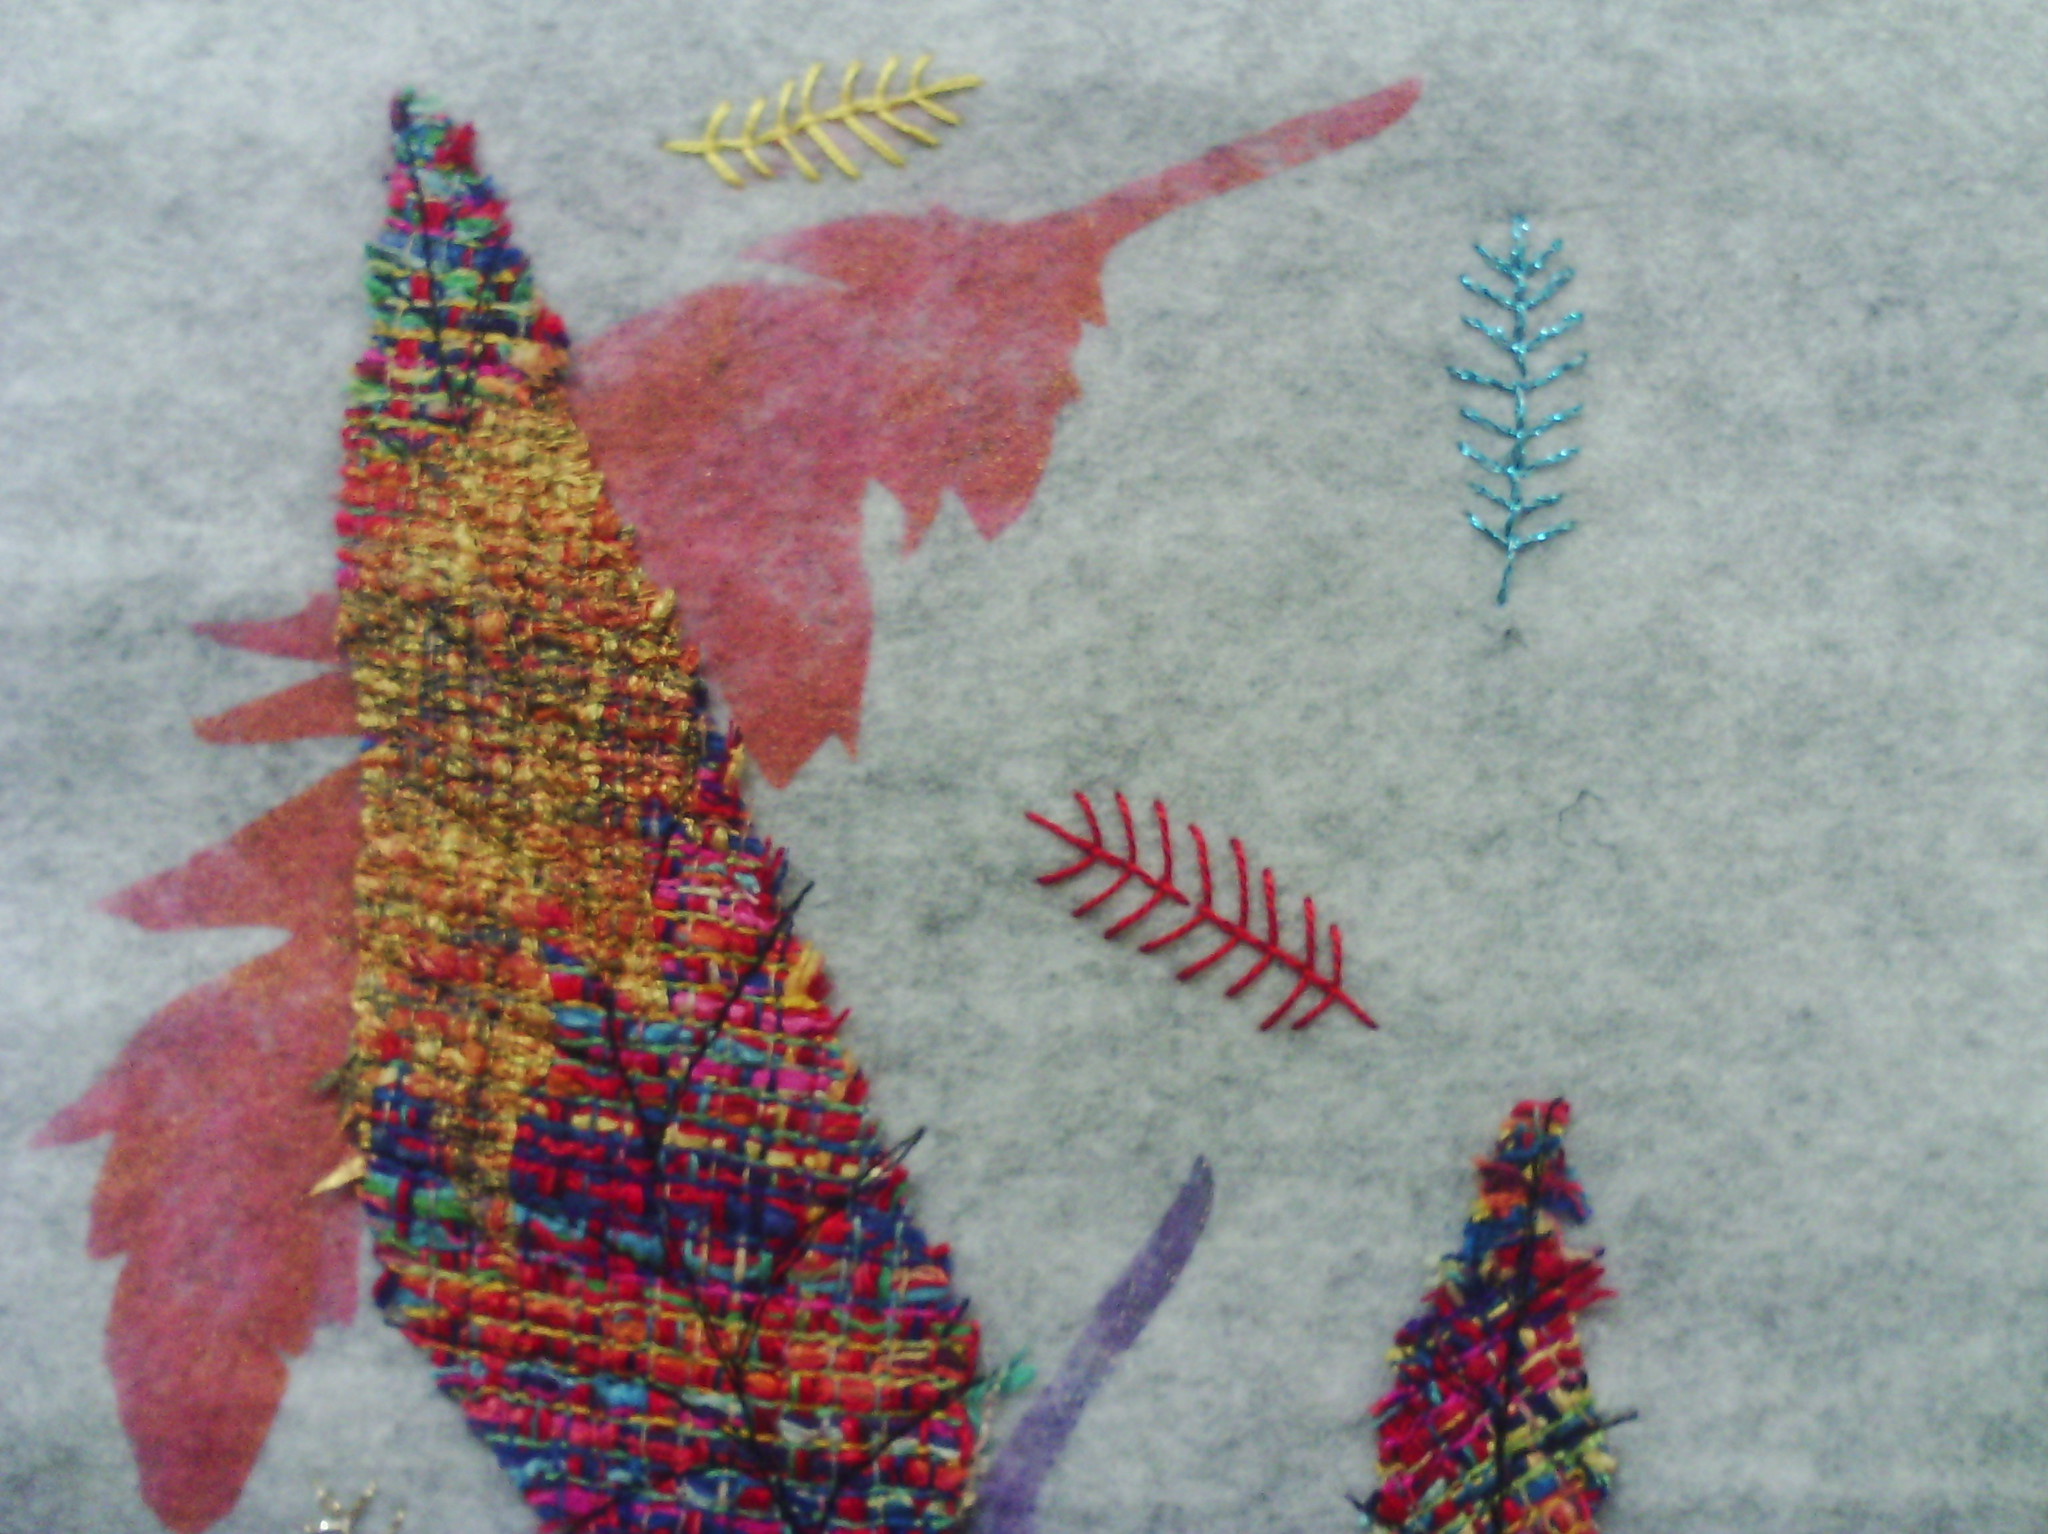
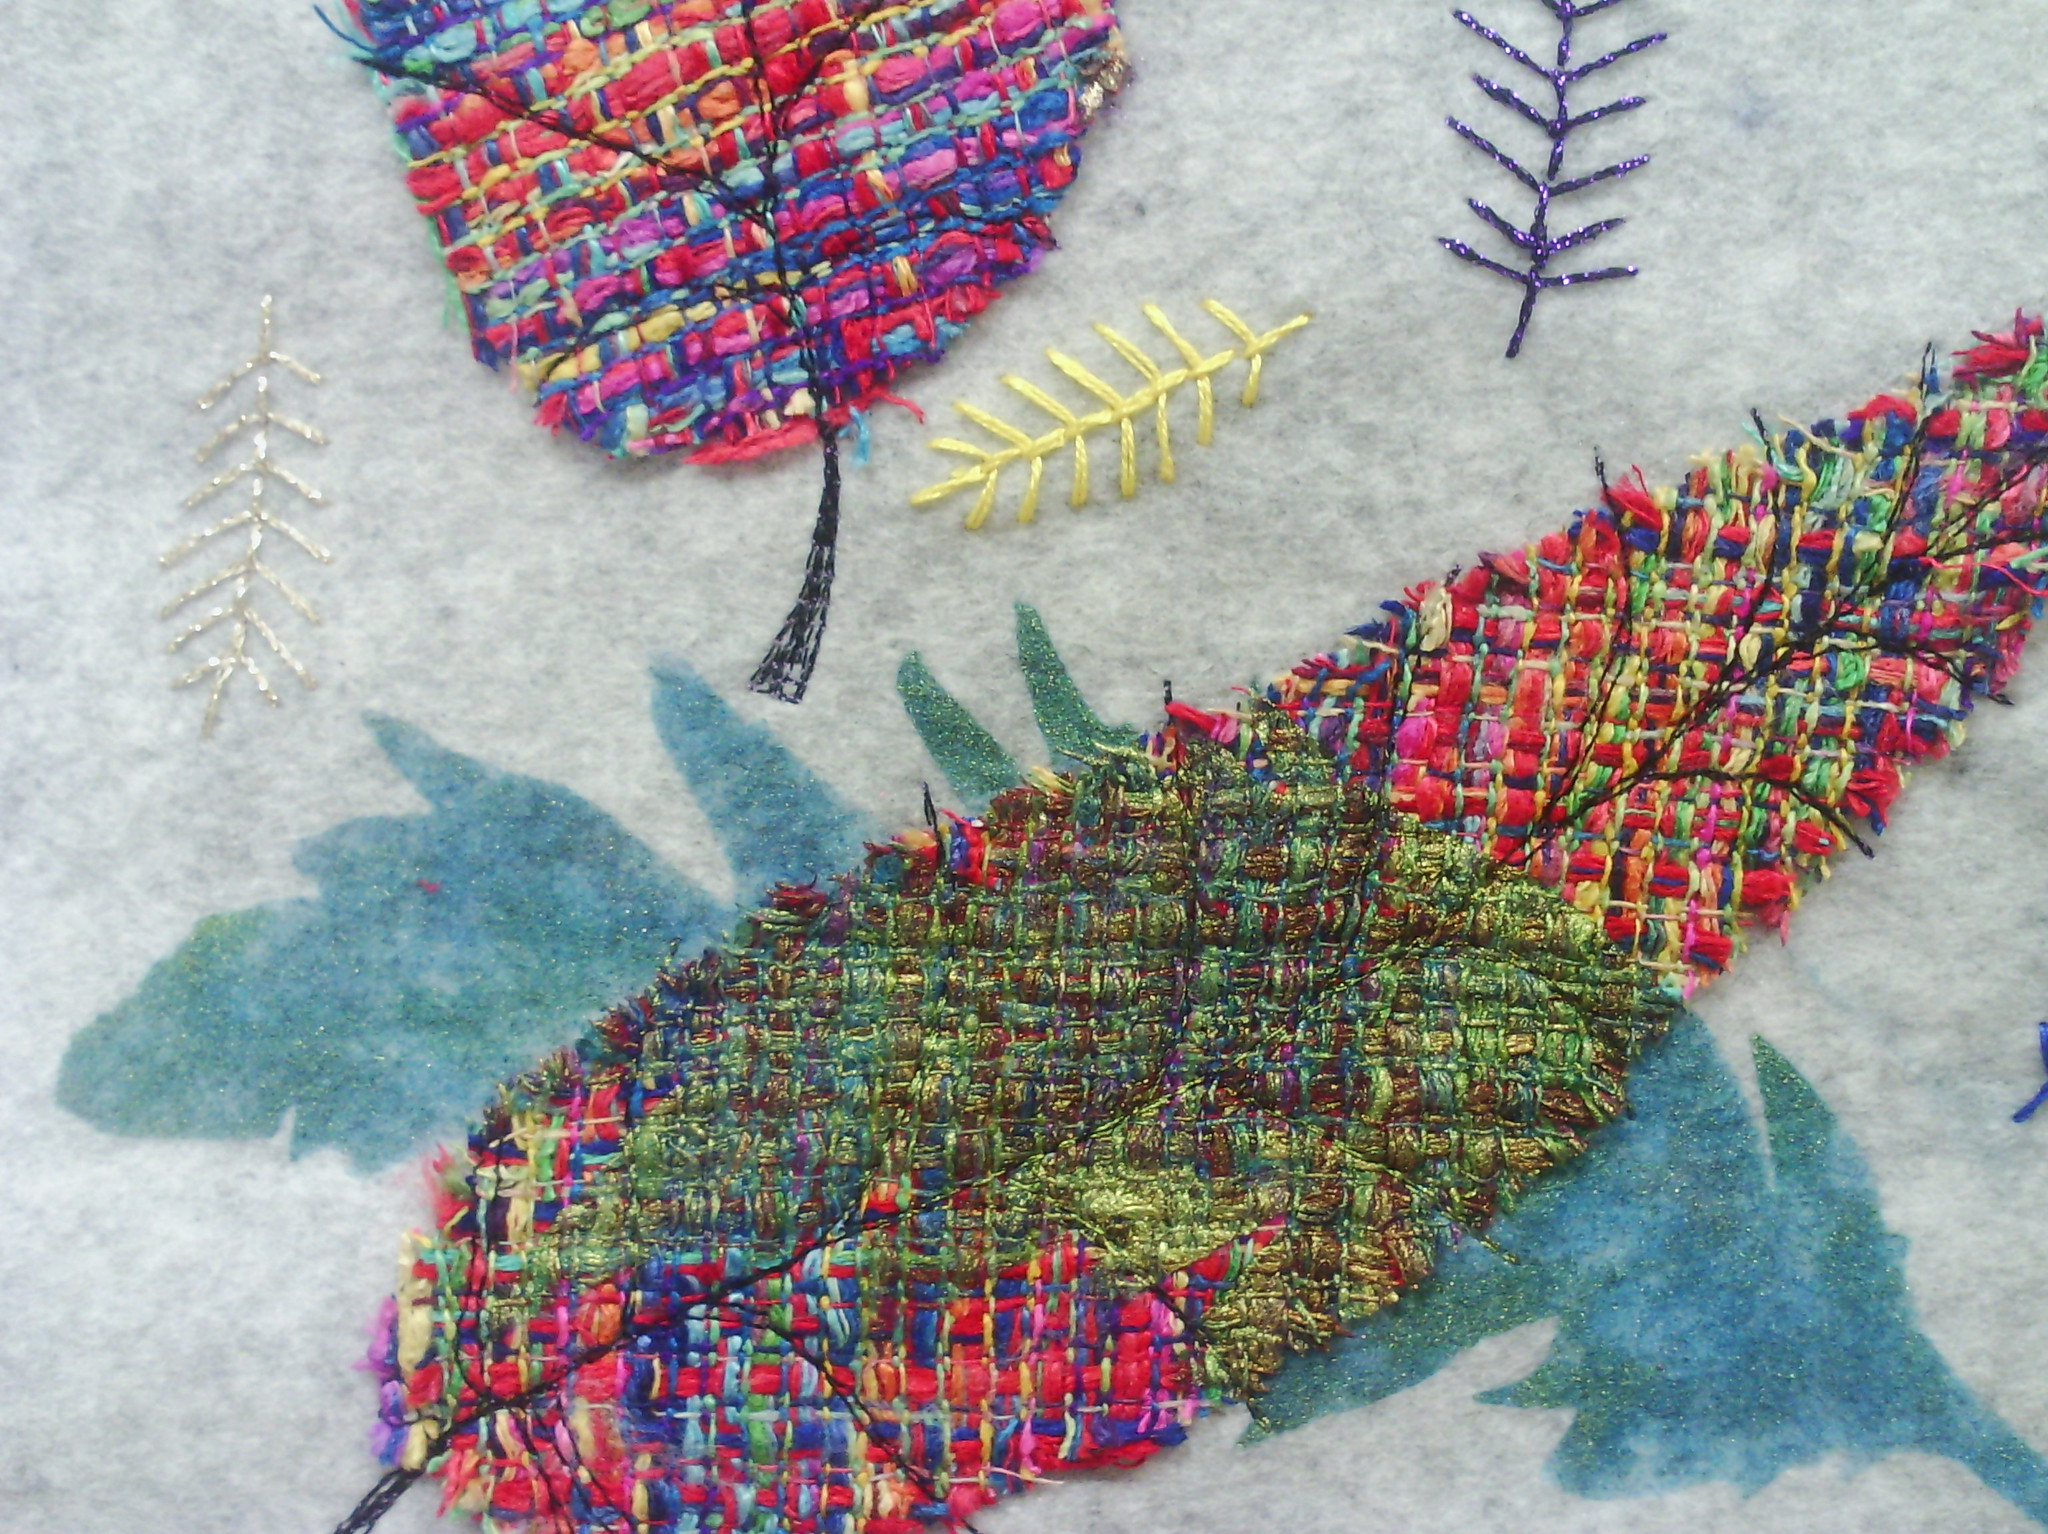
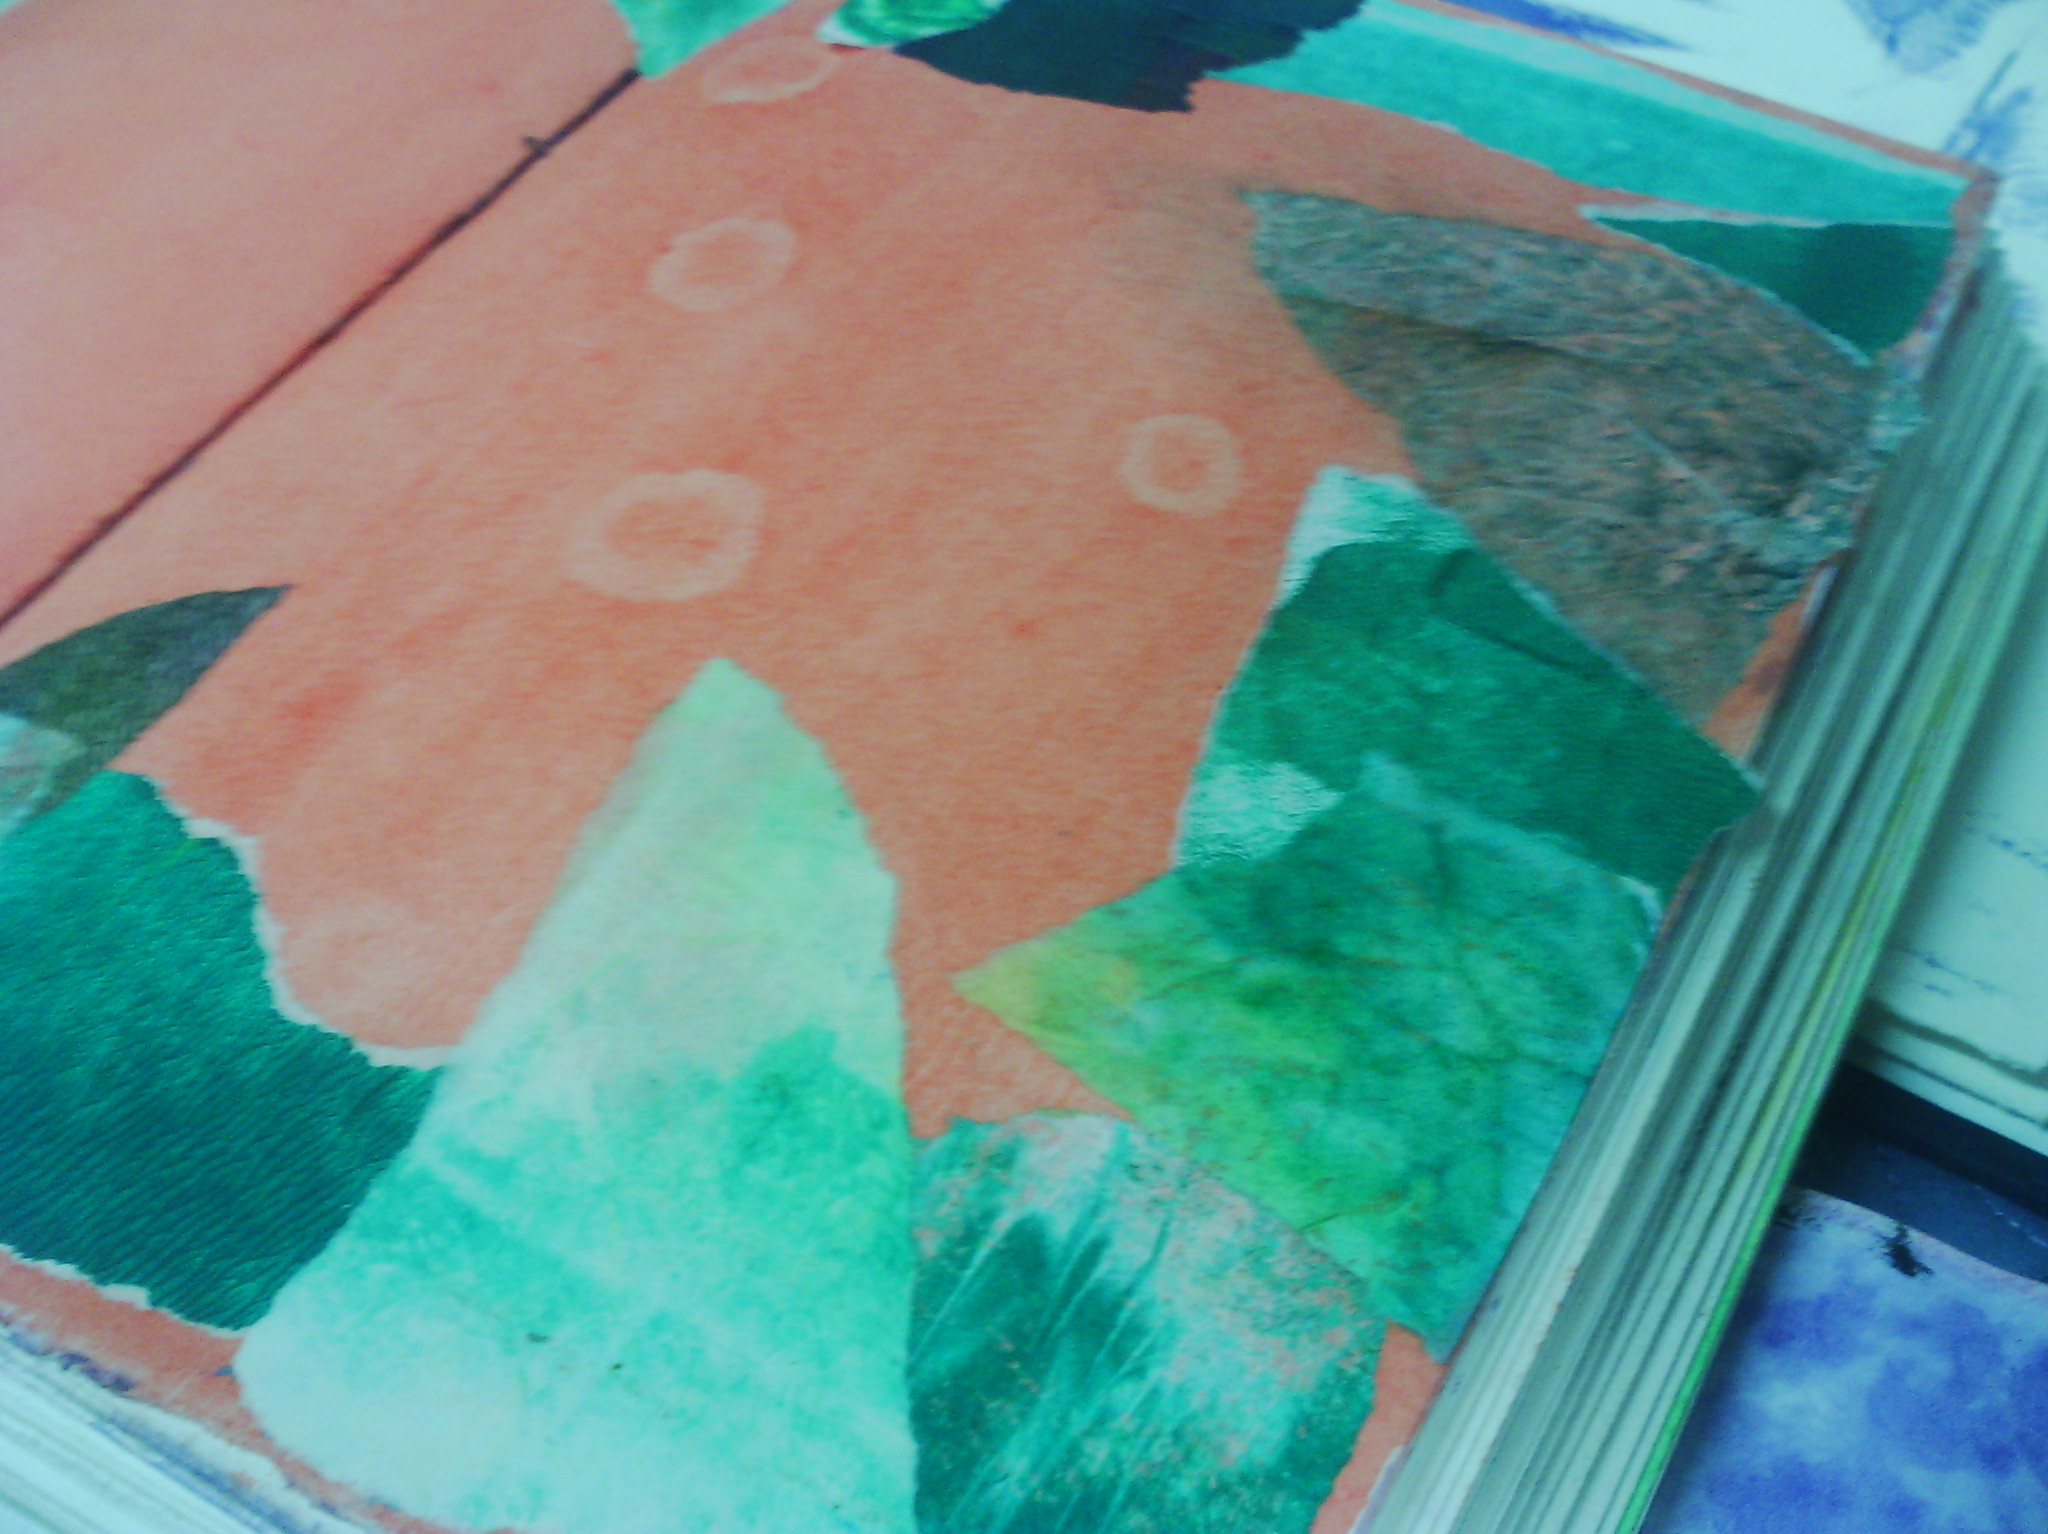
This was the blue gold and it did the same thing.  I also used violet gold, but I didn't overlap it much, so I  didn't take a photo.
I still felt it needed more and got some beads out, but as I sat down to start, I saw some candlelight thread I bought on a recent trip.  YUM!  so I embroidered some feathers - using feather stitch of course!  I also added a few feathers in the colours in the silk fabric - yellow, red and blue.
And that is where I am at.
I am not sure where to go next - whether to add more stitching and what method for binding.  I am leaning towards beading the edge and adding some seed stitch, but you are welcome to leave suggestions.
And that was my fabric fix.

Happy creating!

Thursday, November 28, 2013

A bit of background

Day 28 of AEDM.  I can't believe I have lasted four weeks!
Today I have been working on some backgrounds.  I have lent my heat gun to a friend who has a deadline looming and am feeling the loss of it quite deeply.  Being so used to just drying a layer and moving on, it has been a little bit of a trial to have backgrounds lying around all day drying!  And they took longer than usual, because it has been raining all day!

Here are a few of the many journals awaiting the moment of drying!
and a few close ups of the pages.
This spread was some collaged tissue paper prints in my butterfly journal.
This is a spread using complementary colours (red orange and blue green).
And this is a spread in my journal using a dabber bottle.

And for those who liked yesterday's page, here it is after a bit more work.
Happy creating!

Wednesday, November 27, 2013

Collaging work

Today is day 27 of AEDM and, I am working on a page in a small journal, using a printout of a sketch from one of my sketchbooks.

I have cut out the printout and glued it to the page, then went over my lines with a permanent marker, extending some lines past the edge of the printout (My original sketch was in pencil and very faint in the photo).  I then put a wash of purple over it (acrylic).  I redefined the shadows with some more darker purple and added some white highlights.  At the moment, I am waiting for this to dry and then I will go in with gel pens and markers to further define the printout.
The Sketch itself is of a part of a madonna statue by Michaelangelo.  I like to use the old masters' work as models for my sketches.  And I like the idea of re using my work in my journals.

Happy creating!


Tuesday, November 26, 2013

Playing with tiles

Today is day 26 of AEDM.
I am showing where I am at with the tesselating shapes I was designing here.
I am now into the fabric cutting stage.

Lots of fabric cutting.  These fabrics are backed with fusible webbing so I can iron them down on my backing fabric at the end.
And here they are pinned on my design board to show how they are locking together.  I have a lot more to cut and play with, but the piece will be finished eventually.

Happy creating!

Monday, November 25, 2013

Playing with Markers

Today is day 25 of AEDM.
I was having a play with some alcohol based markers I had been given and this is what I came up with.

The background is water based inks and the drawing is alcohol markers with a bit of metallic paint thrown in.
I really enjoyed using these and I am sure I will use them more when I get the hang of it.  I especially love the blender marker that you can use to mix he colours together.

Happy creating

Sunday, November 24, 2013

butterflies are free

Just a quick one today as the internet is playing up

This is the background for my journalling today.
It was one of those pages where I offloaded excess paint and stamp ink as I was working.  I had butterflies on my mind, so I just painted some black around to make the shape and that was that.
I am actually looking forward to journaling on it!

This is day 24 of AEDM
Happy creating!

Saturday, November 23, 2013

Another face

Today I have been quite creative, but I don't think you would be interested in looking at colour mixing charts!,  So I went back to Jane Davenport's video and drew another face.  I find them extremely satisfying, especially since the reason I have avoided them is that I snobbishly regarded them as not art!  Of course that is silly, because art is creating whatever makes you happy.
I really enjoy doing them and feel like can have a success when I am not feeling particularly arty.
Of course, my faces are pretty much all the same at the moment, because I have not actually done many, but I suppose I will get better at making them my own.

Not much stitching seem to be happening, does it, but I am also working feverishly on my Tangled Textiles Challenge piece, but I can't show you that until next week.
Happy Creating!

Friday, November 22, 2013

Playing around

Day 22 of AEDM, wow can't believe I have actually stuck at it!
Today I have been working on a few things, but I will only just show this journal page, which is an excellent example of a page that did not work out the way I wanted, but still, creating is the thing.  Everything you create can't be a masterpiece.  Each bit you do is only a step towards that eventuality - a learning experience.

The butterflies are from the prints yesterday and the flowers are cut with a tiny little cutter from foil chewing gum wrappers!
I must say I added a lot of stuff to the page, oil pastels, paint pens, ink etc and I do like PARTS of it but, there you are, it's all a learning process.

Happy creating

Thursday, November 21, 2013

Jelly love

This is day 21 of 
http://creativeeveryday.com/

I have recently become an addict.  Of Gelatin Printing, that is.
I can't seem to stop. The colours you get are wonderful and it is all so satisfying.  Just a few hours and you end up with so many prints you run out of space to store them, lol.
Today, I spent about an hour printing and I would probably bore you if I showed all my prints.
This is my gelatin plate.  It is about 11x11 inches.

I like to use gelatin, especially now as the weather is getting warmer, as the paint does not dry so quickly.  I do sometimes use an acetate sheet or a perspex sheet, and I do have a silicone plate, but I only use these for certain things, such as  printing plants and grasses, which are hard and do cut into the gelatin plate, because these plates need me to add a retarder to my paint in order to slow the dying time.  I find the cool surface of real gelatin keeps the paint wet longer.
Here are some prints drying,  For me, the process is limited by how much space I have for the prints to dry.
And here are a couple of my favourite prints from today.
Sorry about the blurriness of this one.  It was one of my favourites. The background was a piece of paper I had rolled excess paint from my brayer on (I don't throw much out, lol)
This one, which is the reverse of the one above, printed from the paint left after I had taken the stencil off.  The background is tissue paper (kitchen paper) that had been covered in inks.
This one was also printed on a previous print.  and was also printed after removing the stencil (which was just the card left when I took the shapes out of a silhouette cut).  You can see I often re-use my less than perfect prints as a background.
This is just a few of the prints, I printed about 25, so it was a short, productive session.  Mostly, I print on kitchen paper, which is a bit like deli paper.  We call it Greaseproof paper in Australia.  The reason I do this is that mostly I use these papers for collage and they layer well, being so thin.
Anyhow, enough talking.
Happy Creating

Wednesday, November 20, 2013

A few stencils, and voila!

Here is my piece for Art Every Day Month, Day 20!

It is a 9 inch canvas.  I put down some acrylic colours, using a scraper to get streaks of colour, then when it was dry, I added some feathers in molding paste through a stencil.  When they were dry, I added the blue ink spray through a stencil, then after that was dry, I paintedthe feathers with some different lumiere paint. After that was dry (again) I added some black around the edges of the feathers with a black ink marker.  Since the ink was watersoluble, I went back with a damp brush and feathered the black out to create shadows.
It depends on the angle you look at it as to whether you see the sheen of the metallic paints.
I was pretty pleased with it.  Hope you like it.

Happy creating

Tuesday, November 19, 2013

Butterfly magic

A few weeks ago  I made a tiny little doily, by using free machine embroidery on water soluble stabiliser, here.
This week I have been working on a larger piece that is a butterfly and I have finally finished it.

This is it in the hoop, before I dissolved the solvy. You can see I just outlined the wings and didn't add any details with marker before I stitched it - you can also see that I changed my mind about the lines as I went along as well (The lilac is my stitching, the brown are my guide lines)
Here it is after I had rinsed away the plastic stabiliser and dried it.  i put my hand in to show how lacy it is and how big it is.
and here's a close up to show the wings more clearly.  You can see my stitching isn't perfect, but if you know me, you know that is not an issue.  I like my work to look hand made.
i am looking forward to putting this on my crazy quilt in the new year!  I may dye it or paint it, depending on where it goes.

Happy creating

Monday, November 18, 2013

rotating

After my day from hell yesterday, today was much better.
I copied yesterday's journal page and added it to a book about pots and teapots

This book is 11x11 in and my copy was 11x8.5, so I needed to finish the page and started adding tapes.  I was having fun with that and continued right across the page.
I make my own tapes with double sided tape and the tape layer might be anything, on this spread, there is fabric, paper, plastic, lace, felt, foil and so adding anything to the page was problematic
So - I didn't glue anything down.
The teapot is a gelatin print I made onto heavy paper a while ago and I just cut it out and added it to the page with a brad and voila'
The teapot rotates and pours the tea!
Silly me.
Happy creating!

Sunday, November 17, 2013

One of those days

After such a busy day away from home yesterday, Today I felt a little washed out.  I have actually got a few things done, but it was a struggle.
I did a page of my Pam carriker journal - from her latest book - CREATING at the speed of life, which is a great book for working on art elements.  My students would say 'why do I need to work on these things if I already know them?', but you can always learn something more, and more importantly, once you  have learned something you need to do it often for it to stay in your repertoire.
The other thing I did was to work on a larger piece of water soluble lace, this one is about six inches so involves a lot of stitching and I will probably finish it this week.
I also did my daily page in my journal. Being in a bad mood, I could not think of what to do, so I got a water soluble pencil and scribbled loosely without looking.  Then I looked at my lines and I saw a jug.

So I added some more and defined the jug and activated the pencils with a water brush filled with diluted matte medium (this makes the watercolour permanent when dry, but it is also thicker than water and I find it works better with watersoluble media)
I filled in the background with some watercolour that was left on my palette from a few days ago.
I wondered what to write and the sentence just occurred to me.  Then I did my messy journalling at the bottom.
So that's what I got up to for Day 17 of AEDM.
Happy creating

Saturday, November 16, 2013

At the workshop

Today I went to a soft Pastel workshop given by Max Wilks run by a nearby Art Group some of my friends go to.  We were at a gorgeous old homestead in a national park with gardens tended by the local  garden club.
Here are some of the gardens. there was also lots of lawns, a lake and an orchard.
I took a lot of pictures, which I won't post all today.
This was the picture I settled on for my painting.
And this is where I got to with my painting.  I still have a way to go, but I decided to wait until I have blown up the photo to do the details, since my camera screen is only the size of a business card and I was getting quite tired.
But I'm sure I have done my AEDM challenge for today, particularly as I hadn't touched my pastels in several years!
Happy Creating!

Friday, November 15, 2013

Is it a mosquito, or a dragonfly?

No idea, but it's what happened on the page.
I had been watching a video on using glazes and decided to have a try with one of the pages in my journal where I had just slapped all the leftover paint.
This was the page I chose.  As you can see, a big mess, but I thought I saw something flying on the left hand side.
I outlined the shape I could see and put a yellow glaze over everything else to unify the background.  It worked well.  The texture is still visible underneath, but the shape is much more prominent.
Here I blocked in the shape I saw and turned a circle that was under all the paint but showing through into a sun. I still wasn't happy with my shape and spent a long time thinking....
And this is what I ended up with.  I got so engrossed that I forgot to take pictures in between.
I lightened the body and three of the wings with an iridescent violet then added highlights with a lilac paint pen, then I went back in with a silver and a red gel pen and added more, smudging as I went.  finally, I went over the veins and dark shadows with a black glaze pen.
Here are a couple of close ups.
So, it's amazing what can come out of a messy page!  I do like finding things in my backgrounds and this one, although he is not sure whether he is a mosquito or a dragonfly - turned out well.

Today is Day 15


Happy creating

Thursday, November 14, 2013

Tesselating

This morning, I was working on making a tesselation for use in a textile piece I have been planning.  I want to make an abstract water effect.   My idea required me to make the shapes interlock.
Here is how I made the template.
The steps are shown in the picture above.

  1. I cut a piece of paper.  The corners need to be square.
  2. I folded it in half lengthwise with the fold to the bottom
  3. I marked my cutting line.  Basically I drew how I wanted the end of my shape to be.  I started the line from the fold and curved upward to the edge.  The curve needs to be symmetrical
  4. I cut along my line and this gave me two little bits.  Each had a right angle.
  5. I moved the pieces to the other end of the shape and arranged them with the right angles to the centre
  6. I taped those pieces on. the actual shape in number five is actually a bodgy one where the curve was not symmetrical and you can see what happens, the shape is not right.  It will tesselate.  But it doen't look right.
On the right of the page you can see some shapes interlocked together.  I used my final template for this.
I think it looks a little bit Like water.
I tried the template out (roughly) on my journal page for today.

I traced around my template and then painted with some watercolour.  It looked quite nice.  In my project, I will be using fabric with fusible on the back, I think it will work out.
We will see....
Happy Creating

Wednesday, November 13, 2013

To recycle or not to....

Day 13 of AEDM!
Today I was also out, teaching my Adult art class, but when I got home, I felt the need to make something and the first thing that came to hand was a milk bottle cap!
I decided to put together a quick journal quilt.
The milk bottle cap forms the base for the central button, covered in a little bit of silk.  The silver motif in the centre is simply eight chain links stitched on in a circle with a bead on top and some seed beads around the outside edge.  The purple 'stuff' is some wispy fibre ribbon (two squares overlapped and offset).  The silver swirls are some left over hanger clips for christmas cards, stitched down and the background fabric is one of my clean up cloths from painting.
I liked this one, but I think I might add a bit more stitching, perhaps some hand seed stitches
...and maybe a few beads....
Happy creating

Tuesday, November 12, 2013

busy as a bee

Day 12 of AEDM today, and being tuesday here,  means that I was away from my studio gossiping with the quilting group and teaching an art class and have only just got home!
So today, I am just going to show you my journal page, which is extremely boring, but did involve some creativity on my part.  Not much, but some.  I could show something that was not done recently, but that would be cheating.  Luckily, I have been practicing making my writing extremely messy!
Hopefully Tomorrow, I'll have something more creative to show you.
Happy creating!

Monday, November 11, 2013

gilt quilt

Just a short one today.  I have been out down in the big city all day and I'm exhausted, but I did buy a ton of art stuff  ( not all for me, mostly for the art group)!
This journal quilt is a piece of one of my monoprints.  I have added some tulle and under it are metal leaf flakes.  The free motion stippling holds it all down  and I stitched round the print.

Sunday, November 10, 2013

Living large

Today is day ten of AEDM.
I have been thinking over the last few months that I would like to get a larger fibre piece done.  I have not made anything large for a few years and one of the other AEDM participants inspired me to take the opportunity to finish a UFO this month, so I decided to have a go at doing both at once.
this is an applique piece I put together when I was dyeing some fabric a year or so ago.  So far all I had done was scribble on the background and stitch a little way along one petal.
the finished size is about 25 by 30 in, so it is not huge, but is quite large for a wall piece.  I already have a frame to put it in that has also been cluttering up the cupboards for a while.
I did a little stitching today, but did not get as far as I hoped as we lost power for six hours.  This is something that happens a bit way up in the country.  There is only one road through and when a tree falls, it often takes the power lines with it.  Since a fire came through about five years ago, the number of dead trees falling increases every year and I often hear them up in the forest behind us.
but enough of that.  Here are a few shots of the stitching I did today.
Not too much, but there are quite a few days left this month.  I'll see how far I get.

Happy creating!