As the title says, no stitching to show today (although I have done some).
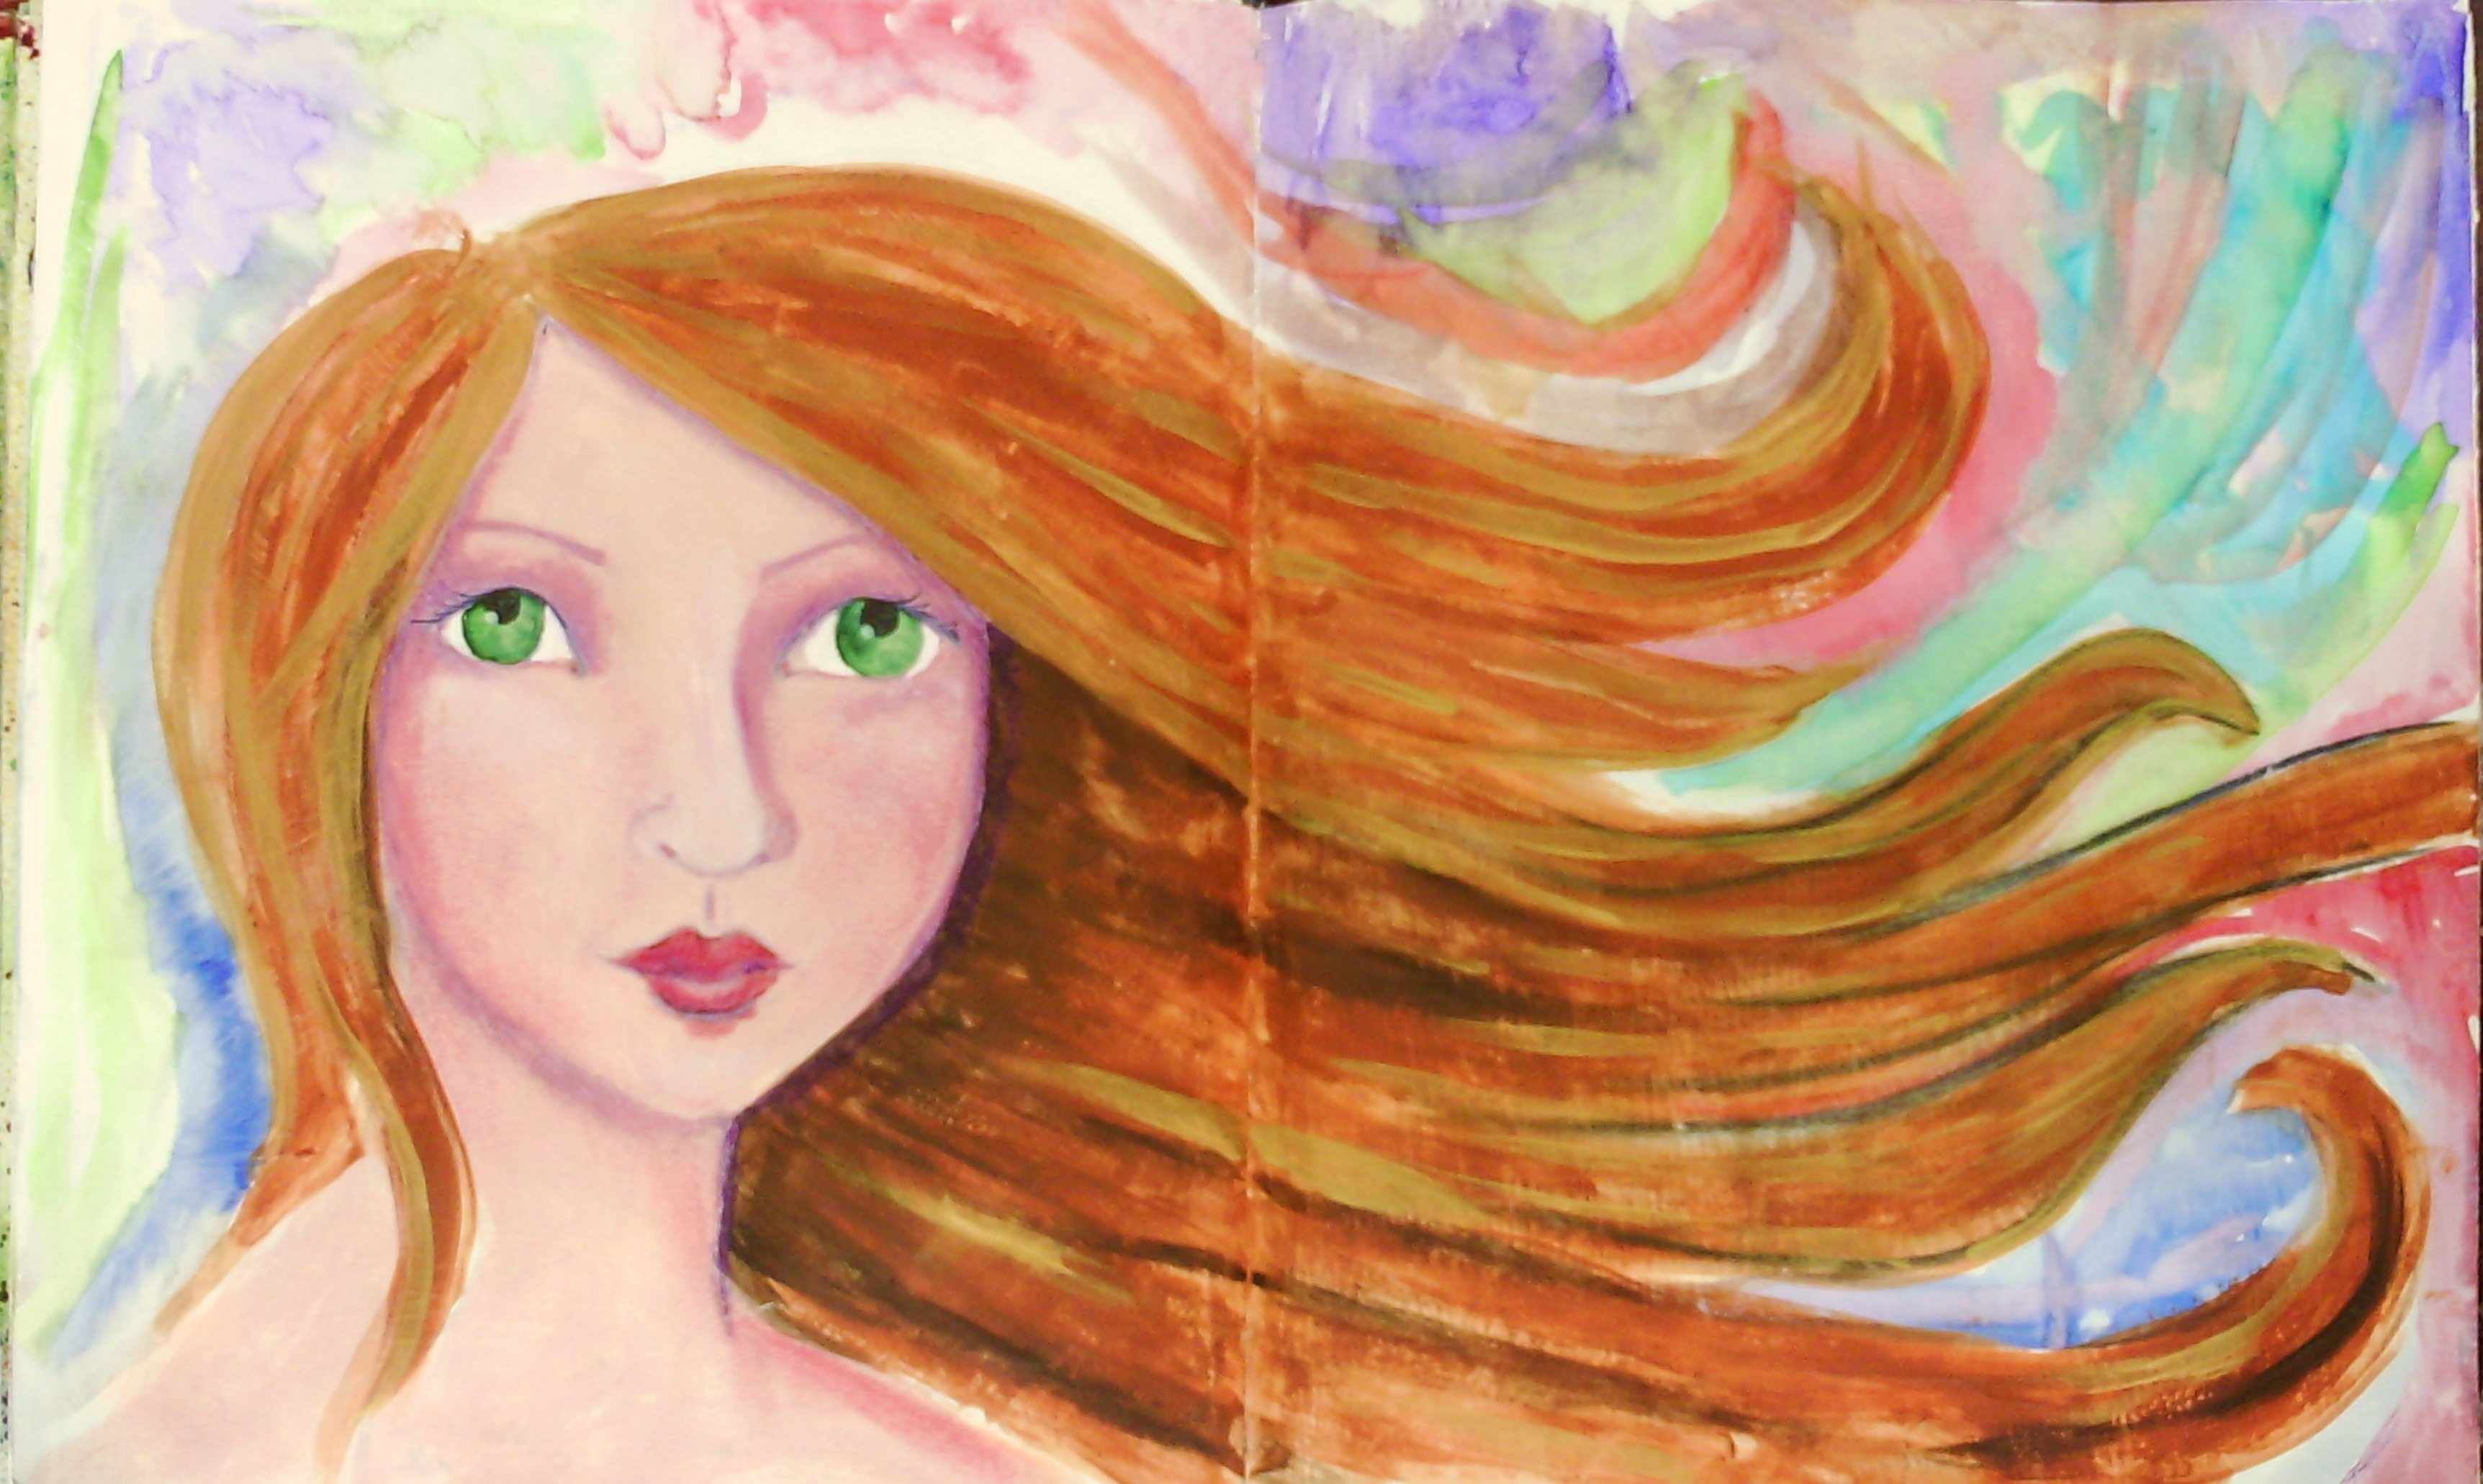
For day 7 of AEDM, I have a journal page to show and those of you who know me well will probably be shocked. It is totally not my style at all.
I was watching Jane Davenport's Whimsical faces video and decided to have a go and this is the result. Quite a few mistakes and bits that didn't work and it was fun to do at the end of a hot sticky day.
I have been working on the monoprint piece and doing a bit more embroidery and beading.
I wonder what tomorrow will bring?
Thursday, November 7, 2013
Wednesday, November 6, 2013
A quick one
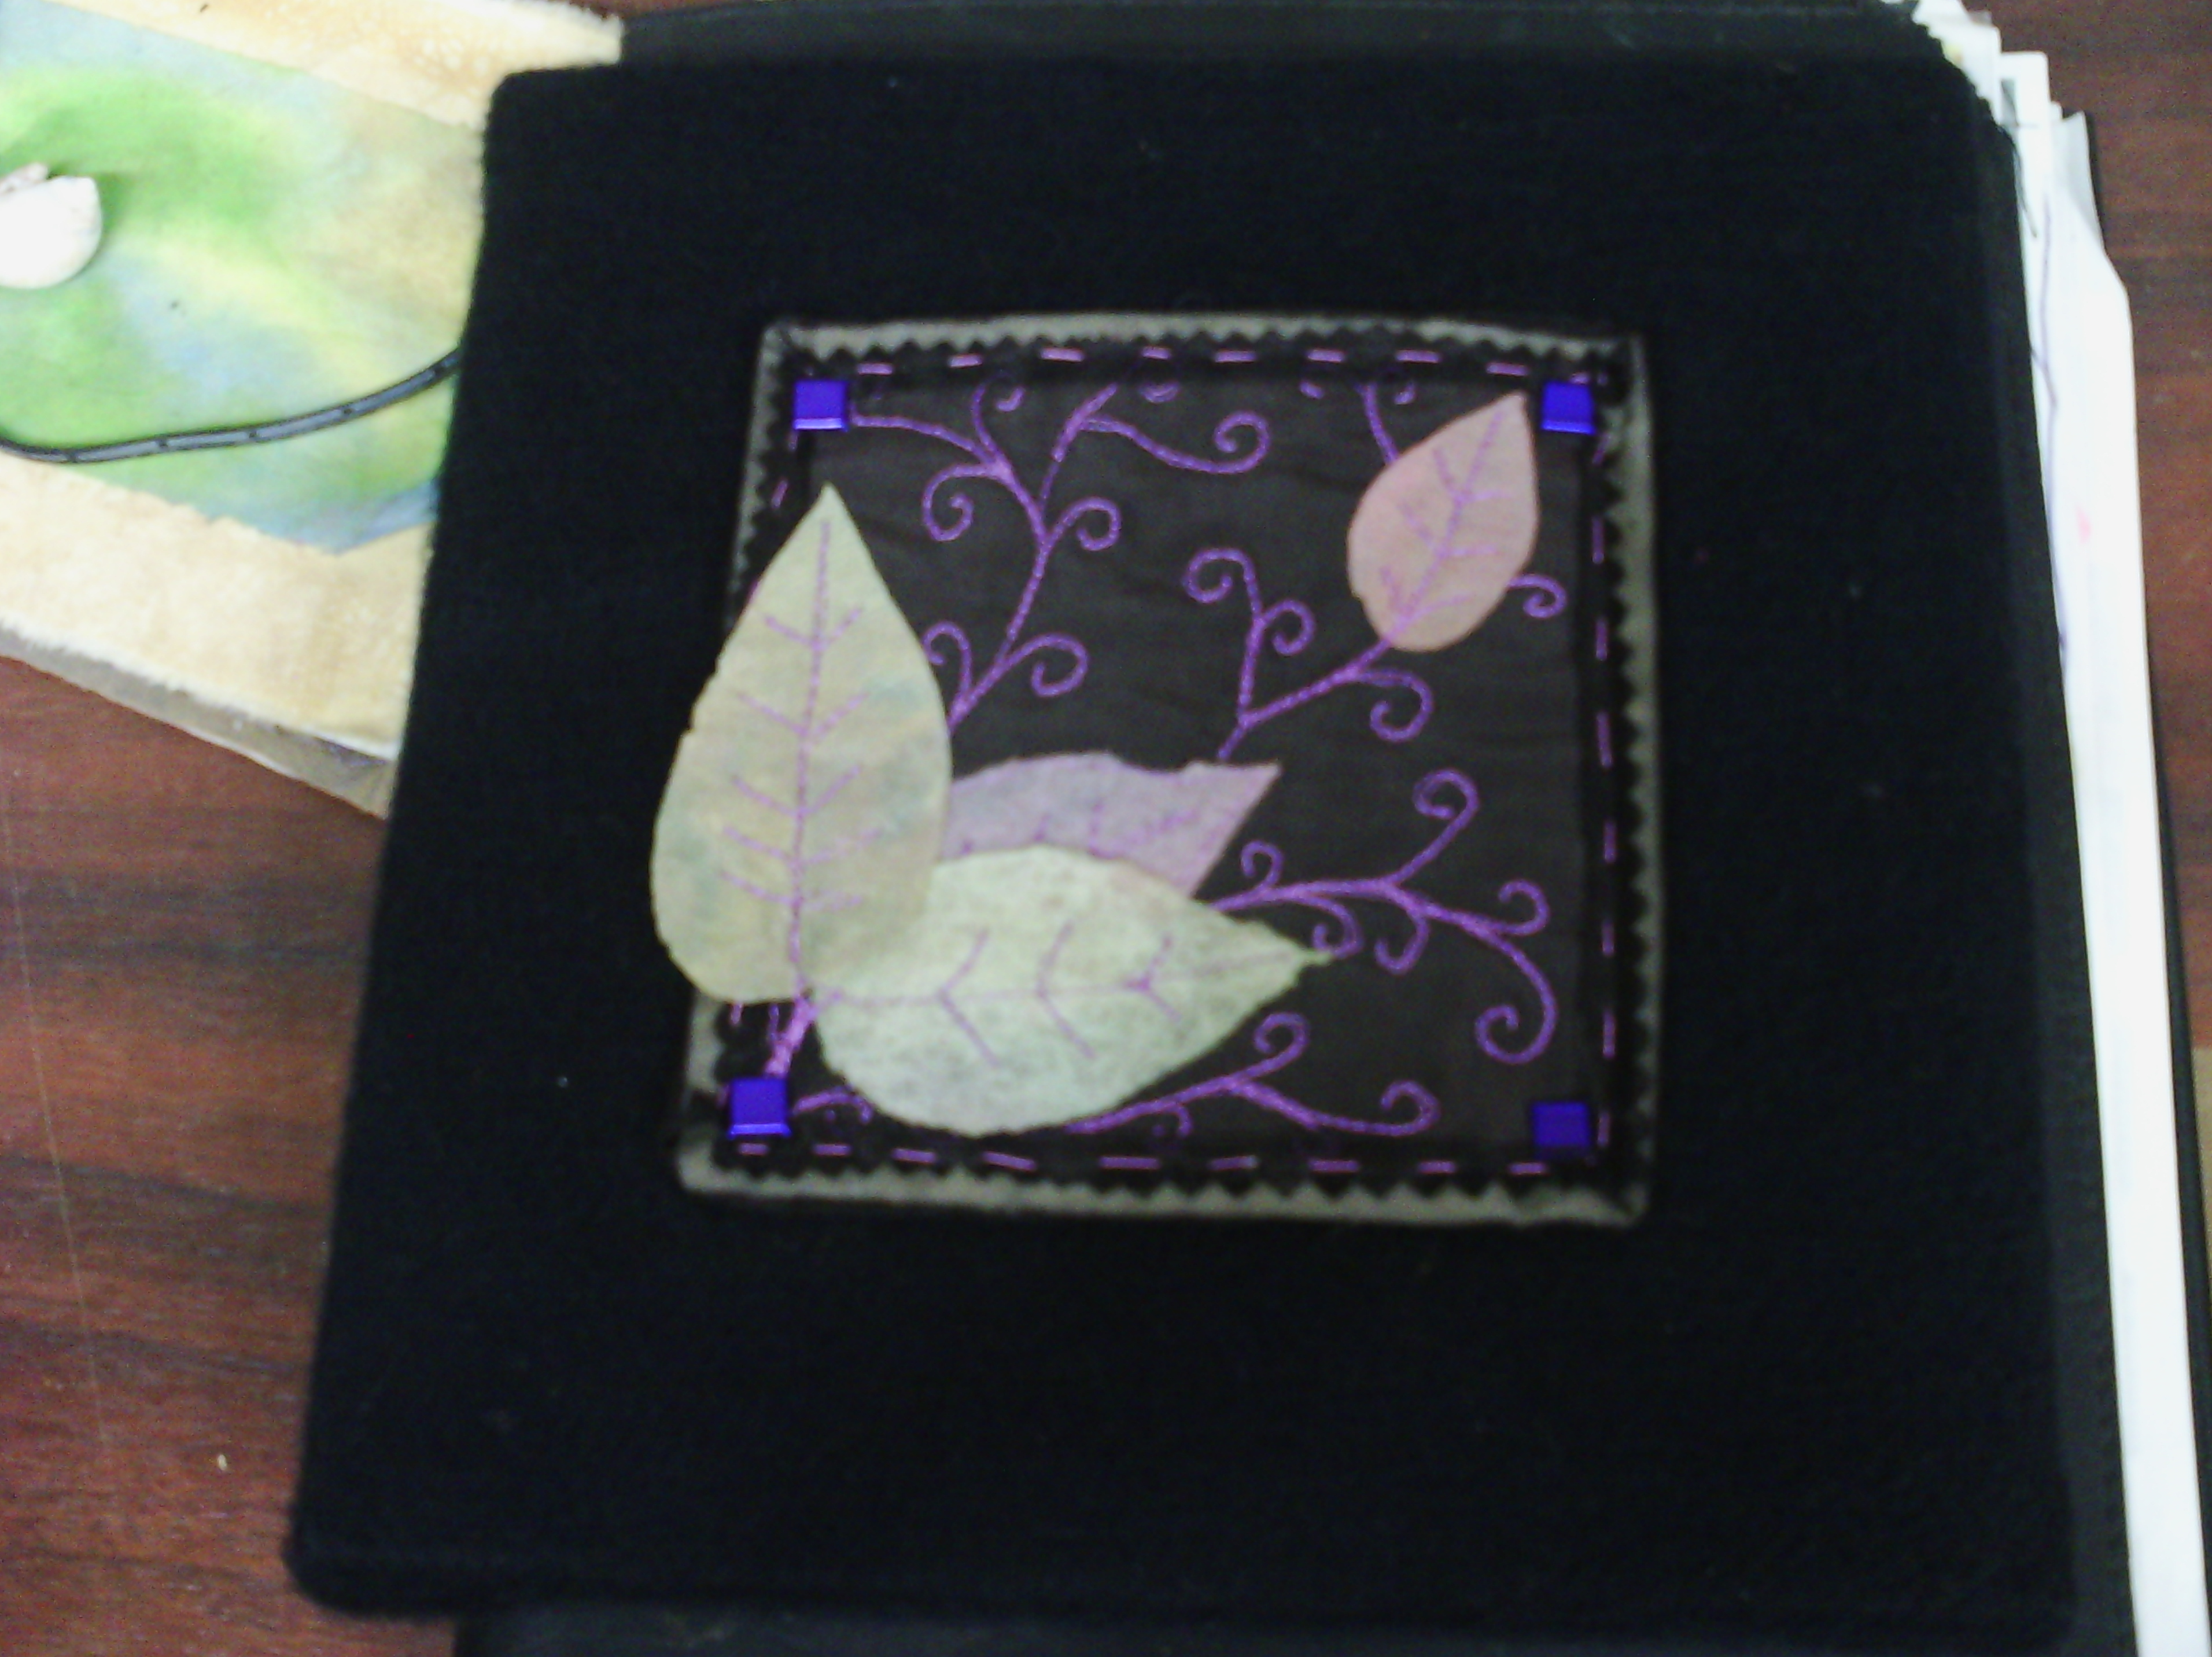
Just a quick one for day 6 of AEDM. I have been out teaching art today, not doing my own, so I only had time to frame up one of my journal quilts for the gallery.
My journal quilts are 5" square and are where I try out different techniques. This one is from a few months ago, but I did mount it today! It is some painted nappyliner leaves and a bit of free motion on black satin.
Of course I always journal every day now, having finally got the habit, but that is not so exciting to look at.
Happy creating every day
My journal quilts are 5" square and are where I try out different techniques. This one is from a few months ago, but I did mount it today! It is some painted nappyliner leaves and a bit of free motion on black satin.
Of course I always journal every day now, having finally got the habit, but that is not so exciting to look at.
Happy creating every day
Tuesday, November 5, 2013
a fabric monoprint
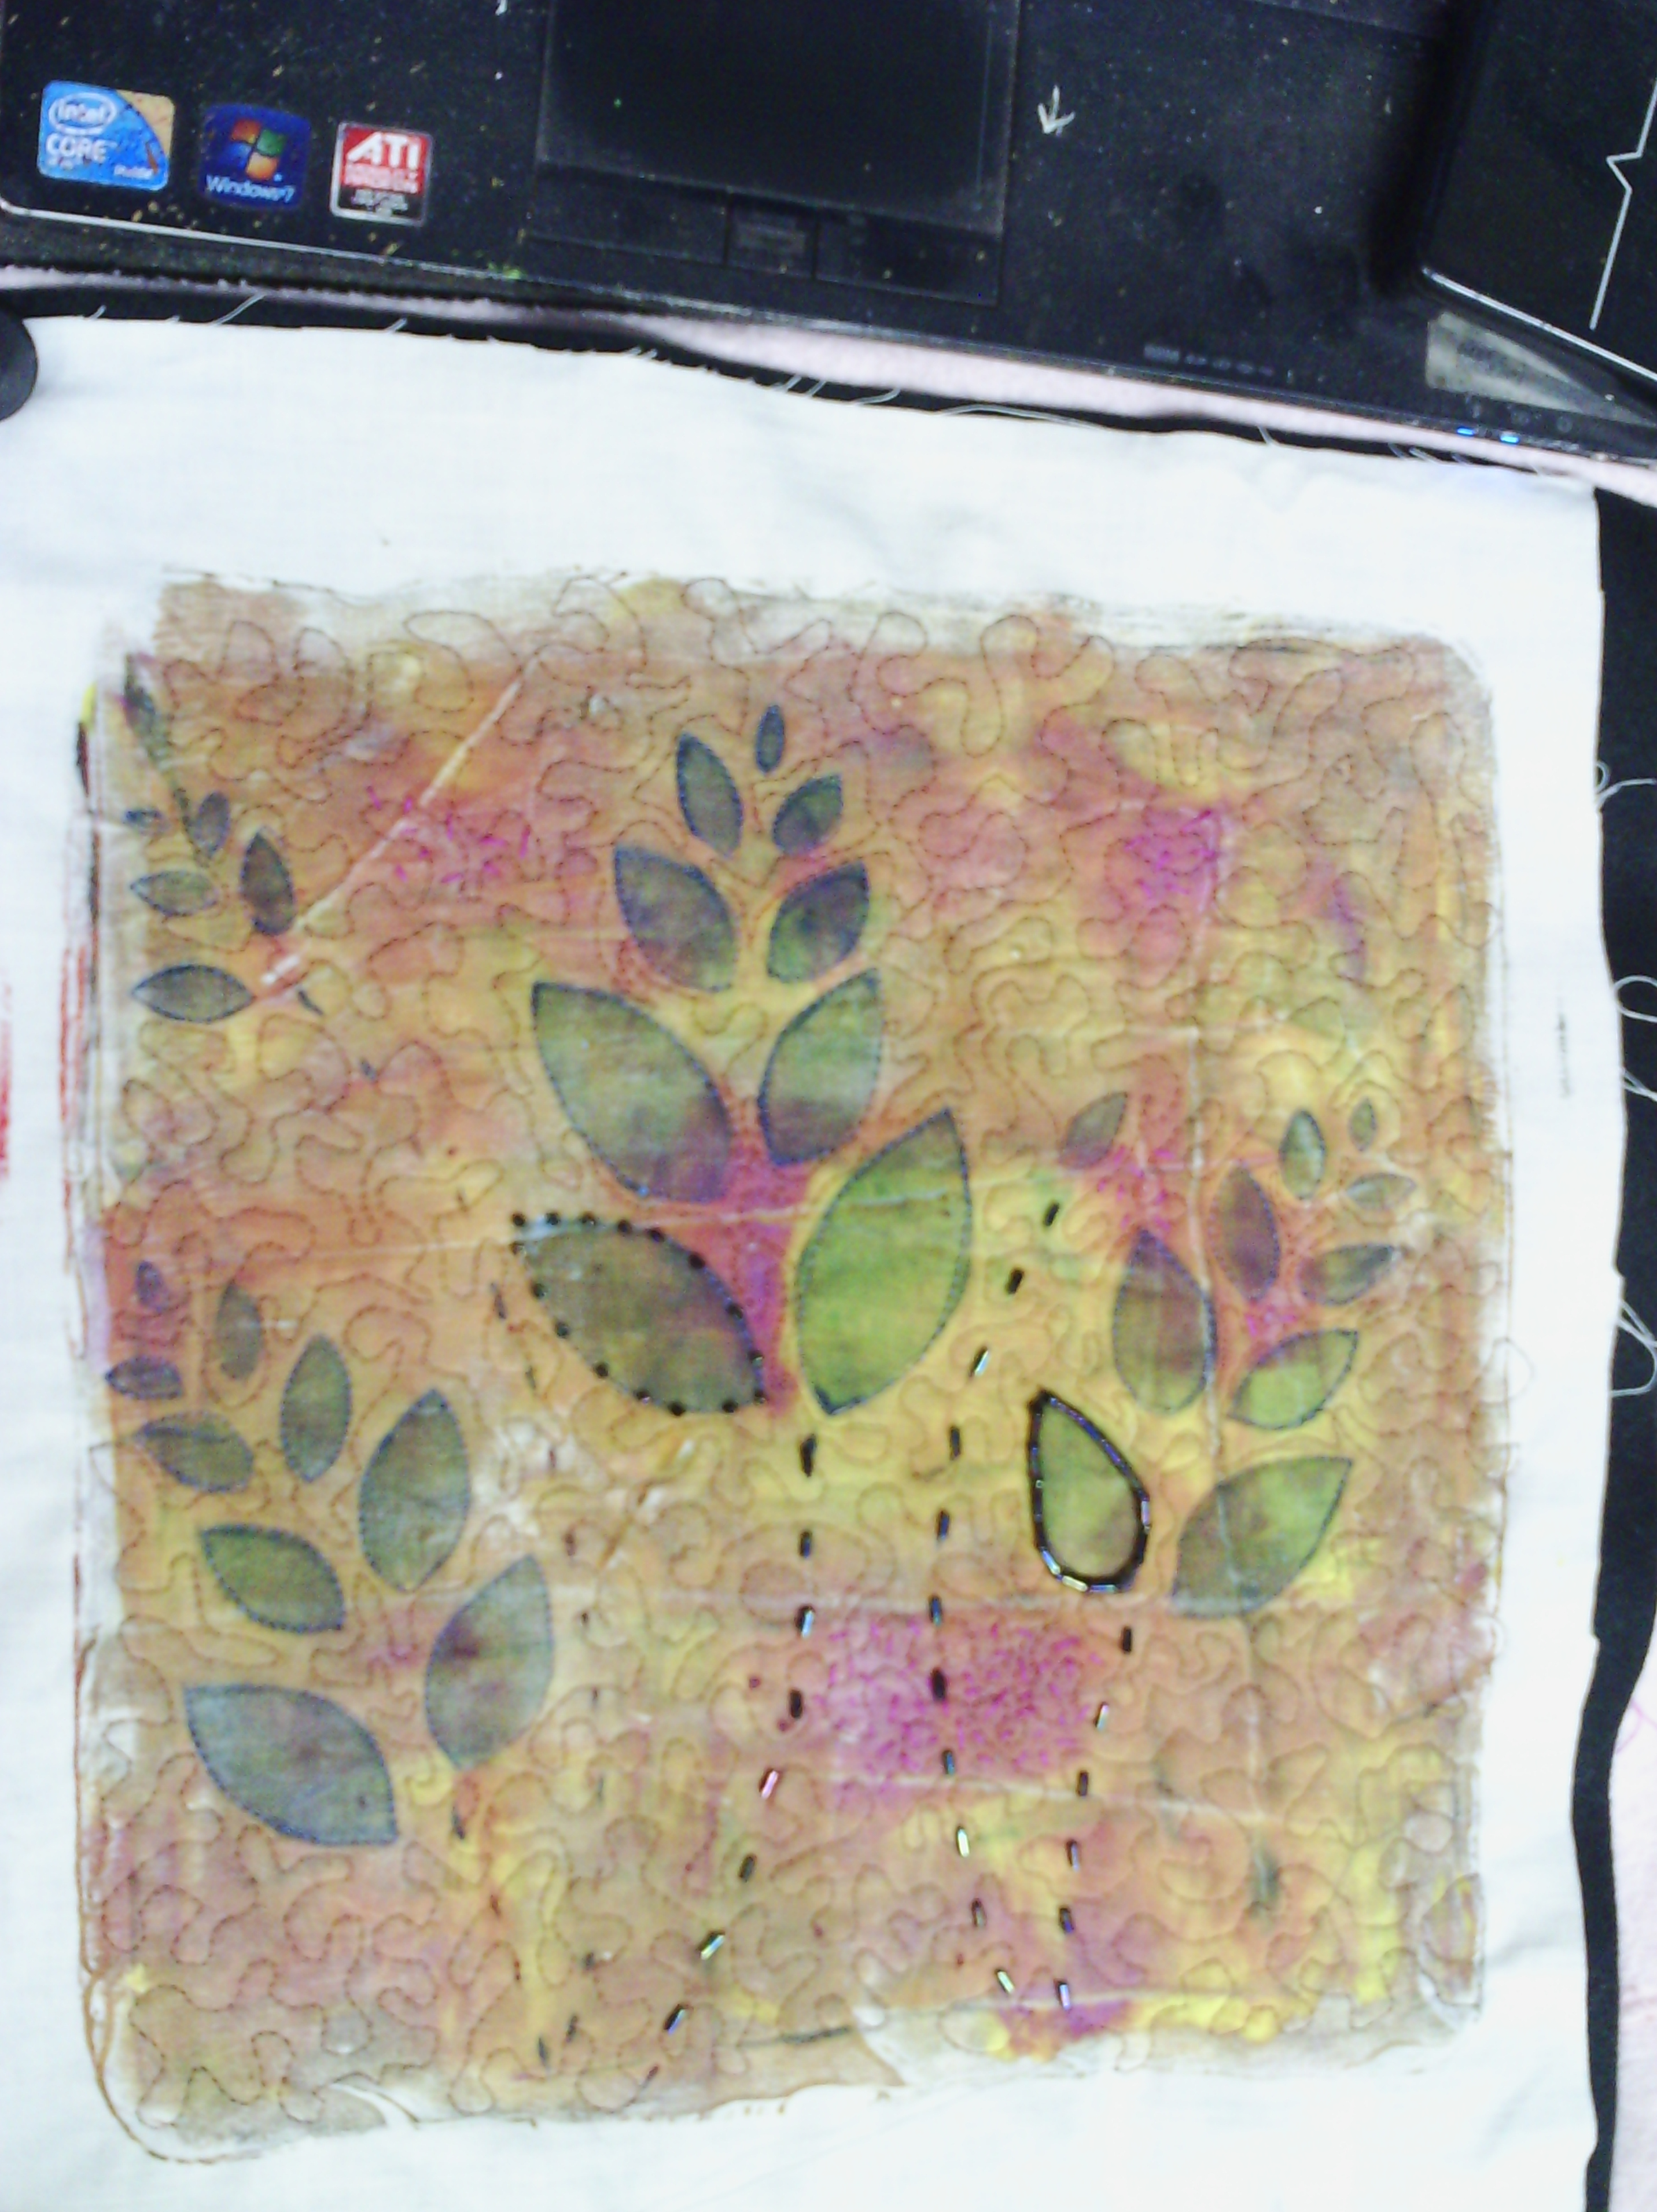
Today, I did some work on a fabric monoprint I made a few weeks ago when I went a bit overboard with gelatin printing.
I have layered it with a piece of felt and quilted all around the flowers and am in the process of beading it.
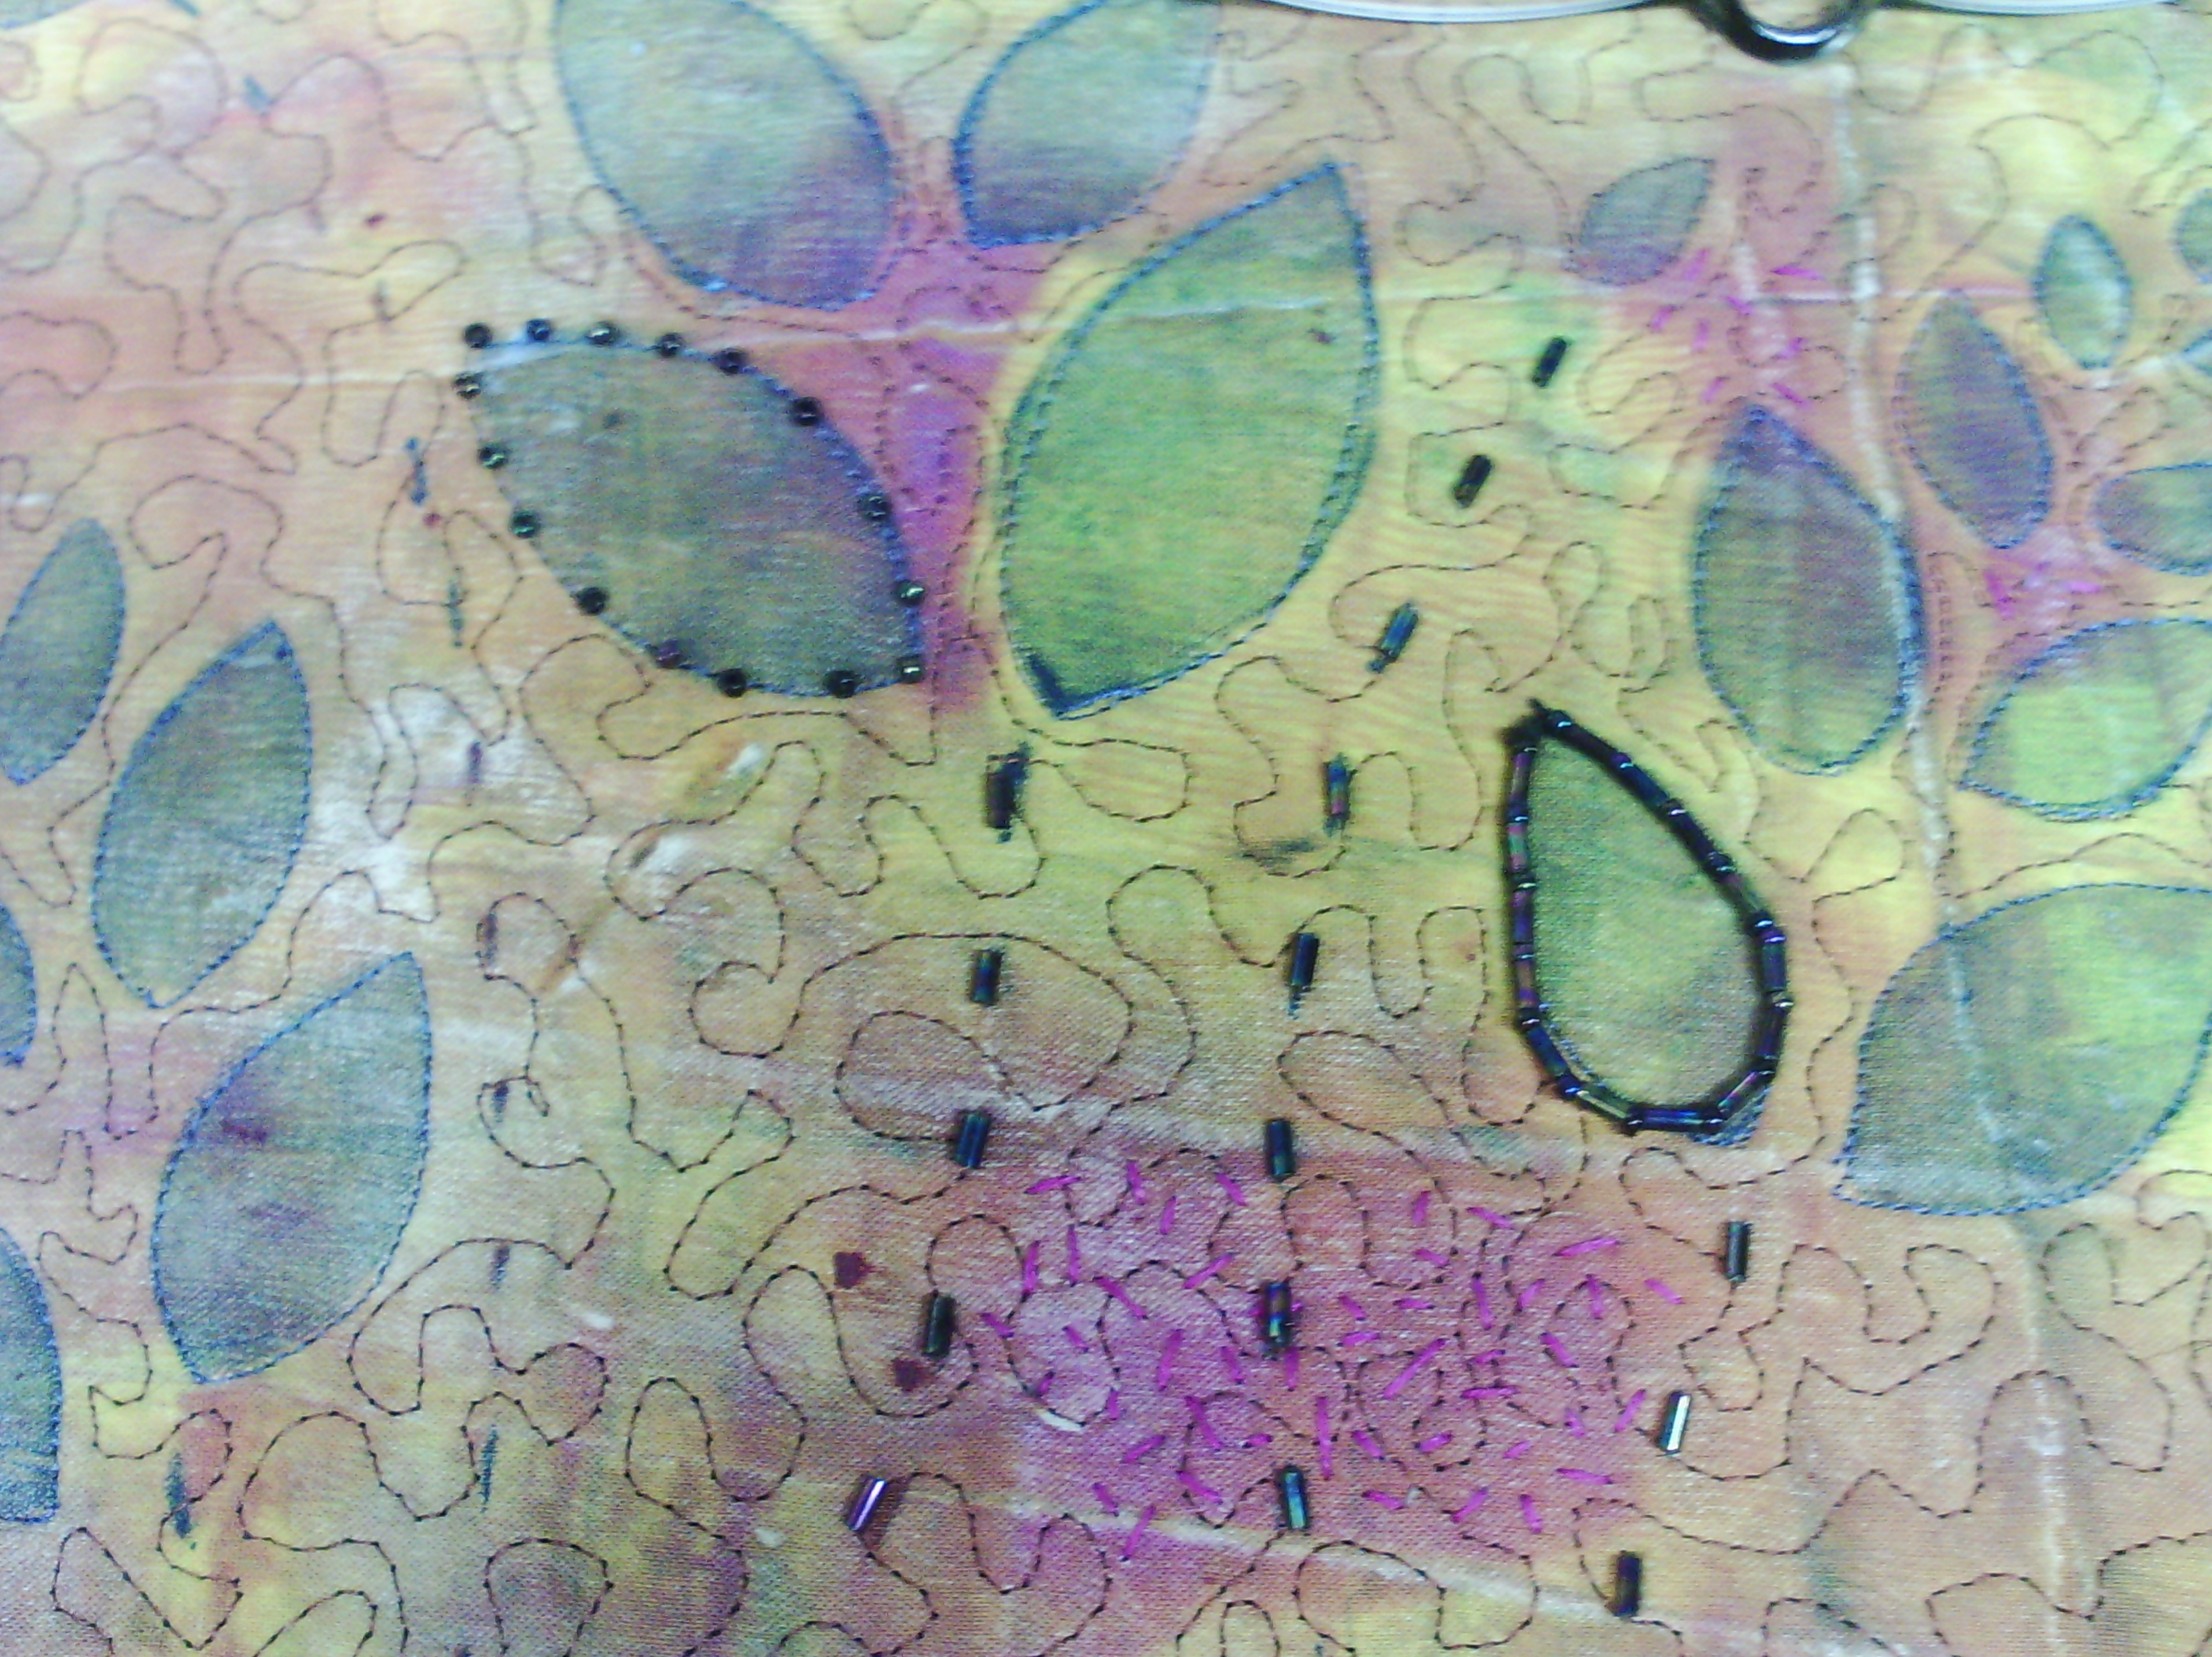
The dotted stems, I am beading with those bugle beads and You can see I was trying out how I wanted to bead the buds/flowers.
Here's a close up of these two ideas, one where I just space beads around the bud and the second where I covered the whole edge with beads. the monoprint is two layers and the flowers were overprinted in a dark blue. these beads are a sort of iridescent dark blue and I thought they would be perfect.
I often take pictures of my work at different stages so I can work out how things are working. Having it in a small picture helps to work out how things are showing up.
This picture obviously helped, because I actually changed my mind totally and did something altogether different.
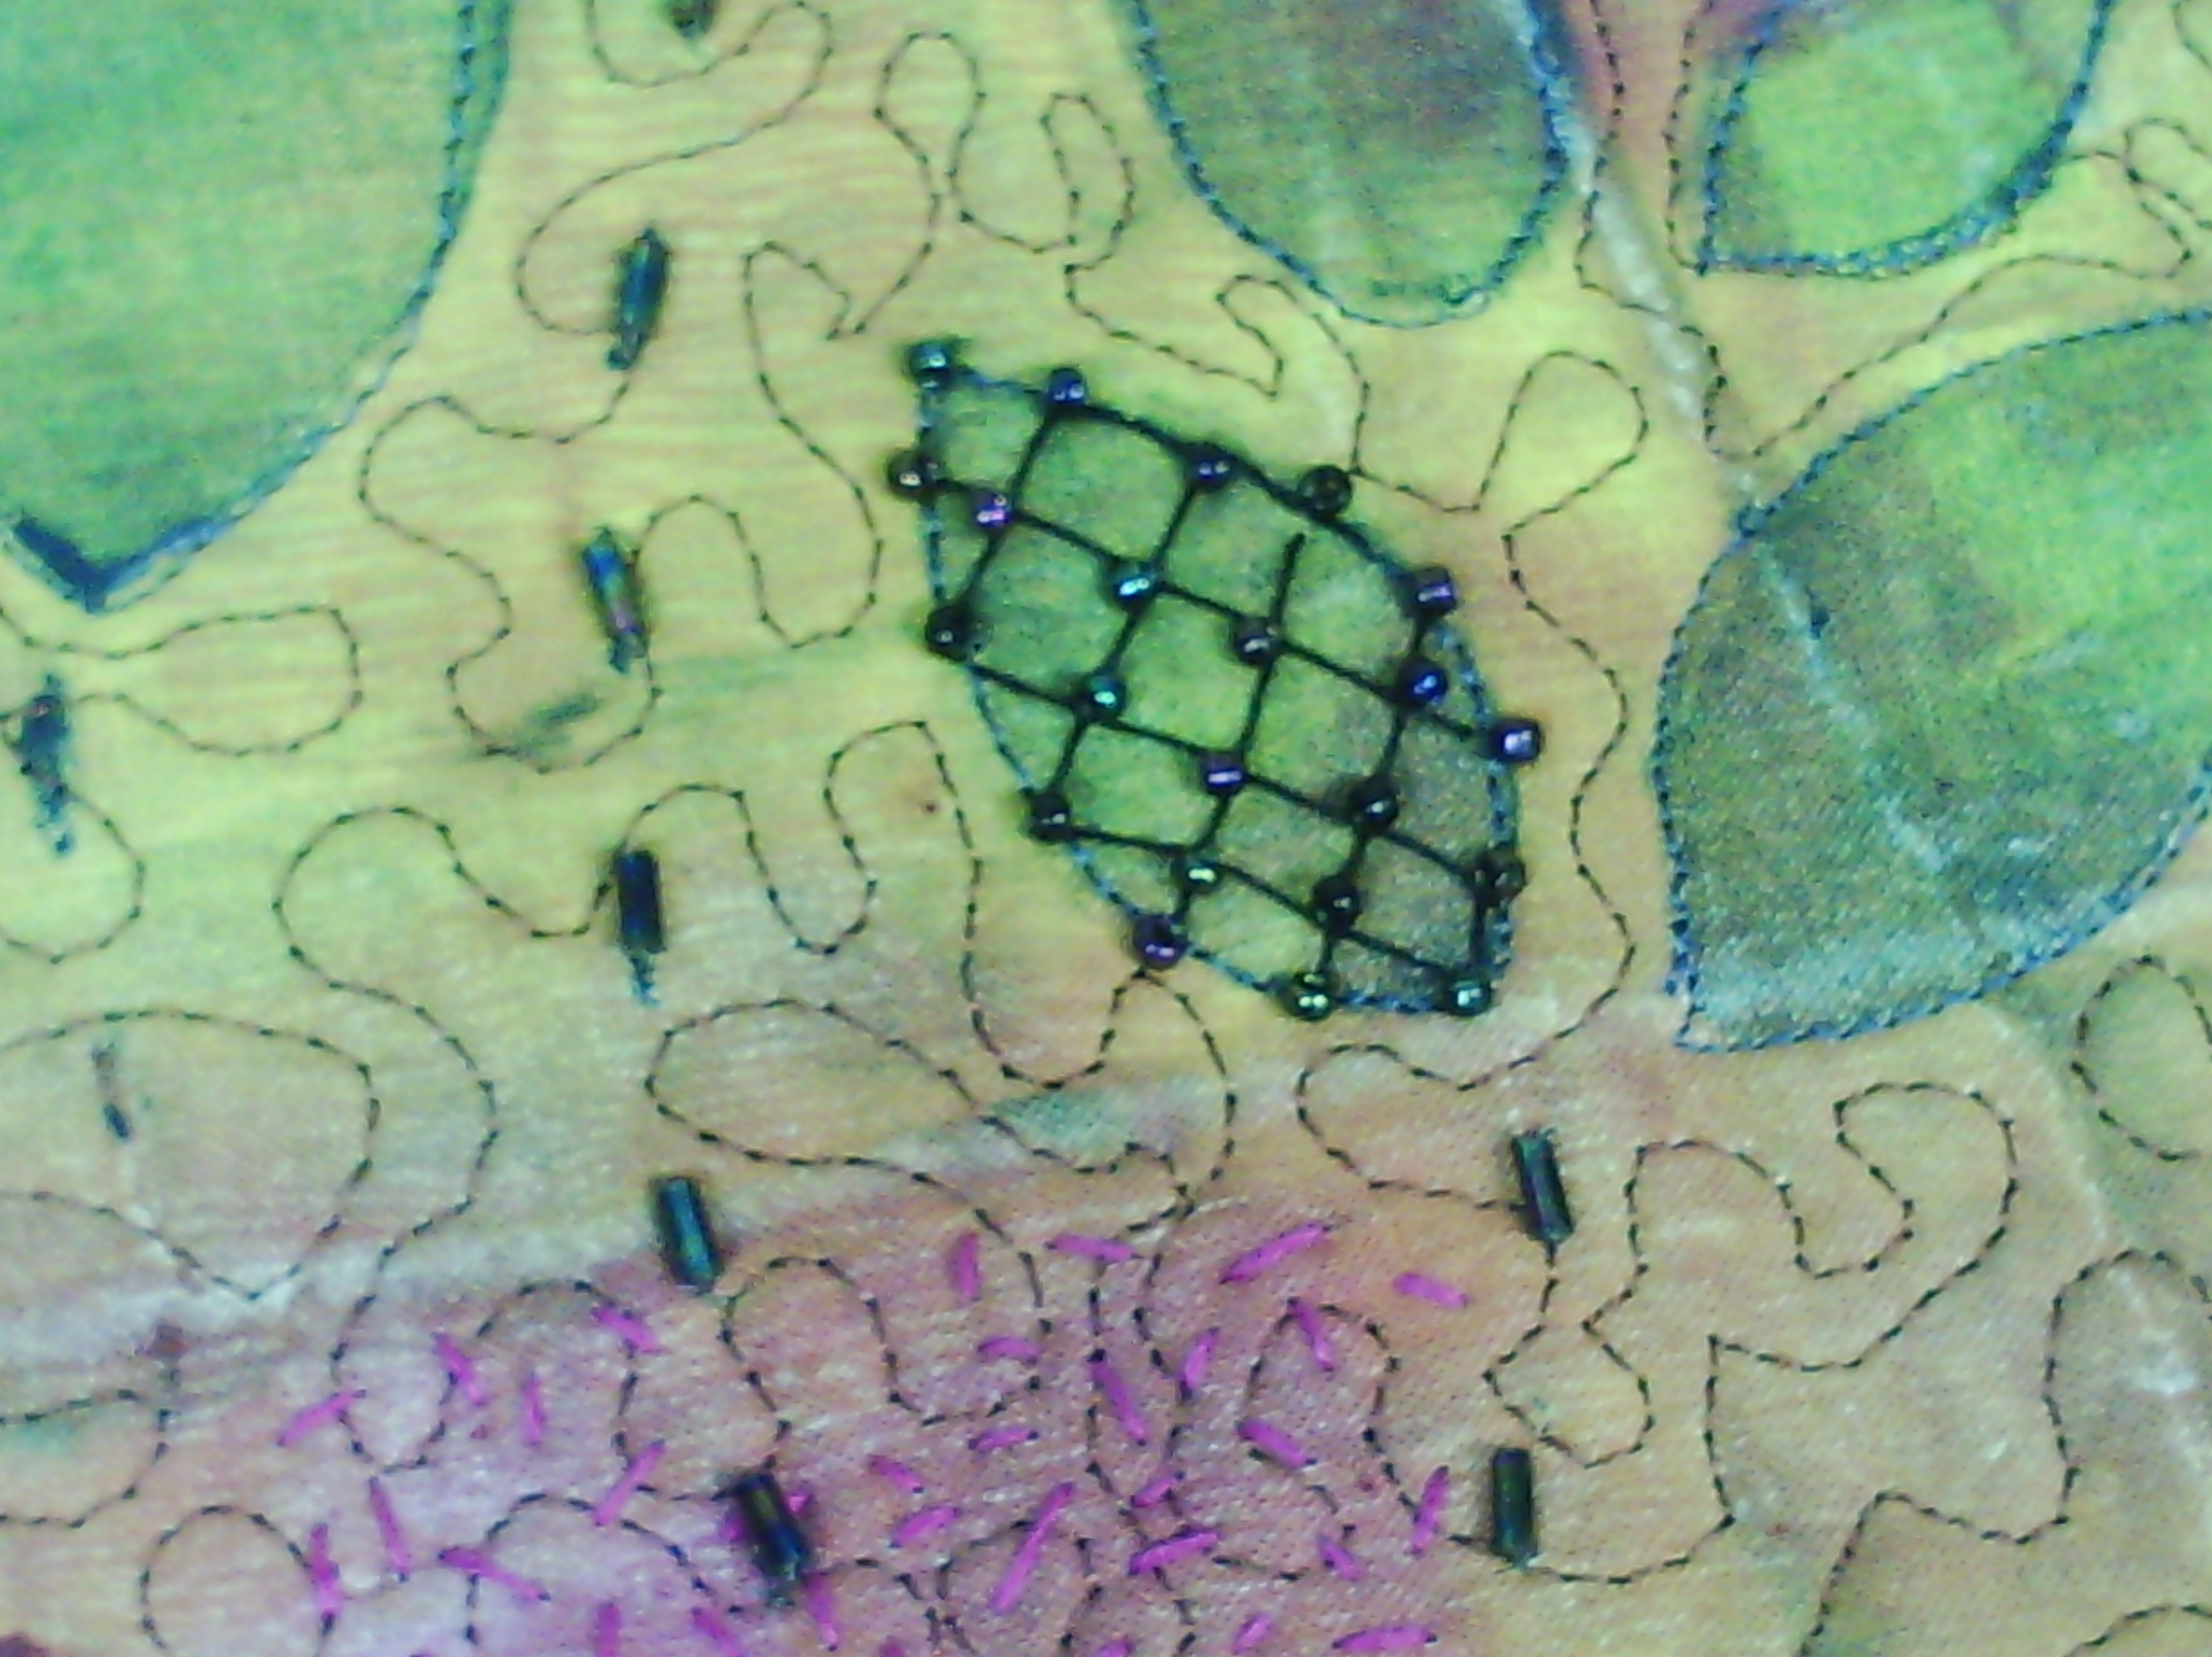
I decided to embroider a lattice and put the beads on it like this.
And here's where I am at with that.
I am liking how this is turning out and hopefully will finish it by the end of the month.
I have layered it with a piece of felt and quilted all around the flowers and am in the process of beading it.
The dotted stems, I am beading with those bugle beads and You can see I was trying out how I wanted to bead the buds/flowers.
Here's a close up of these two ideas, one where I just space beads around the bud and the second where I covered the whole edge with beads. the monoprint is two layers and the flowers were overprinted in a dark blue. these beads are a sort of iridescent dark blue and I thought they would be perfect.
I often take pictures of my work at different stages so I can work out how things are working. Having it in a small picture helps to work out how things are showing up.
This picture obviously helped, because I actually changed my mind totally and did something altogether different.
I decided to embroider a lattice and put the beads on it like this.
And here's where I am at with that.
I am liking how this is turning out and hopefully will finish it by the end of the month.
Monday, November 4, 2013
A little bit of lace
So, day four for Art every day November.
I felt like a bit of lace. something I read last night prompted me to get out the water soluble stabiliser today, but of course I can't remember what.
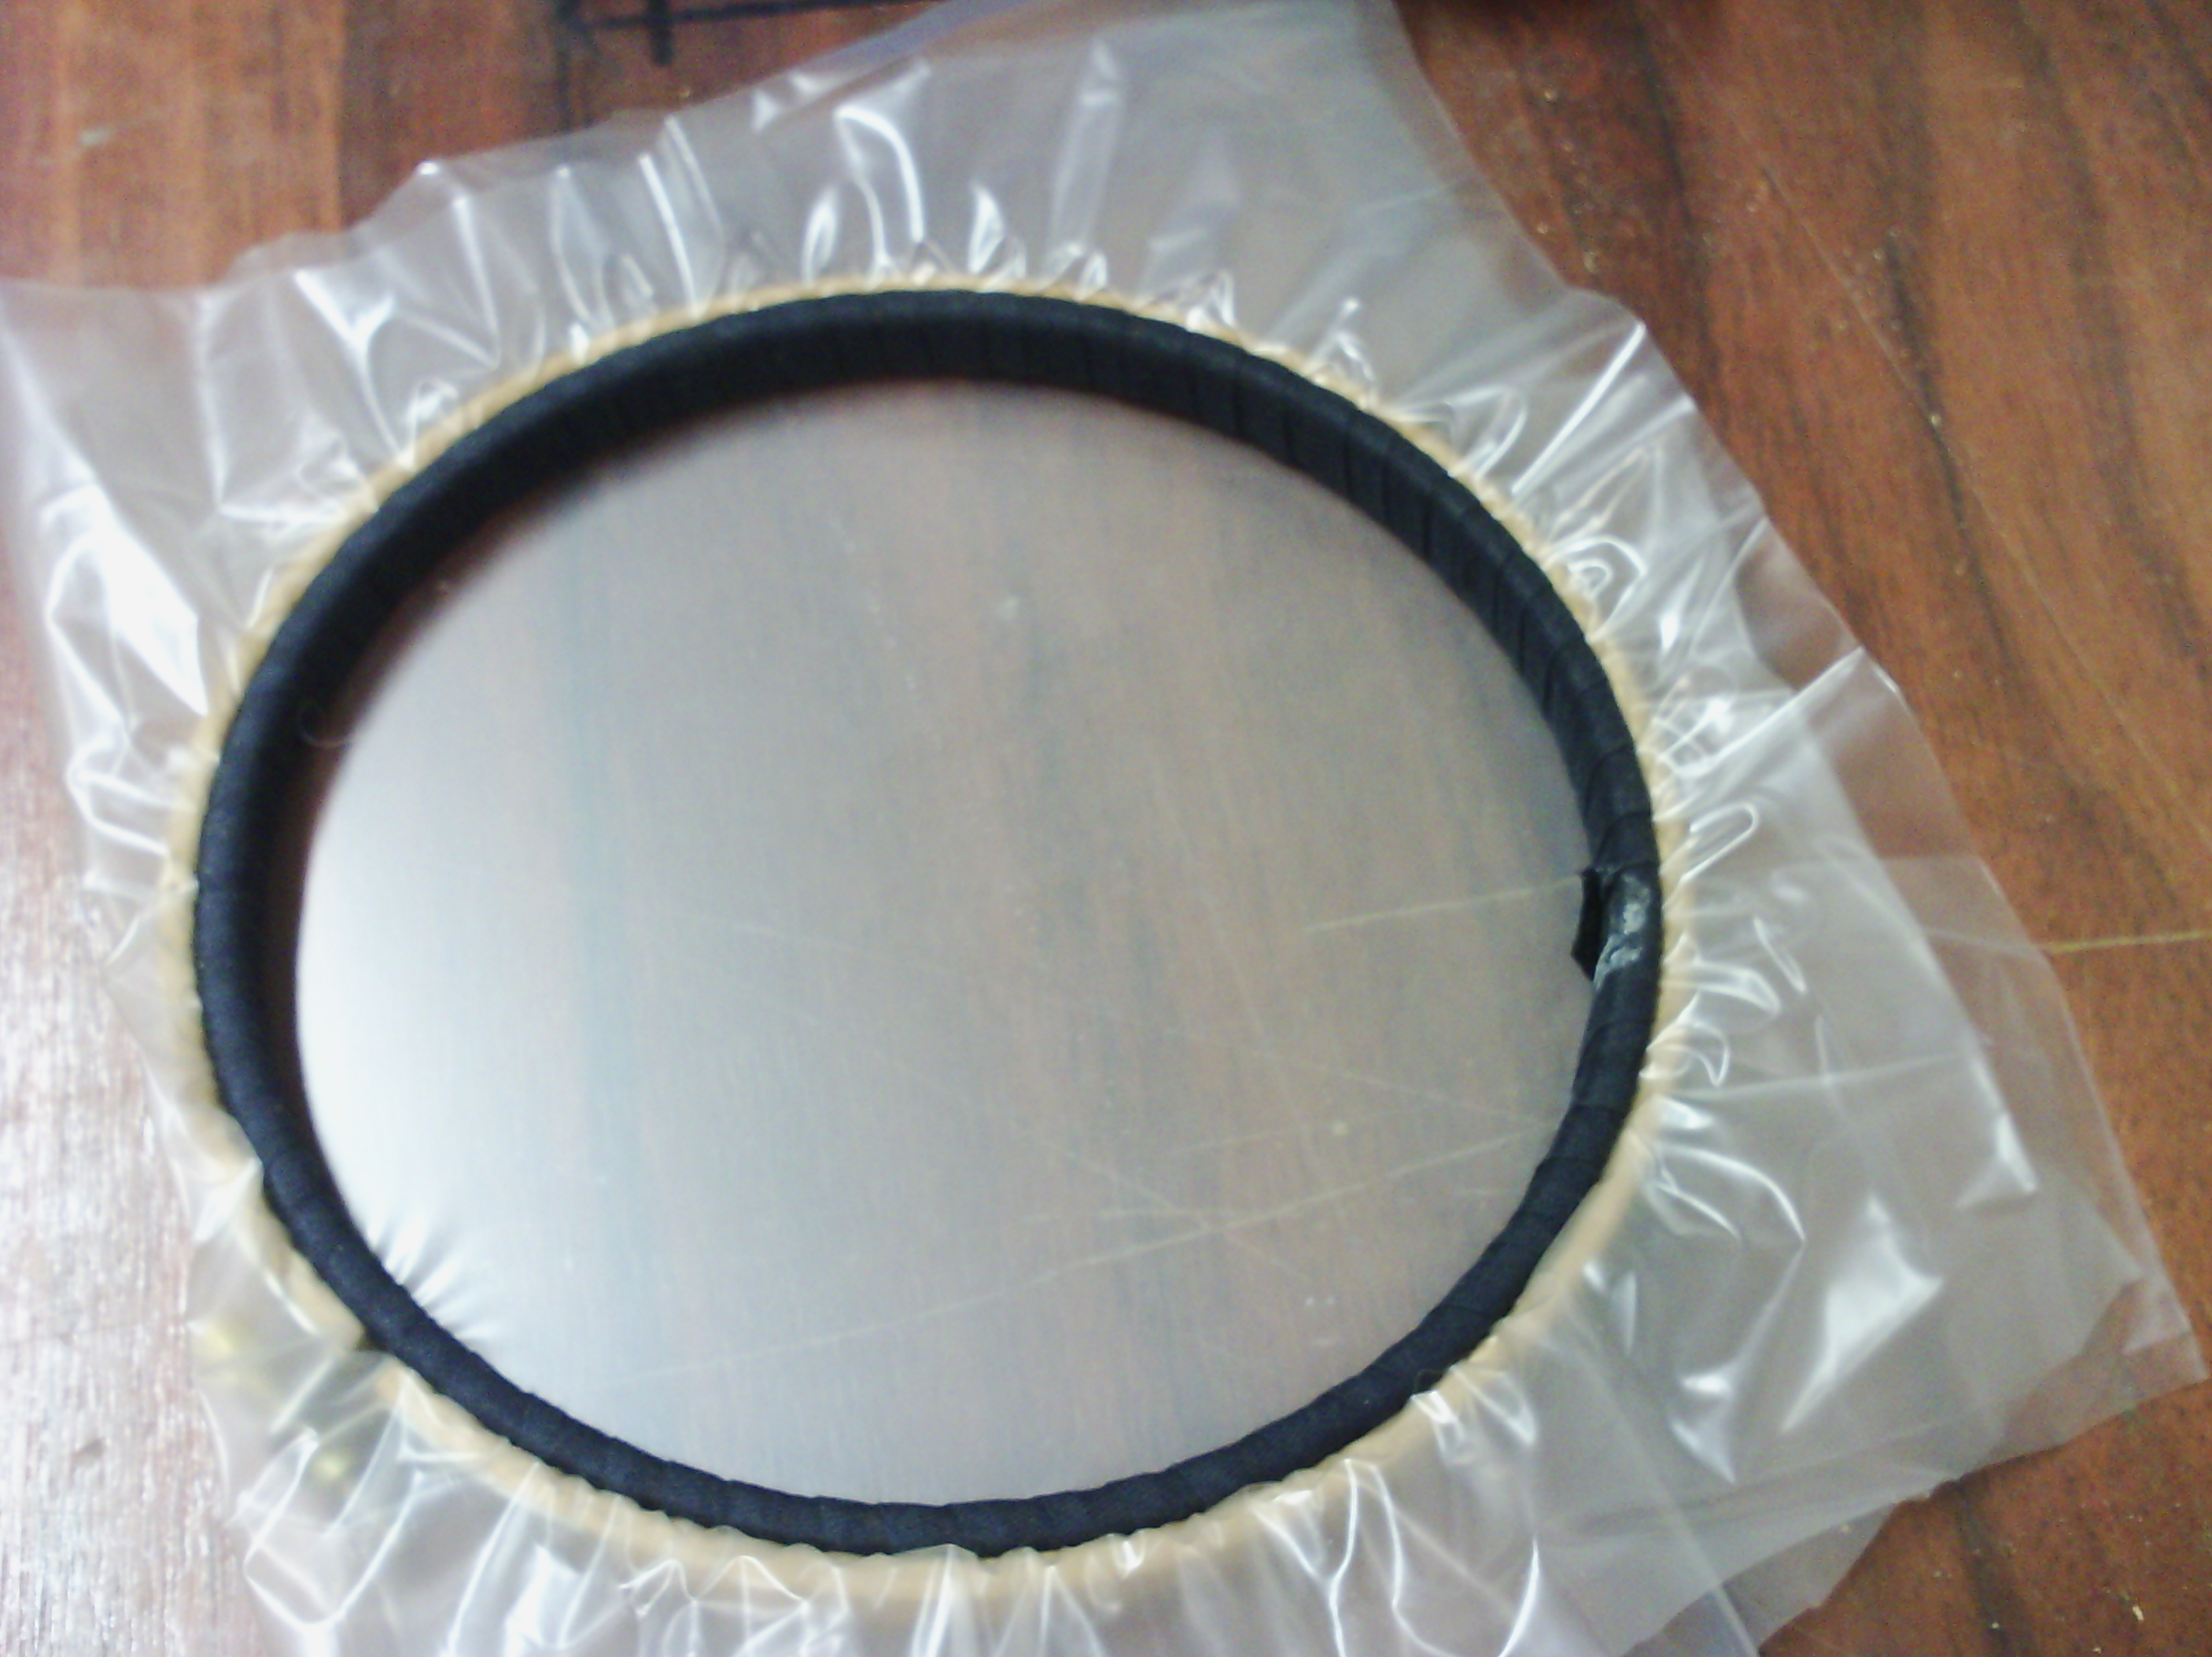
I put two layers of light solvy in a small six inch hoop (upside down for free machine work)
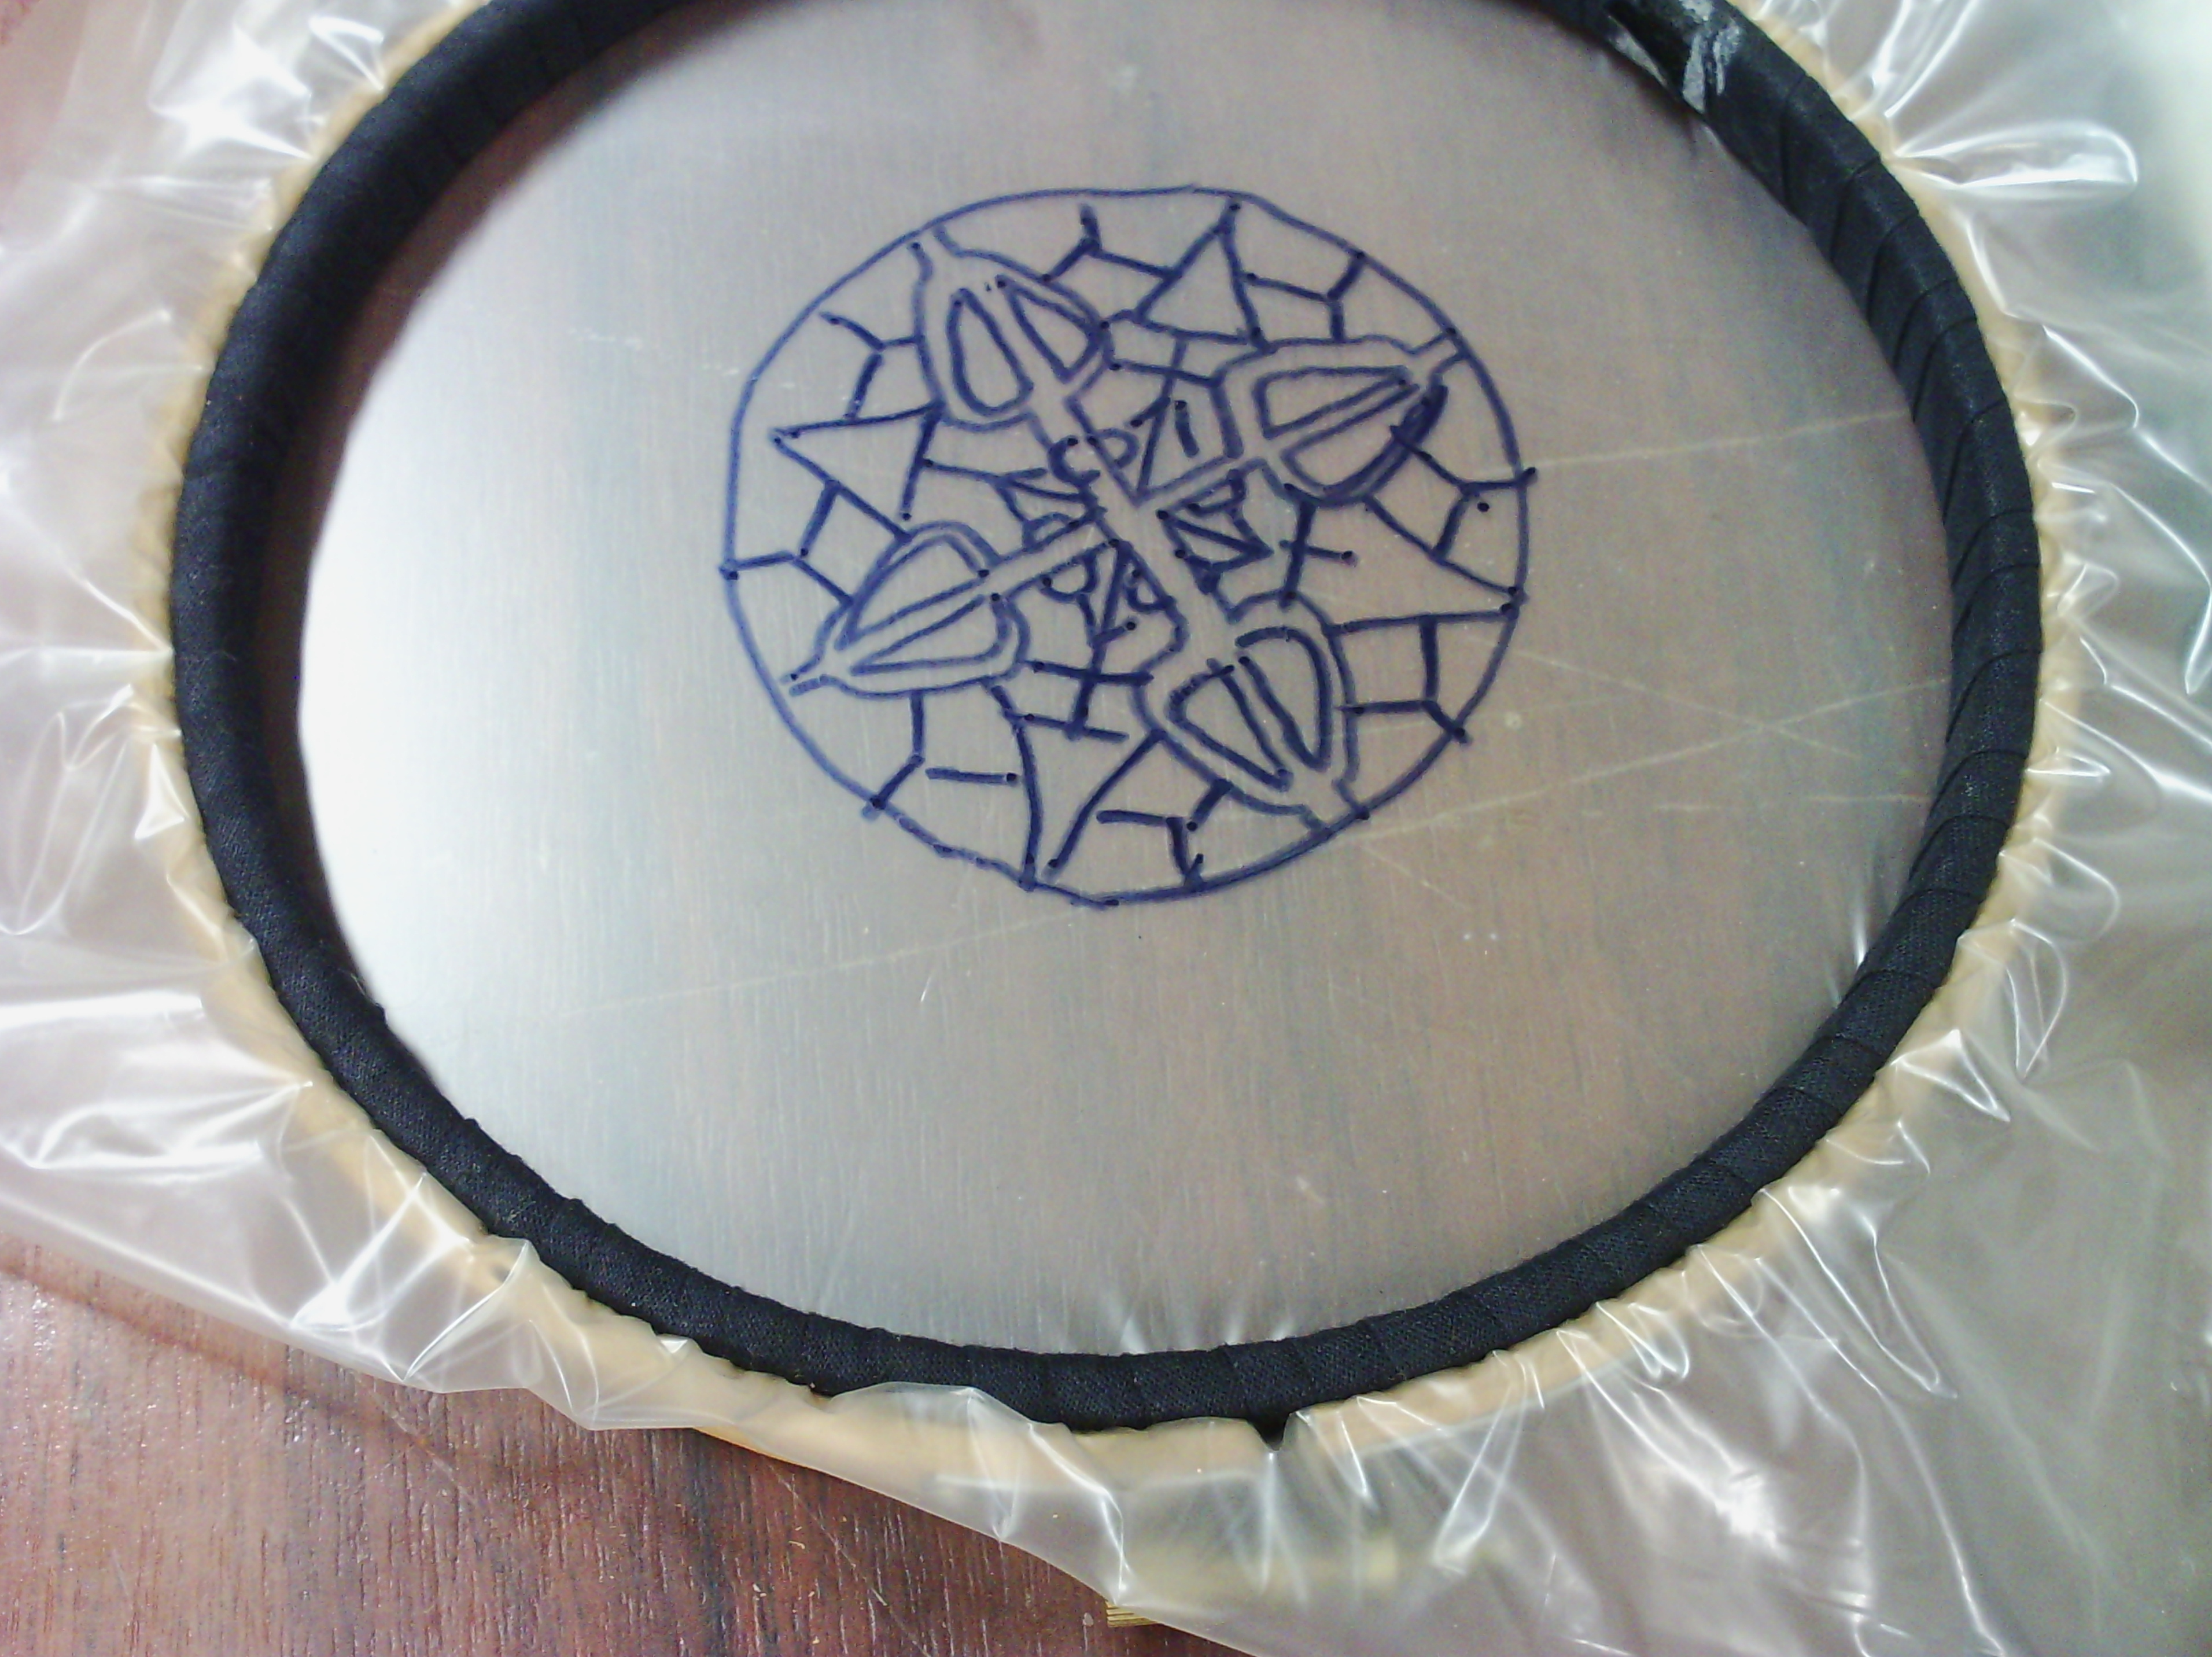
Then I traced a design from a vintage DMC needlelace pattern book with a permanent marker.
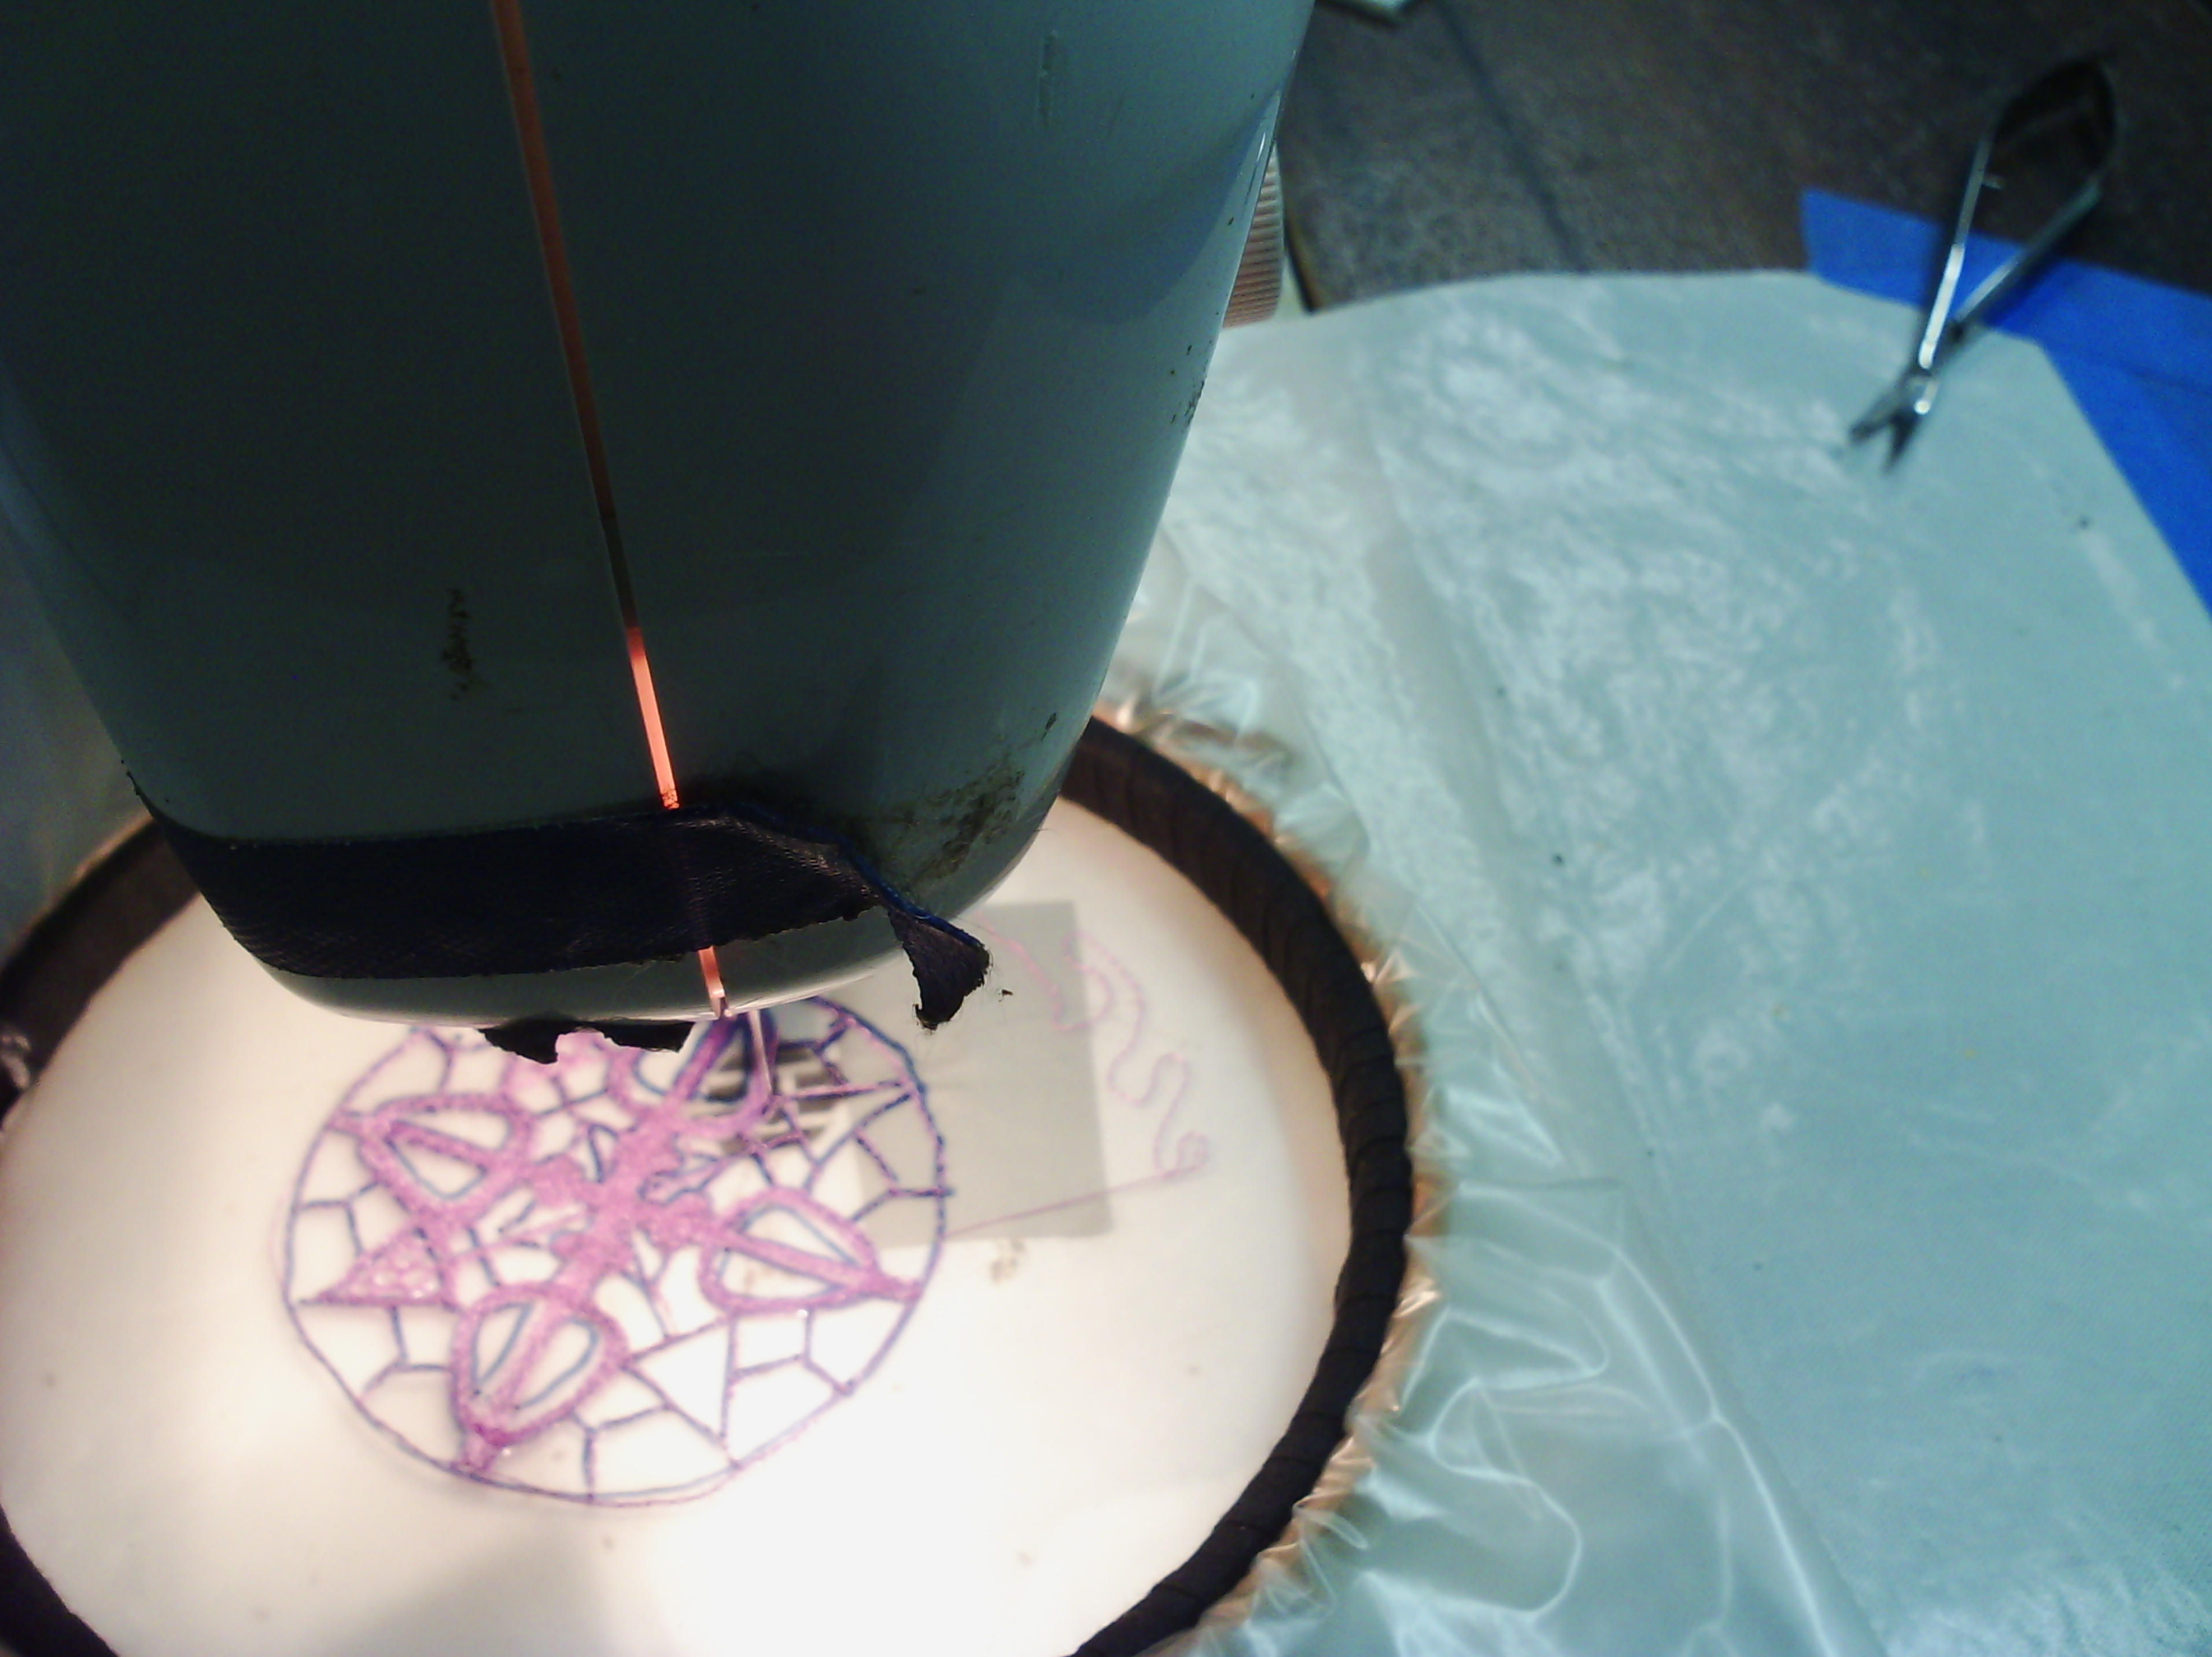
Then I put it under my thread painting machine and started stitching. As you can see, my machine has been through a few woes and had to have a band aid, which is nearly falling off. It also has no feed dogs or foot (I removed both) This is the way I thread paint, but of course I do not recommend it to anyone else as there is a slight danger you might skewer yourself with the needle.
And here it is with the stitching done. As you can see I did not always follow the lines and I added the edging myself because I felt the edge needed a bit more.
The next step is to cut it out of the hoop and wash it in running water to remove the solvy and dry it.
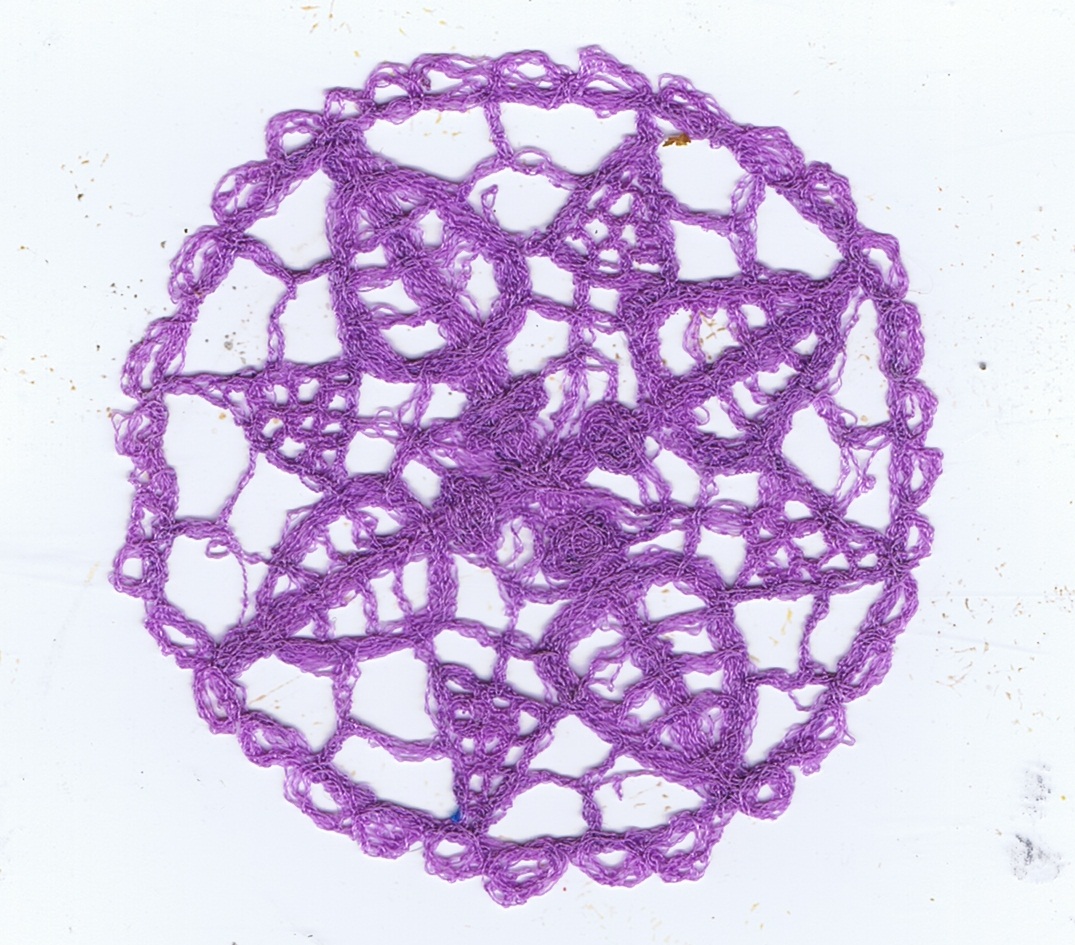
Here it is after washing and drying. I love the imperfect, old look of this type of lace. If I wanted perfect, I suppose I'd buy it. But this will be perfect for my crazy quilt, which is on hold until next year, when CQJP starts again as I have joined it so that I will get my quilt finished.
This challenge is certainly helping me to work every day!
I felt like a bit of lace. something I read last night prompted me to get out the water soluble stabiliser today, but of course I can't remember what.
I put two layers of light solvy in a small six inch hoop (upside down for free machine work)
Then I traced a design from a vintage DMC needlelace pattern book with a permanent marker.
Then I put it under my thread painting machine and started stitching. As you can see, my machine has been through a few woes and had to have a band aid, which is nearly falling off. It also has no feed dogs or foot (I removed both) This is the way I thread paint, but of course I do not recommend it to anyone else as there is a slight danger you might skewer yourself with the needle.
And here it is with the stitching done. As you can see I did not always follow the lines and I added the edging myself because I felt the edge needed a bit more.
The next step is to cut it out of the hoop and wash it in running water to remove the solvy and dry it.
Here it is after washing and drying. I love the imperfect, old look of this type of lace. If I wanted perfect, I suppose I'd buy it. But this will be perfect for my crazy quilt, which is on hold until next year, when CQJP starts again as I have joined it so that I will get my quilt finished.
This challenge is certainly helping me to work every day!
Sunday, November 3, 2013
Stitched Leaves
So, day three for Art every day November. Yay!
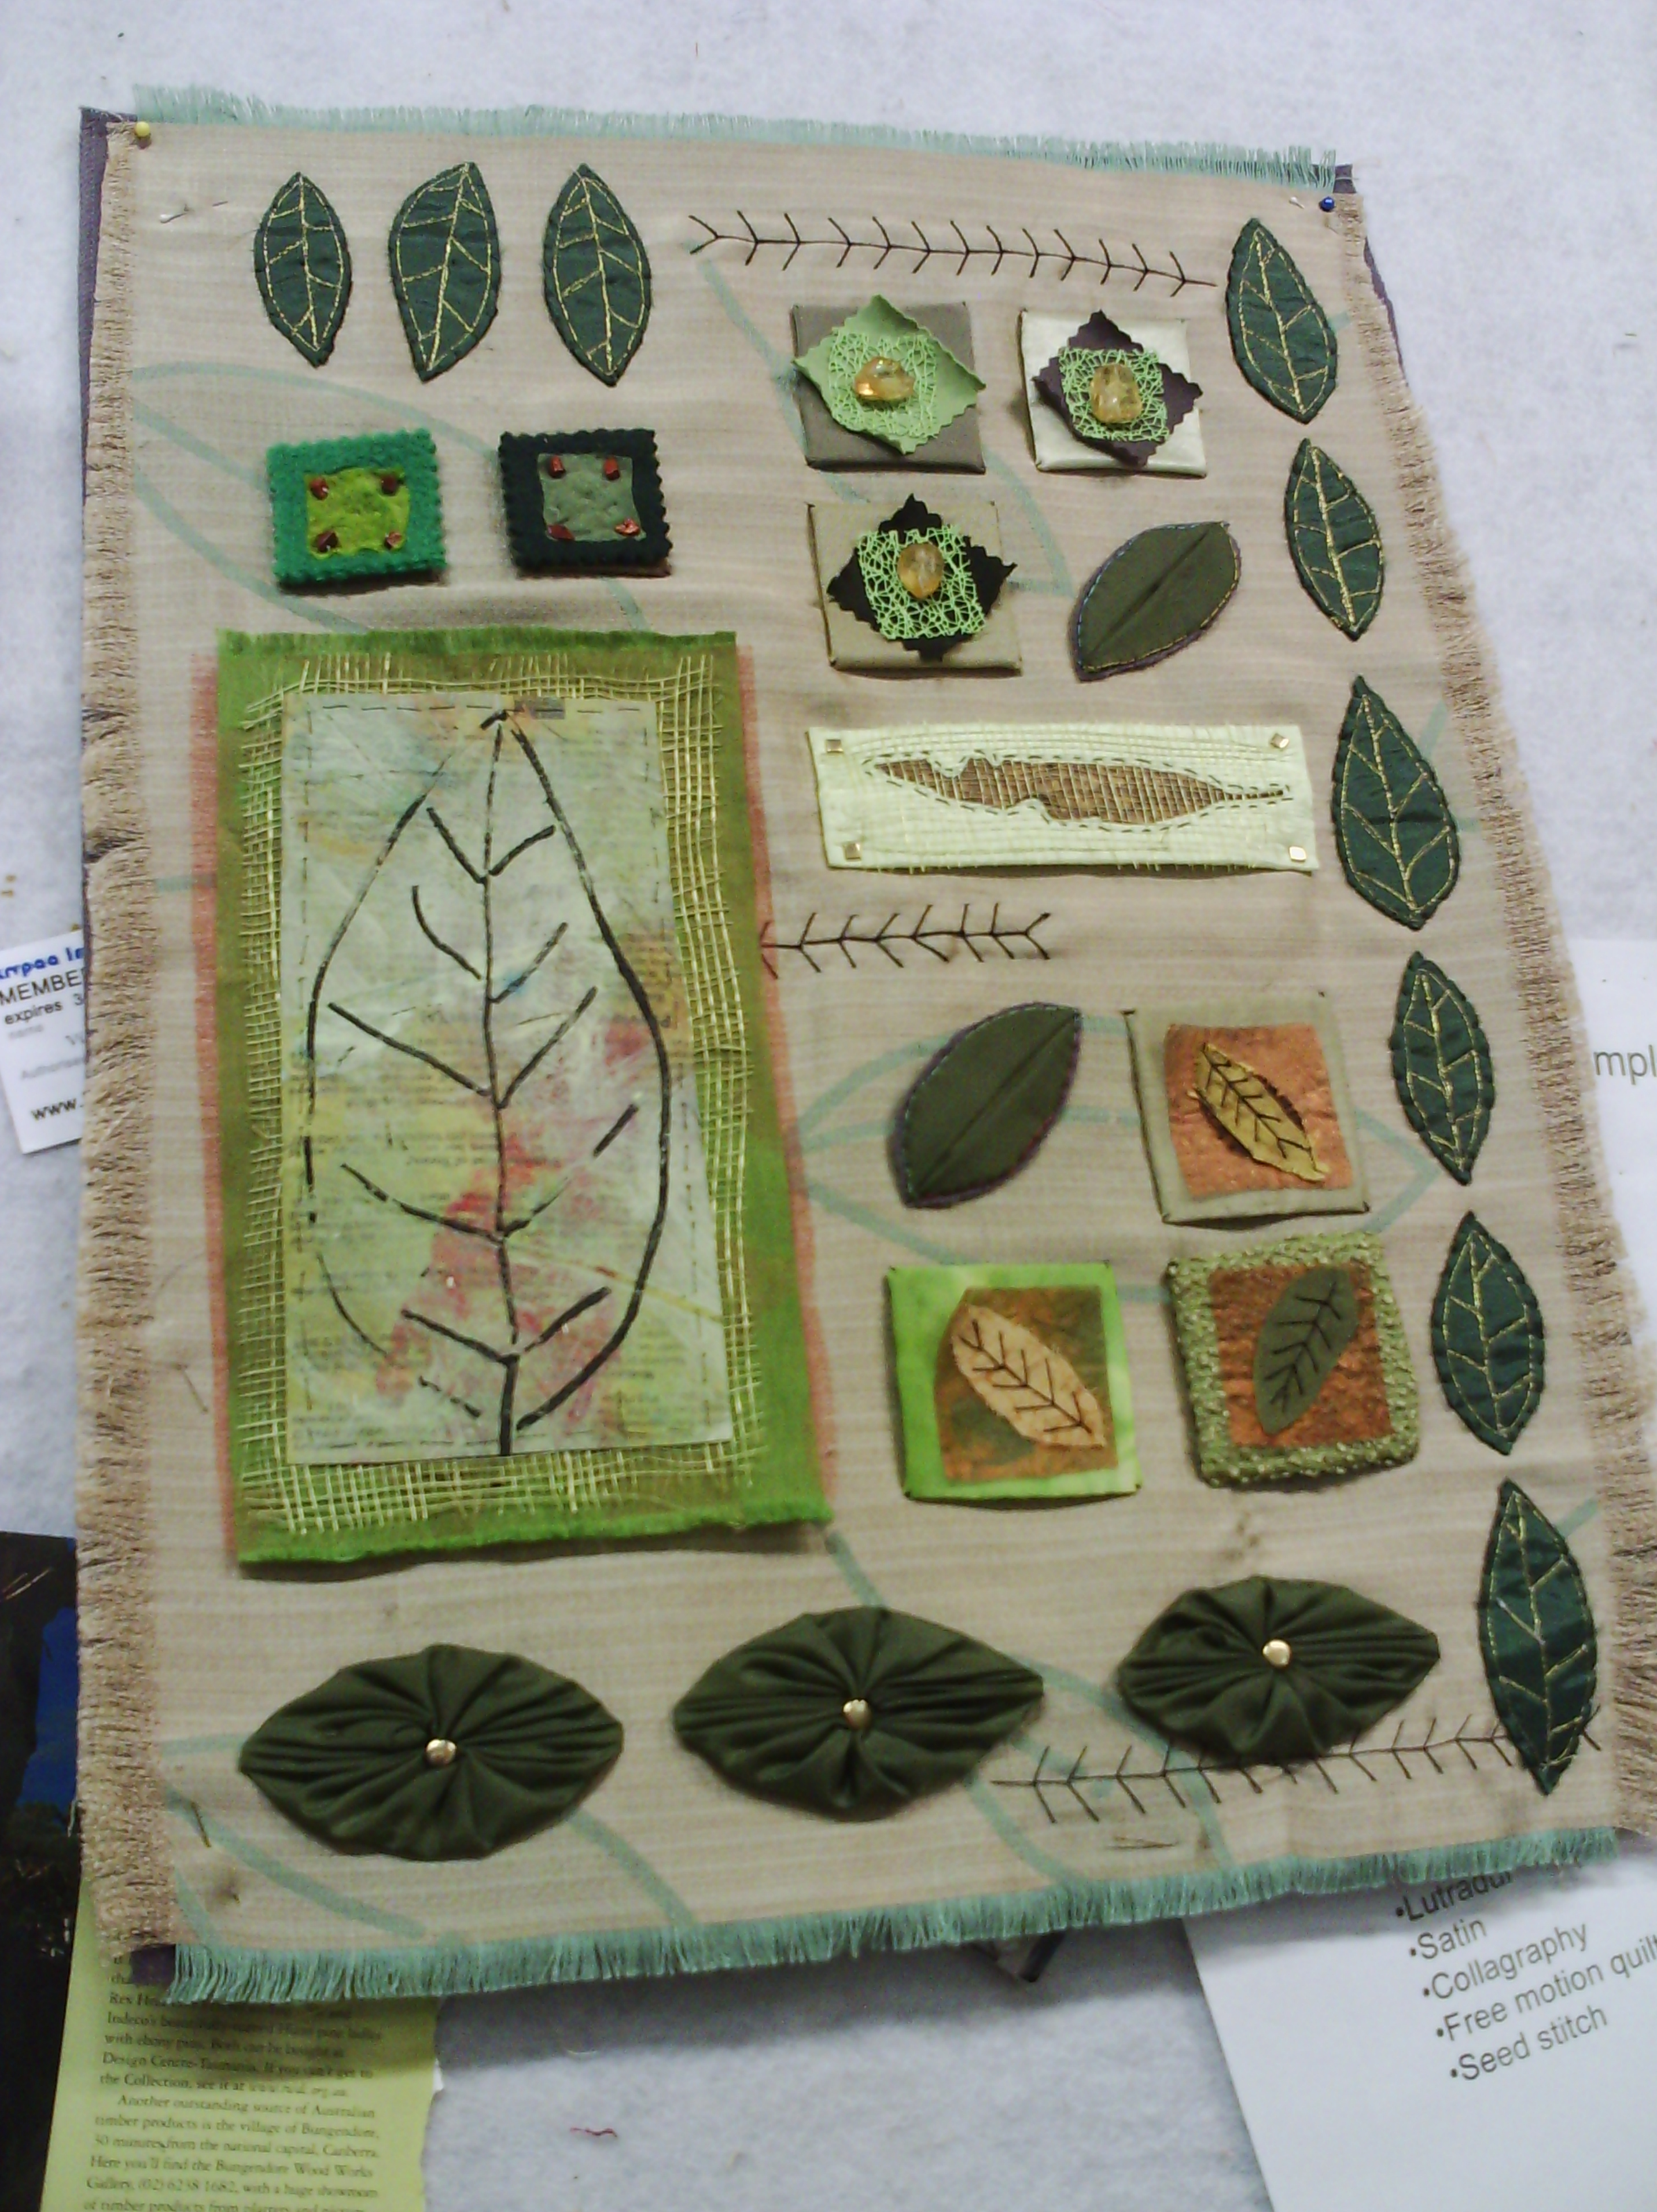
I actually got all the stitching done on the leaf collage.
I still have to trim it up and mount it. I think I will mount it in a large frame with a fair bit of background behind it. I have frayed the edges on the background, which is a gold and green shot furnishing fabric ('shot' fabric has different threads in the warp and weft, so when you fray it you get two different threads top and bottom versus left and right)
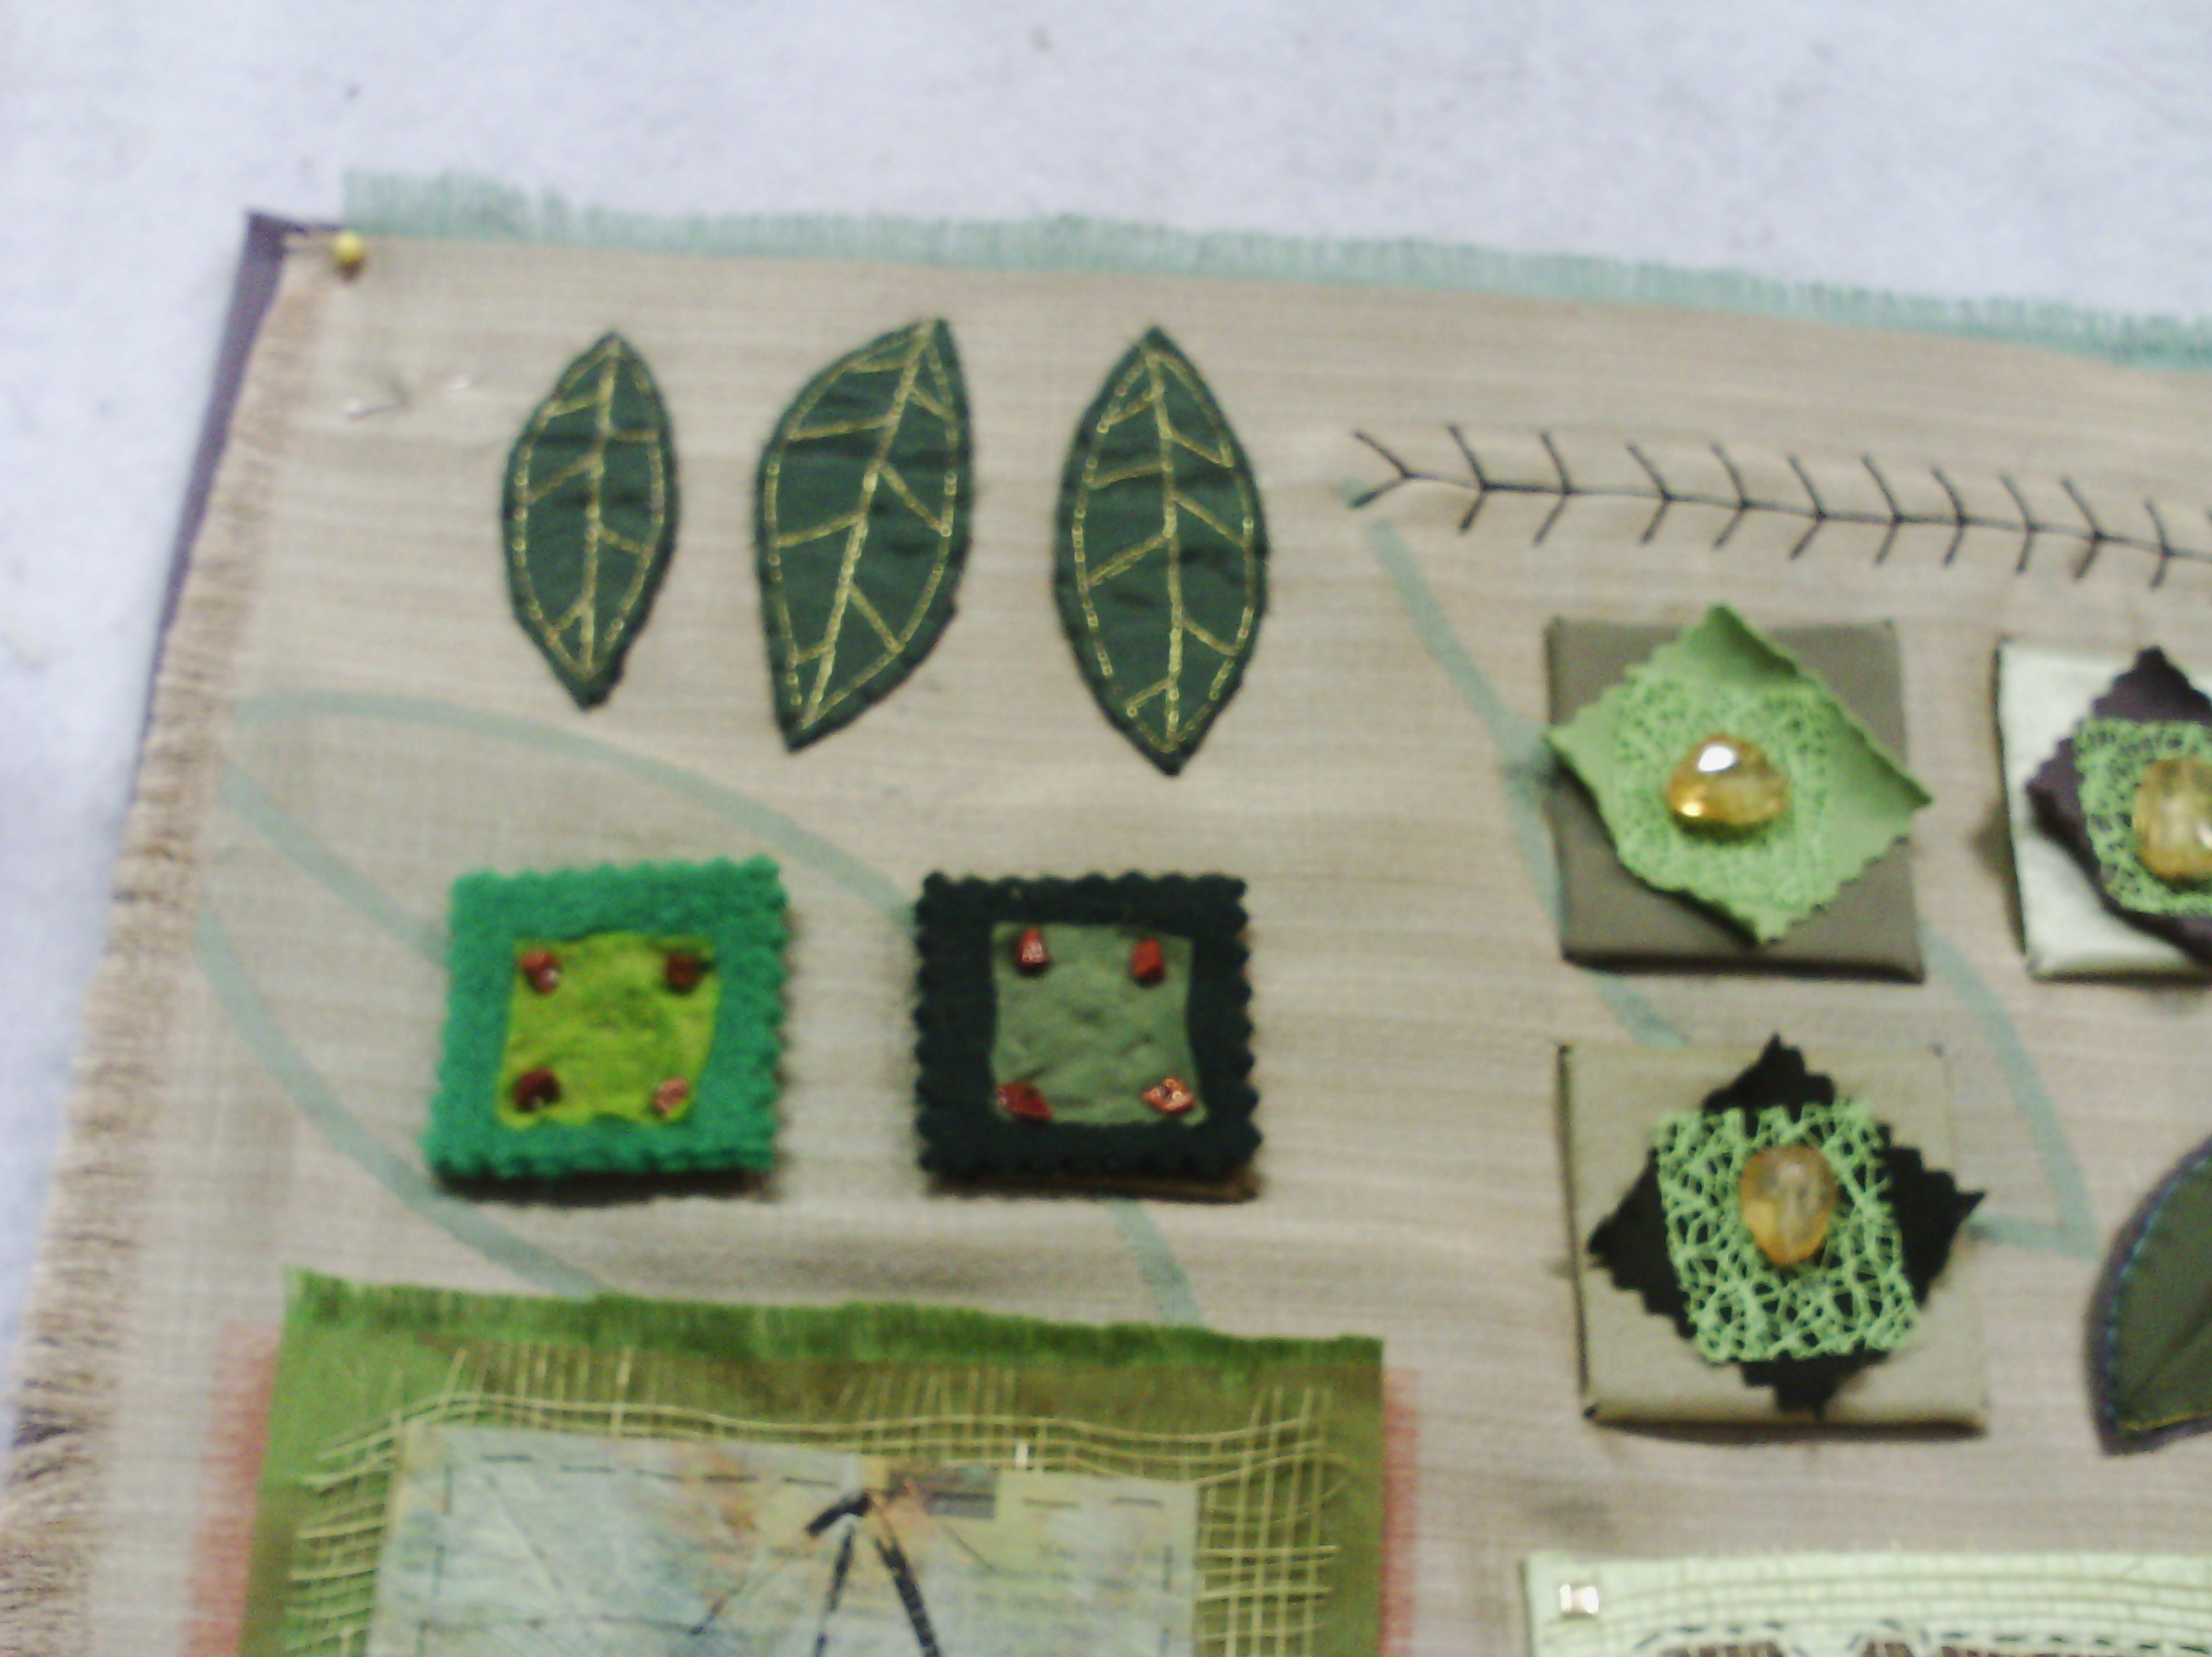
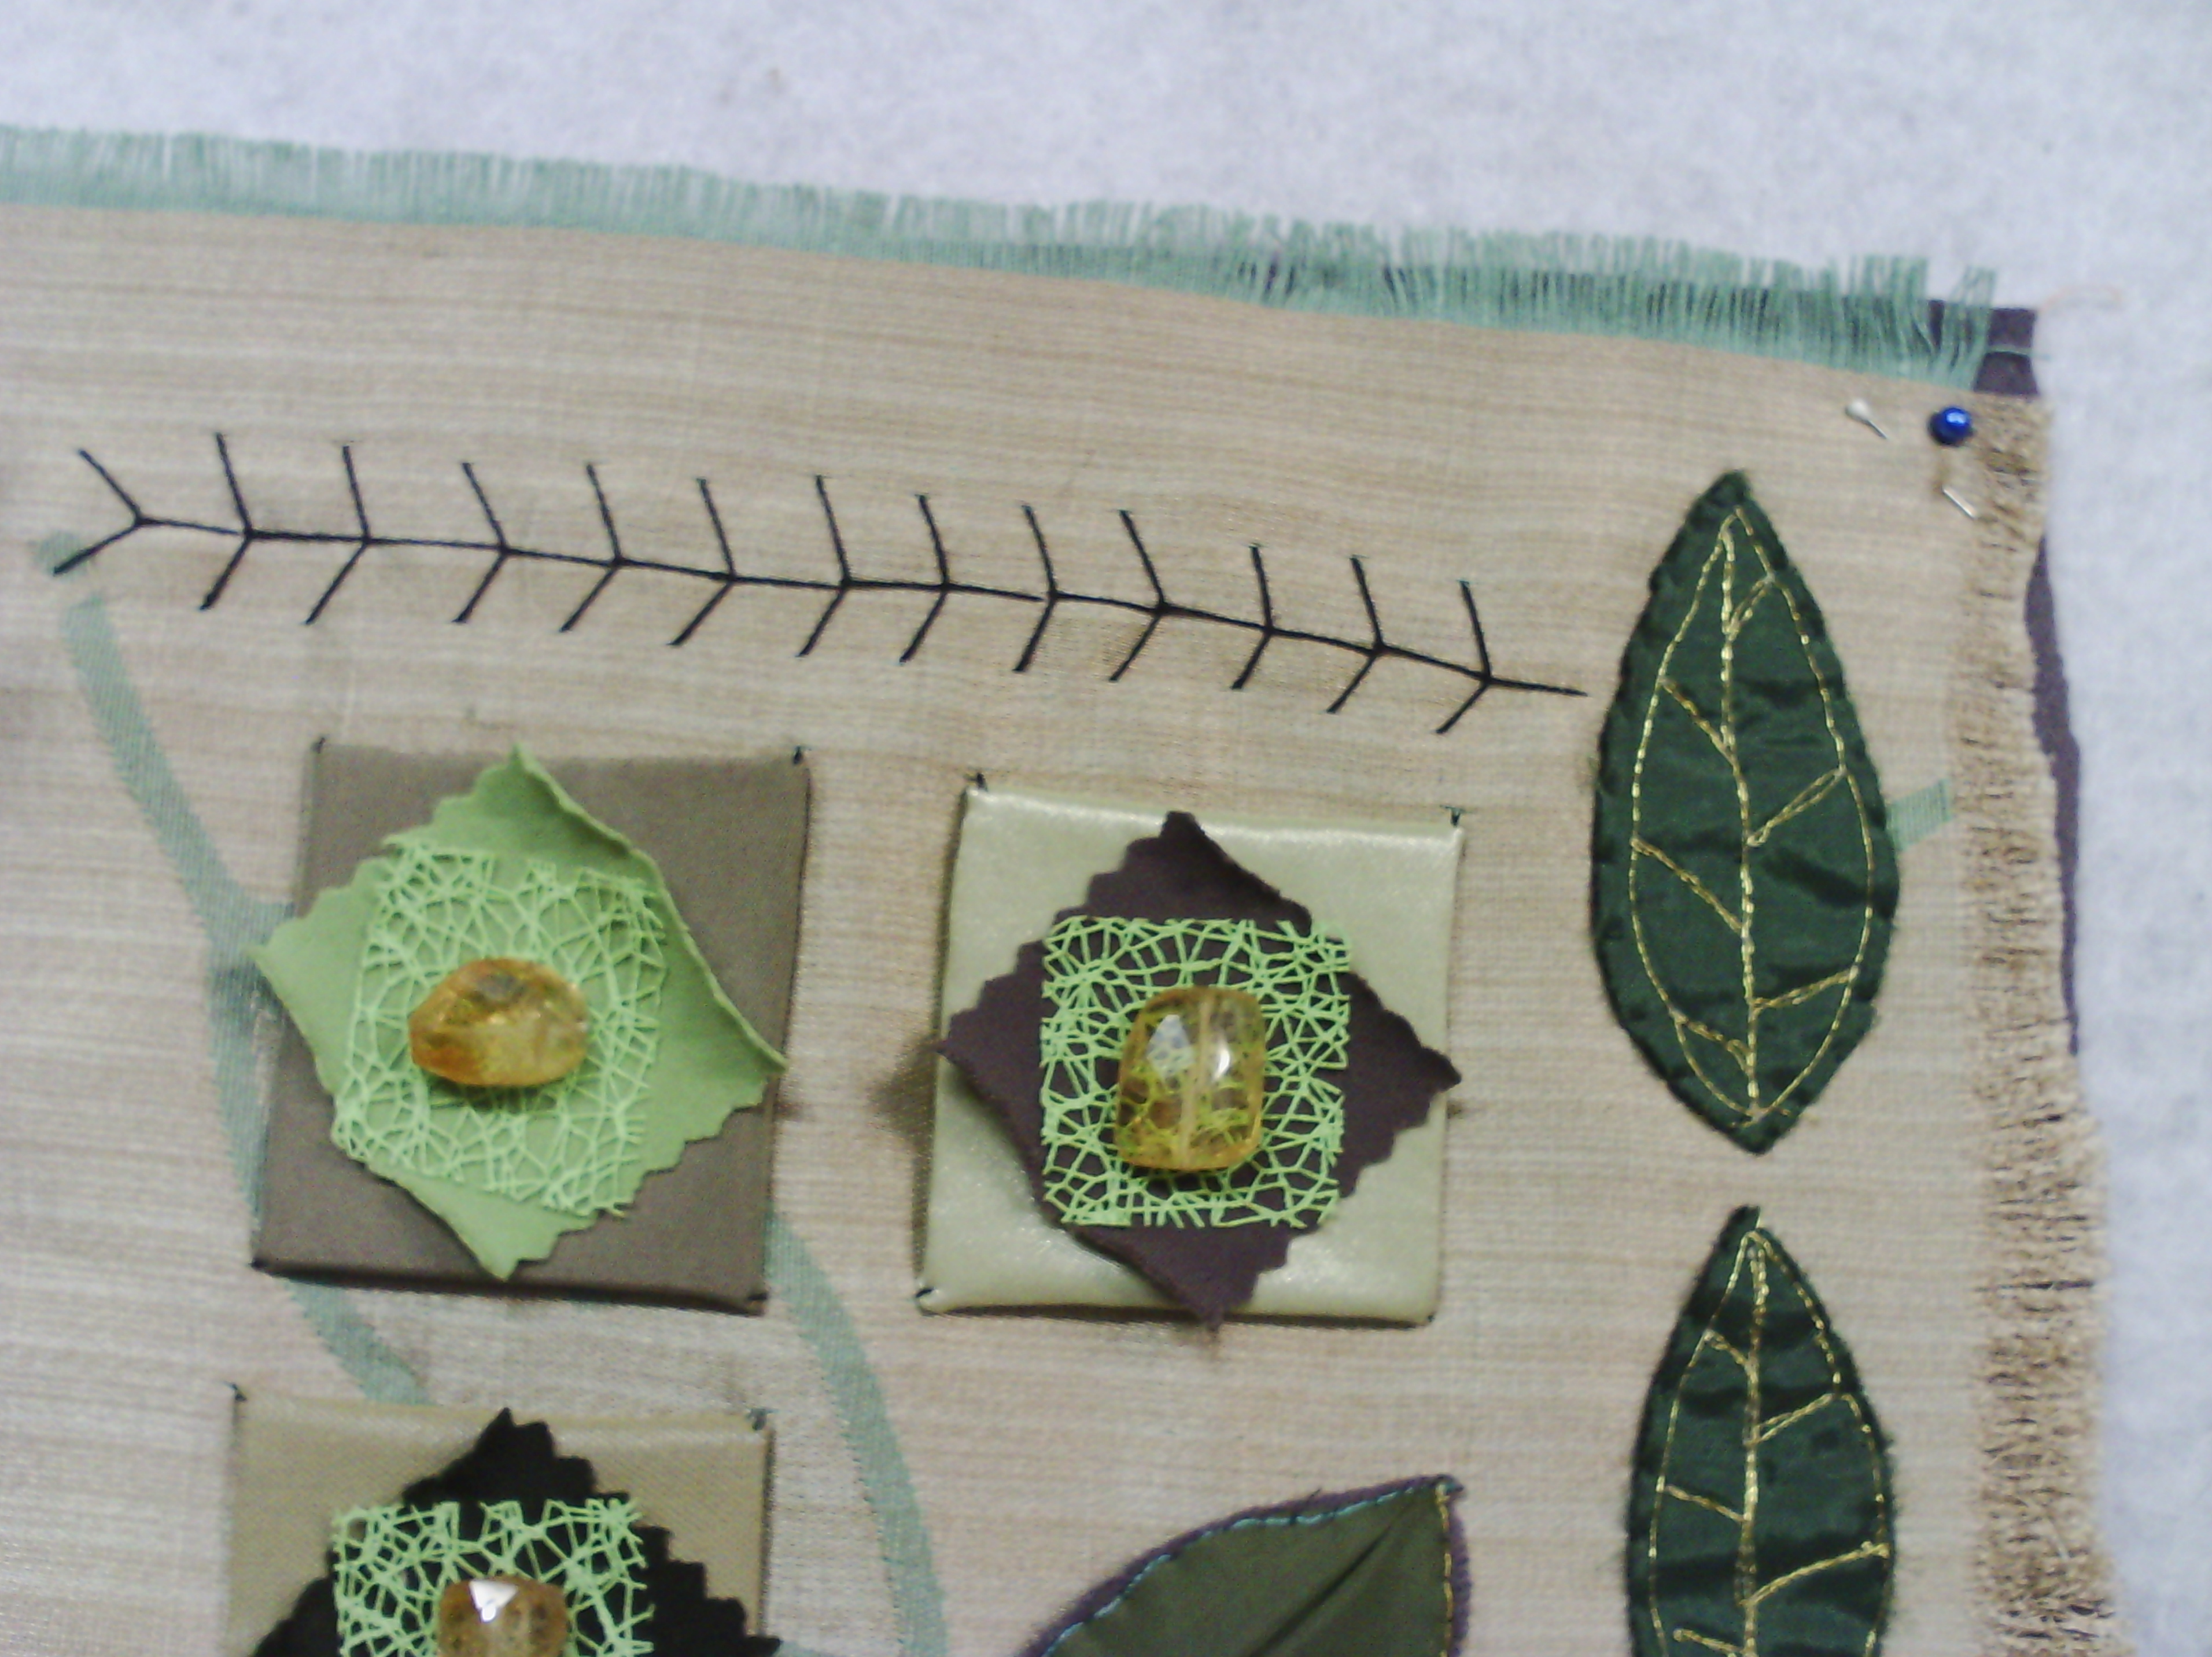
Here are some close ups of the parts.
The three leaves at the top were free motion stitched on satin over black felt then cut out and sewn on.
the two squares below are polar fleece with distressed chiffon on top attached with haematite crystals.
The three squares here are satin sewn over felt layered with poly knit squares, textured ribbon and then quartz crystals.
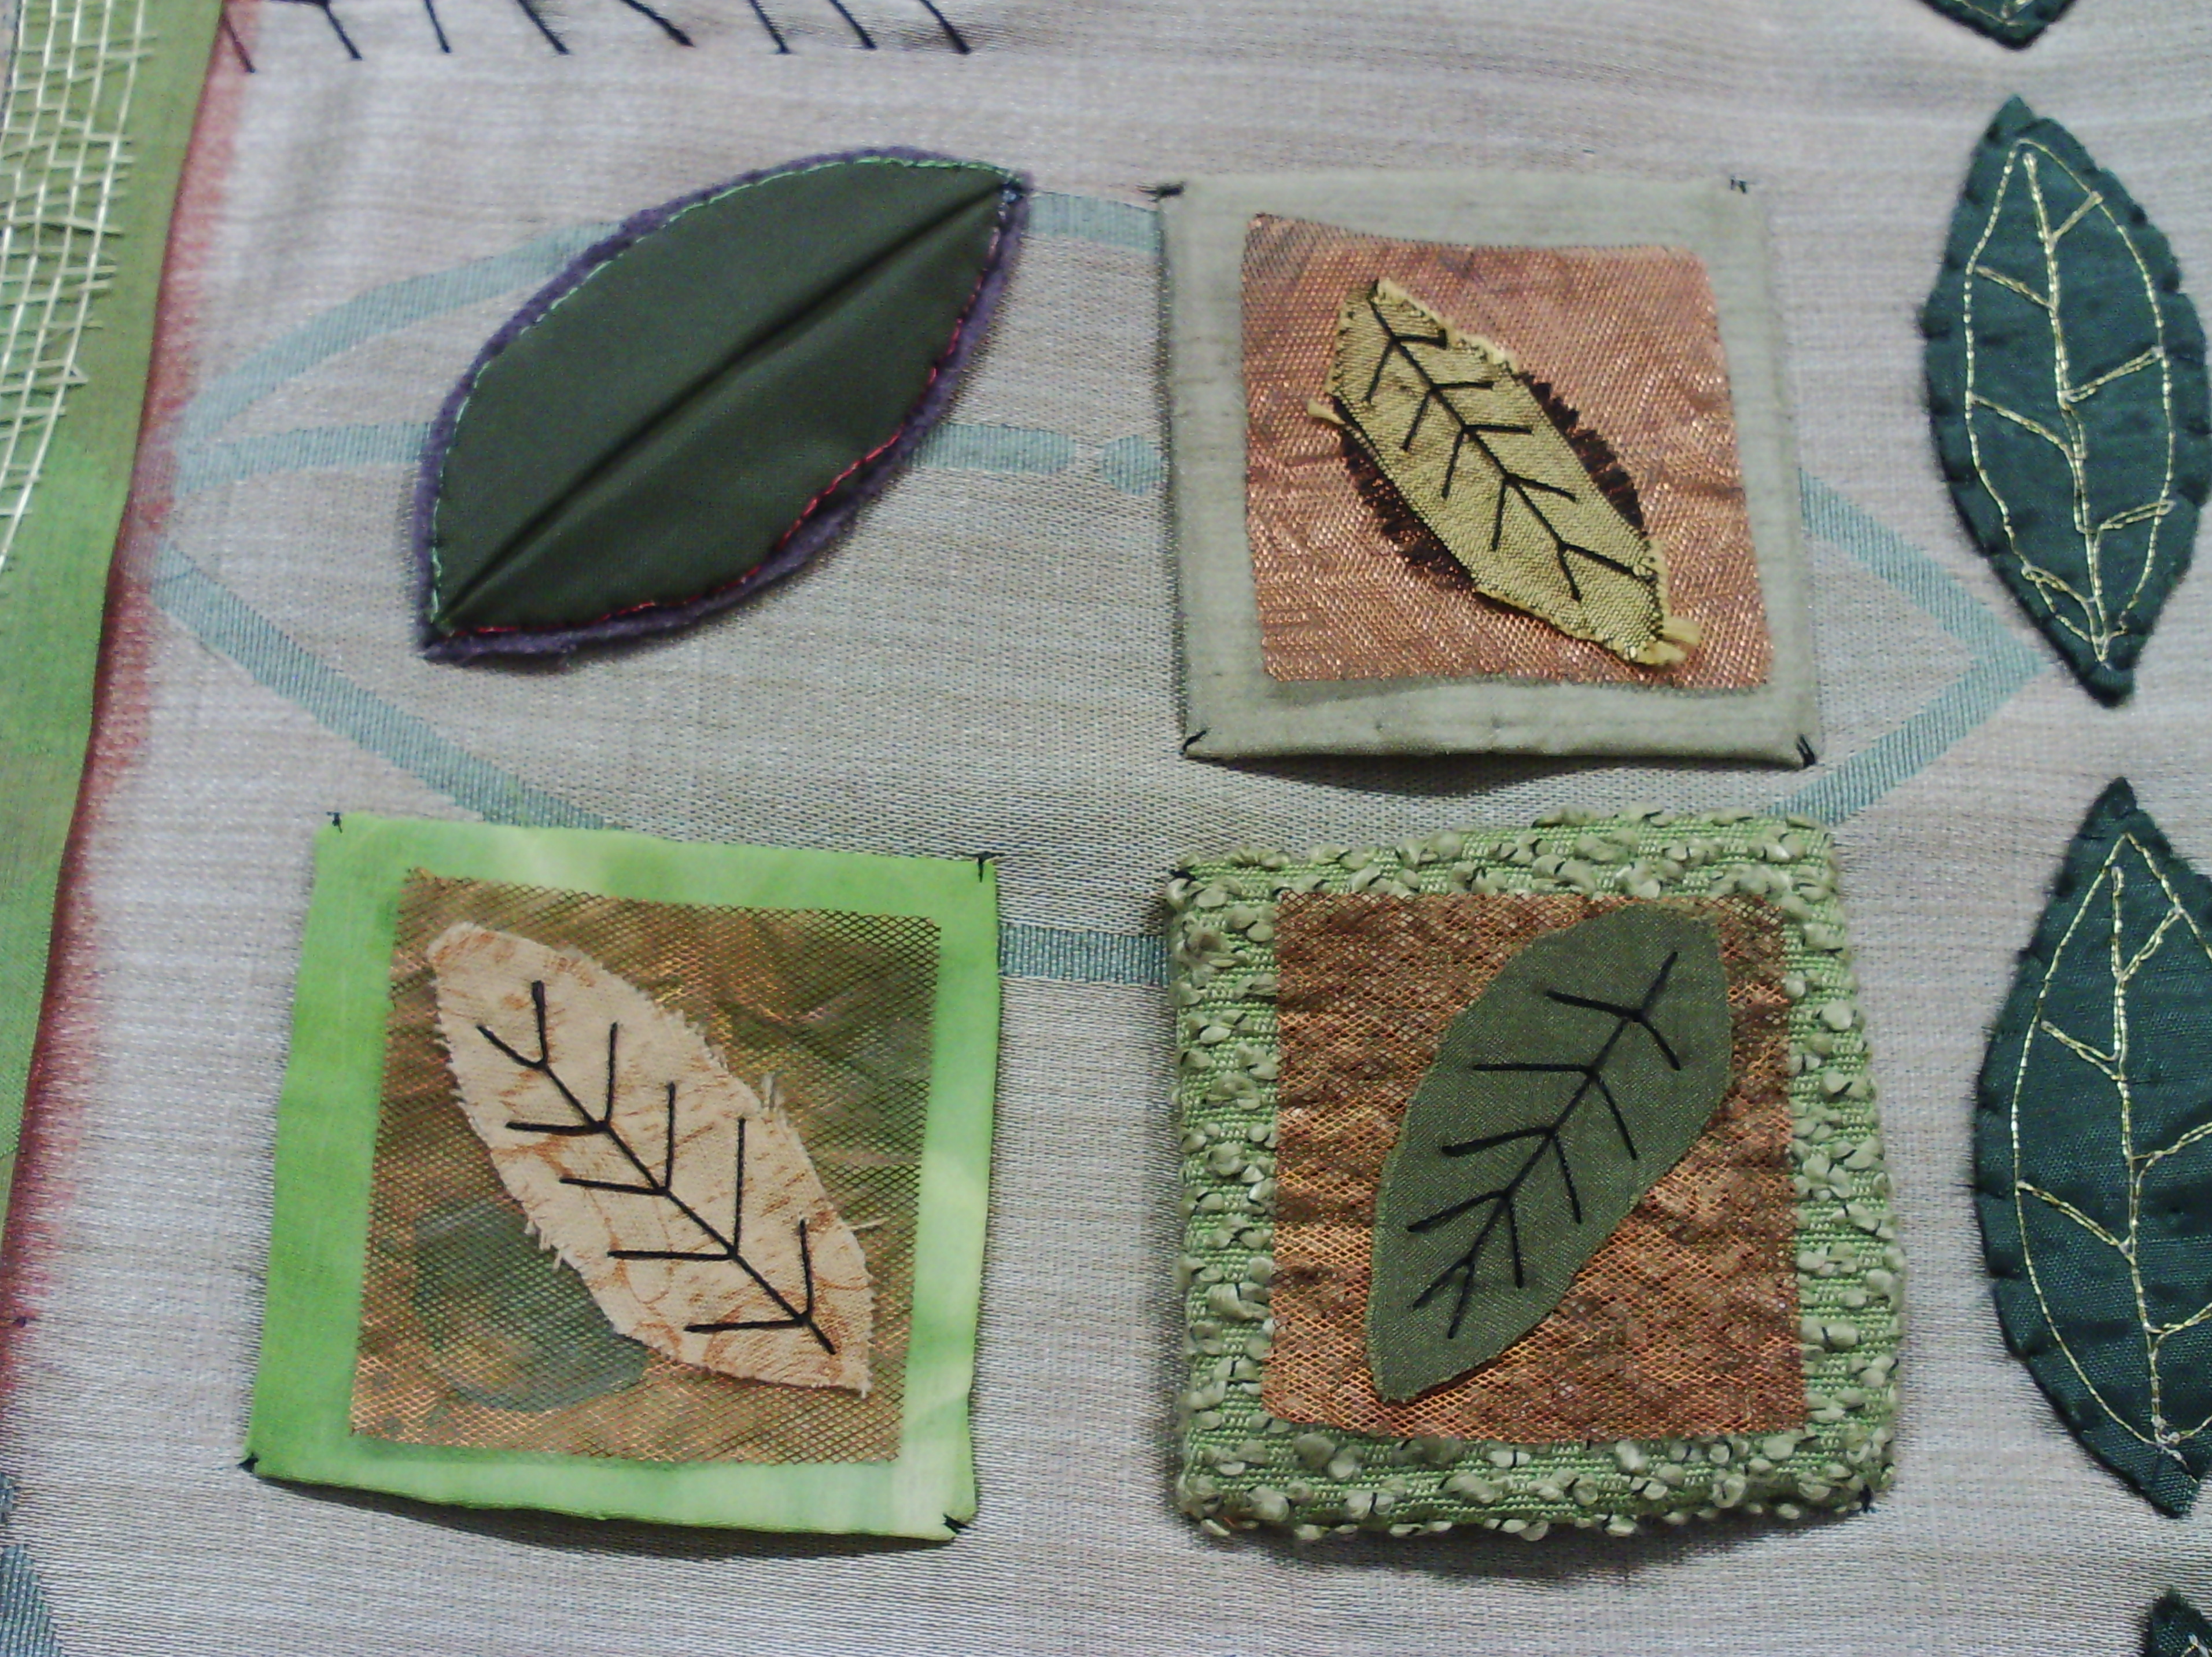
The folded leaf at top left (also in the pic above, but cut off) was made from two folded pieces of satin laid over an unfolded third which was stitched arounf in the leaf shape, cut out and turned inside out then stitched to a felt base and cut out again.
The three squares were made from various fabrics covering a square of felt then layered with copper mesh and finally a leaf attached with fly stitch.
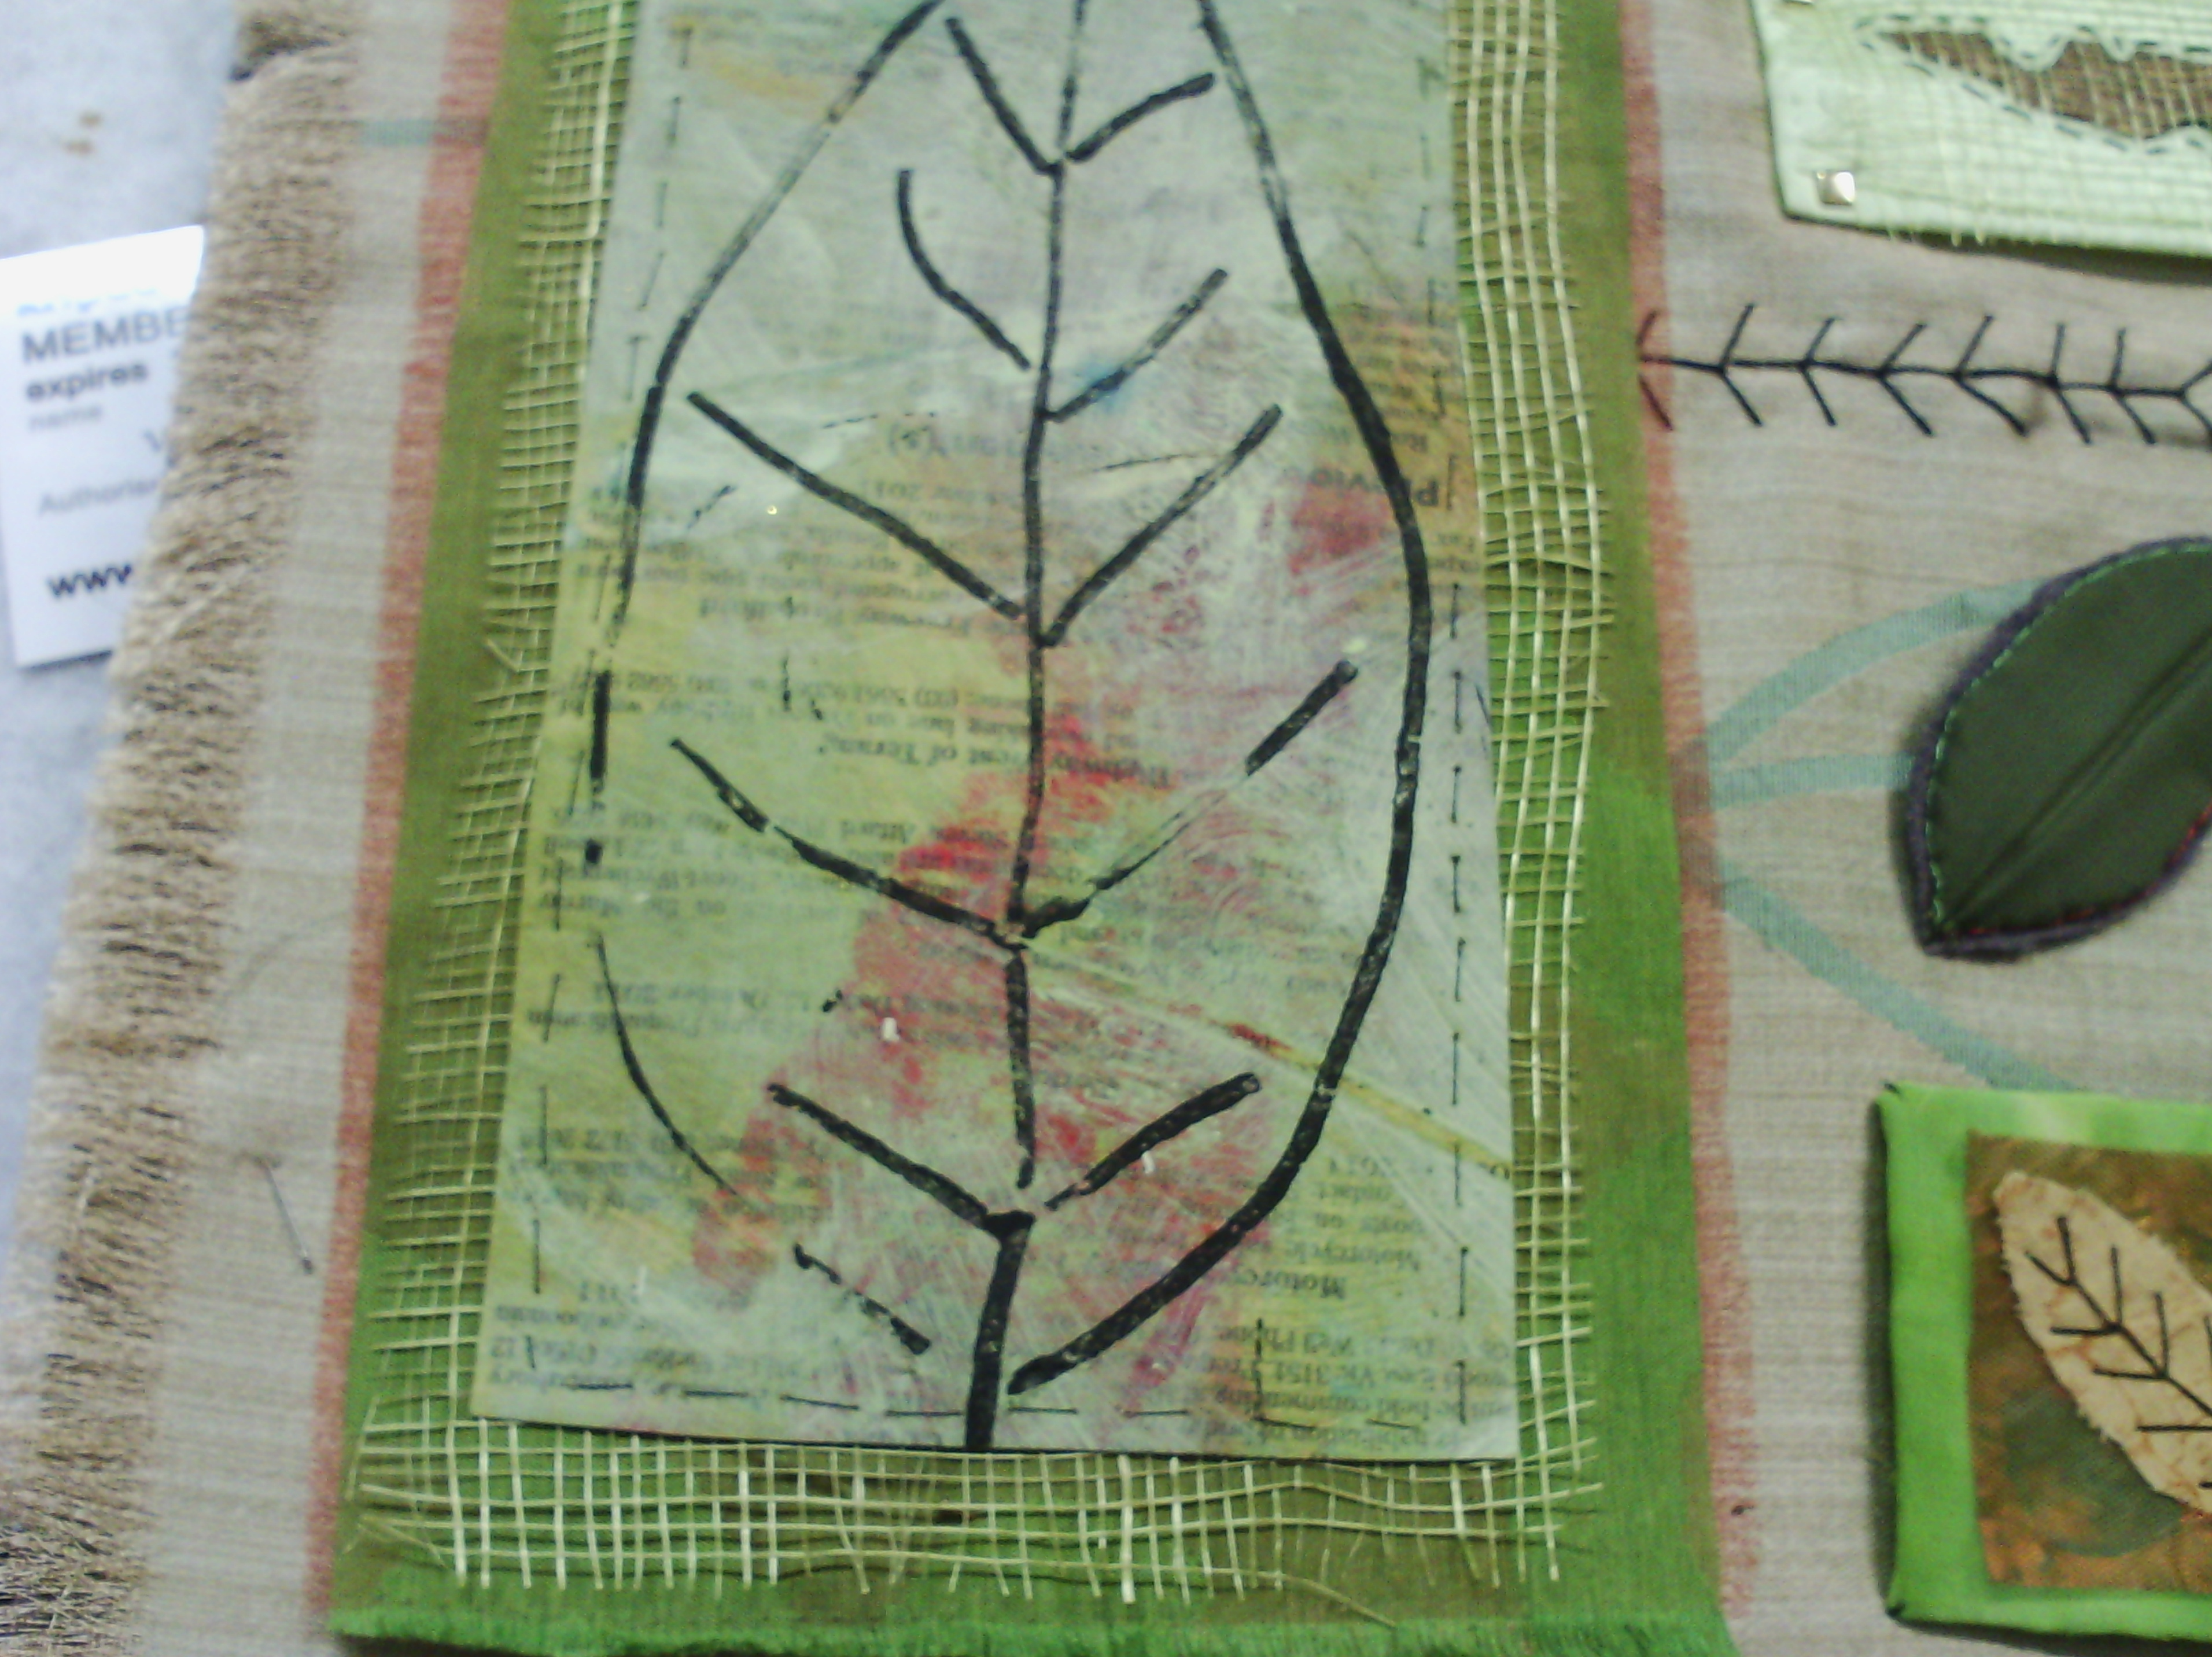
This large focal element is composed of the following layers; a green/red shot satin, a pale green sinnamay (a woven fabric often used in milinery and for fascinators) and a leaf stamped on painted newspaper.
The other, smaller leaf motif at the right centre of thecollage (which I didn't manage to photograph) is composed of a felt triangle covered with pale green satin. On top is a real eucalyptus leaf stitched down under more sinnamay, the whole attached with brads.
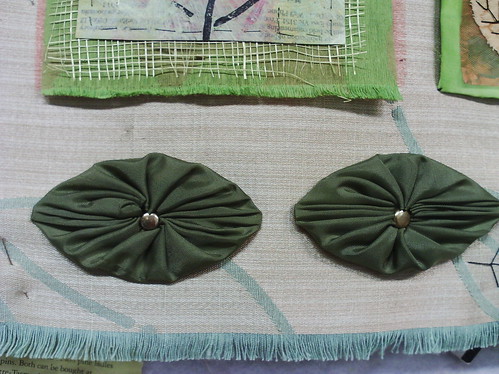
These leaves at the bottom are yo yos formed over an oval piece of card and attached with brads.
Wow, that was a lot, wasn't it? But it all took a lot longer than one day to make. All I did today was stitch all the motifs down, but I am pretty pleased with it.
I wonder what I will do tomorrow? I will have to go through my UFOs (or perhaps I can say WIPs?) to find my next thing to work on!
I actually got all the stitching done on the leaf collage.
I still have to trim it up and mount it. I think I will mount it in a large frame with a fair bit of background behind it. I have frayed the edges on the background, which is a gold and green shot furnishing fabric ('shot' fabric has different threads in the warp and weft, so when you fray it you get two different threads top and bottom versus left and right)
Here are some close ups of the parts.
The three leaves at the top were free motion stitched on satin over black felt then cut out and sewn on.
the two squares below are polar fleece with distressed chiffon on top attached with haematite crystals.
The three squares here are satin sewn over felt layered with poly knit squares, textured ribbon and then quartz crystals.
The folded leaf at top left (also in the pic above, but cut off) was made from two folded pieces of satin laid over an unfolded third which was stitched arounf in the leaf shape, cut out and turned inside out then stitched to a felt base and cut out again.
The three squares were made from various fabrics covering a square of felt then layered with copper mesh and finally a leaf attached with fly stitch.
This large focal element is composed of the following layers; a green/red shot satin, a pale green sinnamay (a woven fabric often used in milinery and for fascinators) and a leaf stamped on painted newspaper.
The other, smaller leaf motif at the right centre of thecollage (which I didn't manage to photograph) is composed of a felt triangle covered with pale green satin. On top is a real eucalyptus leaf stitched down under more sinnamay, the whole attached with brads.
These leaves at the bottom are yo yos formed over an oval piece of card and attached with brads.
Wow, that was a lot, wasn't it? But it all took a lot longer than one day to make. All I did today was stitch all the motifs down, but I am pretty pleased with it.
I wonder what I will do tomorrow? I will have to go through my UFOs (or perhaps I can say WIPs?) to find my next thing to work on!
Saturday, November 2, 2013
A near finish
Today was my monthly quilting group. Between the gossip, I actually did stitch, so have met my challenge for today! However, I did not finish the quilt. I am nearly finished binding the quilt I showed yesterday.
I have bound it with a yummy purple ribbon. I will finish it this evening, but now it is finished, I think it needs a few (or maybe lots) of beads, so it will have to wait a little while longer to be really finished.
I think tomorrow, I might start on a little collage that has been sitting on my design wall for quite a while!
I really just need to stitch down all the leaf motifs and mount or bind it, so we will see how far I get with that tomorrow.
And that's all she wrote!
see you tomorrow.
Friday, November 1, 2013
A stitch every day for November
OK, so I have been absent a bit lately - again.
i have signed up with Leah Piken Kolidas over at creative every day for art every day month. I thought I needed to challenge myself both to blog and to stitch every day, so that is what I am doing.
Today, I finished the free motion on a quilt I was working on at the start of the month.
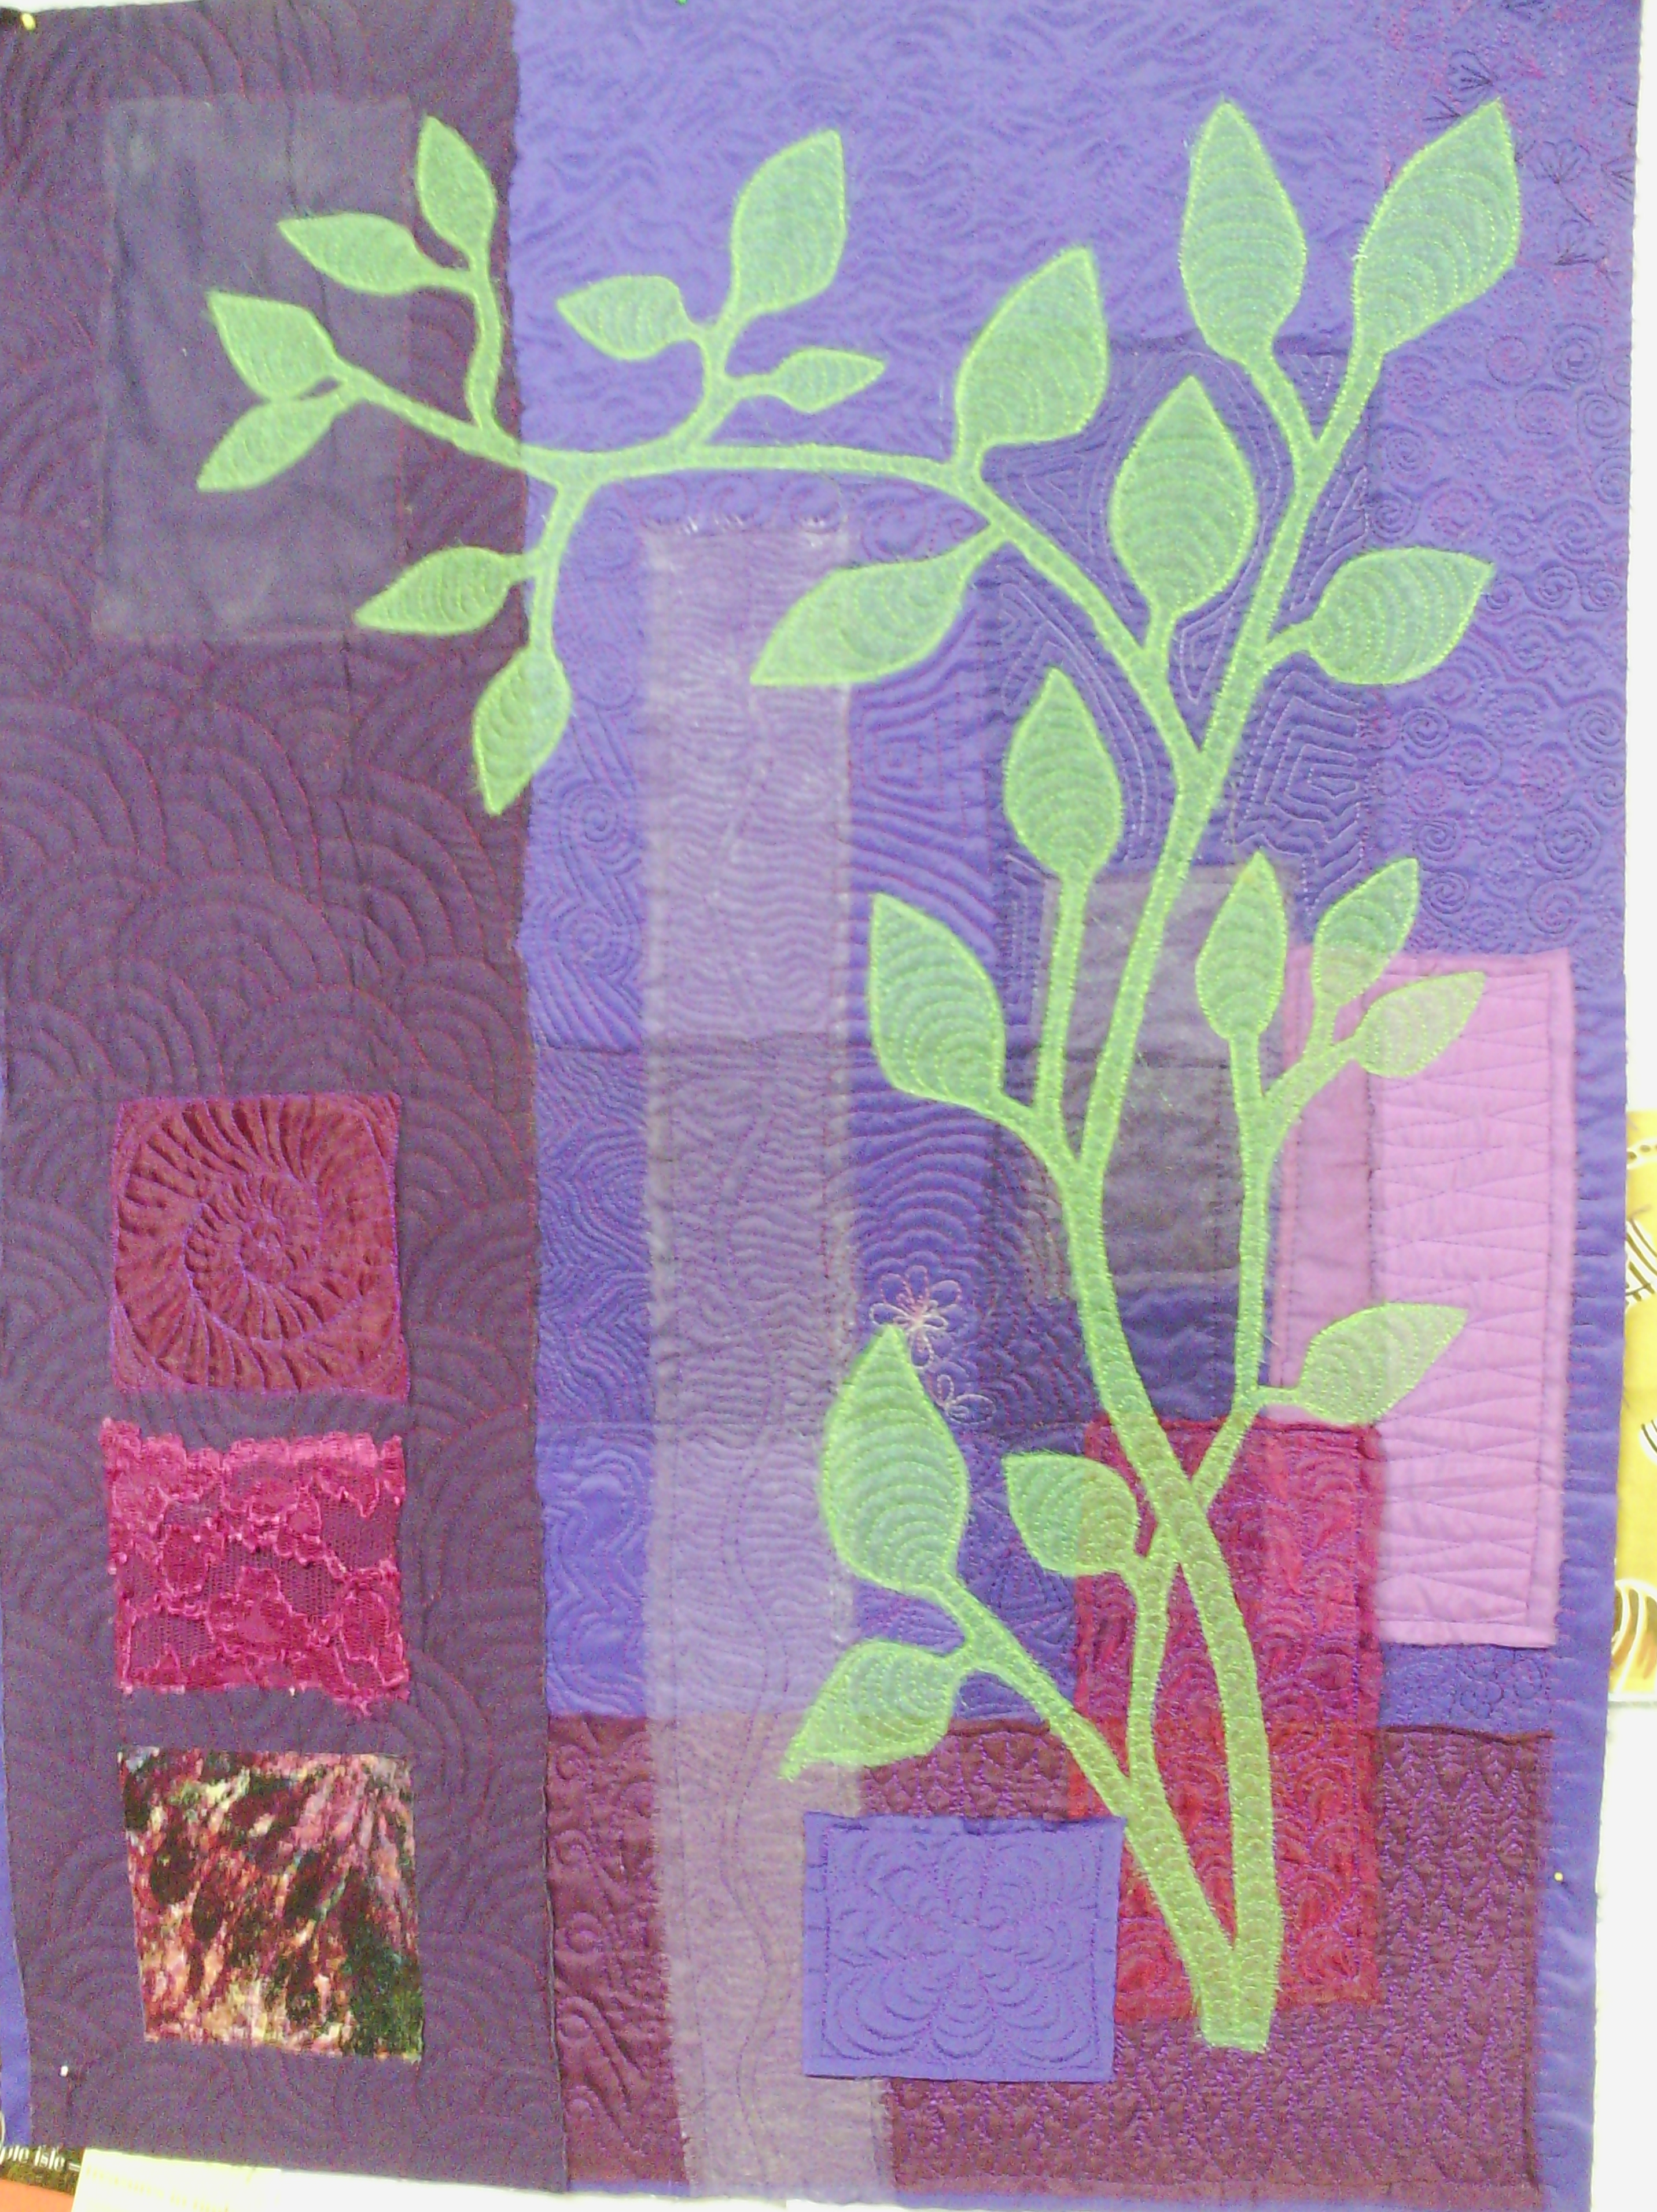
Here is a shot of the whole quilt and I don't think there is any cotton fabric in it! It is all my favourite organzas and satins and lots of other stuff. Tomorrow is our local monthly quilting day, so I intend to square it up and bind it then. Oh, the size is approximately A1 or about 85 by 55 cm or 33x23 in.
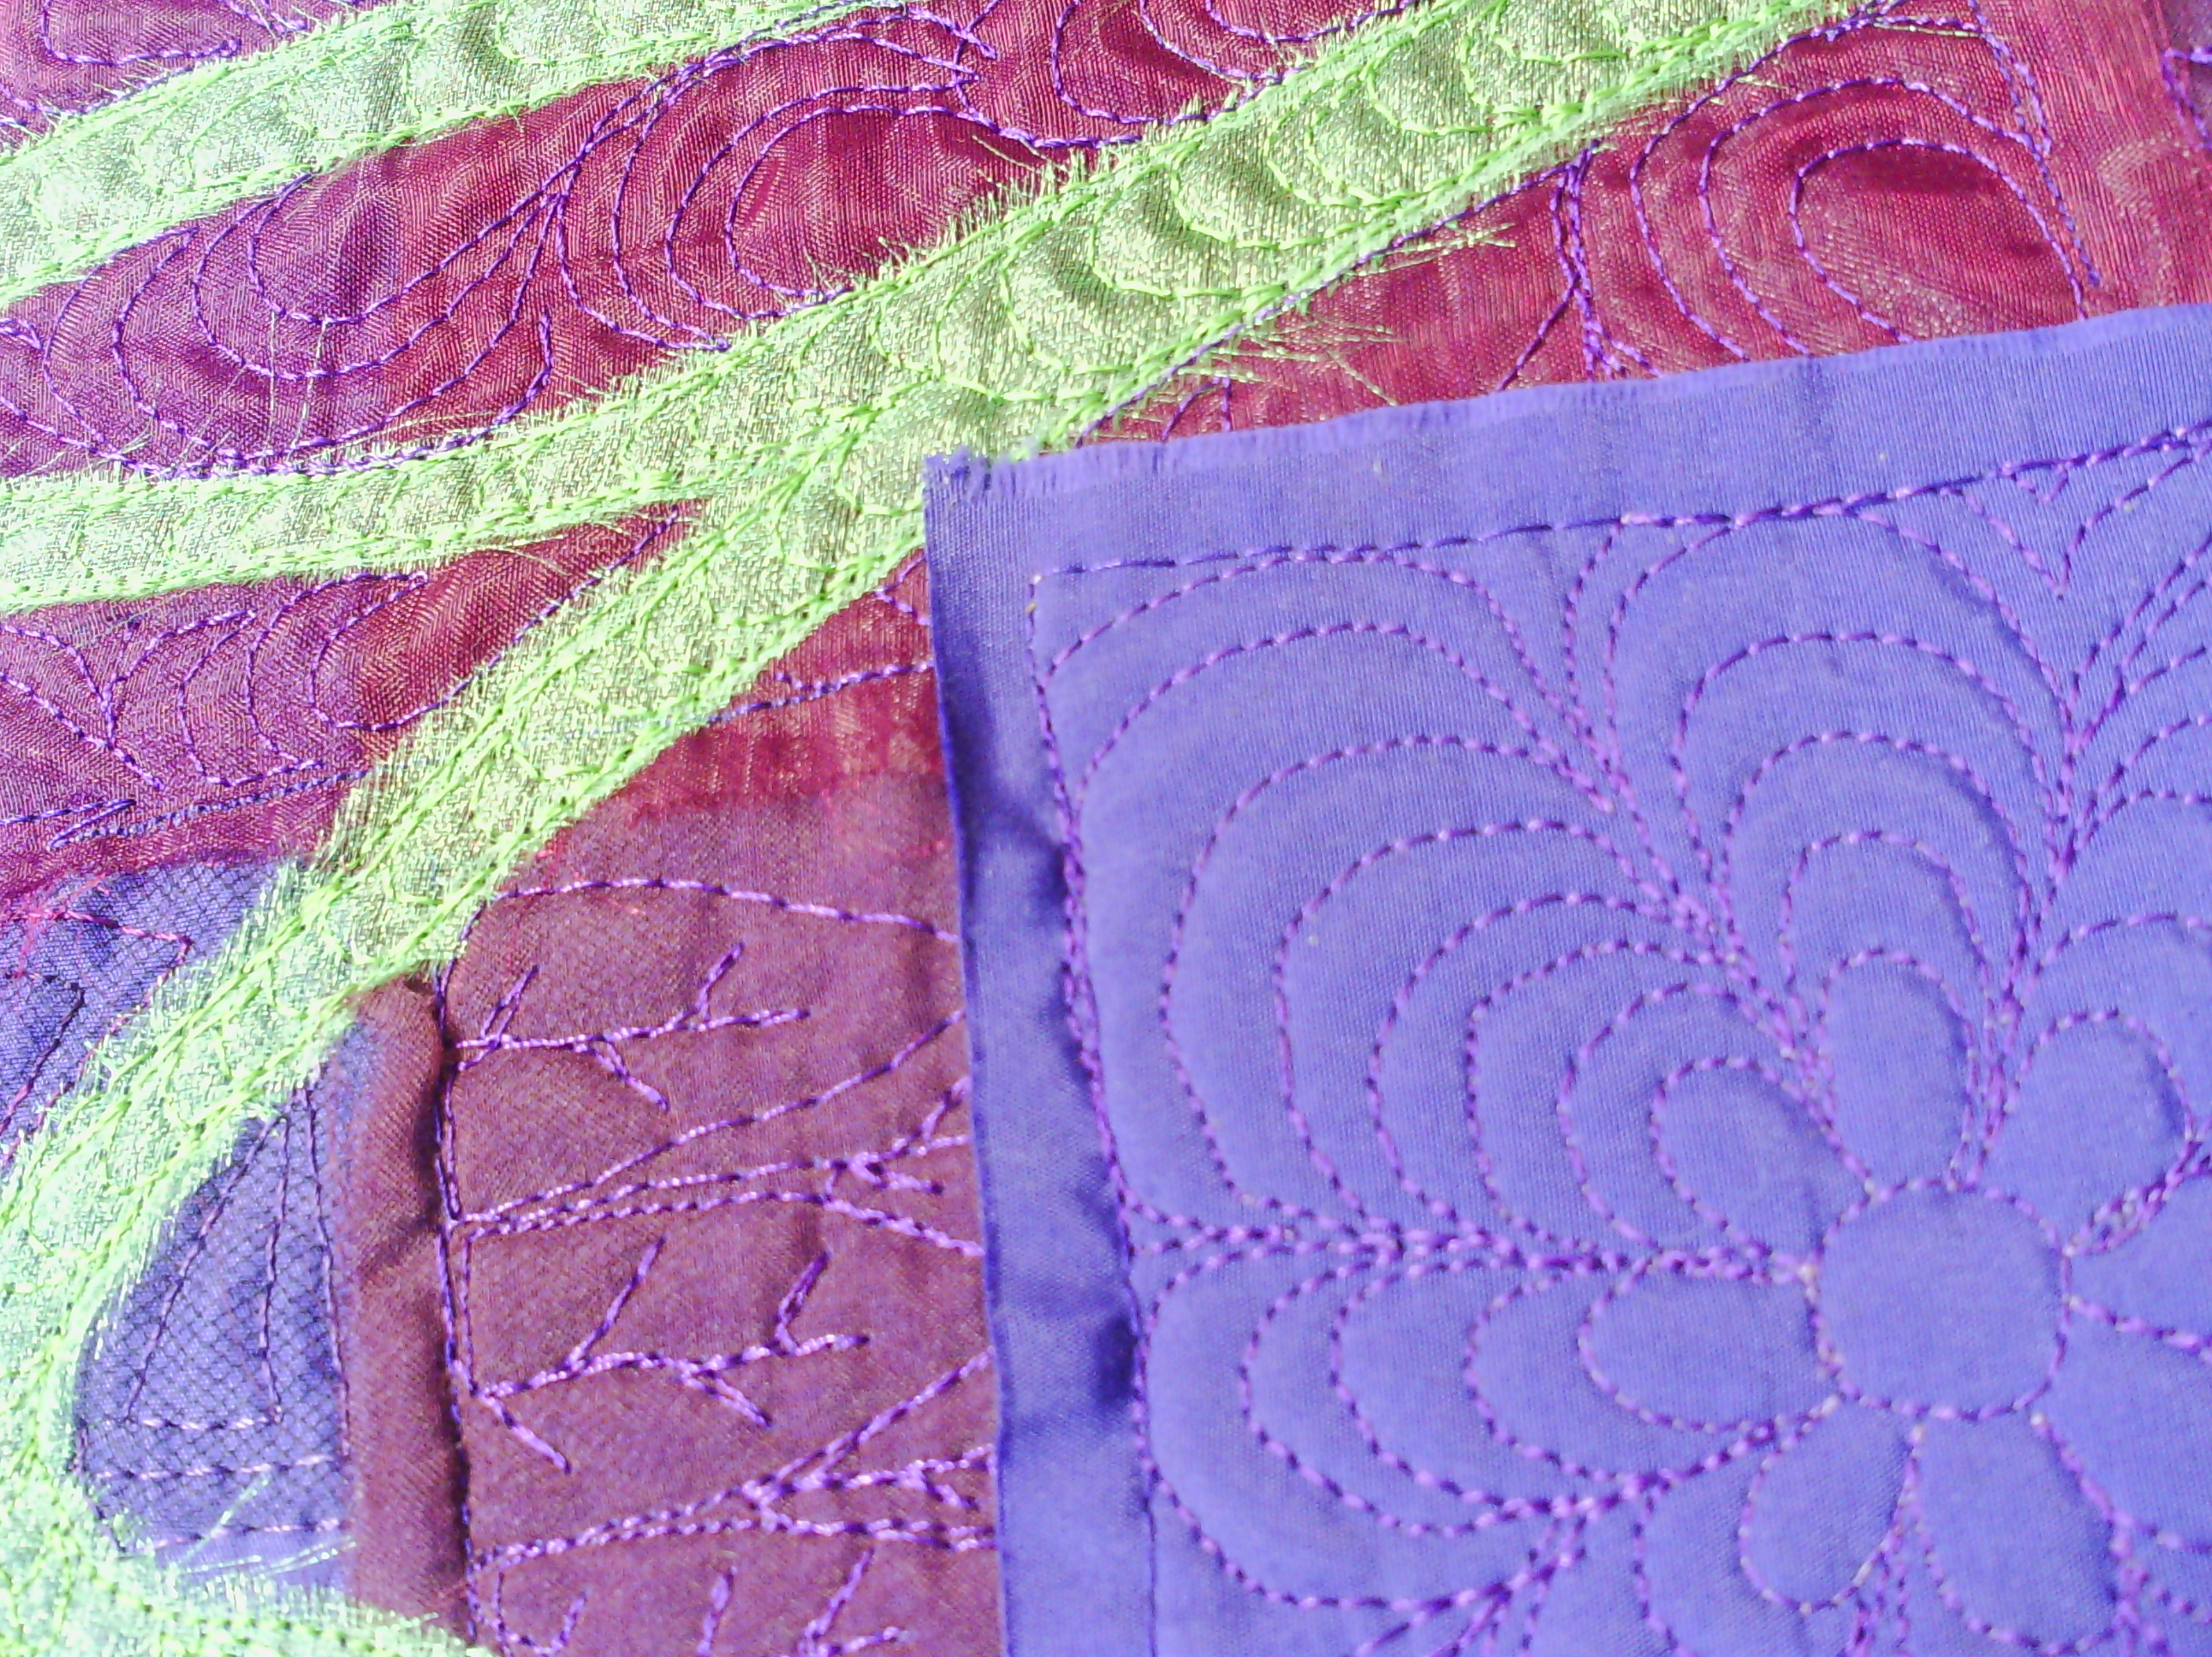
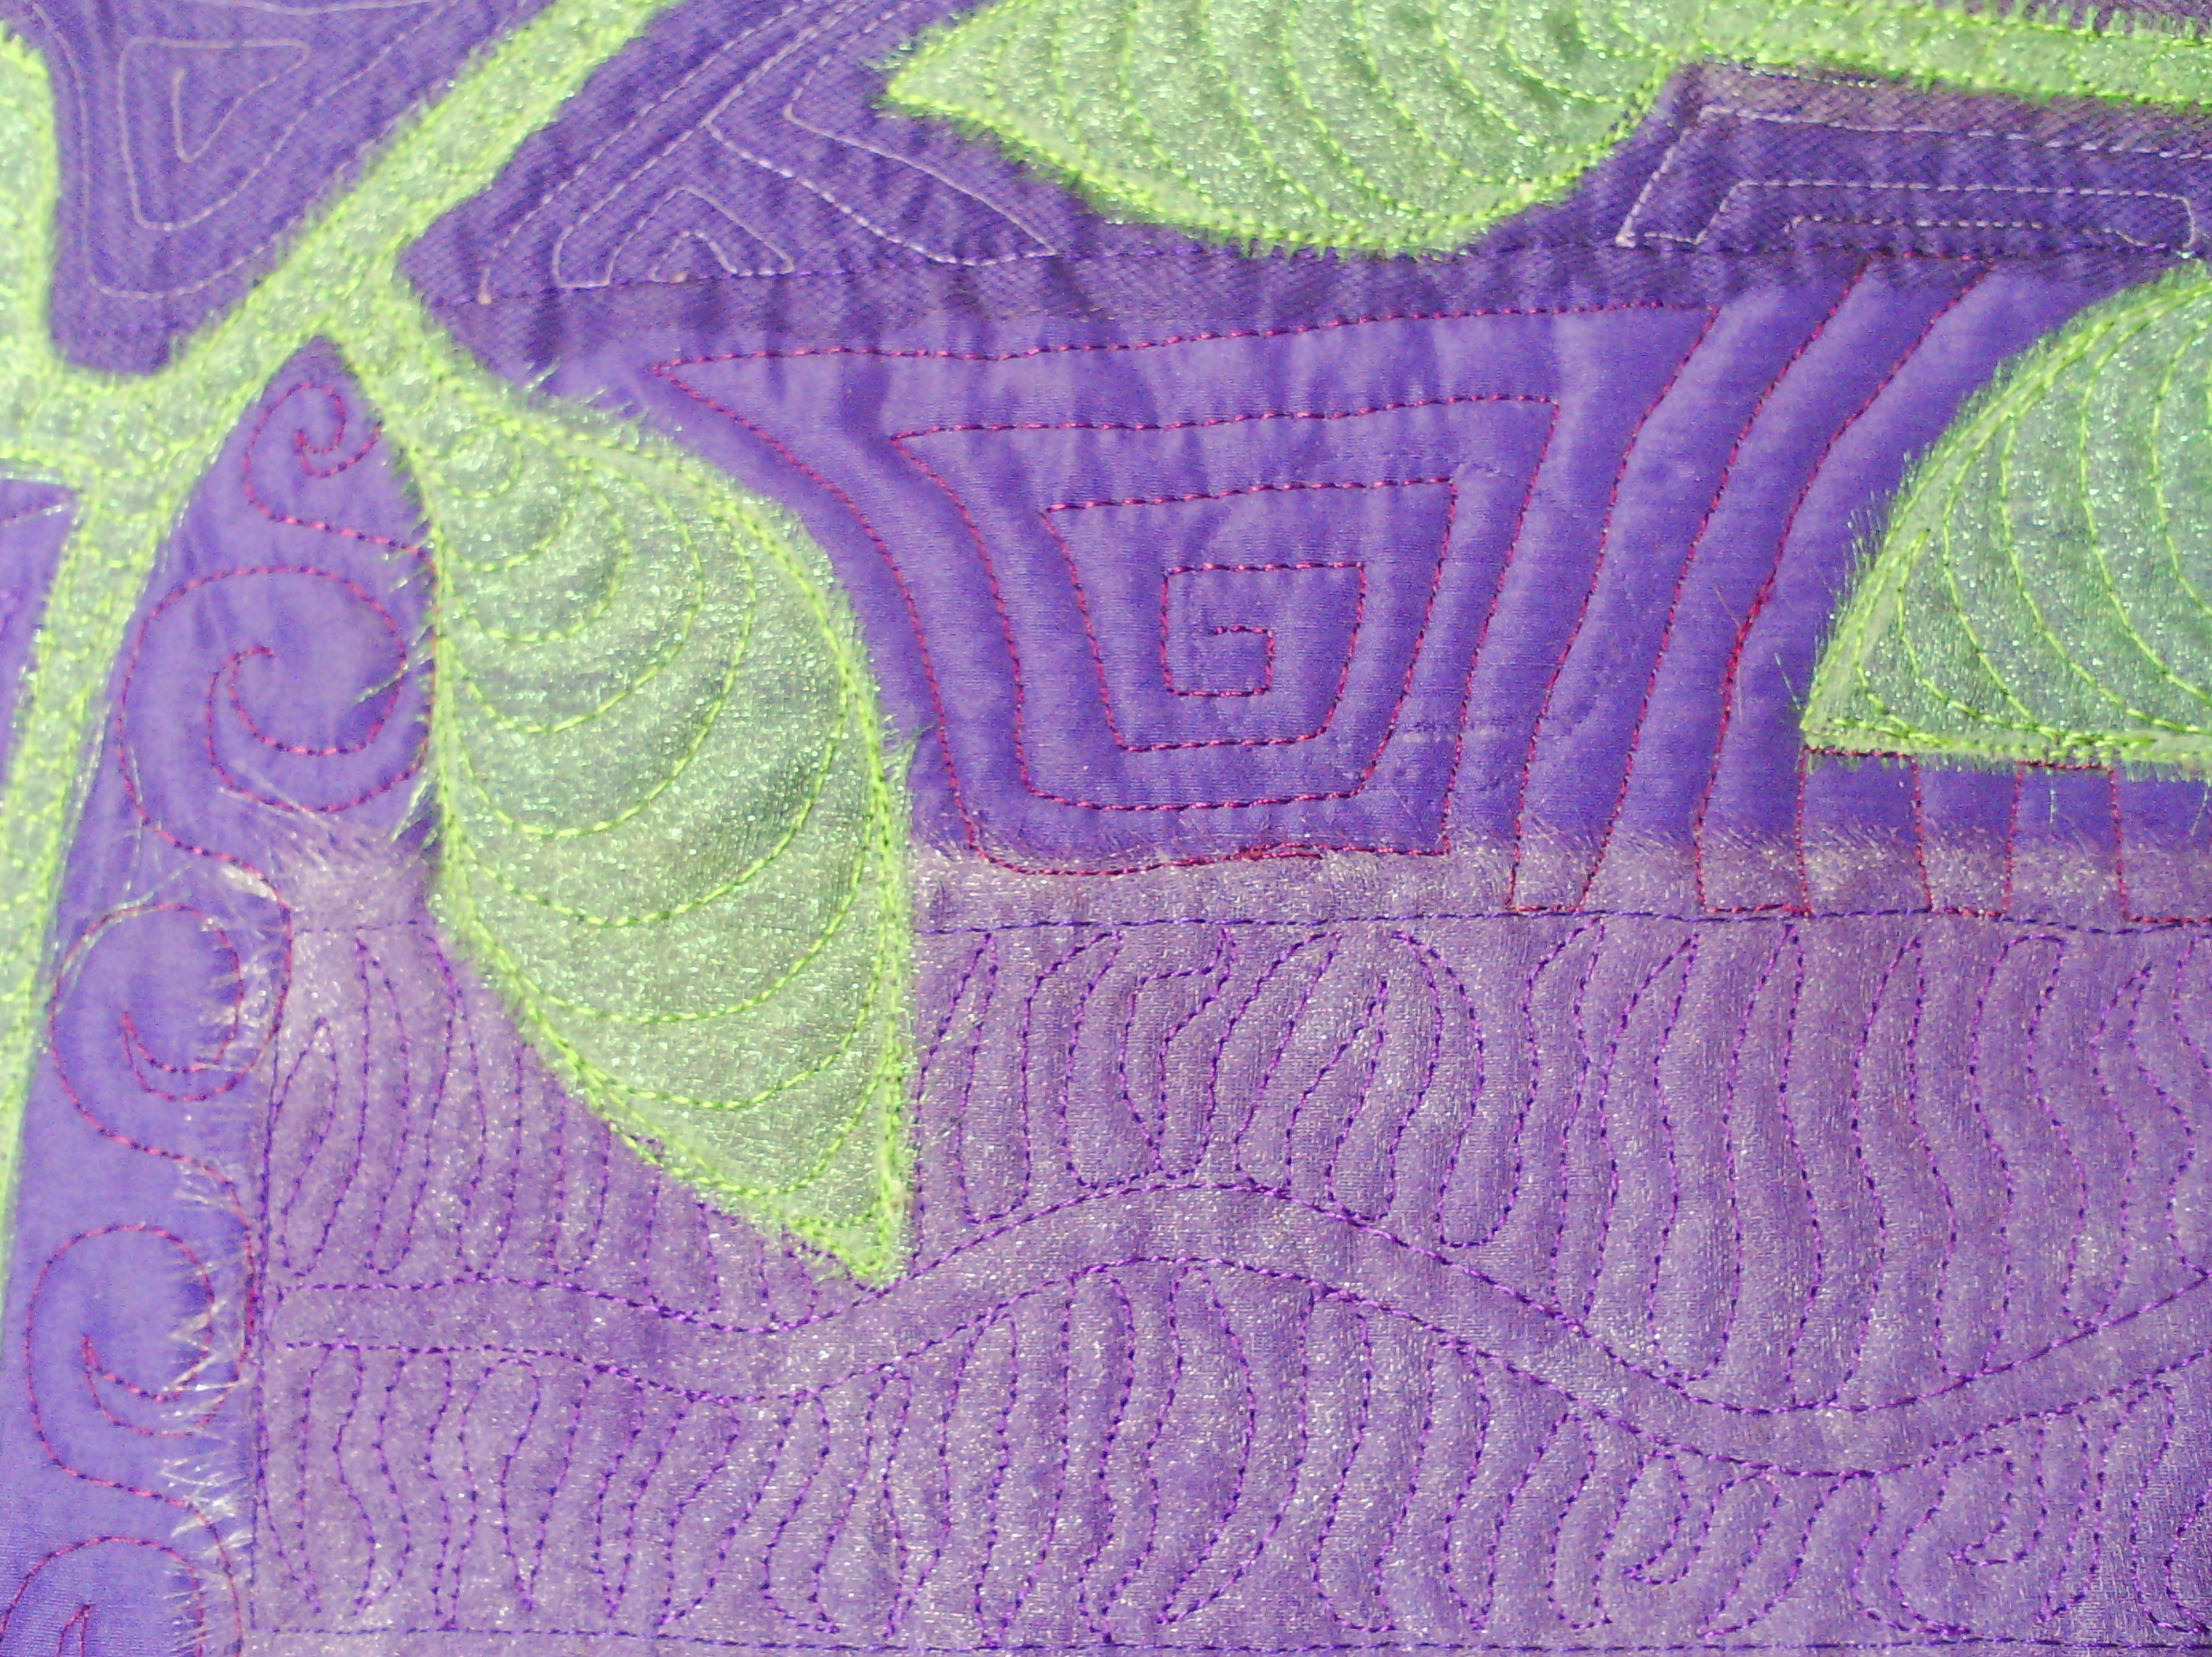
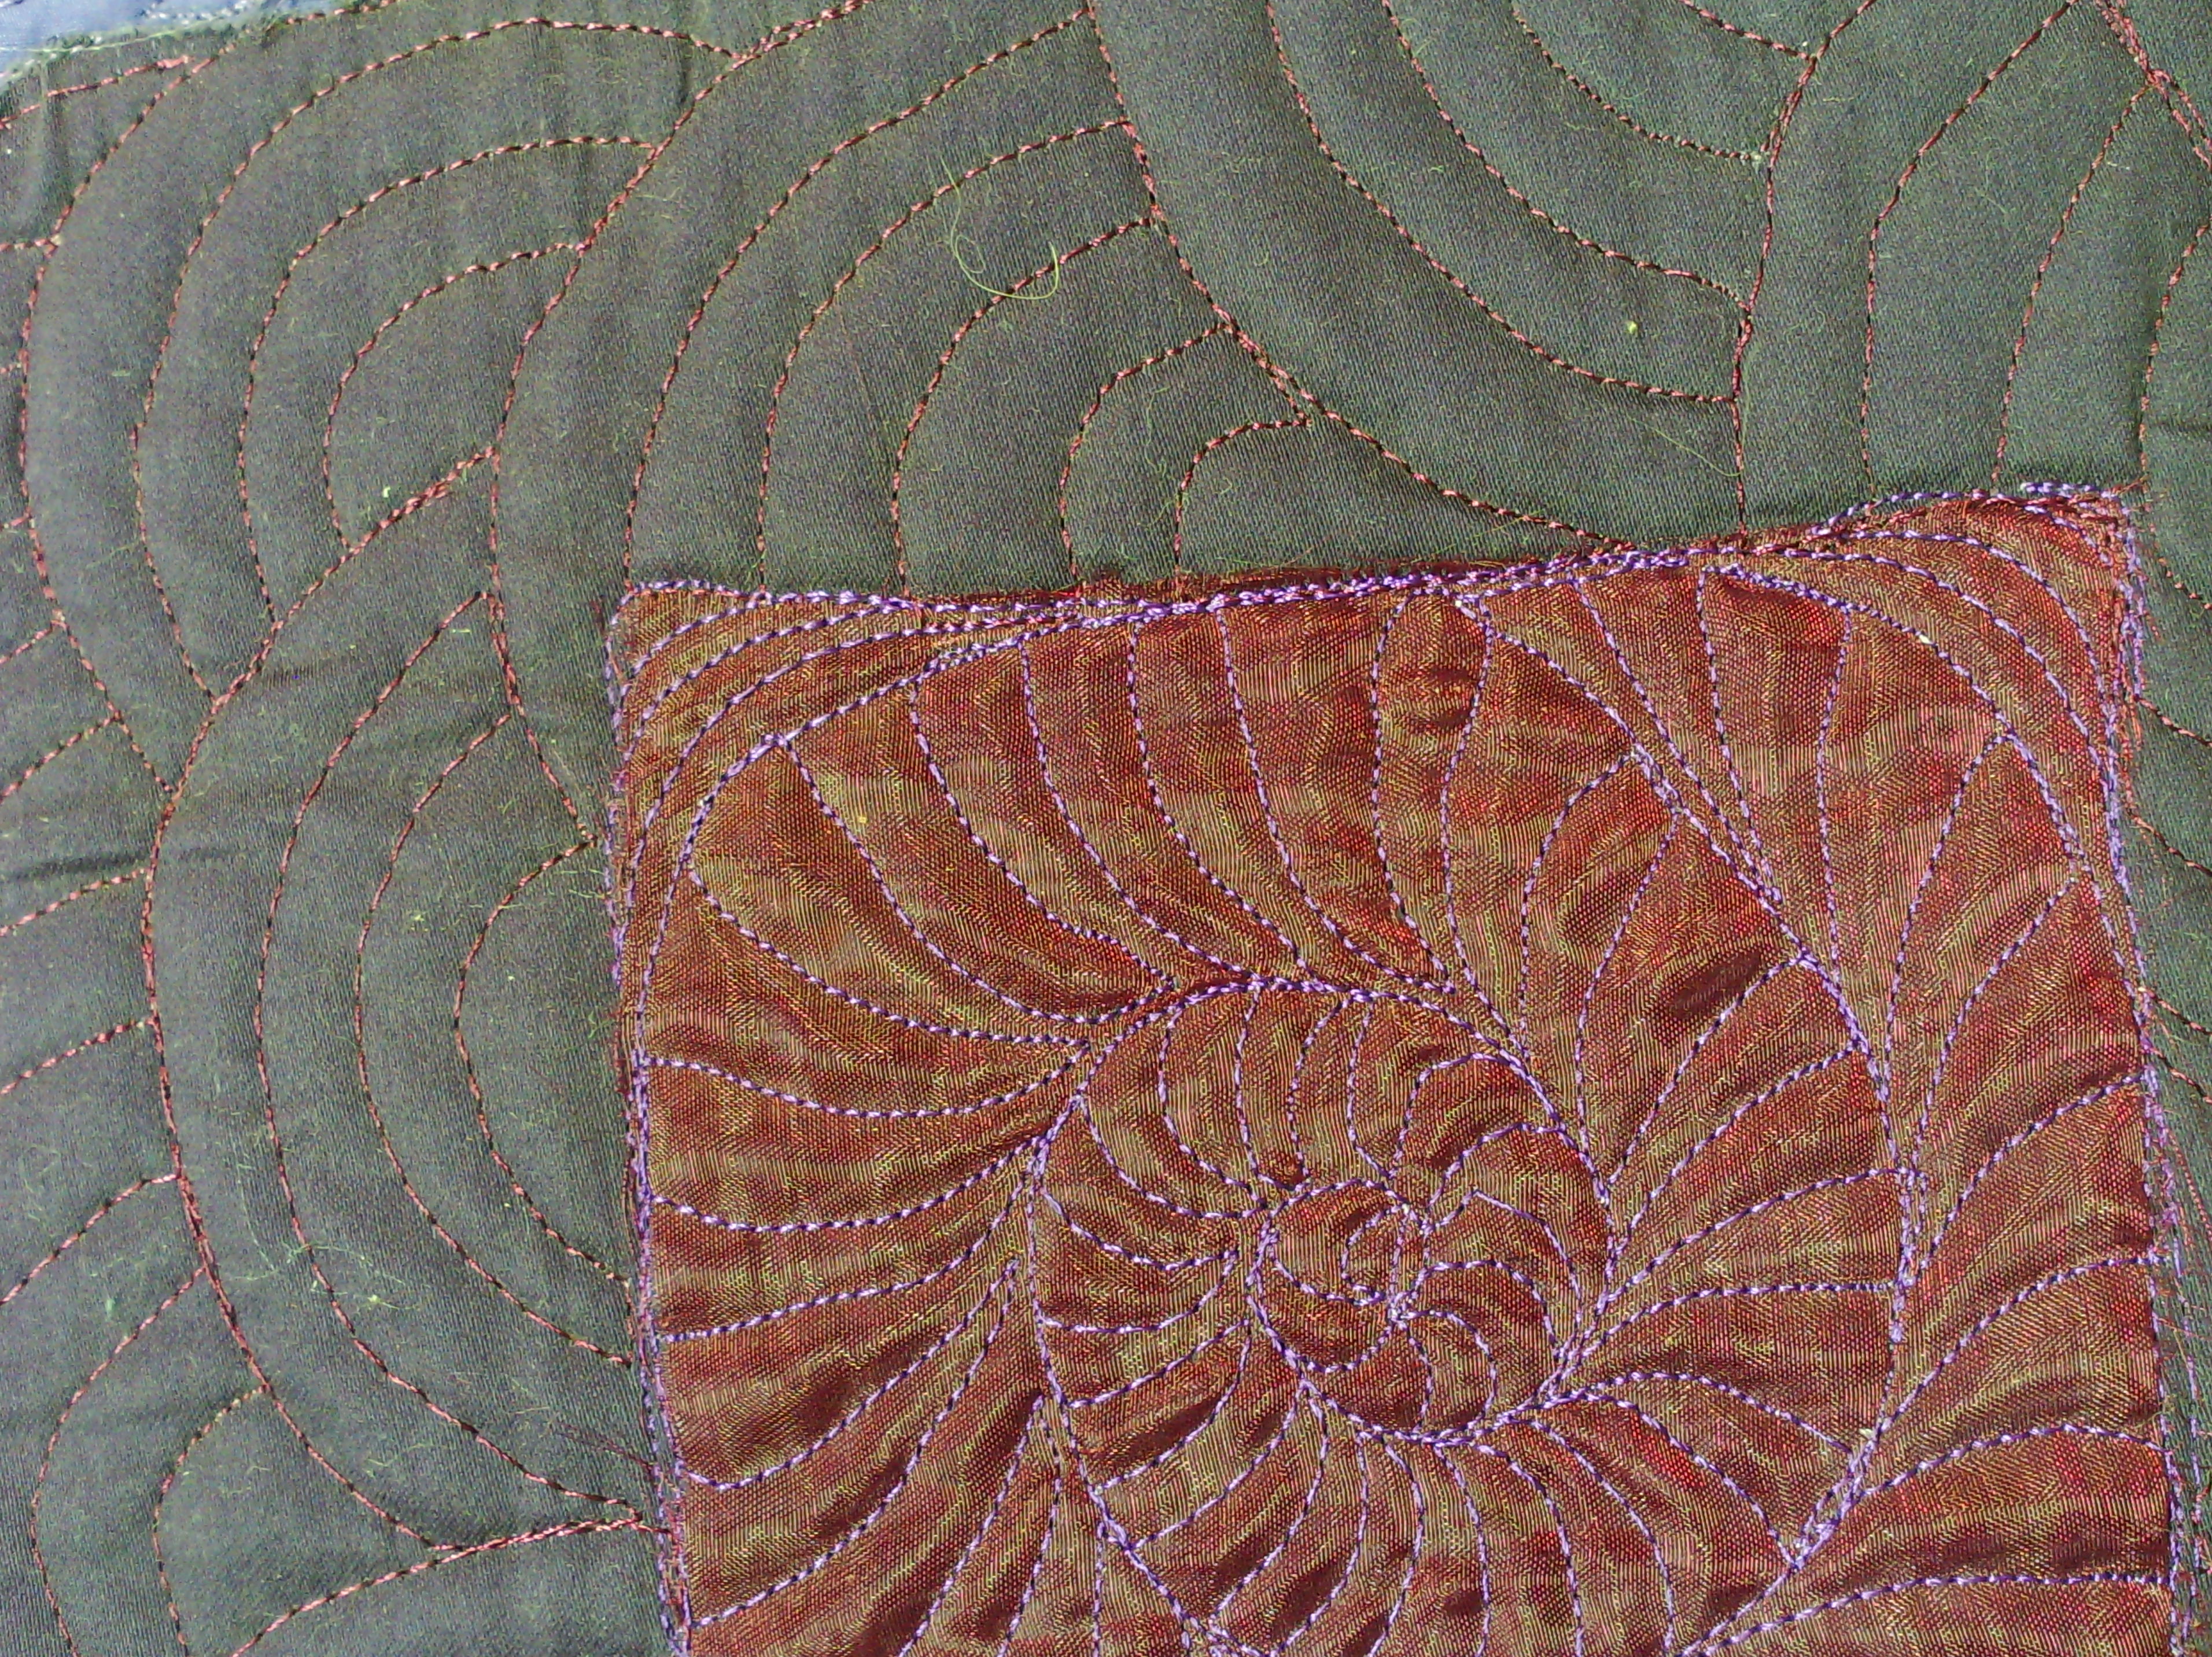
here are a few close ups.
I can't say my free motion is ever perfect, but it creates gorgeous texture anyway.
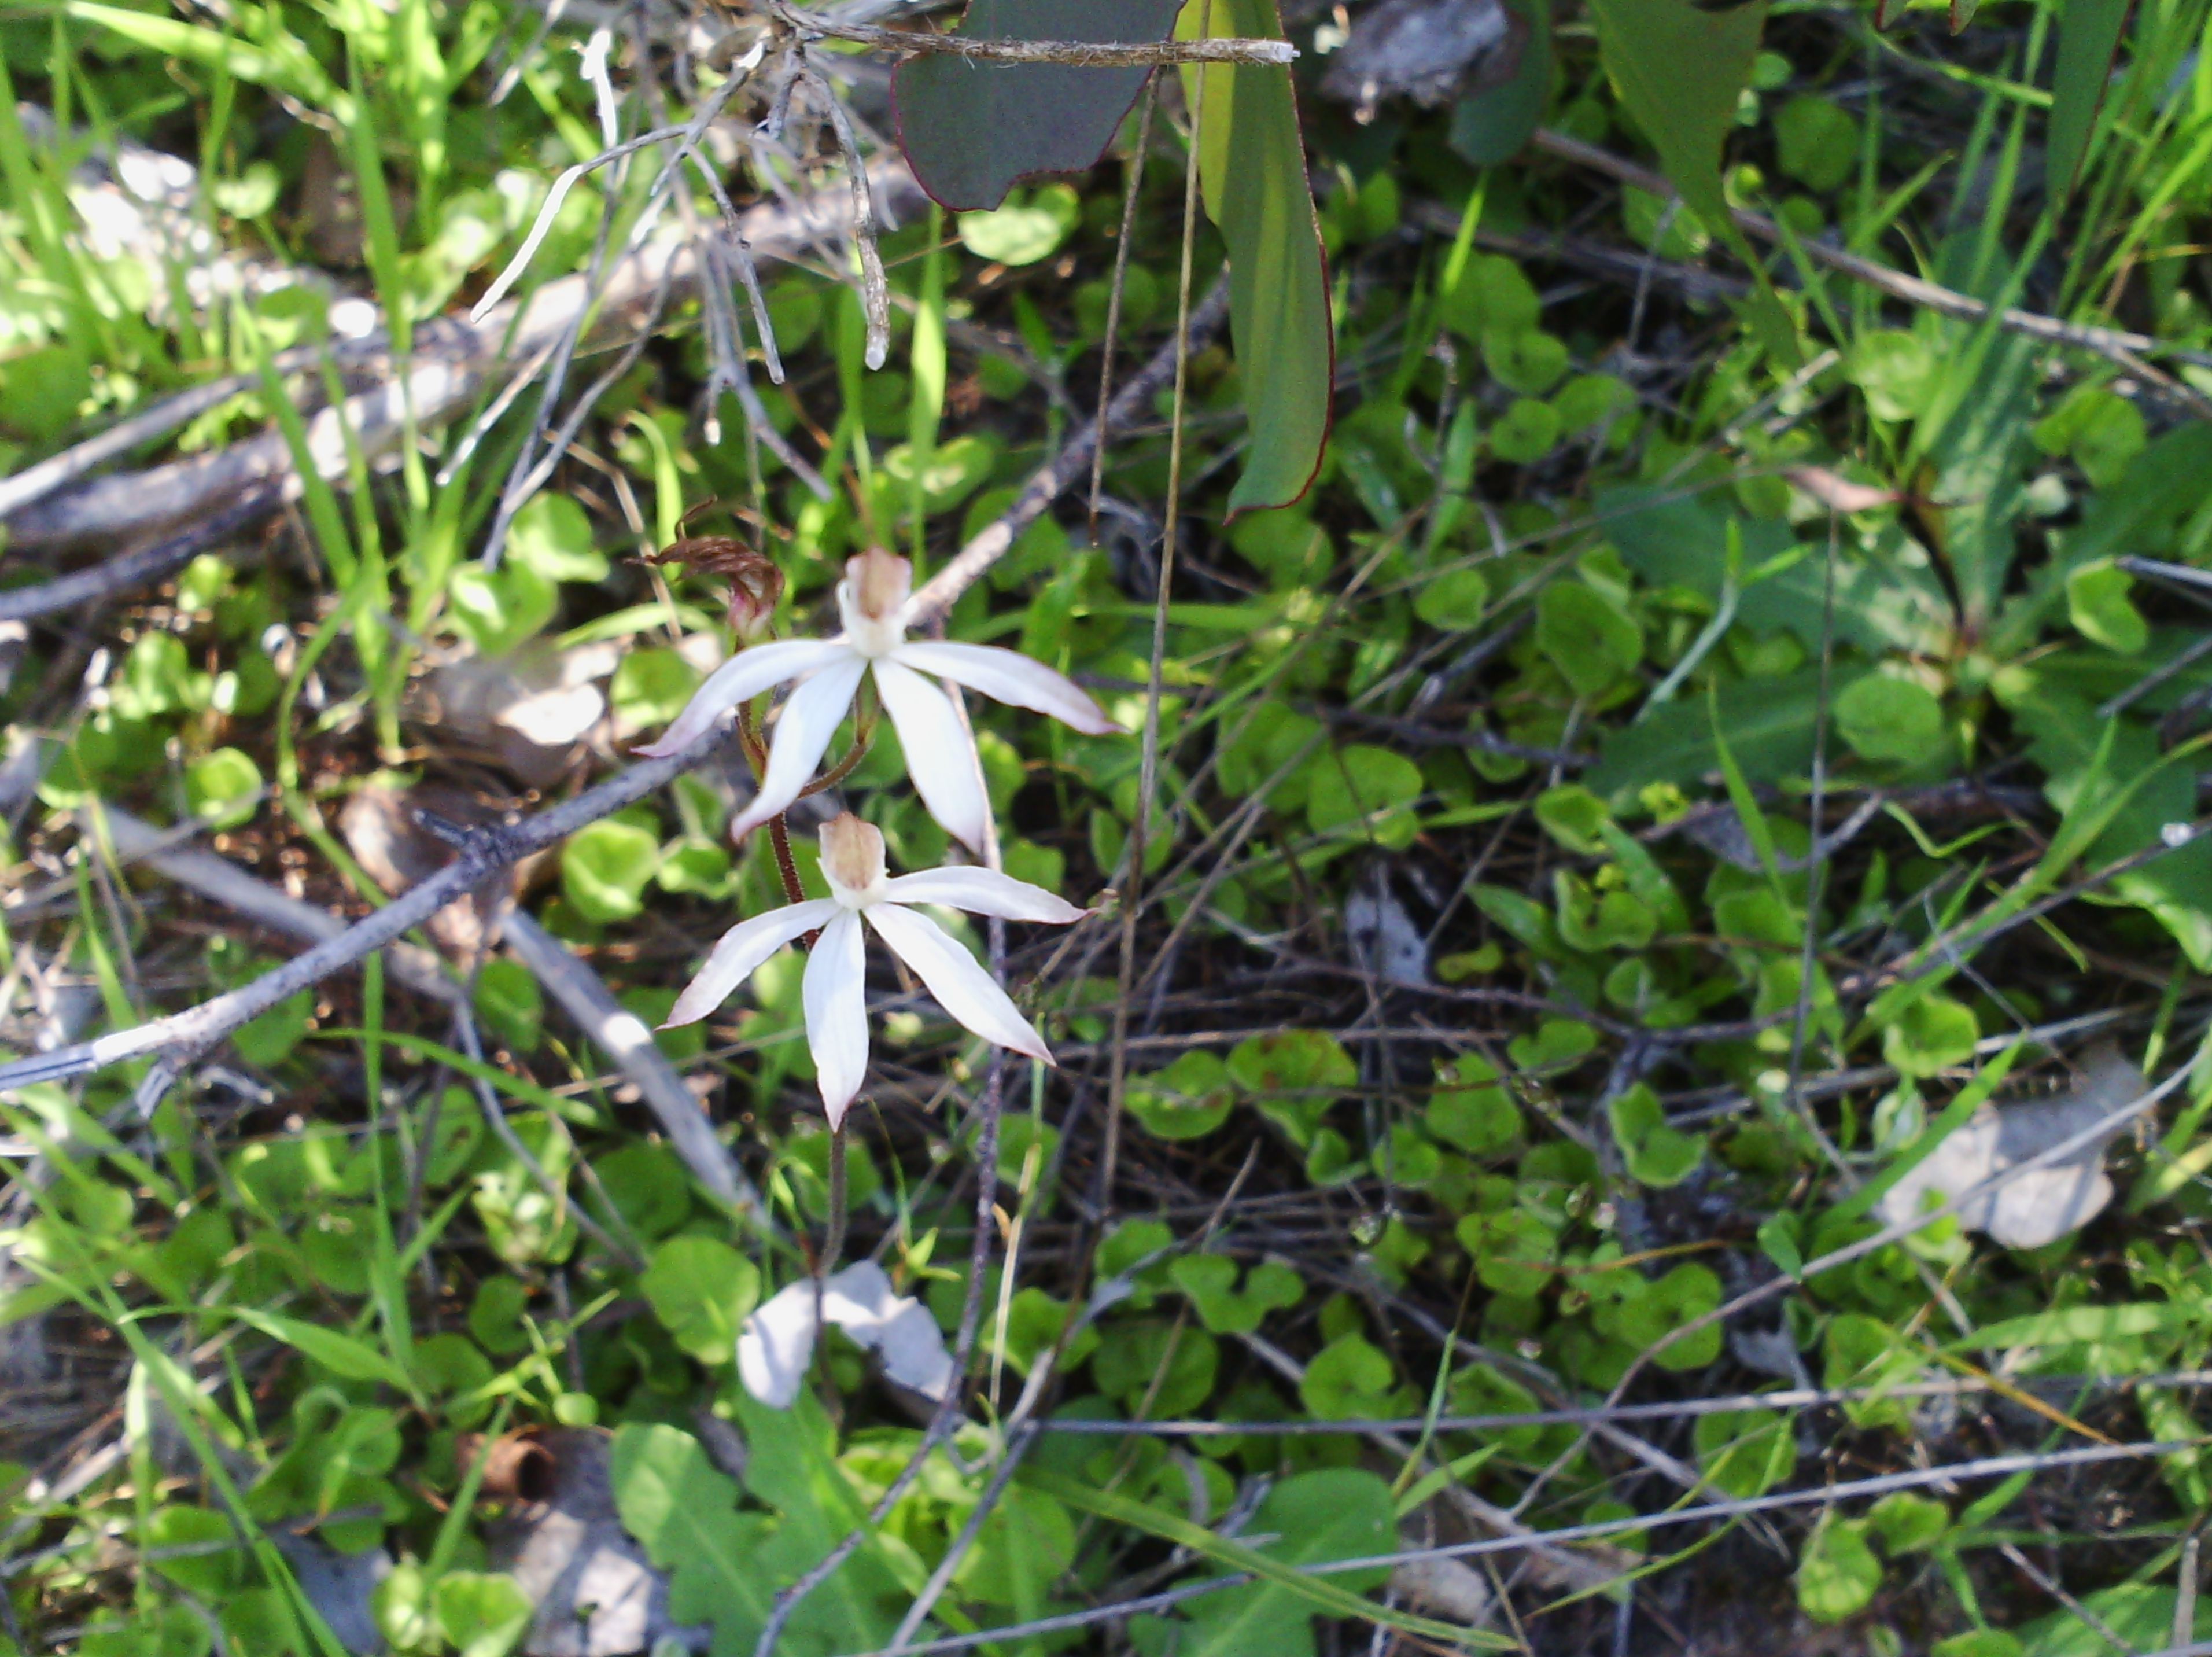
On another note, yesterday I went on my annual hike up the mountain (only a little one) behind my house to look for bush orchids. I only found two, but at least i did find two.
This one is called a caladenia and is usually very easy to find, but not this year. It is about an inch, or 2-3 cm across, so very small, it is pinky-white, but sometimes they are pink as well.
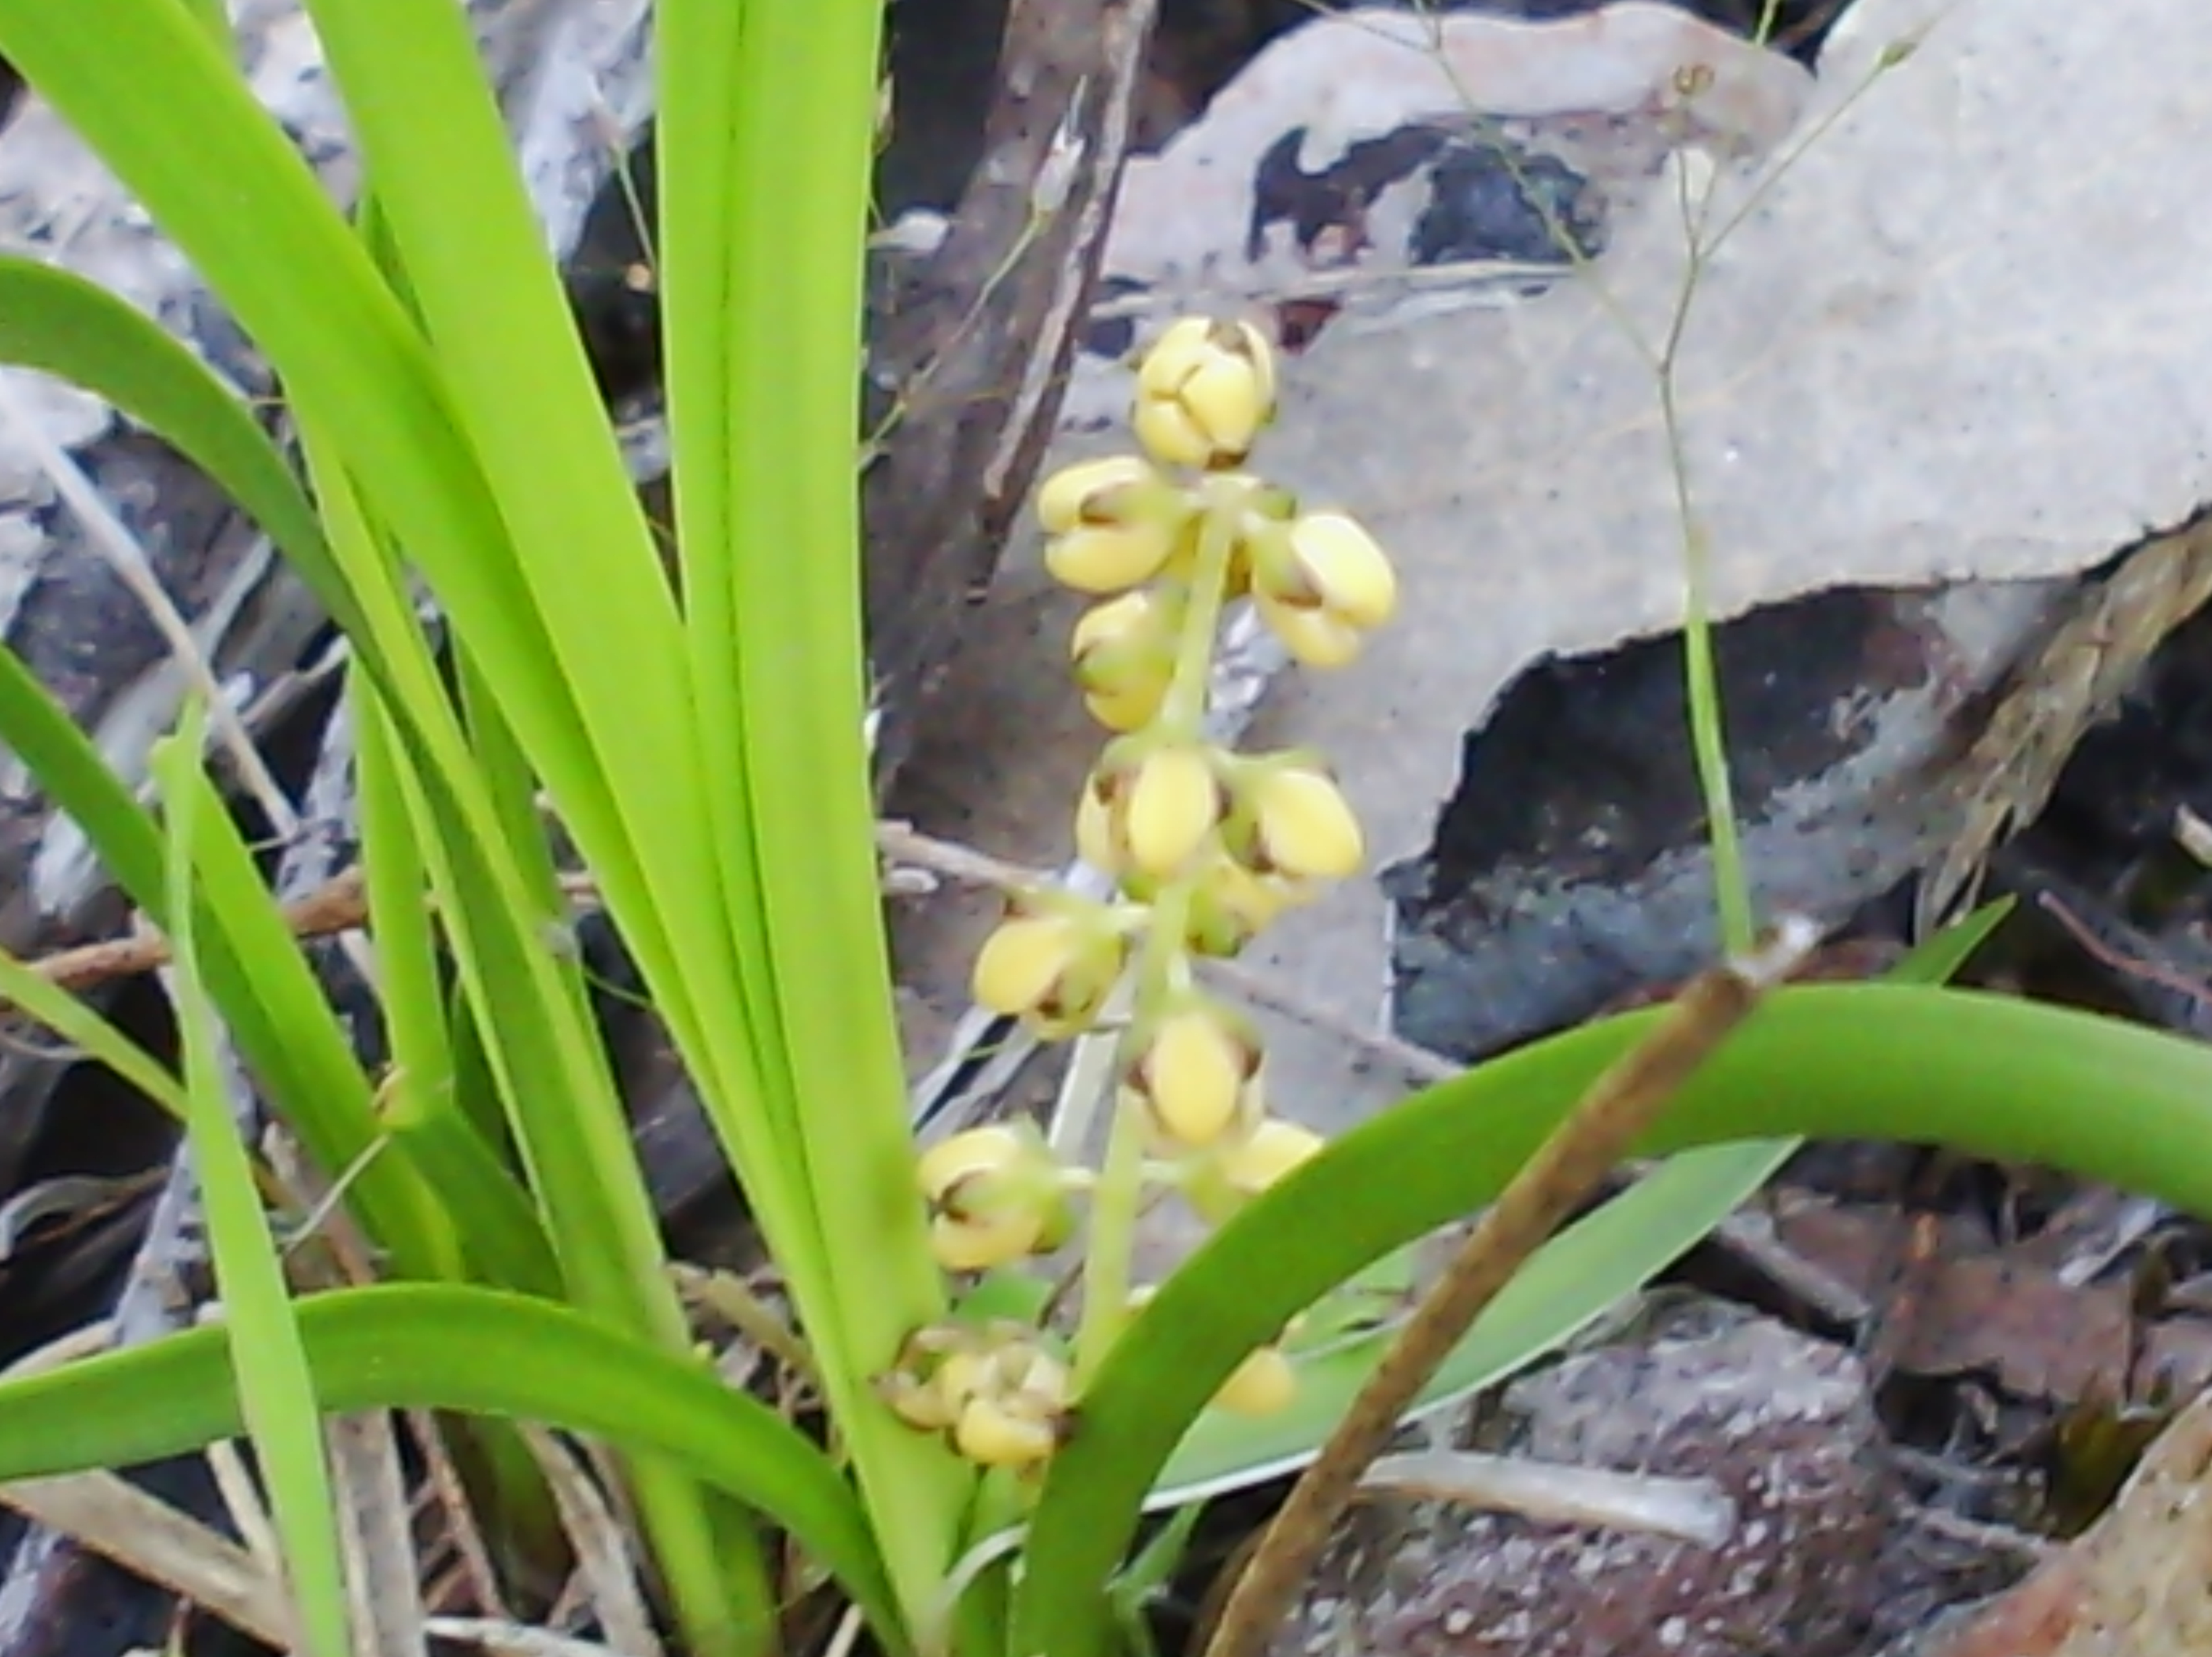
This one is even tinier. The little yellow flowers are less than half a cm or 1/8 inch across. I am not sure what it is, besides being an orchid and I have never seen it before.
So, after trudging for hours, that was all I found. I might try again when the ground dries up a bit as it was very green and these orchids don't really like that. They seem to pick the most inhospitable areas to grow.
that's all for today
Hopefully I will be back, tomorrow with another few little stitches.
i have signed up with Leah Piken Kolidas over at creative every day for art every day month. I thought I needed to challenge myself both to blog and to stitch every day, so that is what I am doing.
Today, I finished the free motion on a quilt I was working on at the start of the month.
Here is a shot of the whole quilt and I don't think there is any cotton fabric in it! It is all my favourite organzas and satins and lots of other stuff. Tomorrow is our local monthly quilting day, so I intend to square it up and bind it then. Oh, the size is approximately A1 or about 85 by 55 cm or 33x23 in.
here are a few close ups.
I can't say my free motion is ever perfect, but it creates gorgeous texture anyway.
On another note, yesterday I went on my annual hike up the mountain (only a little one) behind my house to look for bush orchids. I only found two, but at least i did find two.
This one is called a caladenia and is usually very easy to find, but not this year. It is about an inch, or 2-3 cm across, so very small, it is pinky-white, but sometimes they are pink as well.
This one is even tinier. The little yellow flowers are less than half a cm or 1/8 inch across. I am not sure what it is, besides being an orchid and I have never seen it before.
So, after trudging for hours, that was all I found. I might try again when the ground dries up a bit as it was very green and these orchids don't really like that. They seem to pick the most inhospitable areas to grow.
that's all for today
Hopefully I will be back, tomorrow with another few little stitches.
Subscribe to:
Posts (Atom)