Still not keeping up to date with blogging. I have been so busy with classes at the community house. It's hard to keep to my routine... so perhaps it's time to change it.
I have been trying to finish some large pieces and doing a lot of reading and journalling. I recently had a fall and injured my hand, so that set a lot of work aside, so reading became something to keep myself focussed. Whilst I was reading I came across a lot of journaling inspiration, so when my hand got mobile, that's what I started with. I did quite a few pages, none of which are finished, but are passable.
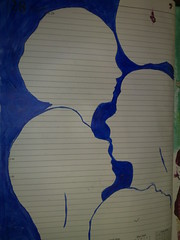
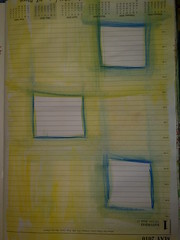
This is a sketch page for a large collage which is in my list of things to do.
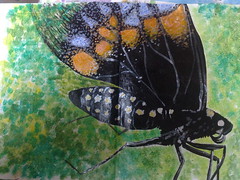
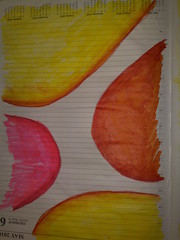
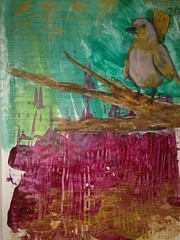
This was inspired by a magazine picture.
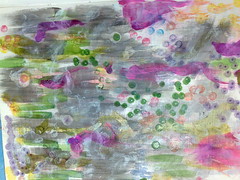
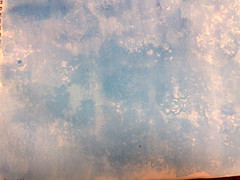
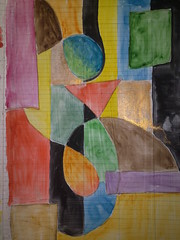
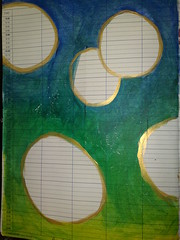
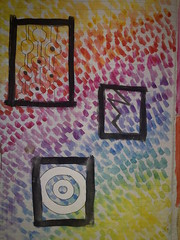
A few experimental backgrounds.
These backgrounds were all inspired by "journal Junkies", which is one of the books I read.
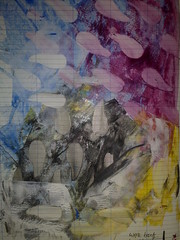
These two were inspire by "art journal freedom", which I also read
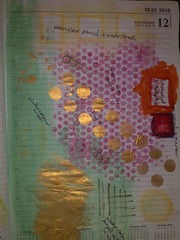
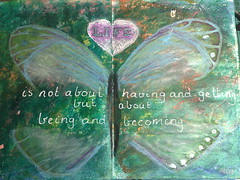
And this one was inspired by a quote.
So that's all the journalling I've been doing.
Hopefully I'll post about a few other things I've been doing in a day or two
Showing posts with label altered books. Show all posts
Wednesday, April 3, 2013
Tuesday, April 24, 2012
Purple and black and an atc book
Well, almost purple. There is some purple. It's purpl-y.
Black felt, painted tyvek, japanese brocade, papillion gold thread, seed beads. Why is it that these simple arrangements are so pleasing?
I have been storing my ATCs (The ones I haven't lost or given away) in my large art folio, which is a bit difficult to be getting out all the time, but last week, when I was at the opp shop, I spied a recipe book which gave me an idea for storing lots of ATCs
Unfortunately, I forgot to take a picture before I pulled it all apart, but as you can see above, the recipes were in little tab pages that would each old an ATC and also have room for a description.
So I pulled it all apart.
Then I put it back together again.
Created a new spine with iron on interfacing
Stacked the pairs into signatures (groups of pairs of pages)
And when I had enough signatures, I sewed it back together again.
This is the new spine, with my markings for spacing the blocks of signatures.
And this is the new book, with my ATCs in it. I could only fit 120 in this book, which is nearly full, a few spaces left, but I have plenty of pages left to make into two new books for the rest of the year and this is a much easier to access way to store them!
One problem solved, anyhow.
Black felt, painted tyvek, japanese brocade, papillion gold thread, seed beads. Why is it that these simple arrangements are so pleasing?
I have been storing my ATCs (The ones I haven't lost or given away) in my large art folio, which is a bit difficult to be getting out all the time, but last week, when I was at the opp shop, I spied a recipe book which gave me an idea for storing lots of ATCs
Unfortunately, I forgot to take a picture before I pulled it all apart, but as you can see above, the recipes were in little tab pages that would each old an ATC and also have room for a description.
So I pulled it all apart.
Then I put it back together again.
Created a new spine with iron on interfacing
Stacked the pairs into signatures (groups of pairs of pages)
And when I had enough signatures, I sewed it back together again.
This is the new spine, with my markings for spacing the blocks of signatures.
And this is the new book, with my ATCs in it. I could only fit 120 in this book, which is nearly full, a few spaces left, but I have plenty of pages left to make into two new books for the rest of the year and this is a much easier to access way to store them!
One problem solved, anyhow.
Friday, February 24, 2012
A special heart and paper bags
Today's ATC has just been received by my swap partner in holland, so I can show you it now.
The background was simply felt with crumpled organza held by beads. The heart was free machine embroidery on water soluble stabiliser, which was washed away after. I used rayon and metallic threads. The heart is double sided and was inspired by a Design Matters TV episode, although the design was my own. I attatched a ring finding to the top and tied a ribbon on.
The reason I did this was...
Then the heart can be removed from the hook I sewed in and worn as a pendant or brooch or simply as a dangly. I hope my partner enjoys it.
Also, Thought I'd show you a little book I am in the process of constructing.
I used paper bags to construct this book.
Nothing fancy, just thin el cheapo bags I had for putting people's purchases in when I did markets.
I can't say whose youtube video actually inspired this book, because I watched quite a few of them. Just type in 'paper bag book' and you'll see what I mean, there are tons- and in any case, I bound it my own way in the end.
I have the top of the bag on the left and have folded it to the right over my ruler. I used the ruler over the bottom of the bag to make sure they were all folded the same.
I did this, on about six bags. You could use more, it's up to you - and to the thickness of your bags.
On my ironing board, I placed two folded pages about 1/8 inch apart (the one on the left is going to be the first page, so the folded bottom is underneath and will be on the outside of the book)
Instead of paper tip-ins and glue, I decided to use strips of fusible interfacing, which I ironed on. I think this will give a much more flexible and durable binding.
After fusing, I turned the right page onto the left (as if I was reading) and added another page on the right spaced at 1/8 inch as before and then fused that. I kept going until I had all the pages fused together.
When all the pages are bound, they will look like this. There will be a bag bottom, or narrow flap on both the front and back of the book.
The nexy thing I did was to glue the covers on. I cut two pieces of scrap card, which as you can see are about 1/4 inch larger on the top, bottom and non spine side, and glued them down.
Of course and empty book is a bit boring, so here is my first two page spread background, which was collaged from printouts of vintage (copyright free) text. Most of these I got from the Graphics Fairy.
As you might have noticed, this is a book with a difference, as it will have pockets where the tops of the paper bags are and narrow, tab like pages where the bottoms of the bags are and you can arrange these ant way you like, with the exception of the first and last (which must have the bottoms of the bags to the outside of the book to take the covers.
Obviously, I still have a long way to go with this book, and I will keep you updated as I progress.
Oh, I forgot, I did a light wash with strong tea over the collaged page to knock back the whiteness of some of the printed pages.
Doesn't matter what you create - just create it.
The background was simply felt with crumpled organza held by beads. The heart was free machine embroidery on water soluble stabiliser, which was washed away after. I used rayon and metallic threads. The heart is double sided and was inspired by a Design Matters TV episode, although the design was my own. I attatched a ring finding to the top and tied a ribbon on.
The reason I did this was...
Then the heart can be removed from the hook I sewed in and worn as a pendant or brooch or simply as a dangly. I hope my partner enjoys it.
Also, Thought I'd show you a little book I am in the process of constructing.
I used paper bags to construct this book.
Nothing fancy, just thin el cheapo bags I had for putting people's purchases in when I did markets.
I can't say whose youtube video actually inspired this book, because I watched quite a few of them. Just type in 'paper bag book' and you'll see what I mean, there are tons- and in any case, I bound it my own way in the end.
I have the top of the bag on the left and have folded it to the right over my ruler. I used the ruler over the bottom of the bag to make sure they were all folded the same.
I did this, on about six bags. You could use more, it's up to you - and to the thickness of your bags.
Instead of paper tip-ins and glue, I decided to use strips of fusible interfacing, which I ironed on. I think this will give a much more flexible and durable binding.
After fusing, I turned the right page onto the left (as if I was reading) and added another page on the right spaced at 1/8 inch as before and then fused that. I kept going until I had all the pages fused together.
When all the pages are bound, they will look like this. There will be a bag bottom, or narrow flap on both the front and back of the book.
The nexy thing I did was to glue the covers on. I cut two pieces of scrap card, which as you can see are about 1/4 inch larger on the top, bottom and non spine side, and glued them down.
Of course and empty book is a bit boring, so here is my first two page spread background, which was collaged from printouts of vintage (copyright free) text. Most of these I got from the Graphics Fairy.
As you might have noticed, this is a book with a difference, as it will have pockets where the tops of the paper bags are and narrow, tab like pages where the bottoms of the bags are and you can arrange these ant way you like, with the exception of the first and last (which must have the bottoms of the bags to the outside of the book to take the covers.
Obviously, I still have a long way to go with this book, and I will keep you updated as I progress.
Oh, I forgot, I did a light wash with strong tea over the collaged page to knock back the whiteness of some of the printed pages.
Doesn't matter what you create - just create it.
Thursday, January 12, 2012
Remember spring, and altered books
playing card, molding paste through a stencil, gesso, watercolour paint, (very messy) decorative machine stitching, lazy daisy, felt backing.
Another brief glimpse into my artbooks, today.
This is a niche, cut into my insect theme book, using layered tissue paper and a cast tissue dragonfly.
and another, layered tissue page in my techniques book, with some decorative stitching on the side of the page.
I have arranged some distressed leaf samples I did a while ago on some paste paper in my leaf theme book.
Here are two little niches, front and back in my leaf theme book.
hereis the page complete, with a metal leaf and a cast made from it mounted.
and from the back, with the distressed leaves showing through.
this page is created using newspaper, gesso, acrylic and then a watercolour wash with salt.
And I am playing with this acetate overlay, but I think I might make one out of stitching to go on this page.
I am very busy with things I can't show you yet, which is quite frustrating, but hopefully next week the pressure will be off slightly and I will be able to get some playing done!
And don't you forget to play every day!
Don't forget Lisa's ATC
Another brief glimpse into my artbooks, today.
This is a niche, cut into my insect theme book, using layered tissue paper and a cast tissue dragonfly.
and another, layered tissue page in my techniques book, with some decorative stitching on the side of the page.
I have arranged some distressed leaf samples I did a while ago on some paste paper in my leaf theme book.
Here are two little niches, front and back in my leaf theme book.
hereis the page complete, with a metal leaf and a cast made from it mounted.
and from the back, with the distressed leaves showing through.
this page is created using newspaper, gesso, acrylic and then a watercolour wash with salt.
And I am playing with this acetate overlay, but I think I might make one out of stitching to go on this page.
I am very busy with things I can't show you yet, which is quite frustrating, but hopefully next week the pressure will be off slightly and I will be able to get some playing done!
And don't you forget to play every day!
Don't forget Lisa's ATC
Saturday, December 17, 2011
Painted papers
At present, I am posting a lot of mixed media, however I do have a number of textile pieces in process.
I will be posting these as they are finished in the next few weeks
Deadlines are looming, and of course, that is when the work gets done, lol.
Today I am posting about some painting on paper I did recently. The papers will be used in collage and mixed media work.
As you can see from the overviews above, I did quite a few samples as well as trying out a couple of techniques at the same time.
The first thing I wanted to play with was paste paper. I had recently read about this at a gorgeous bookbinding blog here. If you are not at all interested in paper, you will be after looking at her galleries.
Paste paper is like what we called fingerpainting at Kindergarten, just a bit more of a grown-upversion. Whilst not really paste papers, the two above were printed with paste paint, using a lace doily (a mass produced machine one) The first is the positive and the second is the negative. I loved this effect.
These second two are using paste paint on newspaper. In the first one, I used a barbecue rubber brush to create a pattern, in the second, my fingers, but you can see that even with dark paint the coverage is really not good enough for newspaper.
This sample used green paste paint with glitter on brown paper. The swirls were created with the rubber brush.
This paste sample was swished with the brush. This was on a coated paper and you can see in the top right that the coating decided to come off. not a good paper to use.
This one is the same, using a brush to create texture, but on a more interesting paper which knows how to behave. This was on an opened out white paper bag, (with a shiny side, like you buy lollies/candy in at the shop) The result was almost translucent when dry and I really liked it.
The same white paper and paste, using the rubber brush to make this lovely texture. My favourite.
This time more colours, some metallic and a small brush to make swirls. This one is great, too.
This one is what is called a pulled paper - You know when you used to make inkblots or butterflies by folding the paper paint side in then opening it again. The texture is really interesting and I will be doing maore of this type.
The other things I wanted to play with were newspaper and adding stuff to painted papers.
Here are three painted newspapers. The two things I learned were that the paint needs to be dark and thick and more than one layer works best. I don't want to obscure all the print, but I want it to be difficult to read.
I also decided that it would be worht trying a light coat of gesso before painting to wash out the text a bit, then I could have more muted colours.
These three were all paint on paper, but with different additions sprinkled on. The one on the left was baking soda - in the middle rock salt and right was sugar. They all create a different texture. ( I do not think the baking soda changed the colour, but being a biochemist I am aware this is possible, so as i can't remember if the paint was the same in all three, I will just have to do it again)
The final two samples are just using different papers.
This one is on white butcher's paper, the type they wrap your meat in. I used the shiny side and found it took prints really well.
This last sample was an accident, but I was interested in what happened. I used freezer paper under my papers to protect the work surface and this is a piece which inadvertently got painted. I thought the paint would come off, but it doesn't, so it's worth keeping my protecting sheets for another project.
All in all, this was a very productive day, and I got a lot sheets of lovely paper to use in my books and mixed media out of it. The sample tags I have shown here are just little bits cut off the edges of thode sheets, and would you believe it? I have also used the scraps from cutting out the tags on some collaged book covers!
We don't waste much around here!
I will be posting these as they are finished in the next few weeks
Deadlines are looming, and of course, that is when the work gets done, lol.
Today I am posting about some painting on paper I did recently. The papers will be used in collage and mixed media work.
As you can see from the overviews above, I did quite a few samples as well as trying out a couple of techniques at the same time.
The first thing I wanted to play with was paste paper. I had recently read about this at a gorgeous bookbinding blog here. If you are not at all interested in paper, you will be after looking at her galleries.
Paste paper is like what we called fingerpainting at Kindergarten, just a bit more of a grown-upversion. Whilst not really paste papers, the two above were printed with paste paint, using a lace doily (a mass produced machine one) The first is the positive and the second is the negative. I loved this effect.
These second two are using paste paint on newspaper. In the first one, I used a barbecue rubber brush to create a pattern, in the second, my fingers, but you can see that even with dark paint the coverage is really not good enough for newspaper.
This sample used green paste paint with glitter on brown paper. The swirls were created with the rubber brush.
This paste sample was swished with the brush. This was on a coated paper and you can see in the top right that the coating decided to come off. not a good paper to use.
This one is the same, using a brush to create texture, but on a more interesting paper which knows how to behave. This was on an opened out white paper bag, (with a shiny side, like you buy lollies/candy in at the shop) The result was almost translucent when dry and I really liked it.
The same white paper and paste, using the rubber brush to make this lovely texture. My favourite.
This time more colours, some metallic and a small brush to make swirls. This one is great, too.
This one is what is called a pulled paper - You know when you used to make inkblots or butterflies by folding the paper paint side in then opening it again. The texture is really interesting and I will be doing maore of this type.
The other things I wanted to play with were newspaper and adding stuff to painted papers.
Here are three painted newspapers. The two things I learned were that the paint needs to be dark and thick and more than one layer works best. I don't want to obscure all the print, but I want it to be difficult to read.
I also decided that it would be worht trying a light coat of gesso before painting to wash out the text a bit, then I could have more muted colours.
These three were all paint on paper, but with different additions sprinkled on. The one on the left was baking soda - in the middle rock salt and right was sugar. They all create a different texture. ( I do not think the baking soda changed the colour, but being a biochemist I am aware this is possible, so as i can't remember if the paint was the same in all three, I will just have to do it again)
The final two samples are just using different papers.
This one is on white butcher's paper, the type they wrap your meat in. I used the shiny side and found it took prints really well.
This last sample was an accident, but I was interested in what happened. I used freezer paper under my papers to protect the work surface and this is a piece which inadvertently got painted. I thought the paint would come off, but it doesn't, so it's worth keeping my protecting sheets for another project.
All in all, this was a very productive day, and I got a lot sheets of lovely paper to use in my books and mixed media out of it. The sample tags I have shown here are just little bits cut off the edges of thode sheets, and would you believe it? I have also used the scraps from cutting out the tags on some collaged book covers!
We don't waste much around here!
Labels:
altered books,
books,
collage,
mixed media,
painting,
paper,
paste paper,
samples,
tags
Subscribe to:
Posts (Atom)