Friday, February 28, 2014

The tooth is gone

Ah, finally I have had the nasty tooth out and am feeling much better.  I haven't got much done in the last week because of it, but I have progressed with the leaf print I was working on.
I have finished all the free motion.  I scribbled a lot ith a pale thread in the background and i think it looks very lacy.
Here are a few close ups.  /You can click on them to make them larger.
I want to add some hand stitch and beads and perhaps a dragonfly.  We will see.

I went for a short walk this morning, now that the weather is cooler.
The little bits of green are telling me Autumn is not far away.  The creek is very low at this time of the year, but I love the way the rocks are exposed.  In spring, they are well under the water.
I think I might need to print one of these out for my sketchbook, and work on it.  Perhaps I should think about a series based on the creek, which is always in the back of my head, because I can always hear the water flowing.  But at present I have too many other things to finish, so sketchbook work is a good idea to do so I don't forget.

Happy Creating!

Tuesday, February 25, 2014

Here is my contribution to T for Tuesday this week
This is a very simple page, that is not quite finished, but is one I like.  I like the shaped edge and the all over printing with the words, which I carved from two pencil erasers.
That's all for today as I am still in agony, but will be seeing the dentist on thursday, thank goodness!

Monday, February 24, 2014

Digital drawing day - two domestic items

I have had a few days with a bad tooth.  Hopefully to get fixed tomorrow.
So I am a bit late with DDD today.
The theme for this week was two domestic items speaking to one another.  I thought of "the pot calling the kettle black"  and this was my quick half hour sketch.
Have a look over on Terry's blog for hers and June's interpretations, which were much more imaginative than mine, but perhaps I can be forgiven as pain is not very condusive to creativity.

Happy creating!

Saturday, February 22, 2014

A bit of a round up

I have a few bits and pieces on the go at the moment.
Firstly, I have been doing a bit of free machine sketching.
I have  squares of fabric next to the machine and I try and have a bit of a sketch each day.
Also, all the printing I have been doing has given me a few ideas.
These are a few prints on voile (Sorry about the orientation, I forgot to rotate it), pinned up on the wall that I am thinking about.
This is one of the prints.It looks very pale, but that is because the fabric is transparent, that I was trying out with a frame, but unfortunately slightly too large.  but then...
I tried this print, which looked really good, so I layered it up and started stitching.
I am loving how the stitching is making the leaves pop and am looking forward to adding a bit of hand stitching and beads to this after I finish the machine work.

Also, when I was down at the opp shop (charity store for those in the US), I spied this-
beautiful trim.  It looks like coloured lace in this picture, but it is actually about four inches wide.  I am itching to find something to use it on!

Happy Creating!

Friday, February 21, 2014

And this is how it is done

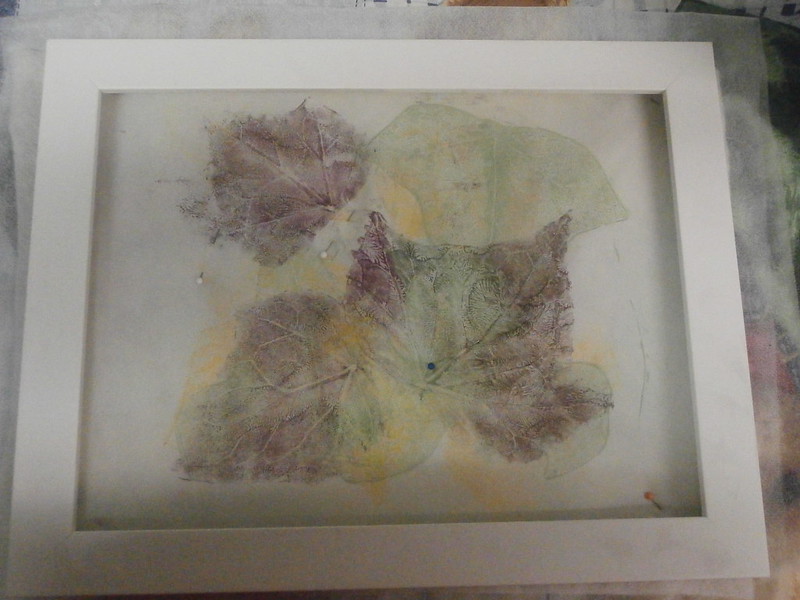
I did promise a tutorial for how I printed the Leaves from yesterday
and here it is

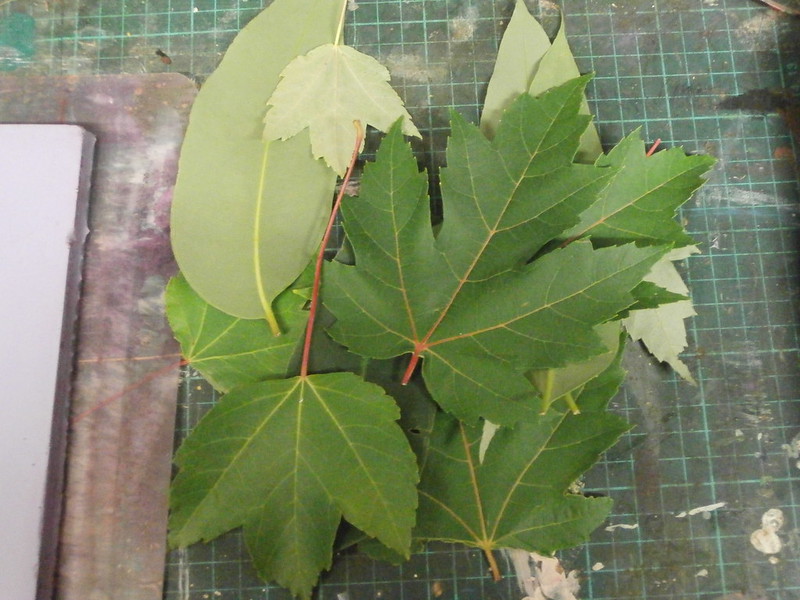
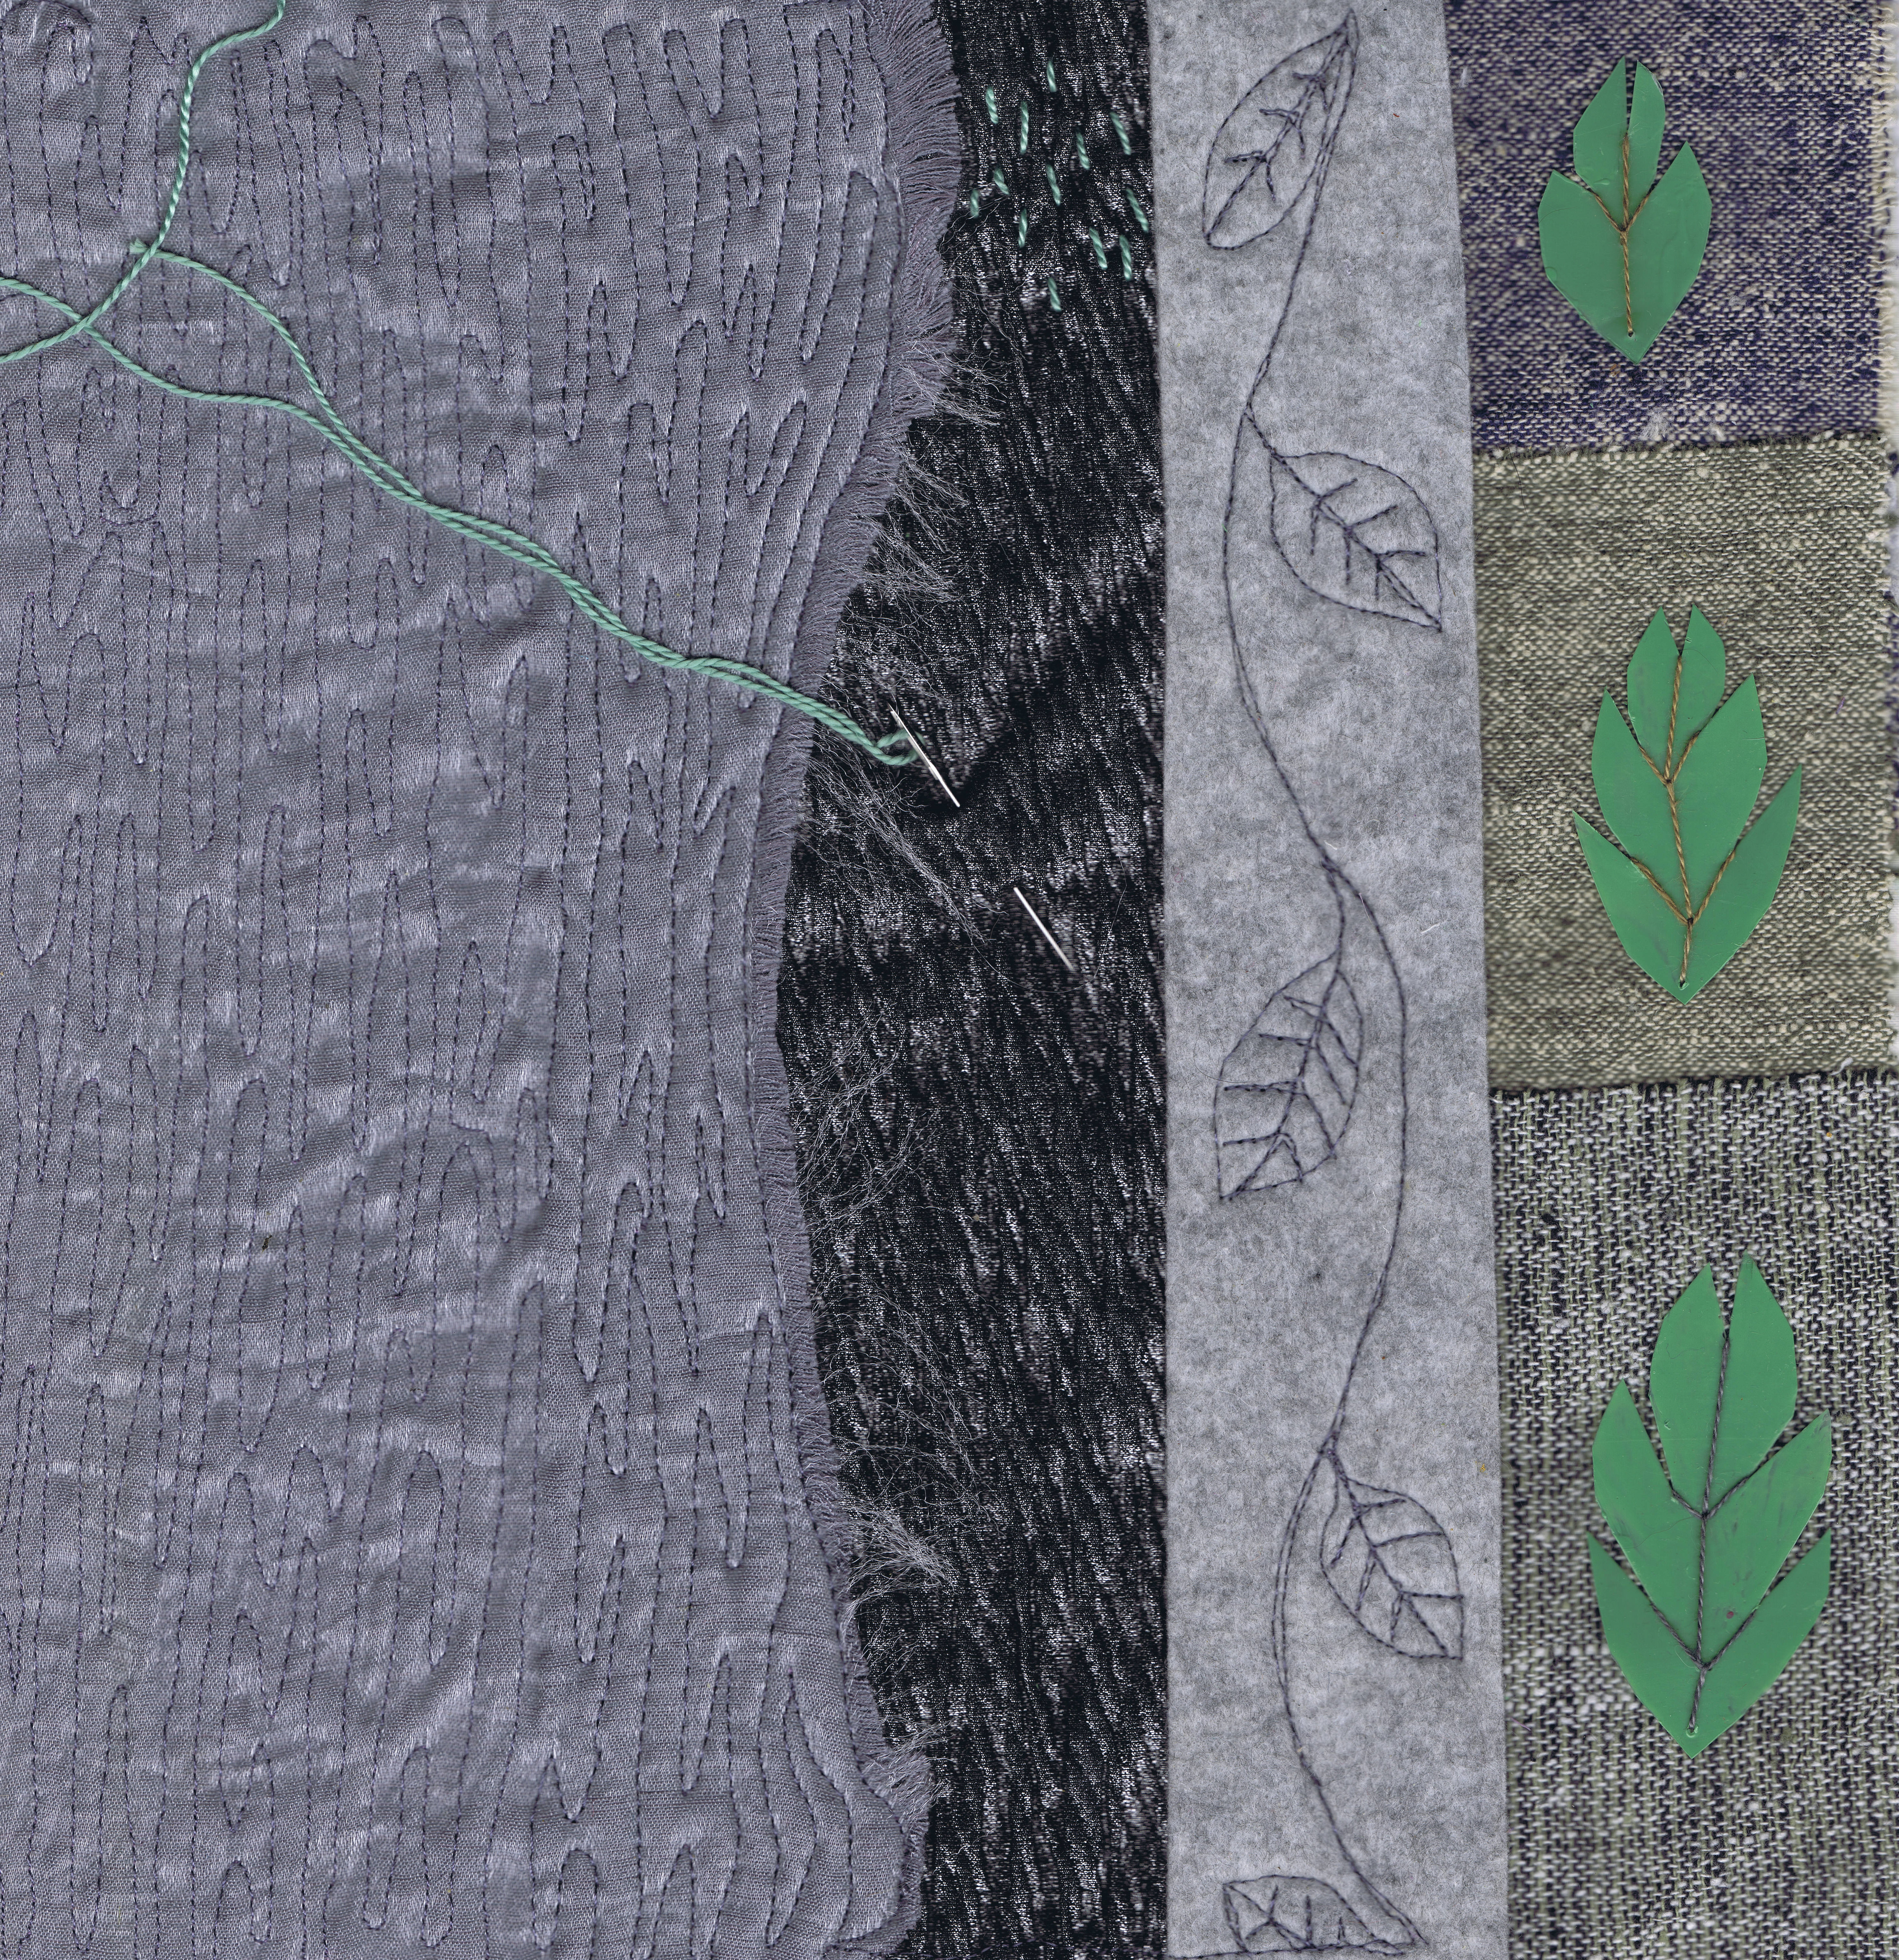
Of course you start with some leaves.  I like to pick ones which have lots of veins.
You need a plate to print from.  Most people use a gelli plate, but this is a plate made from silicon rubber that my husband made for me.  He made it from the stuff he uses to make molds for his railways.
I have tried this technique with a plate made from actual gelatin, but to get good prints you need to press hard and I find the leaf veins dig into the gelatin.
The roller is a hard rubber one, which, again, my hubby made for me from an old inkjet printer roller.  He is a very ingenious bloke!  But you can get these rollers from art suppliers.  You can use a decorators dense foam roller from the hardware, it works well, but soaks up a lot of paint, so not only is there waste, it is hard to change colours, which I like to do a lot.
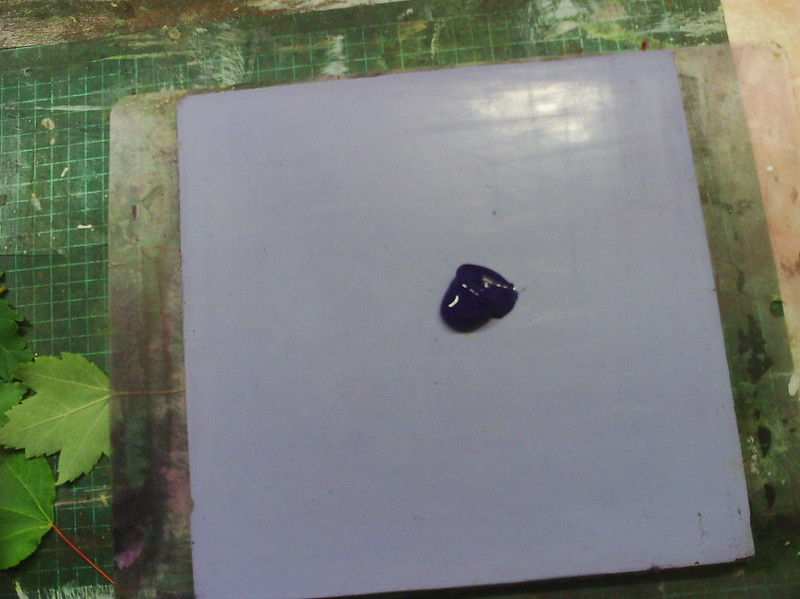
So we add paint.  You can do this step on a palette and then apply to the plate, but I am extremely lazy!
Roller out the paint so it is even.  I can see already that I have added too much paint.  Obviously if you roller onto a palette first, then this is not likely to happen.
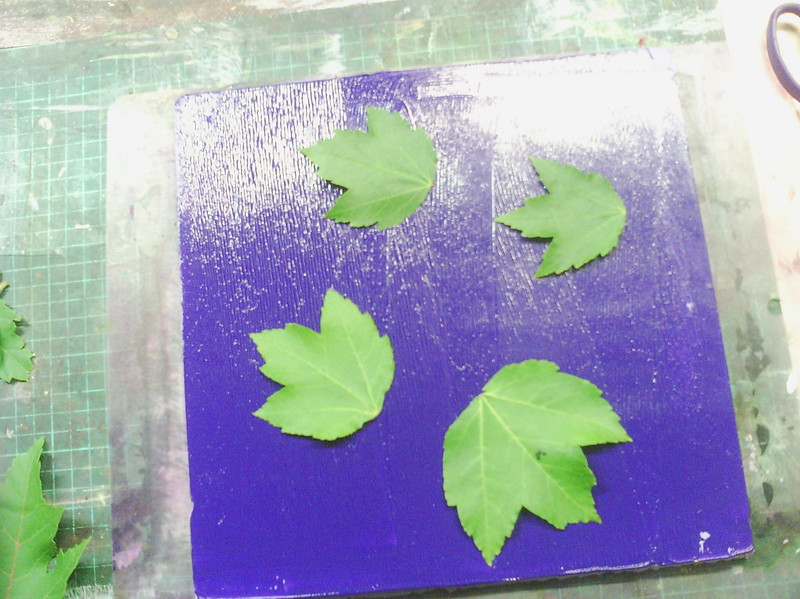
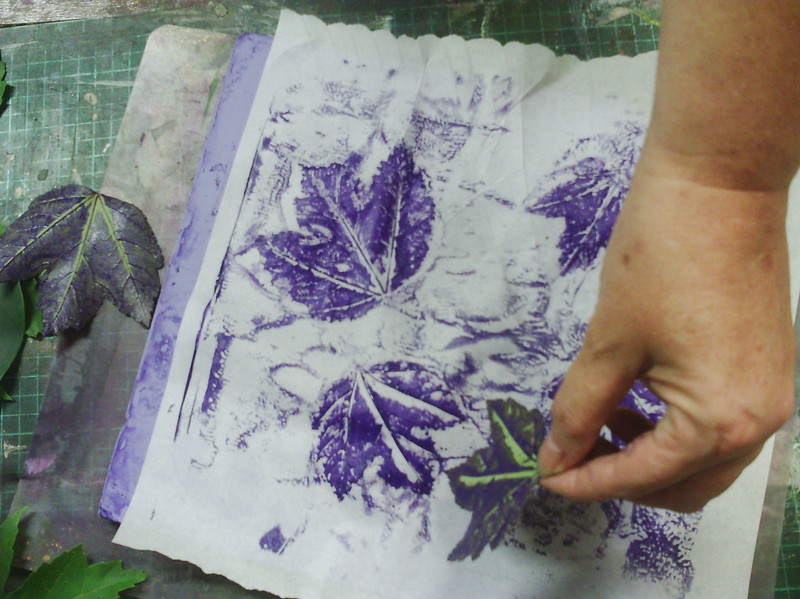
When you have an even layer of paint, add the leaves.  just place them down lightly, if you press them, you will get fingerprints, later.
I place the leaves bottom, or vein side down, in order to get a better print later.
The next step is to place your paper (or fabric) down and to rub over the surface without moving it.  I like to use my hands, so I can feel the edges of the leaves and make sure I get a crisp outline.  You can use a clean roller, but I find that the paper can sometimes move and blur the print.
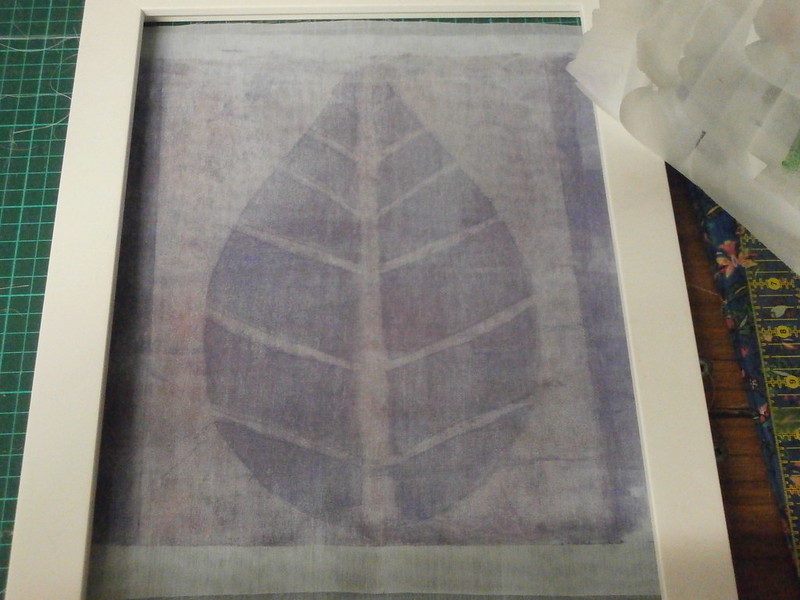
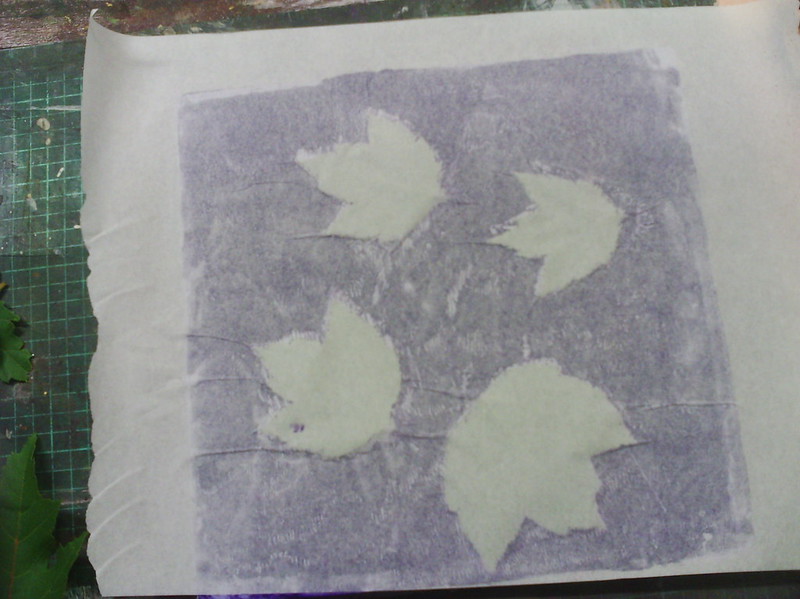
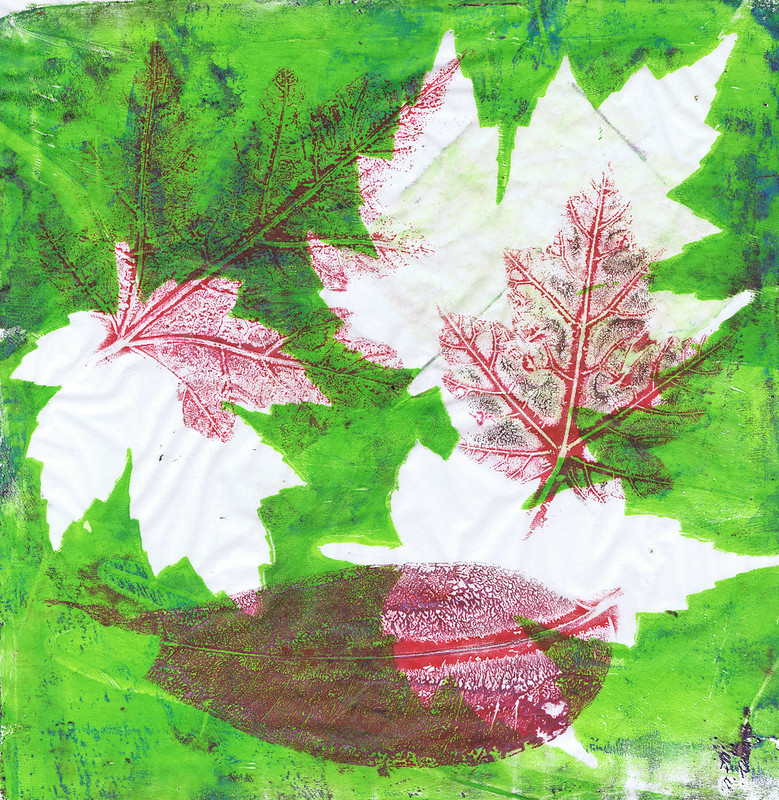
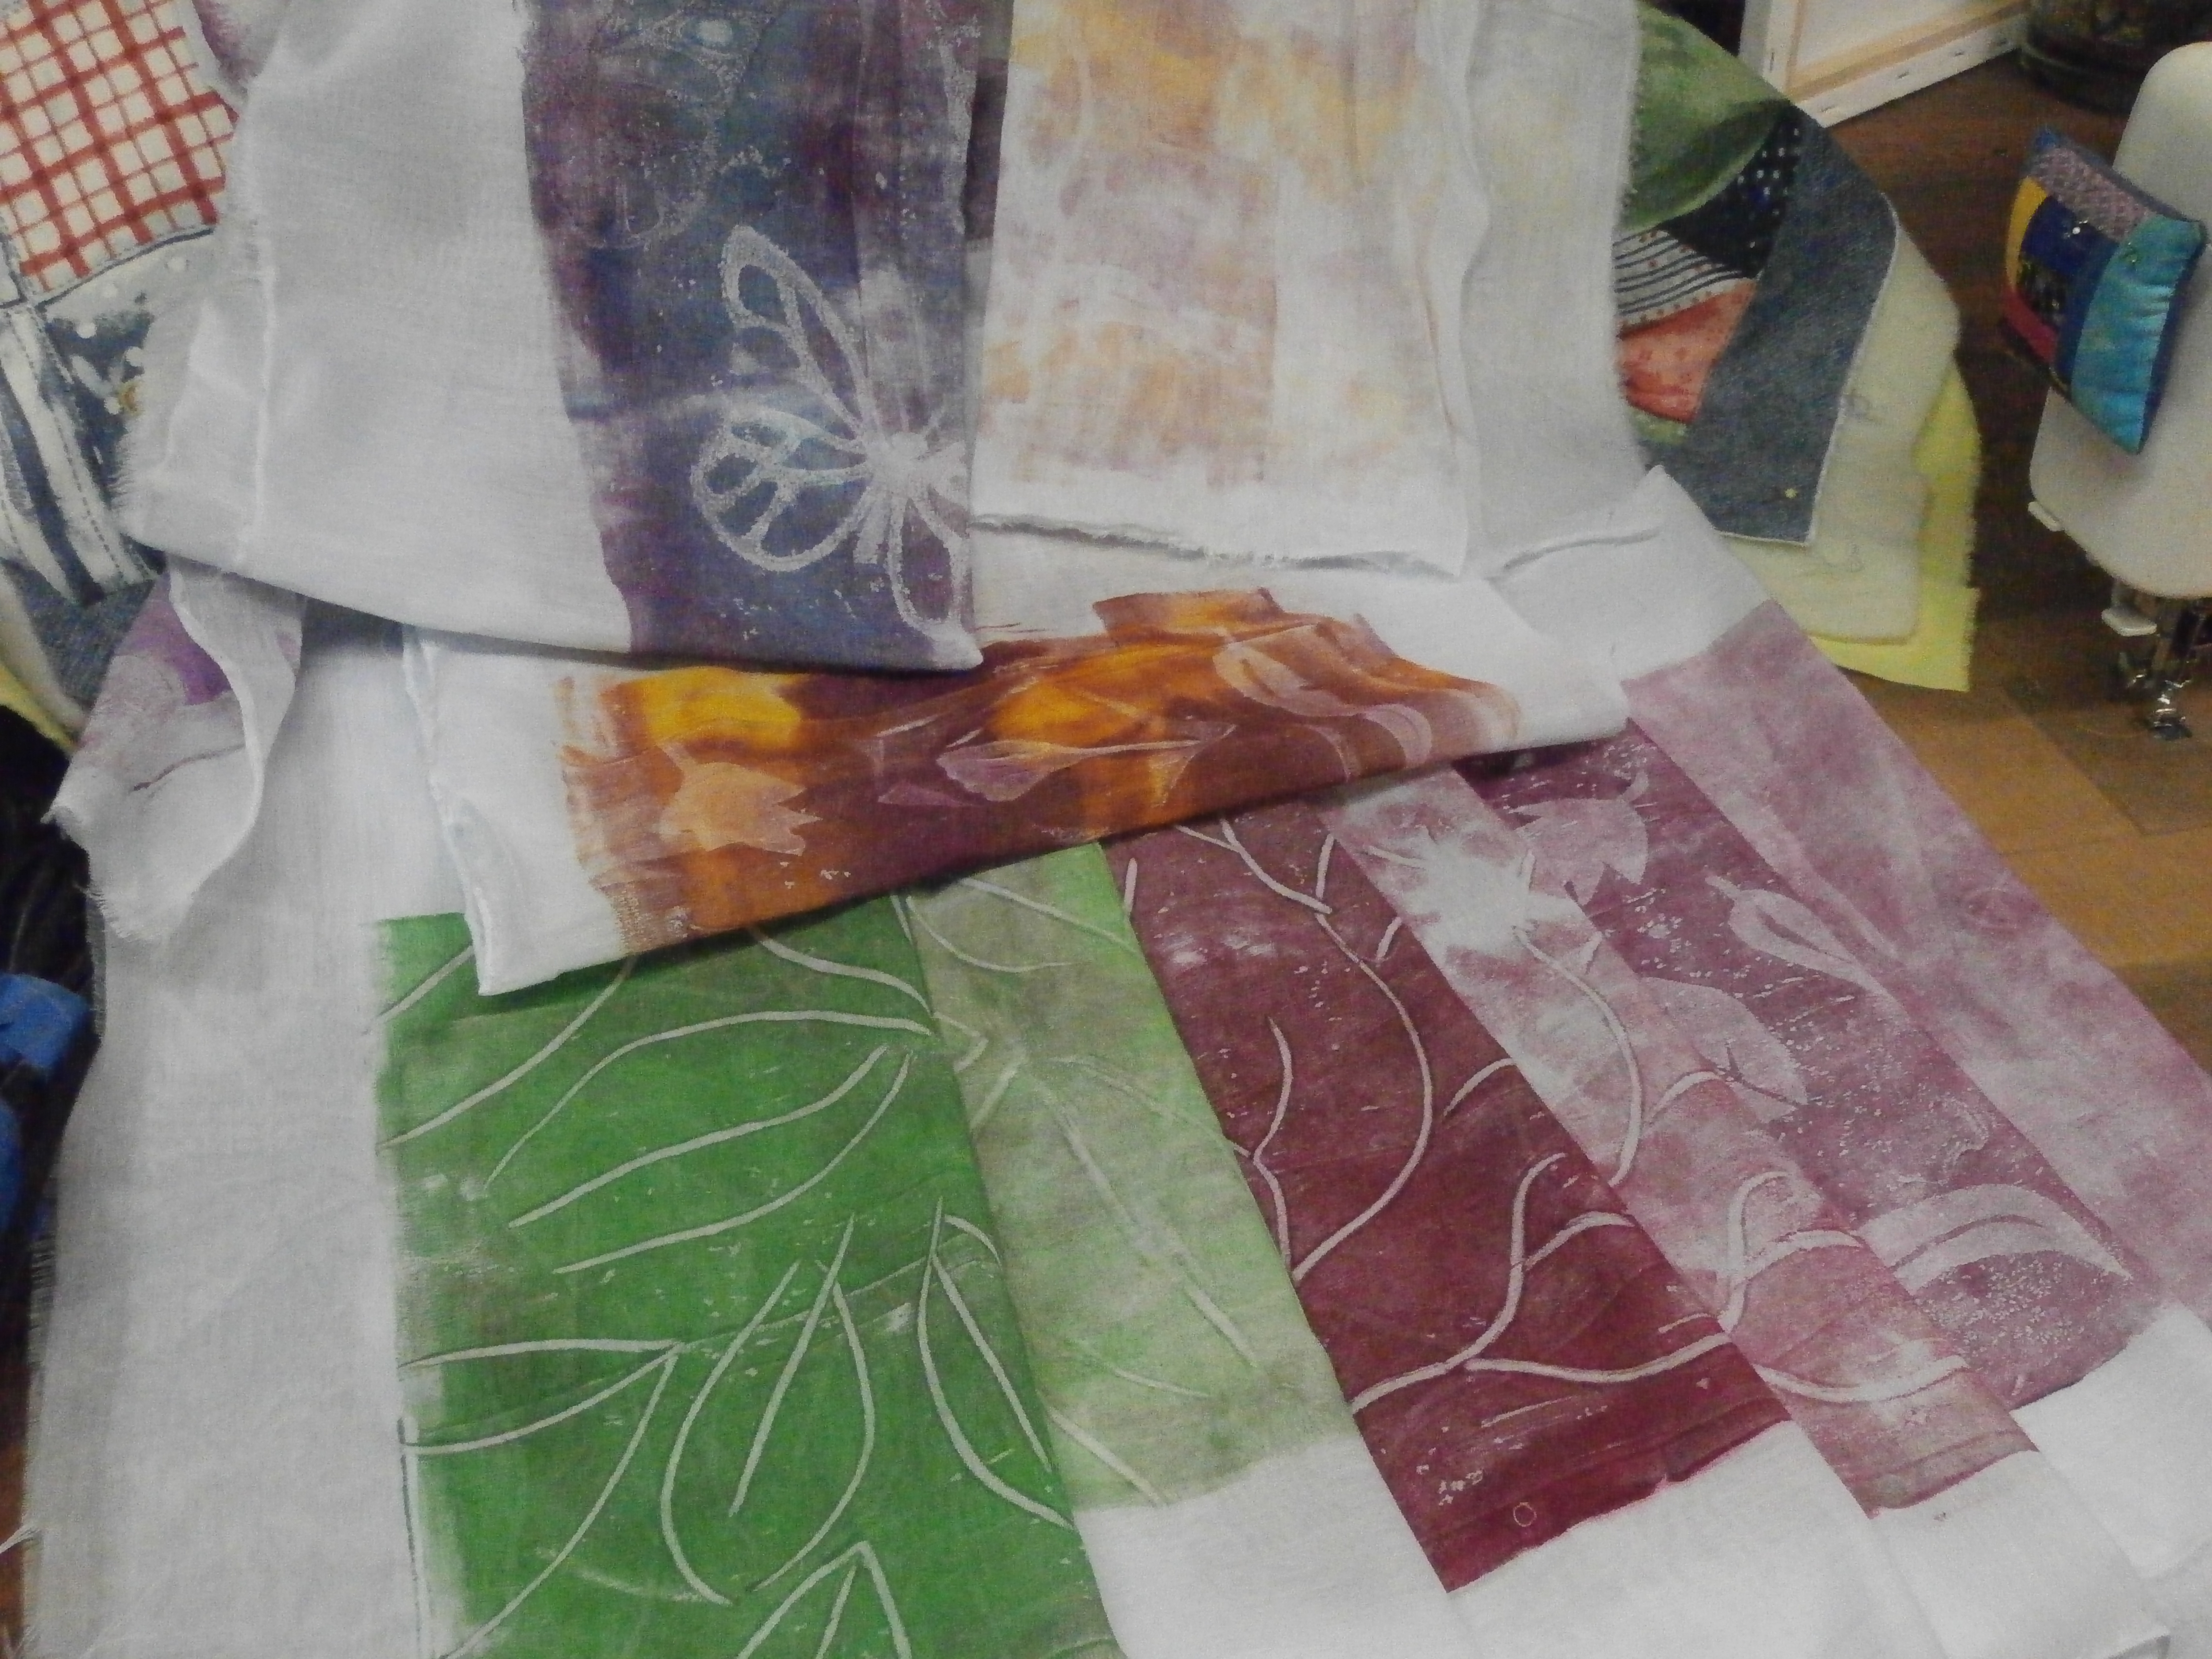
This is the type of print we get at this stage, a negative print.  One thing to take into account is the thickness of the paper.  The thinner the paper, the crisper the print will be.  This, although it is thin, is quite stiff.  Also, because I used too much paint it is a bit blobby and there is till paint around the leaves.
What we are trying to do here is remove all the paint from around the leaves.
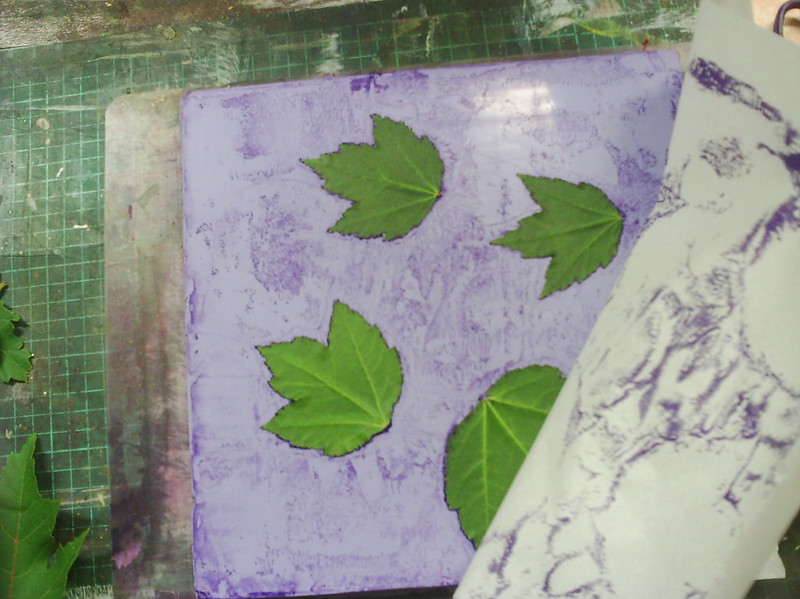
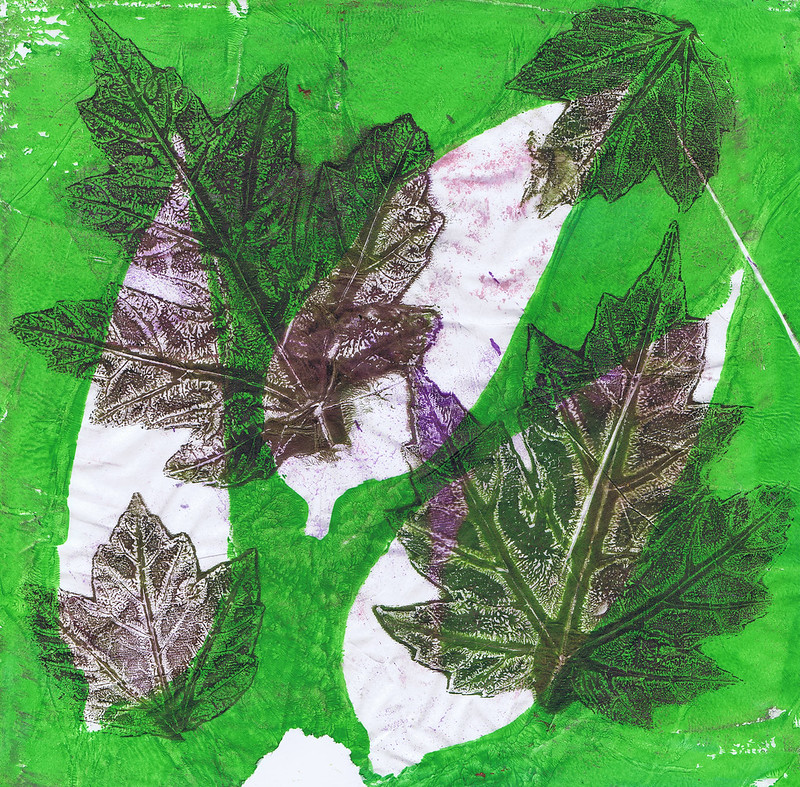
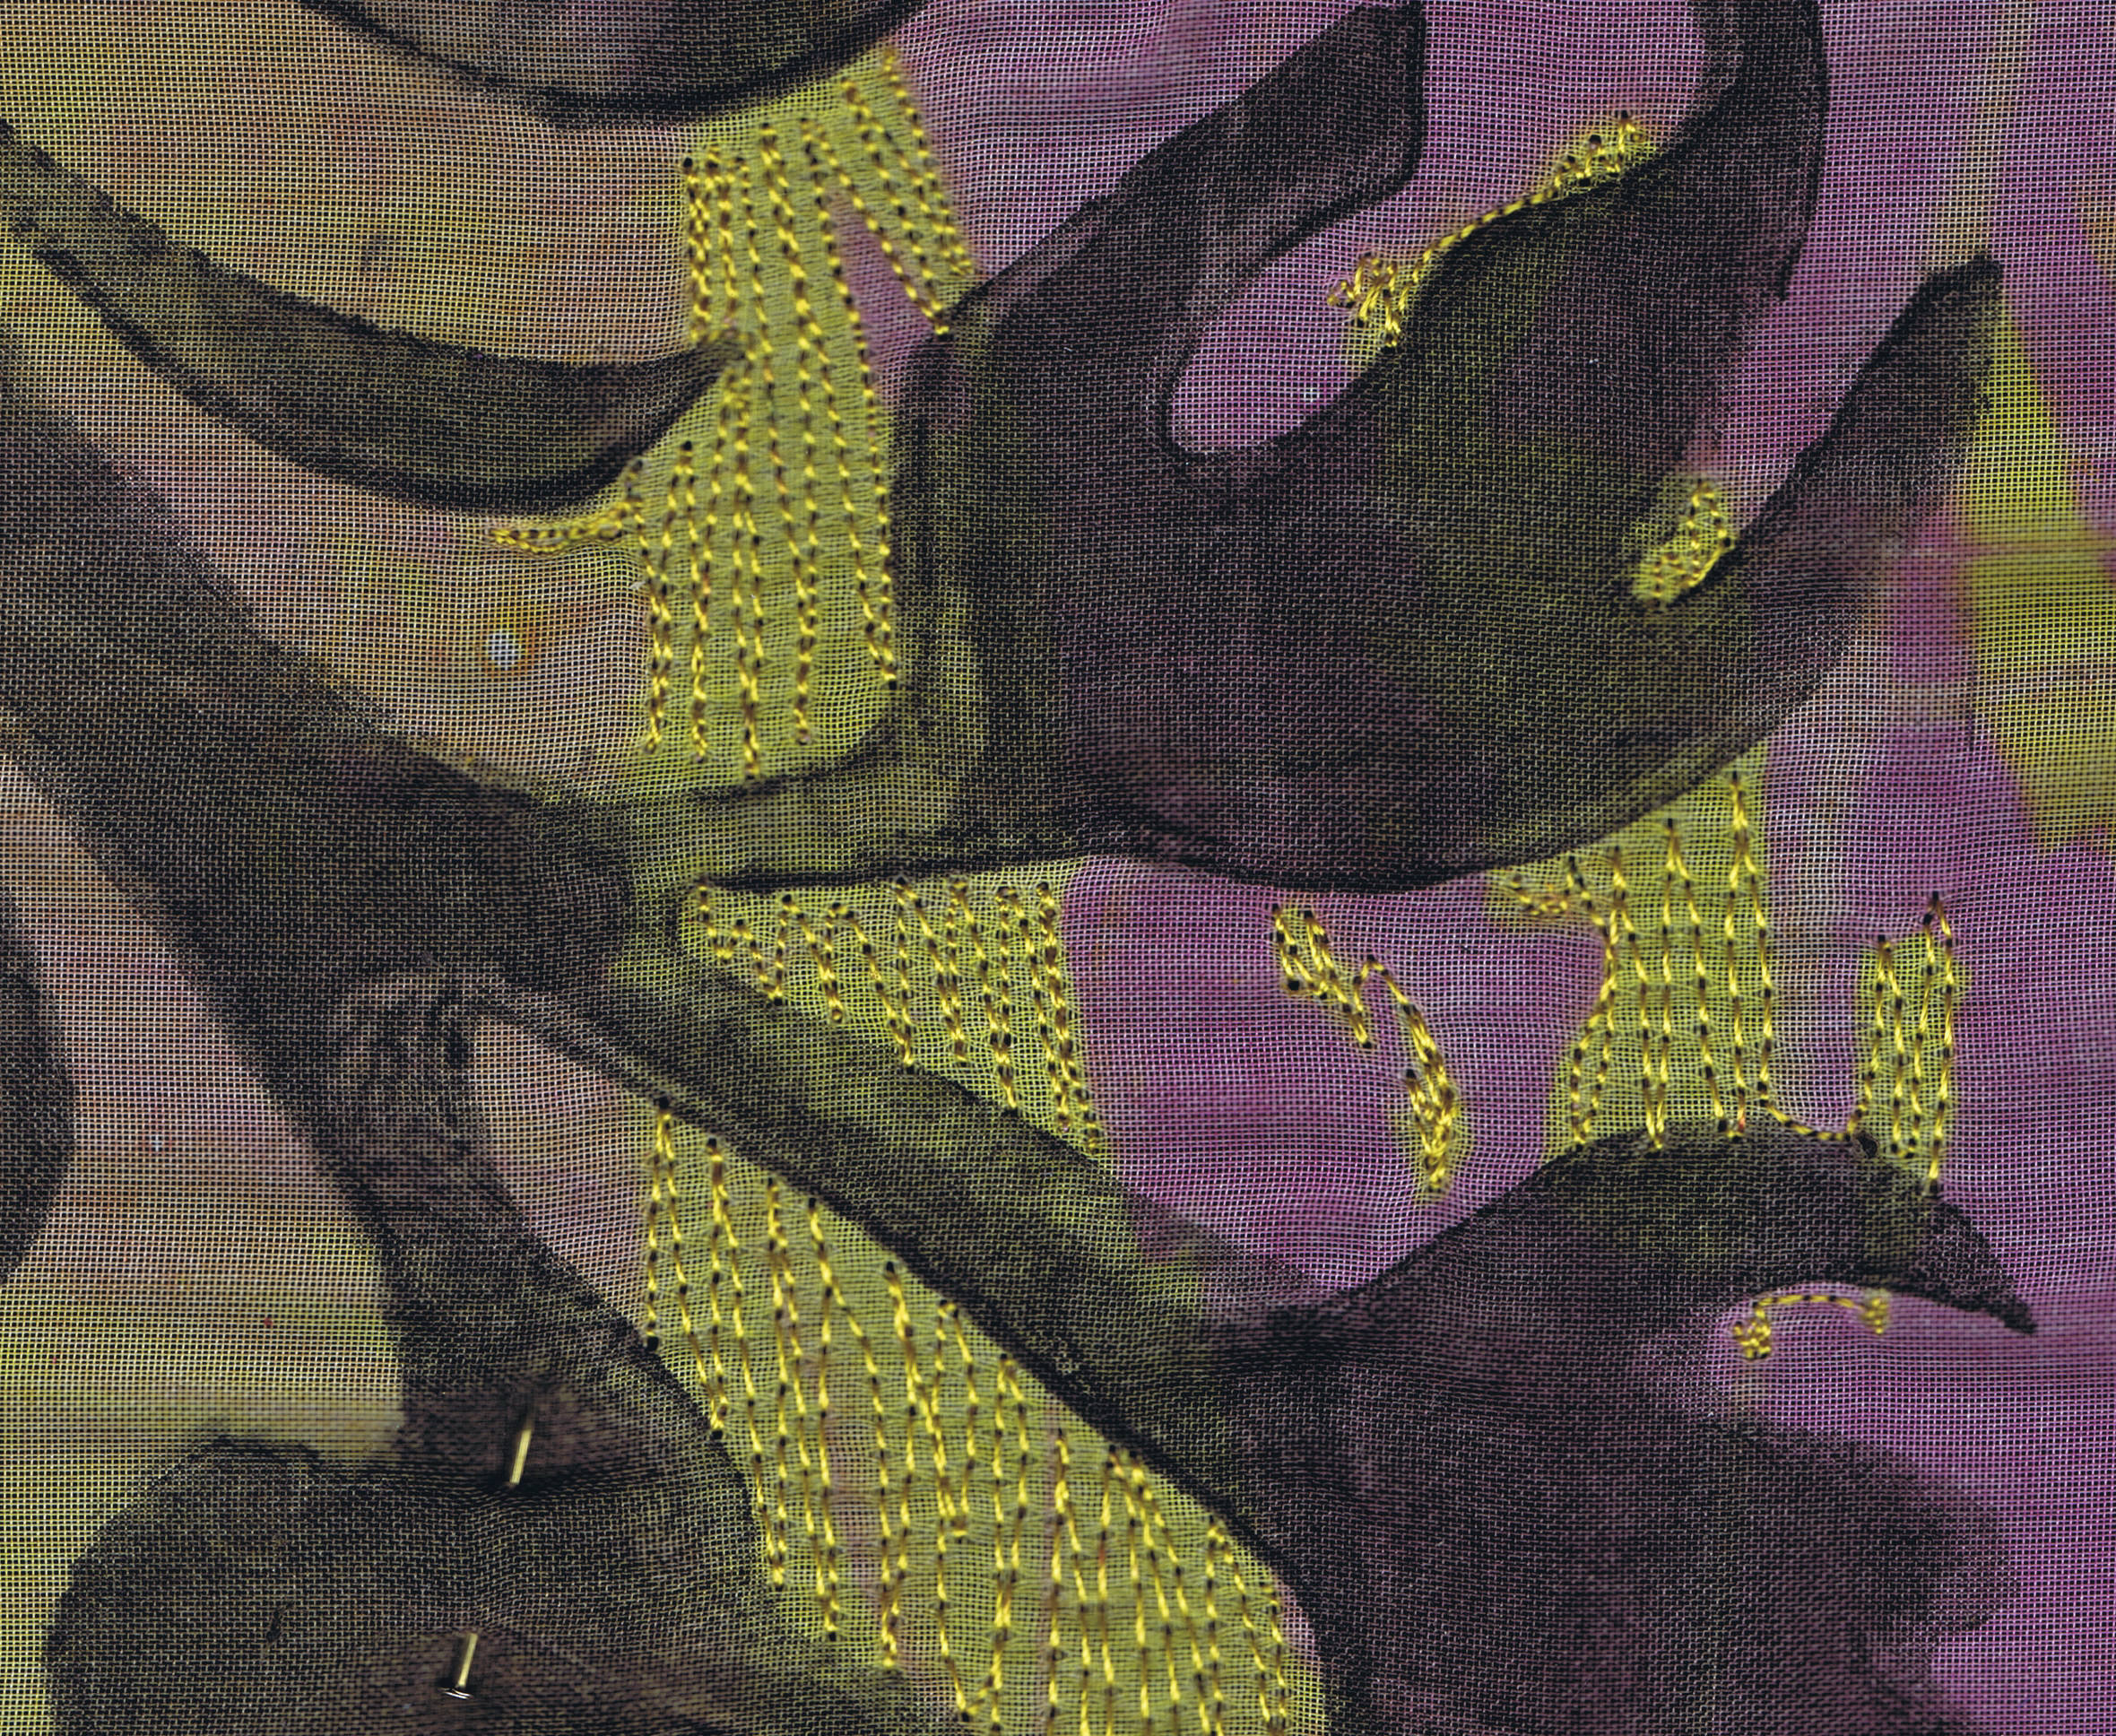
Because there was so much paint left over, I printed again.  This is greaseproof paper, very similar to deli paper, which I often use as it is very thin, so prints very crisply, but also is easy to collage.  On the right, you can see there is not much paint left on the plate.  What is left is dry and will not move, but hopefully the paint under the leaves is still wet.  This is the part of the printing where we get the lovely prints, so I hope so.
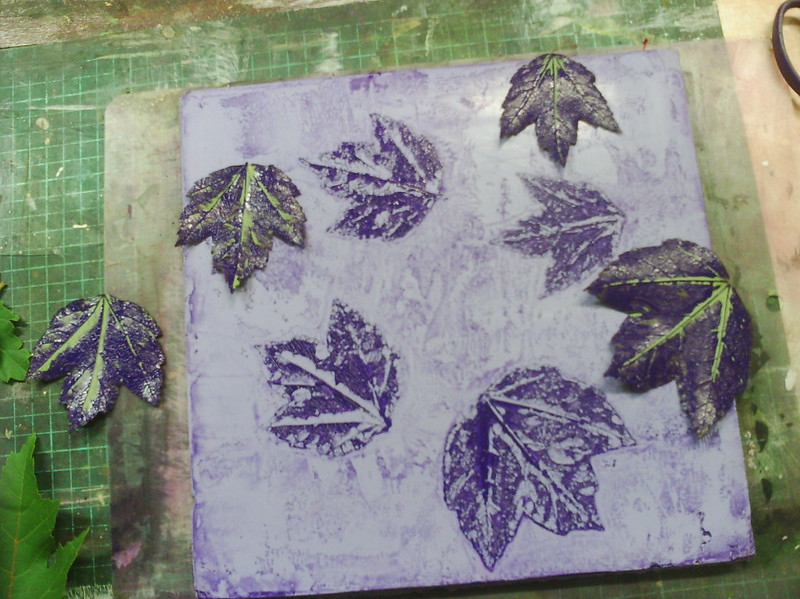
On the left above, I removed the leaves carefully, then on the right printed the paint that was left under the leaves.
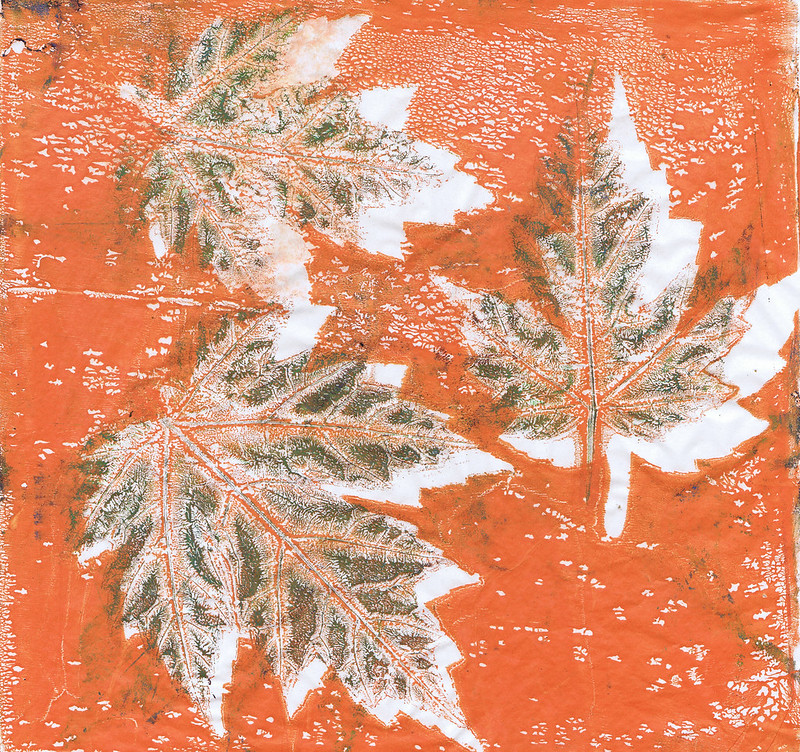
Because I had too much paint, the leaf prints are not as delicate as some of the ones I showed yesterday, but at least there is good contrast and you can see what happens.
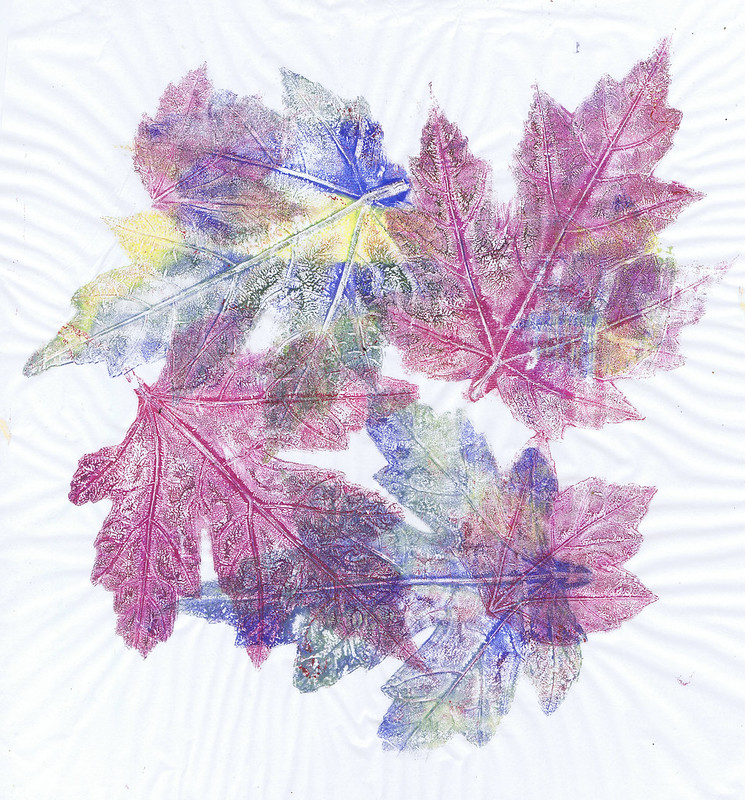
If you are really quick, you can also print the paint off the leaves themselves.
This brings me to the most important part of this process.  Speed.
Because we are looking to get the leaf print at the end, we need to do everything very quickly, because the acrylic paint is drying all the time.
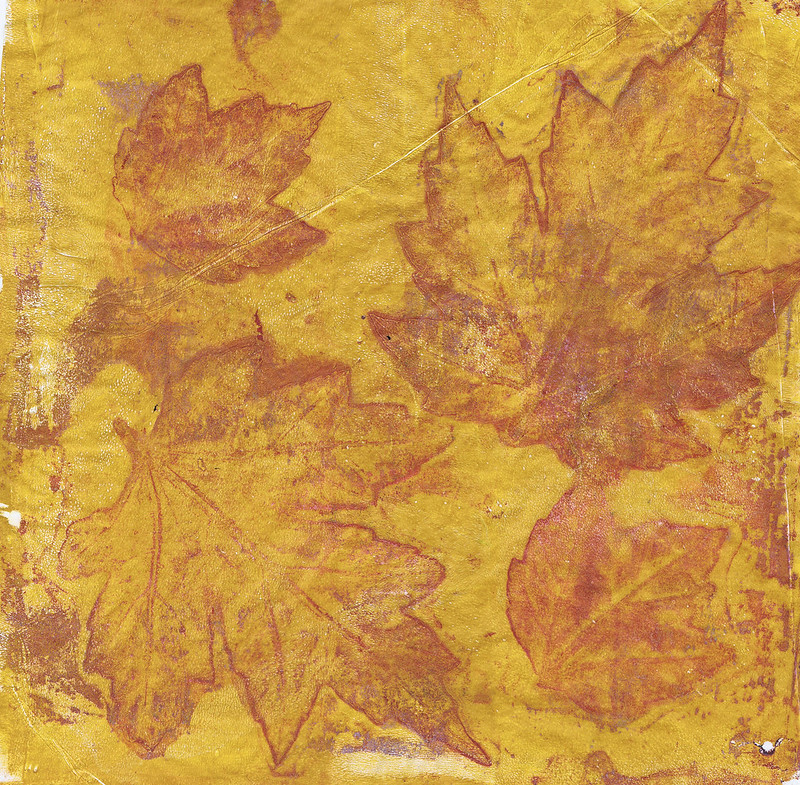
If, by chance you get to the end and those beautiful leaf prints have dried on the plate, there is a way that you can (sometimes) get the prints off.
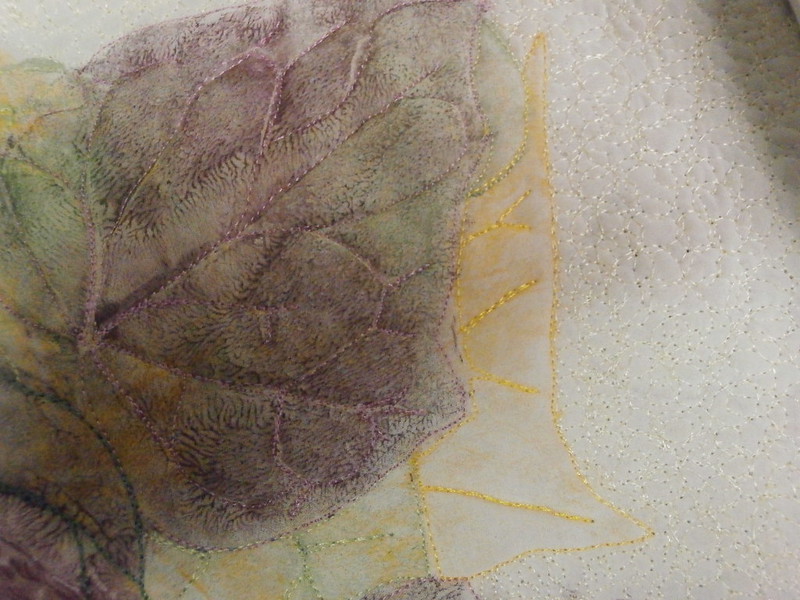
The red/burgundy leaves above were ones that actually had dried on the plate.  What I did was to roller over some yellow ochre paint VERY CAREFULLY so as not to disturb the image.  Let it sit for a few moments.  You may even see the leaf prints melting into the rollered paint, then print, and here, you need to press quite firmly.  I must say that this does not always work and requires a bit of practice, but it is possible.  One thing to remember is to make sure the two colours contast well!
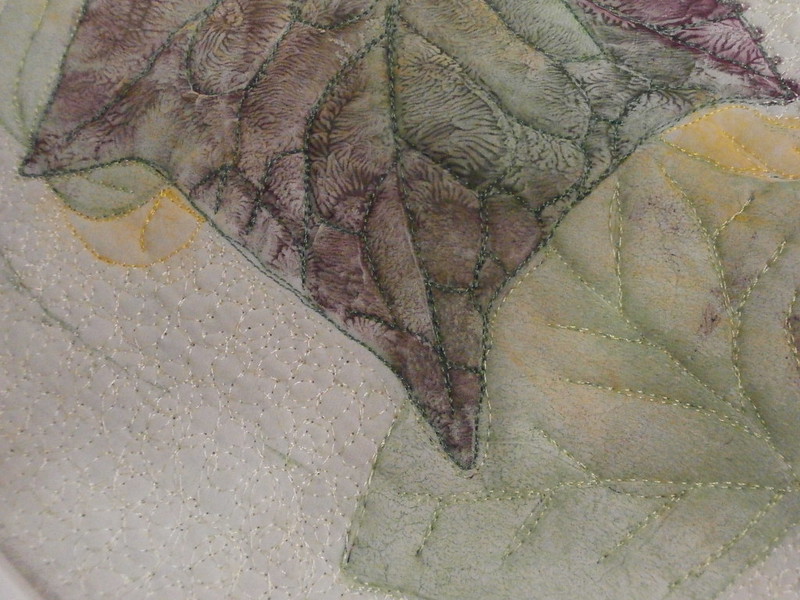
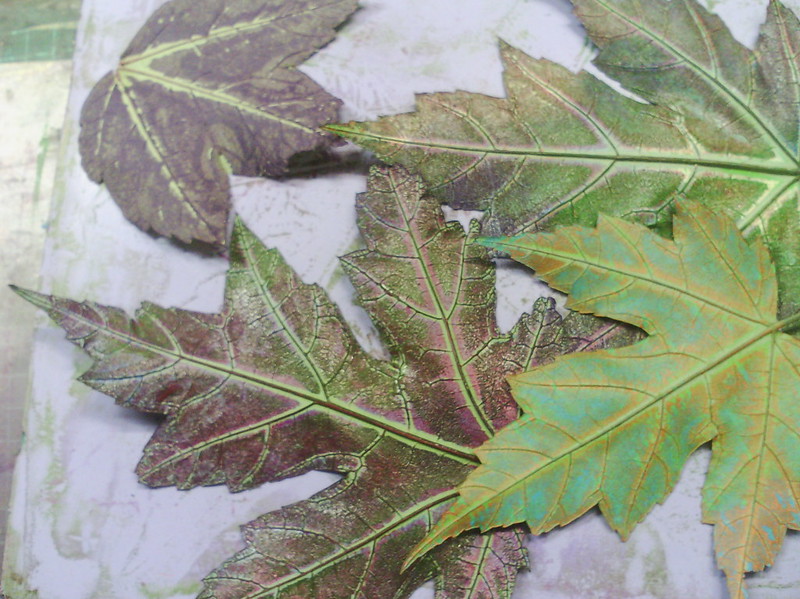
And when you are finished, I love how all the layers of paint on the leaves looks.  I have lots of these, which I have kept and allowed to dry.  I am currently looking for a nice big glass bowl to put them in.
Hope you enjoyed this tutorial.  I am sure there are other ways to do this, but this is my favourite way.
Oh, and by the way.  I do not clean my plate between prints.  This allows me to get effects like this above, where the new paint and leftover paint have merged together to give a more interesting leaf.

Happy Creating!

Thursday, February 20, 2014

Leaves, leaves, leaves

You might notice I have changed my blog back to the normal layout.  As much as I love the interactive layout, some friends, were having problems, so I changed back.
I have had another big printing session.  I collected some leaves from the trees at the community house yesterday and I love the prints I get with real leaves.
Above is an example.  Aren't they gorgeous!
I use my silicone plate for this technique and it gives such wonderful detail.  I don't know what I will do with all the prints, but I just like looking at them and there is the added bonus that if you don't clean the plate every time, you get some mixtures, like the one above.
Here are a few more
These ones have two layers.  That is they were printed twice, once with the leaves still on the plate and once with the leaves taken off.
These two were printed twice as well, but from different plates.
This was also printed twice, both from the final print
This one is a bit special.  sometimes if you are not quick, the final print, which is the beautiful one, dries on the plate before you can print it.  But I have found that if you roller paint over very gently and wait a few moments for the rollered paint to re wet the dried paint, you can lift a print like this.

I have more prints, but these are my favourites.  I will post a short tutorial tomorrow, as I don't want to make the post too long!

Happy Creating!

Wednesday, February 19, 2014

A fabric page

I was inspired by a friend's post about fabric books and this is my first page
The central leaf is free motion sketched and I have added some fabrics for the background and some leaves cut from lace.  I also stamped some leaves over it.  I have actually done a lot of stitching on this, but I'll show you that in a later post.

I have also been working on my sunflowers piece that I talked about here.
I started again, taking everything down and was a bit more picky about what I put up.
This was the arrangement I came up with.  But there were some other things I wanted to add to it, so I took some off
The bottom was a little bare, then (black felt), so my next step was to take this picture into my digital drawing program (artrage)
I added some text.  Studio of the south was vincent van gogh's dream, which never came to fruition.
Then I got down to some drawing.
I forgot to save some process versions, but this is where I ended up.  At the top is a sketch of the yellow house where Vincent lived in Arles.  At the bottom is an impression of one of his last paintings and under the top sunflower is a section from one of his letters.  I am quite pleased with this layout, although at present I have no idea of how I will transfer these ideas to the background.  I think there might be a thermofax and maybe some needlefelting and lots more free motion embroidery.  I might also add a bit of paint to the bottom sunflower, but we will see.

Oh and by the way I am a bit behind with visiting blogs, but I will catch up in the next day, sorry.

happy Creating!

Tuesday, February 18, 2014

T for tuesday

Today's post is about teabags, which is something I never use

These are made from tissue paper, with bits of coloured paper inside and the tags were cut from a piece of painted watercolour.

Very short post today.  I may be missing in action a day or to here and there as I have begun two university courses, which will mean I am studying hard!

Sunday, February 16, 2014

Technology - oh my!

Today i am posting about digital sketching.  Over on Terry grant's blog she has been having a challenge with a friend each week on digital drawing.  Last week she set a topic of black and white.
So I had a go.
Black and white to me is a magpie.  Very common and easy to find in my garden.  I have used mostly the pastel tool in Artrage, which I love.
Also this week I also drew a few other things, not black and white.

A couple of leaves picked up in the garden,  Both also done with the pastel tool.

Happy creating!

Saturday, February 15, 2014

A brief update

I have a few bits and pieces to show, none of which are finished, but I though you might like to see what I have been up to.
first is my sunflower piece, which is decidedly NOT moving at present, except perhaps in my head.
I have all the little bits pinned up on a piece of felt, but at present I don't know what to do with them.  I think it might have to be a small series, because I have too much for one piece!

The little daisy collage I started work on has been coming along slowly.  this is where it is at.
It is coming along, but slowly.
I have also started adding to another of my collage a day foundations.
This one was very simple and the strip of felt was just crying out for a vine.  I have free motioned a bark design onto the silver fabric to the left.  The green leaves on the fight, are pieces of plastic cut into leaf shapes, painted with green nail polish and stitched on with fly stitches to reference the leaf veins.  I am at present doing some seed stitch into the black textured area in the centre with a green thread that matches the leaves.

The next thing to show you is just a practice piece.
 This is a sea theme fabric with pictures in squares which is layered up and has had the squares quilted, ditch, style.  The reason I am showing it is because this is what I get up to when I can't think of what to do.  I just stitch a square and usually, that gets me going.  Picasso once said "Inspiration exists, but it has to find you working" This is my "working" quilt, because even though it might seem like I am always on the ball, I have times when my muse is absent.  This mindless stitching sometimes gets me moving.
Next, is another thing I do when I am stuck.  you are probably getting the idea, I have been a bit stuck this week! lol
I have a pile of monoprints, like this one, on chiffon, which I just play with the stitching on.  I usually just use a layer of felt underneath.
You can see in this detail, i am just thread sketching over the colours in the background.
And of course, I have added to this pile of monoprints today, with a handful of prints on voile (Like chiffon, but a bit stiffer)
These will be cut up and ripped to use in collages. You can perhaps see a tiny bit of checked fabric in the background at top left.  This is a large panel which I have layered up for quilting, which will be a baby quilt for my niece.  Shock, Horror.  Me.  Actually making a quilt! i will show you it in a few weeks when it is finished.

So that is some of what I have been up to this week

Happy creating!