Showing posts with label fusible. Show all posts

Sunday, January 12, 2014

A little magpie

The little, or not so little magpie, of course is me.  anything shiny or metallic gets my attention.
I have been plating with foils and painted fusible lately.  It is not something new, I have done tutorials on it in the past, but unfortunately a lot of my old, old posts have lost their photos.  Perhaps that should be an aim for this year, to redo those tutorials???
Anyhow, here is my collage a day using these lovely things.
If you are not familiar with these techniques, they both use fusible web, but in different ways.  This sample is on velvet, a la Angie hughes, but these techniques can be used on just about any surface that won't melt with an iron such as paper or wood.
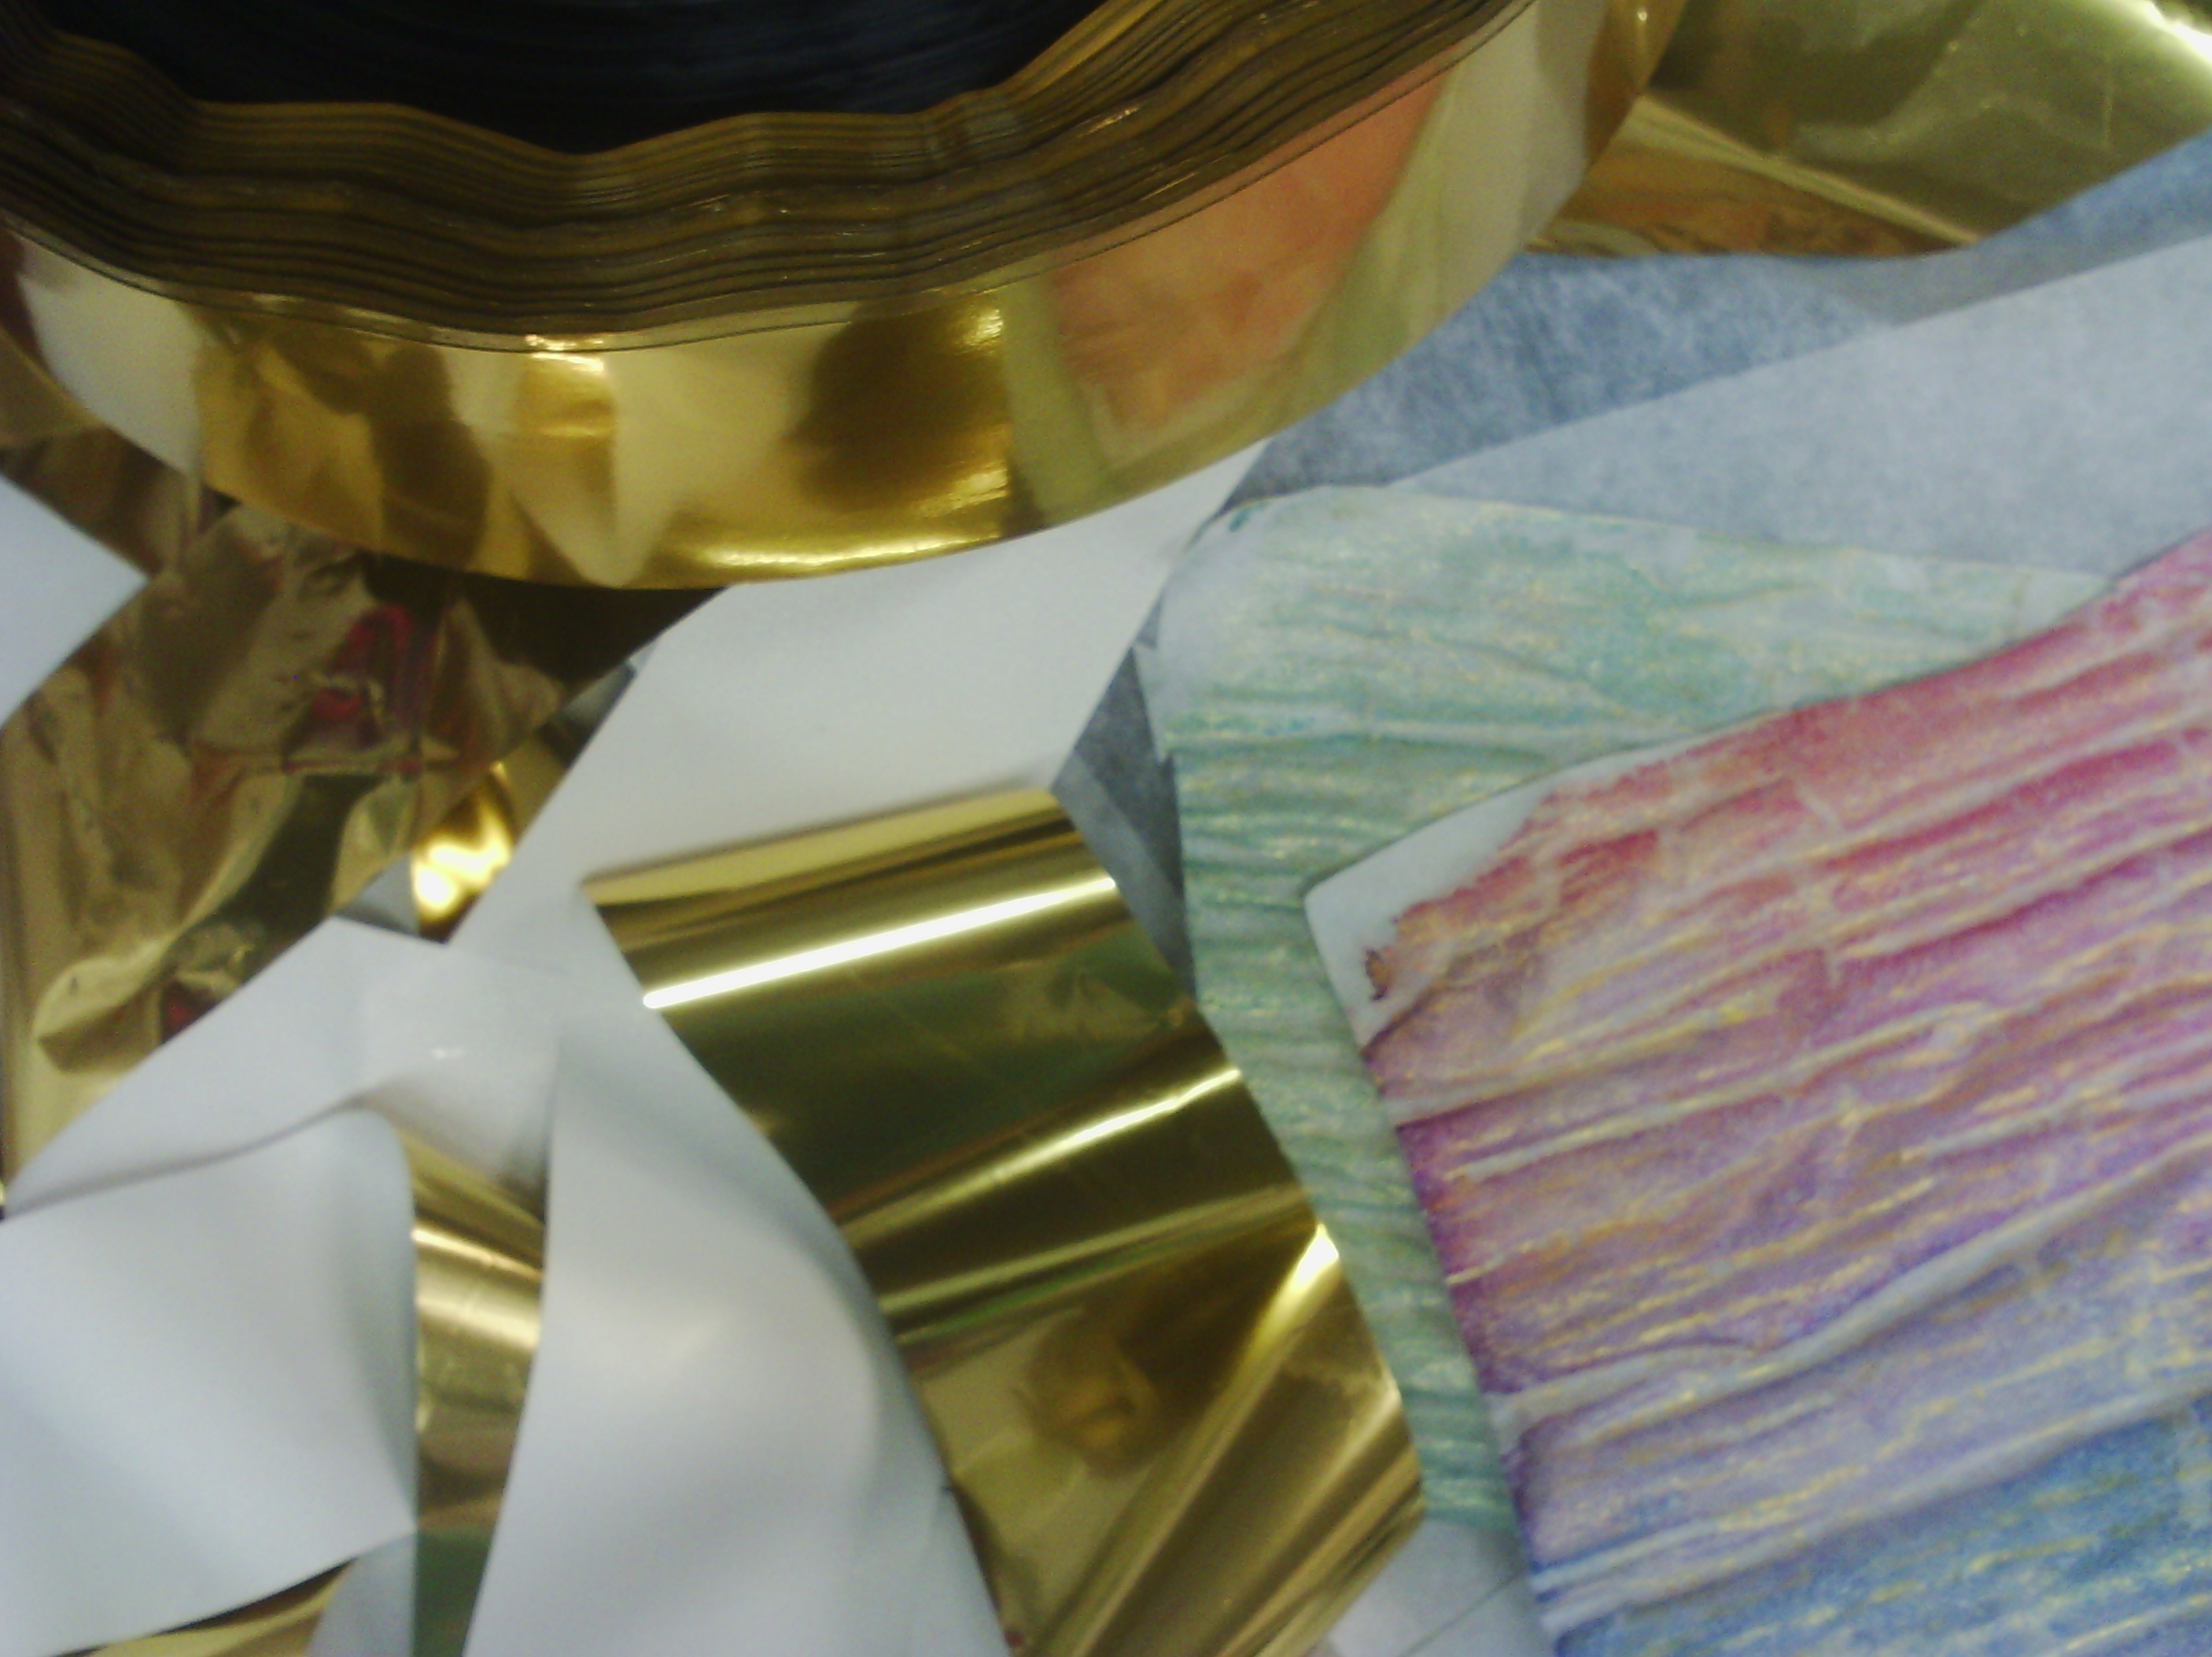
Above are the offending items.  The gold strips with the white back are the foil, which I have a lot of as you can see.  I have other colours as well.  the wrinkly pink and pale green sheets are the painted fusible.
OK, I took some pictures and here is a tutorial

To  use the foil, I cut  leaf shapes out of fusible (this is a web of glue on a sheet of silicon paper which comes in rolls and sheets).
The fusible web is rough on one side and smooth on the other.  The rough side is the glue and the smooth side is the paper.
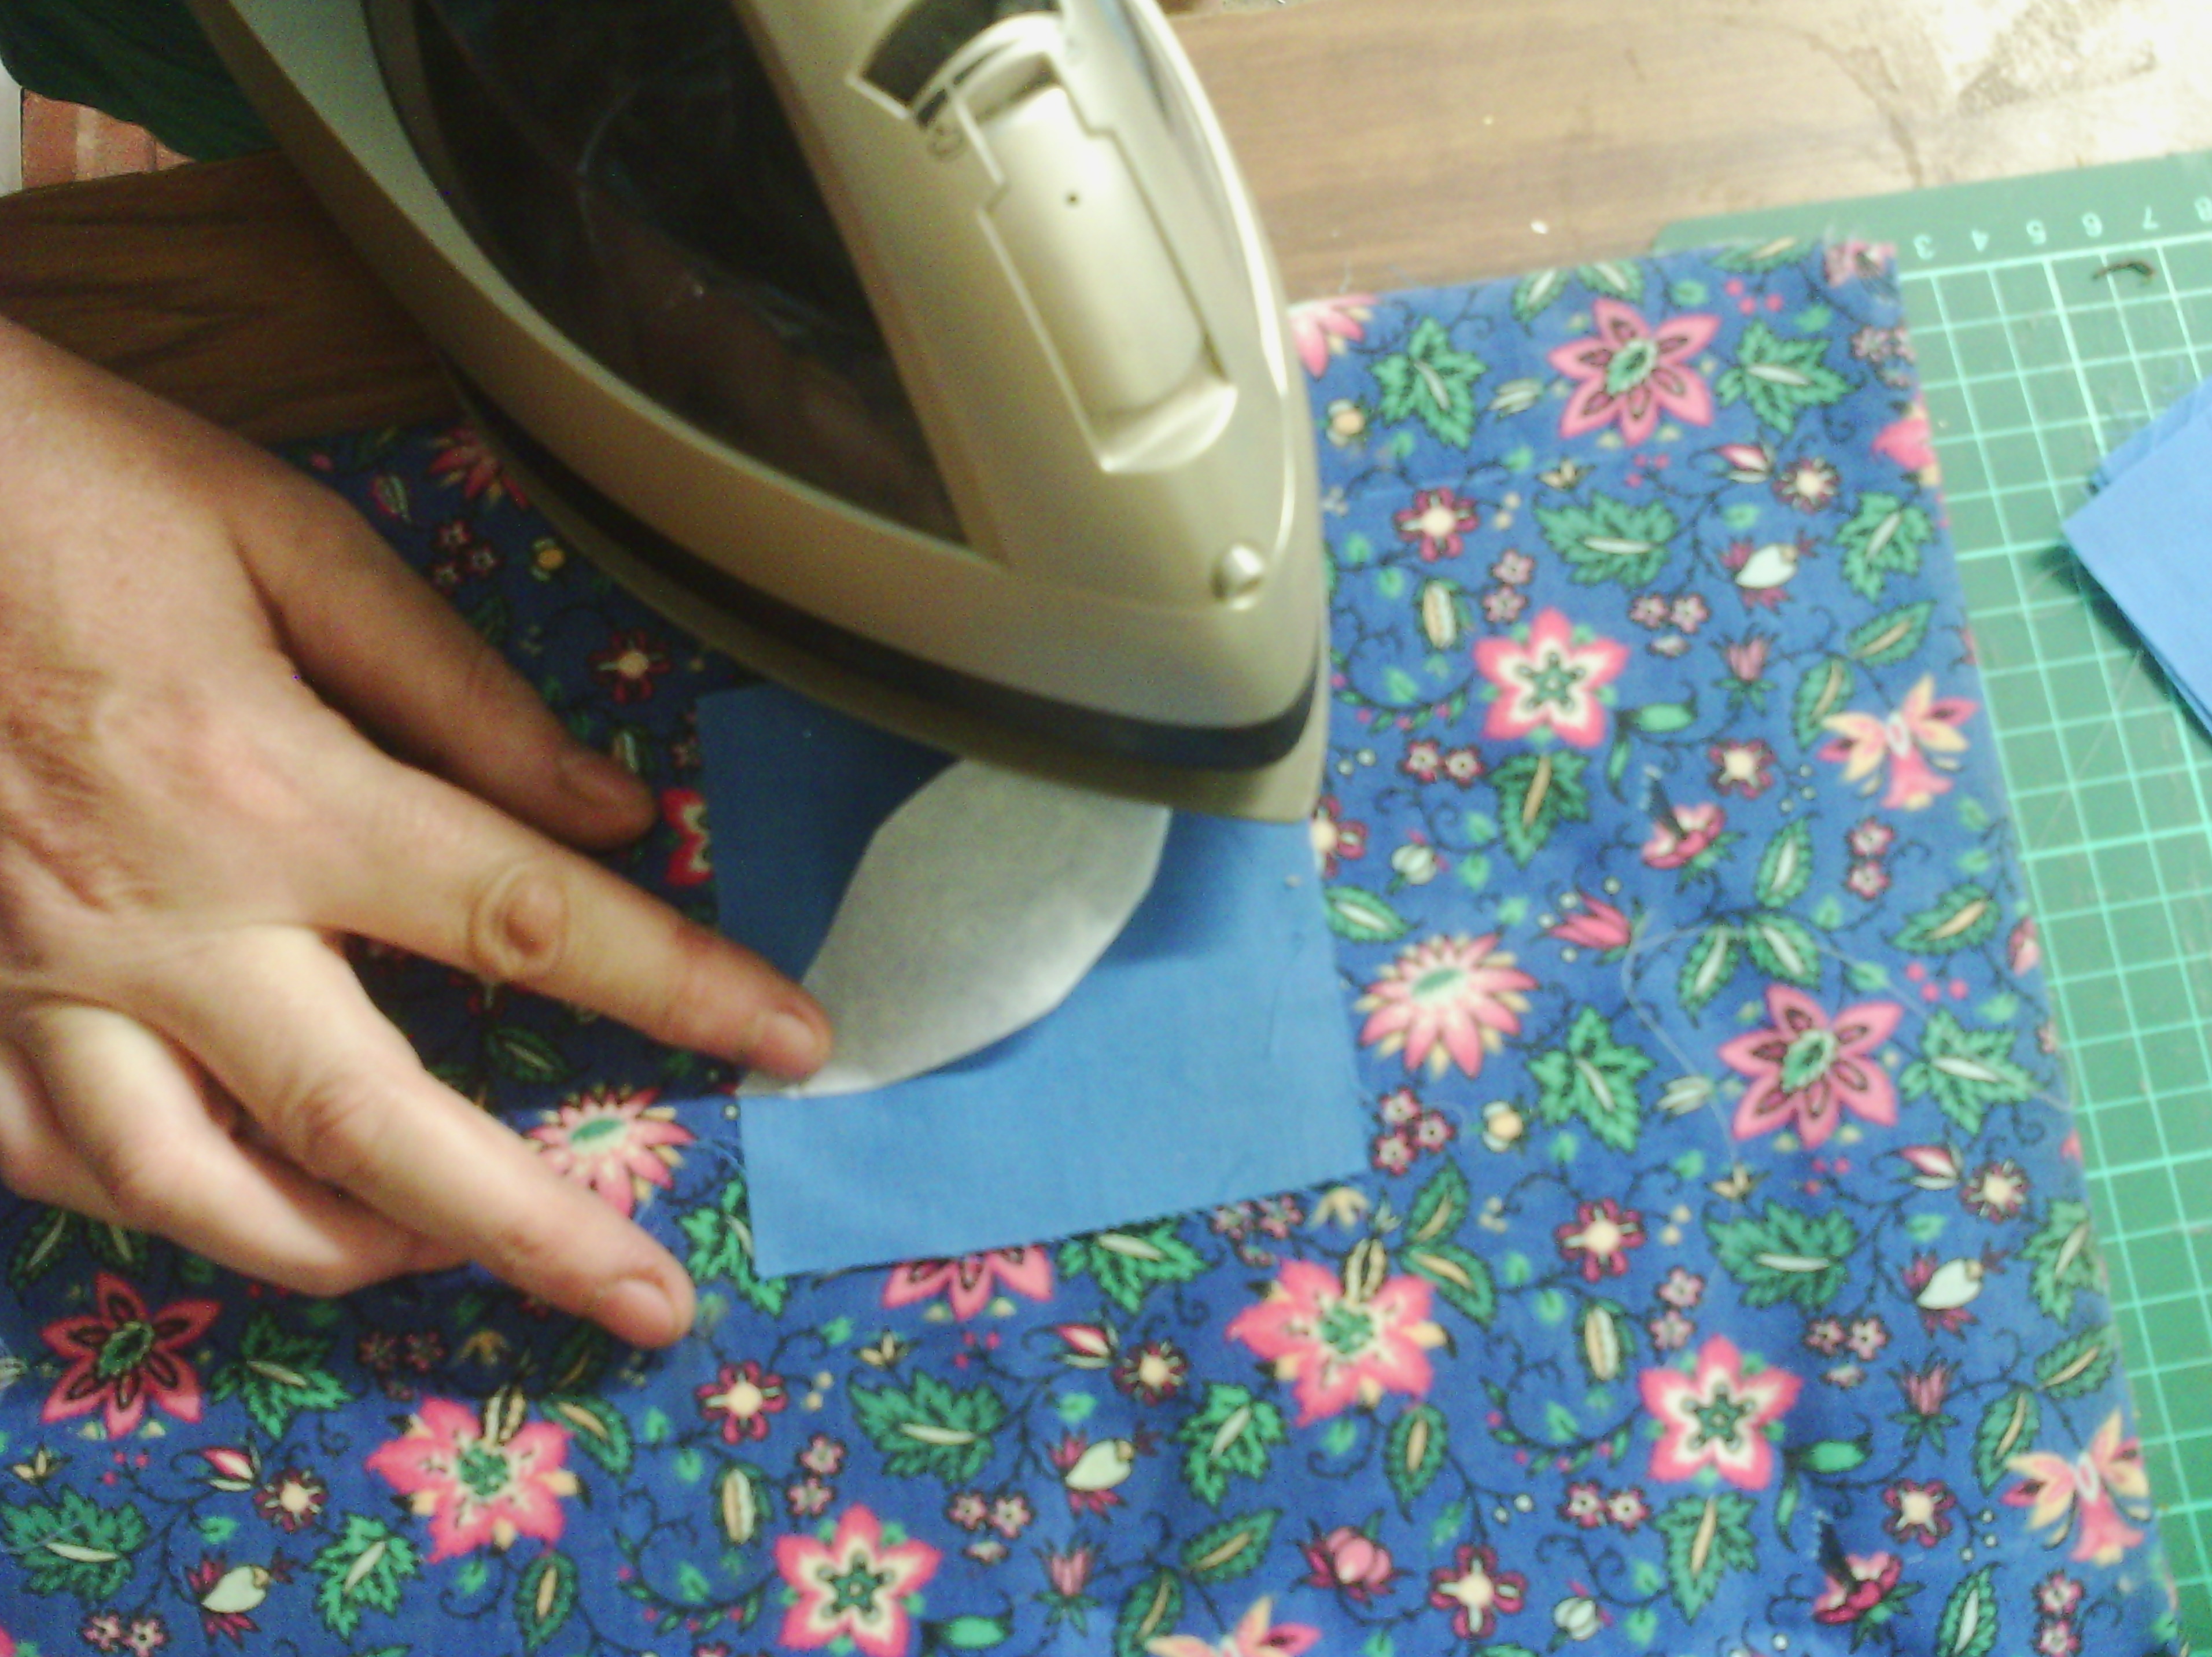
You take the leaf shape and place it fusible (rough) side down and iron it onto the fabric.  Use the instructions that come with the fusible to iron it on, but basically I use a heat that the fabric can cope with.  I also usually use some baking parchment over the top, but I haven't here so it is easy for you to see.
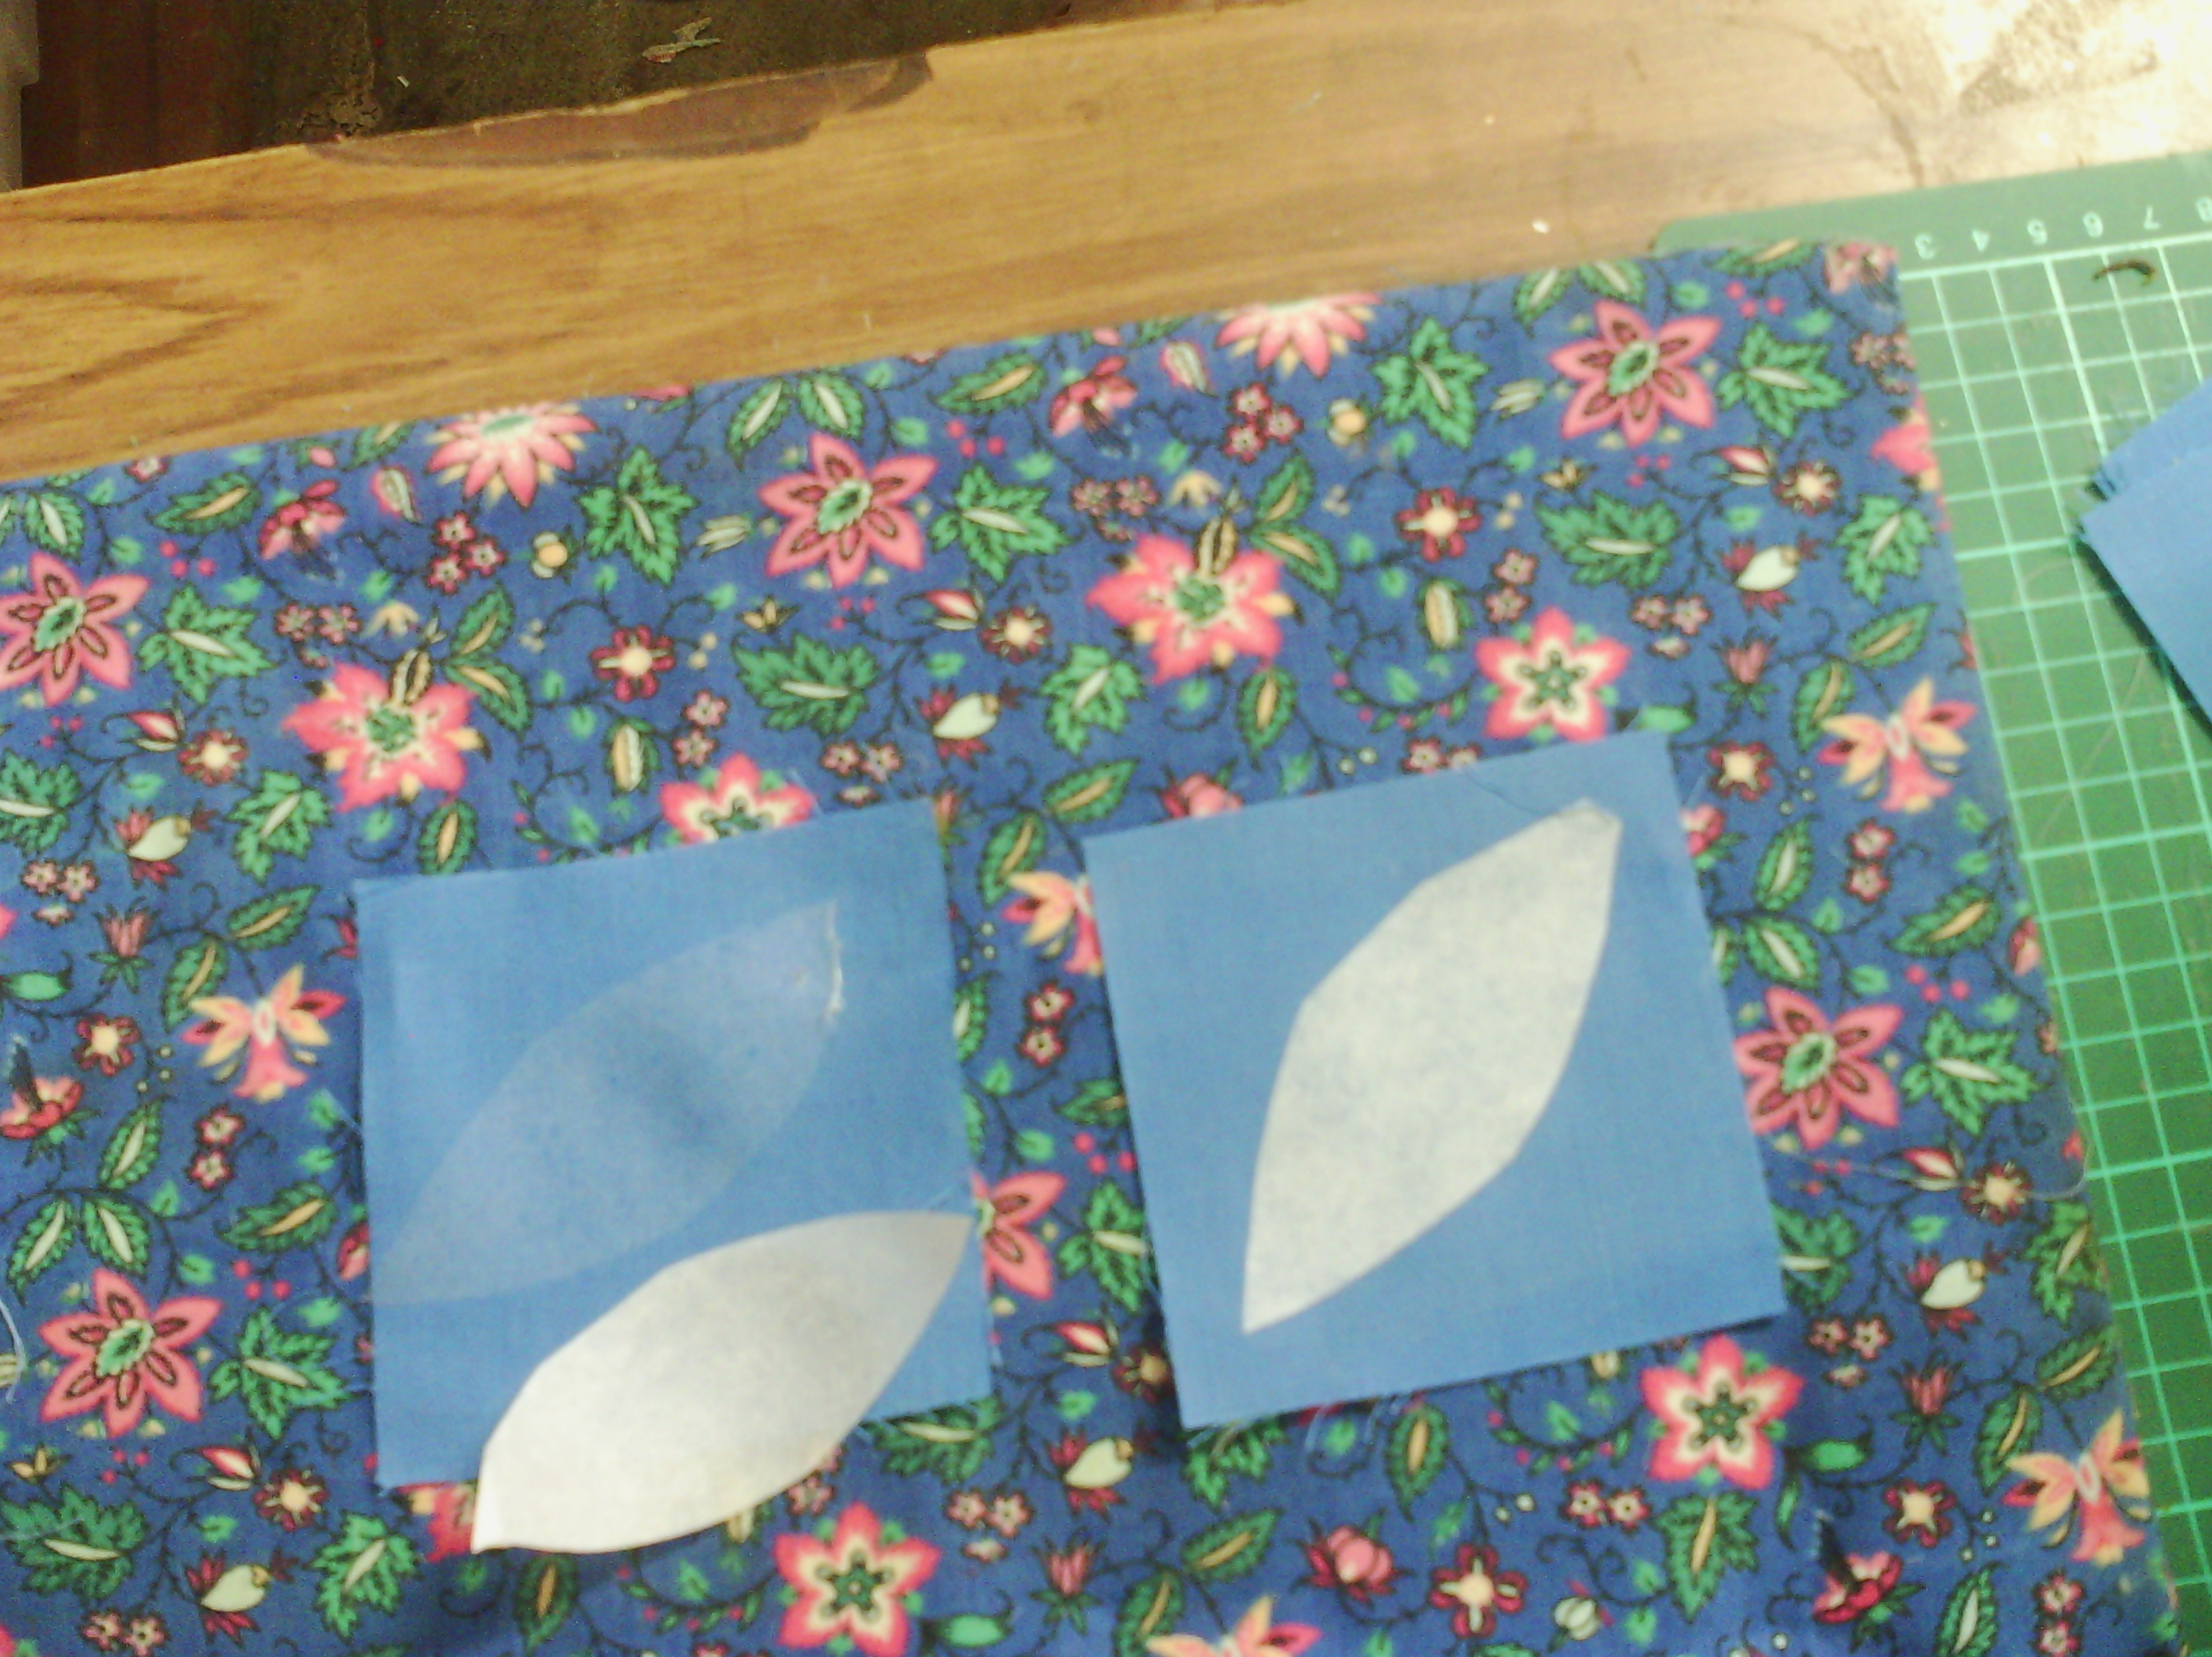
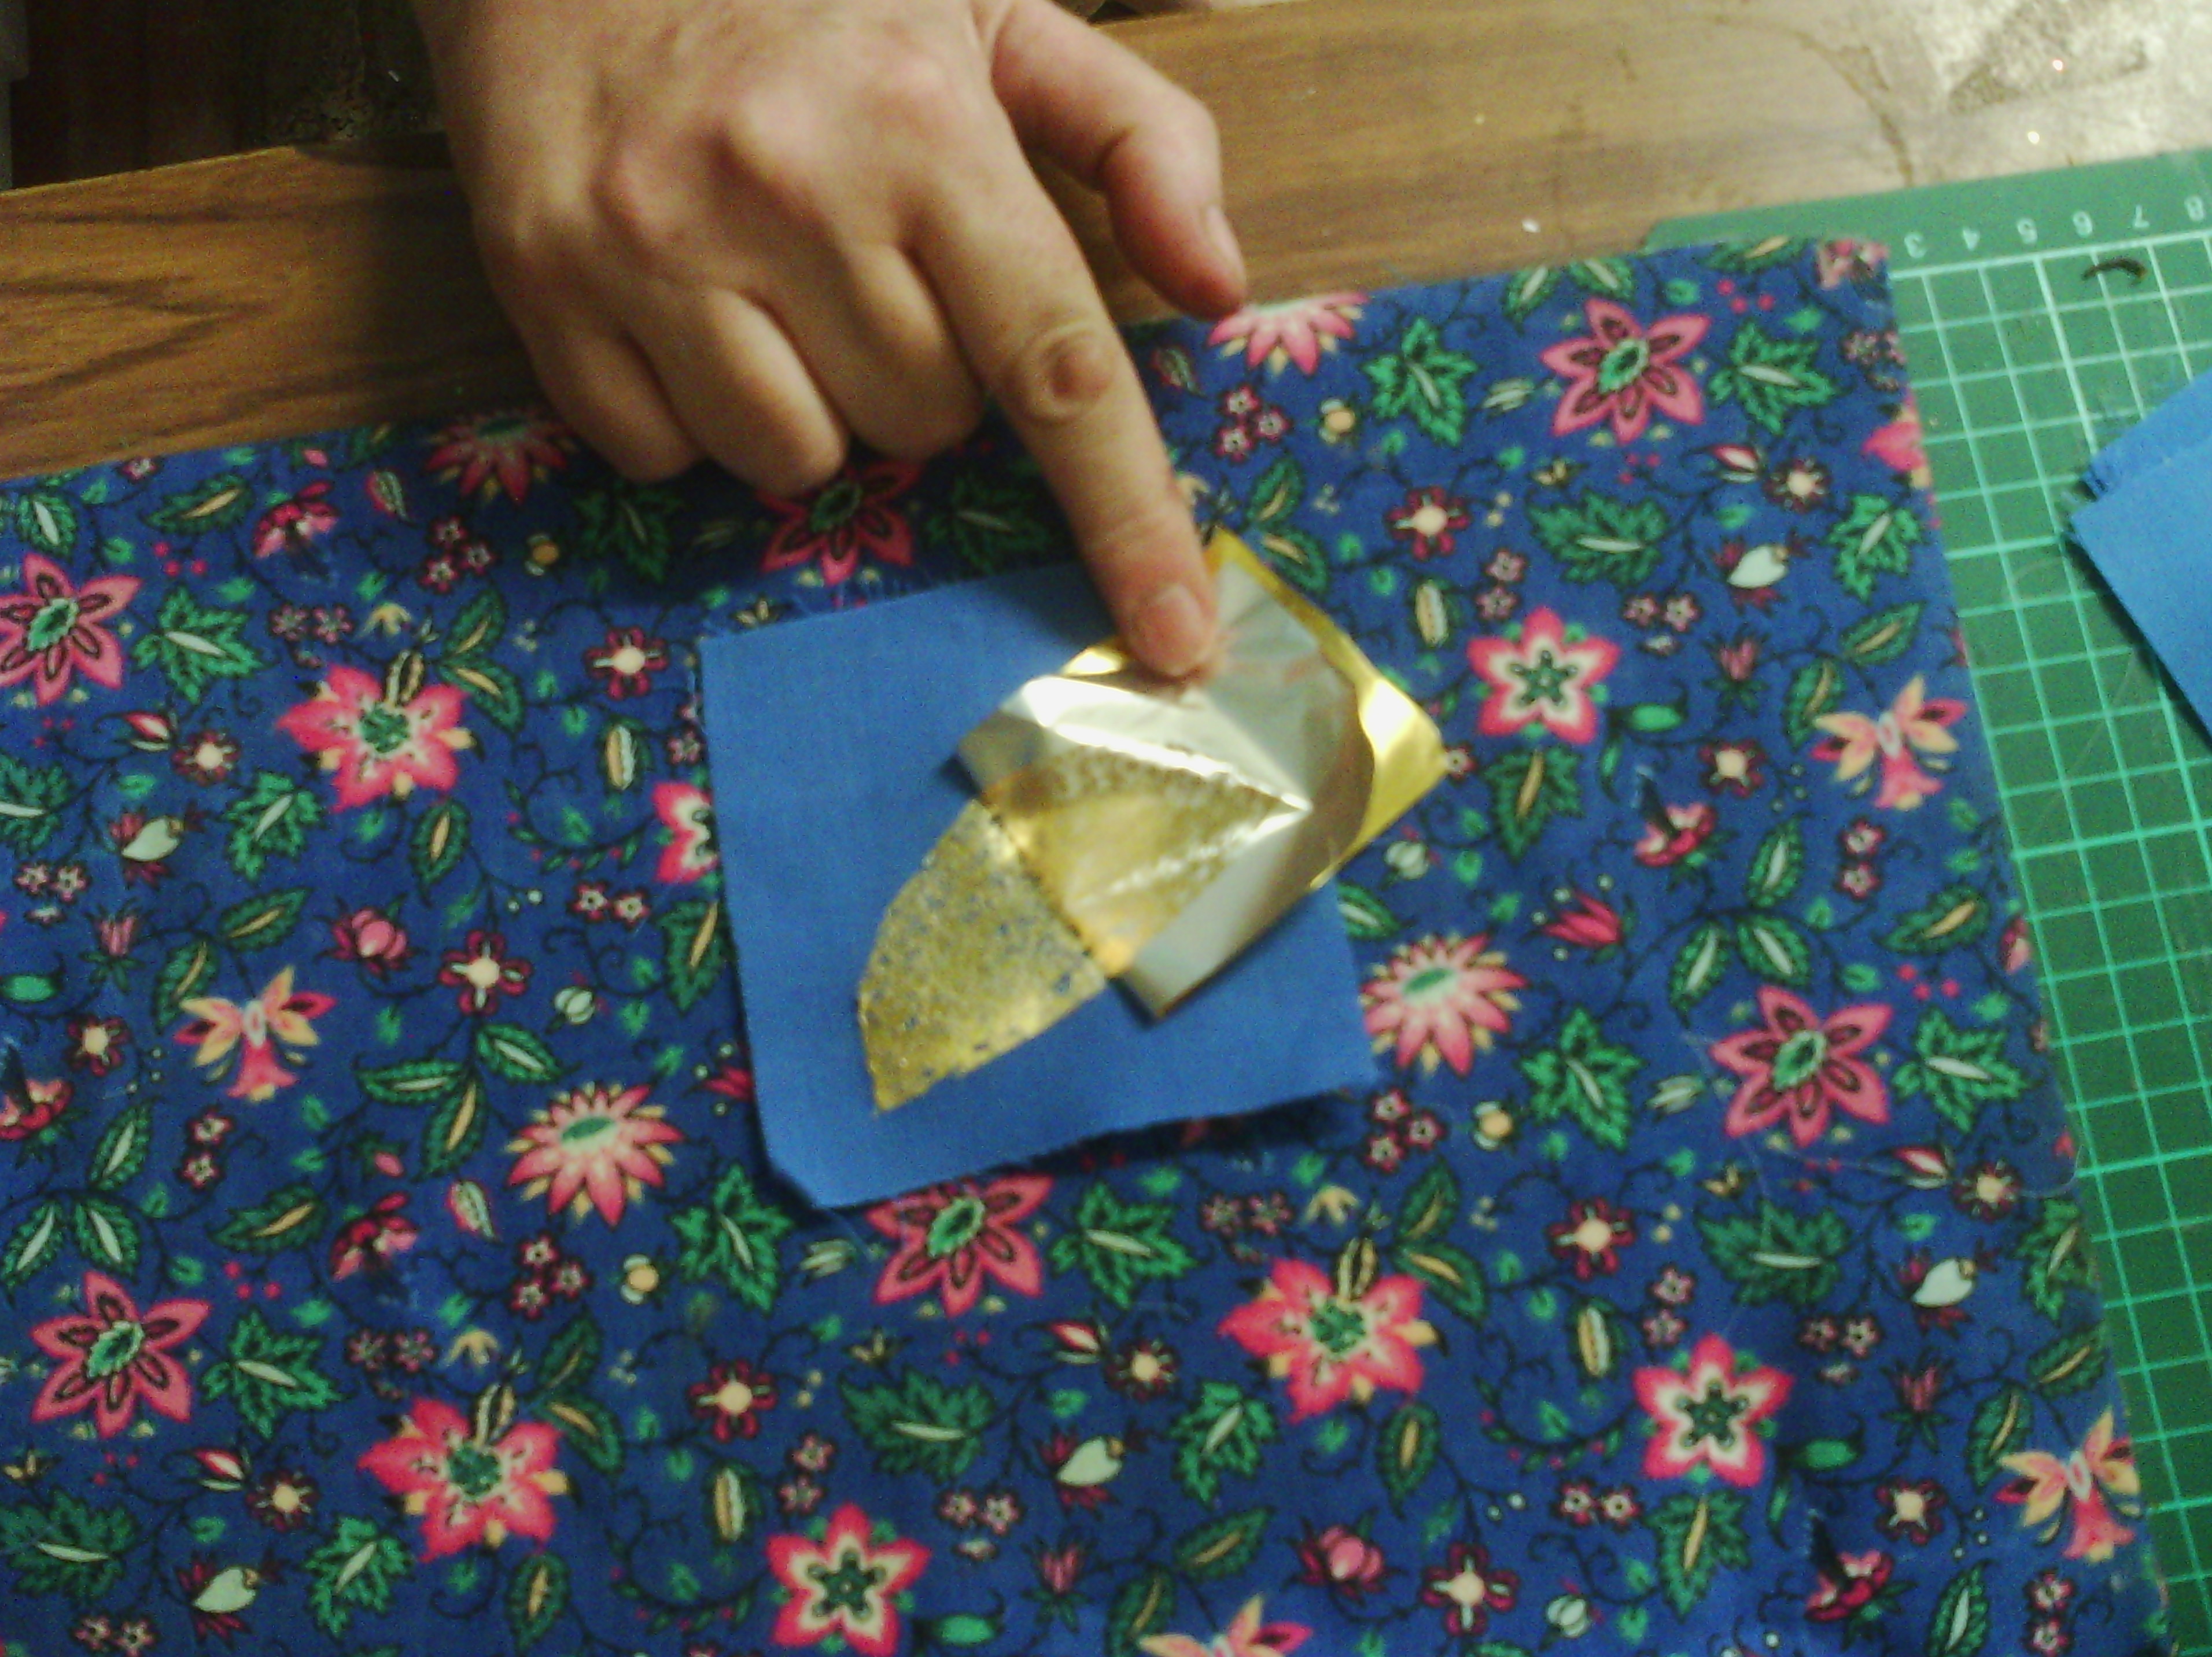
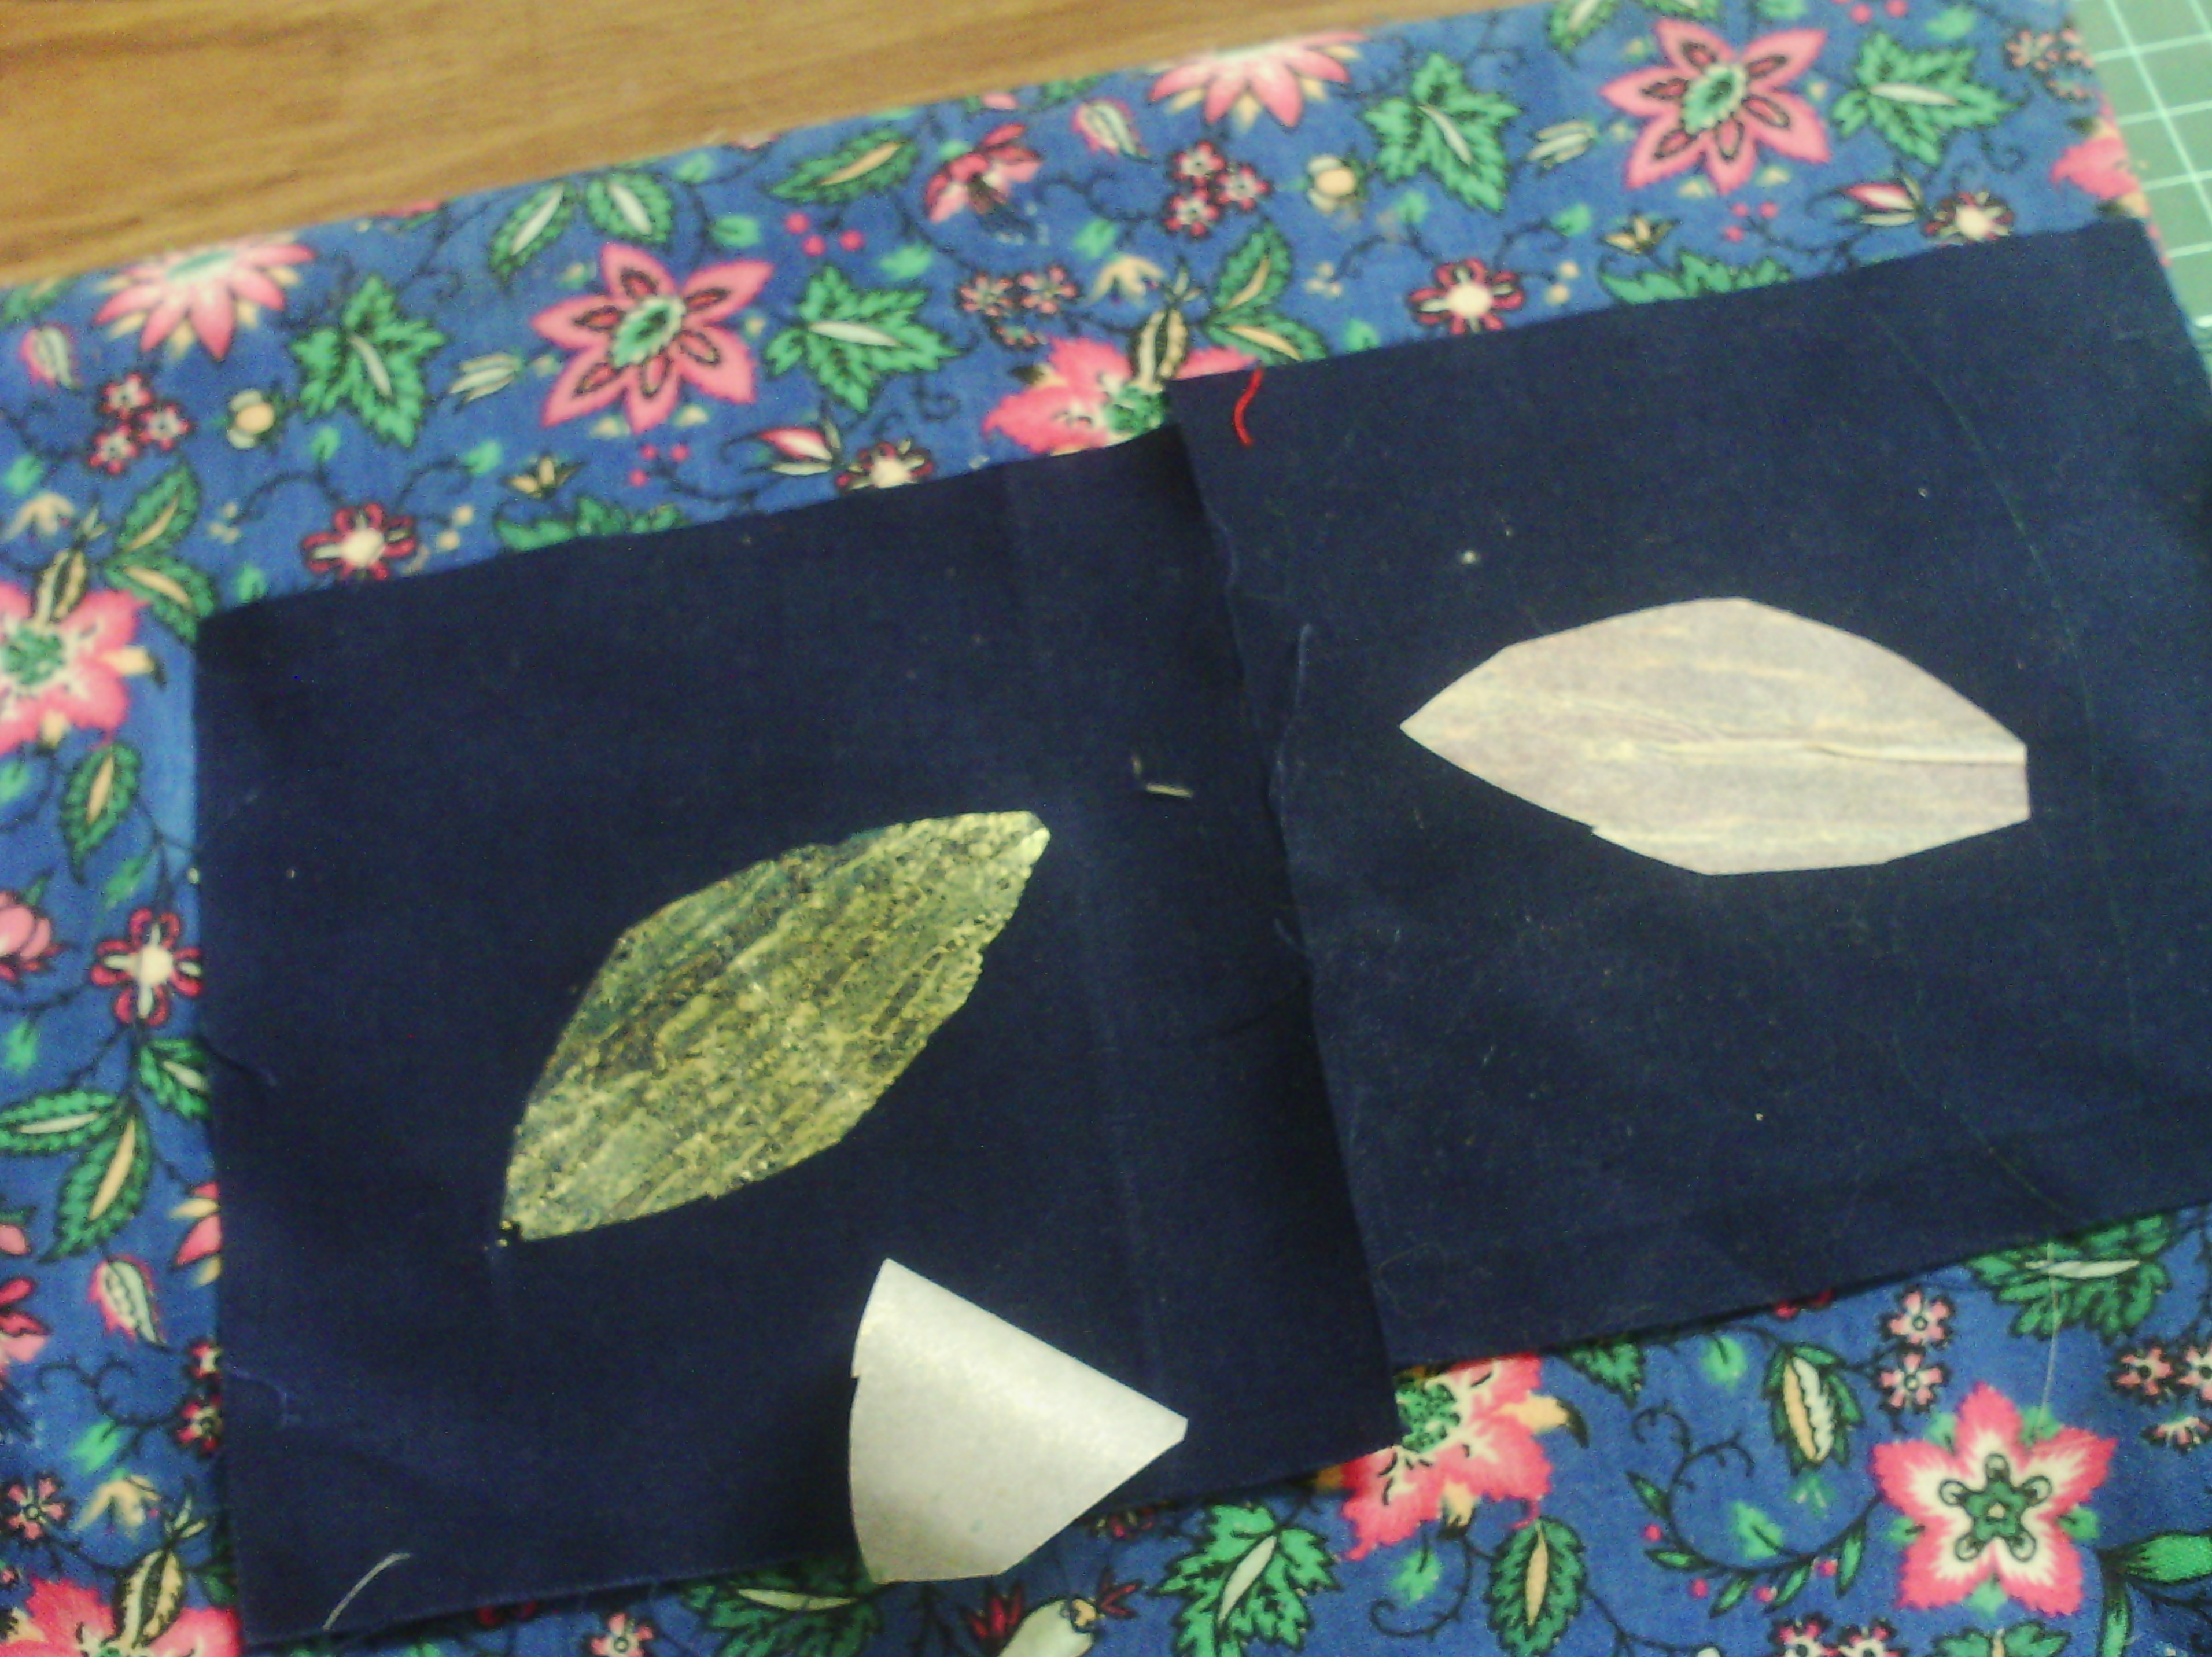
when the ironed on fusible is cool.  You peel off the paper.  Above you can see on the left, the paper has been peeled off leaving a thin layer of glue on the fabric.
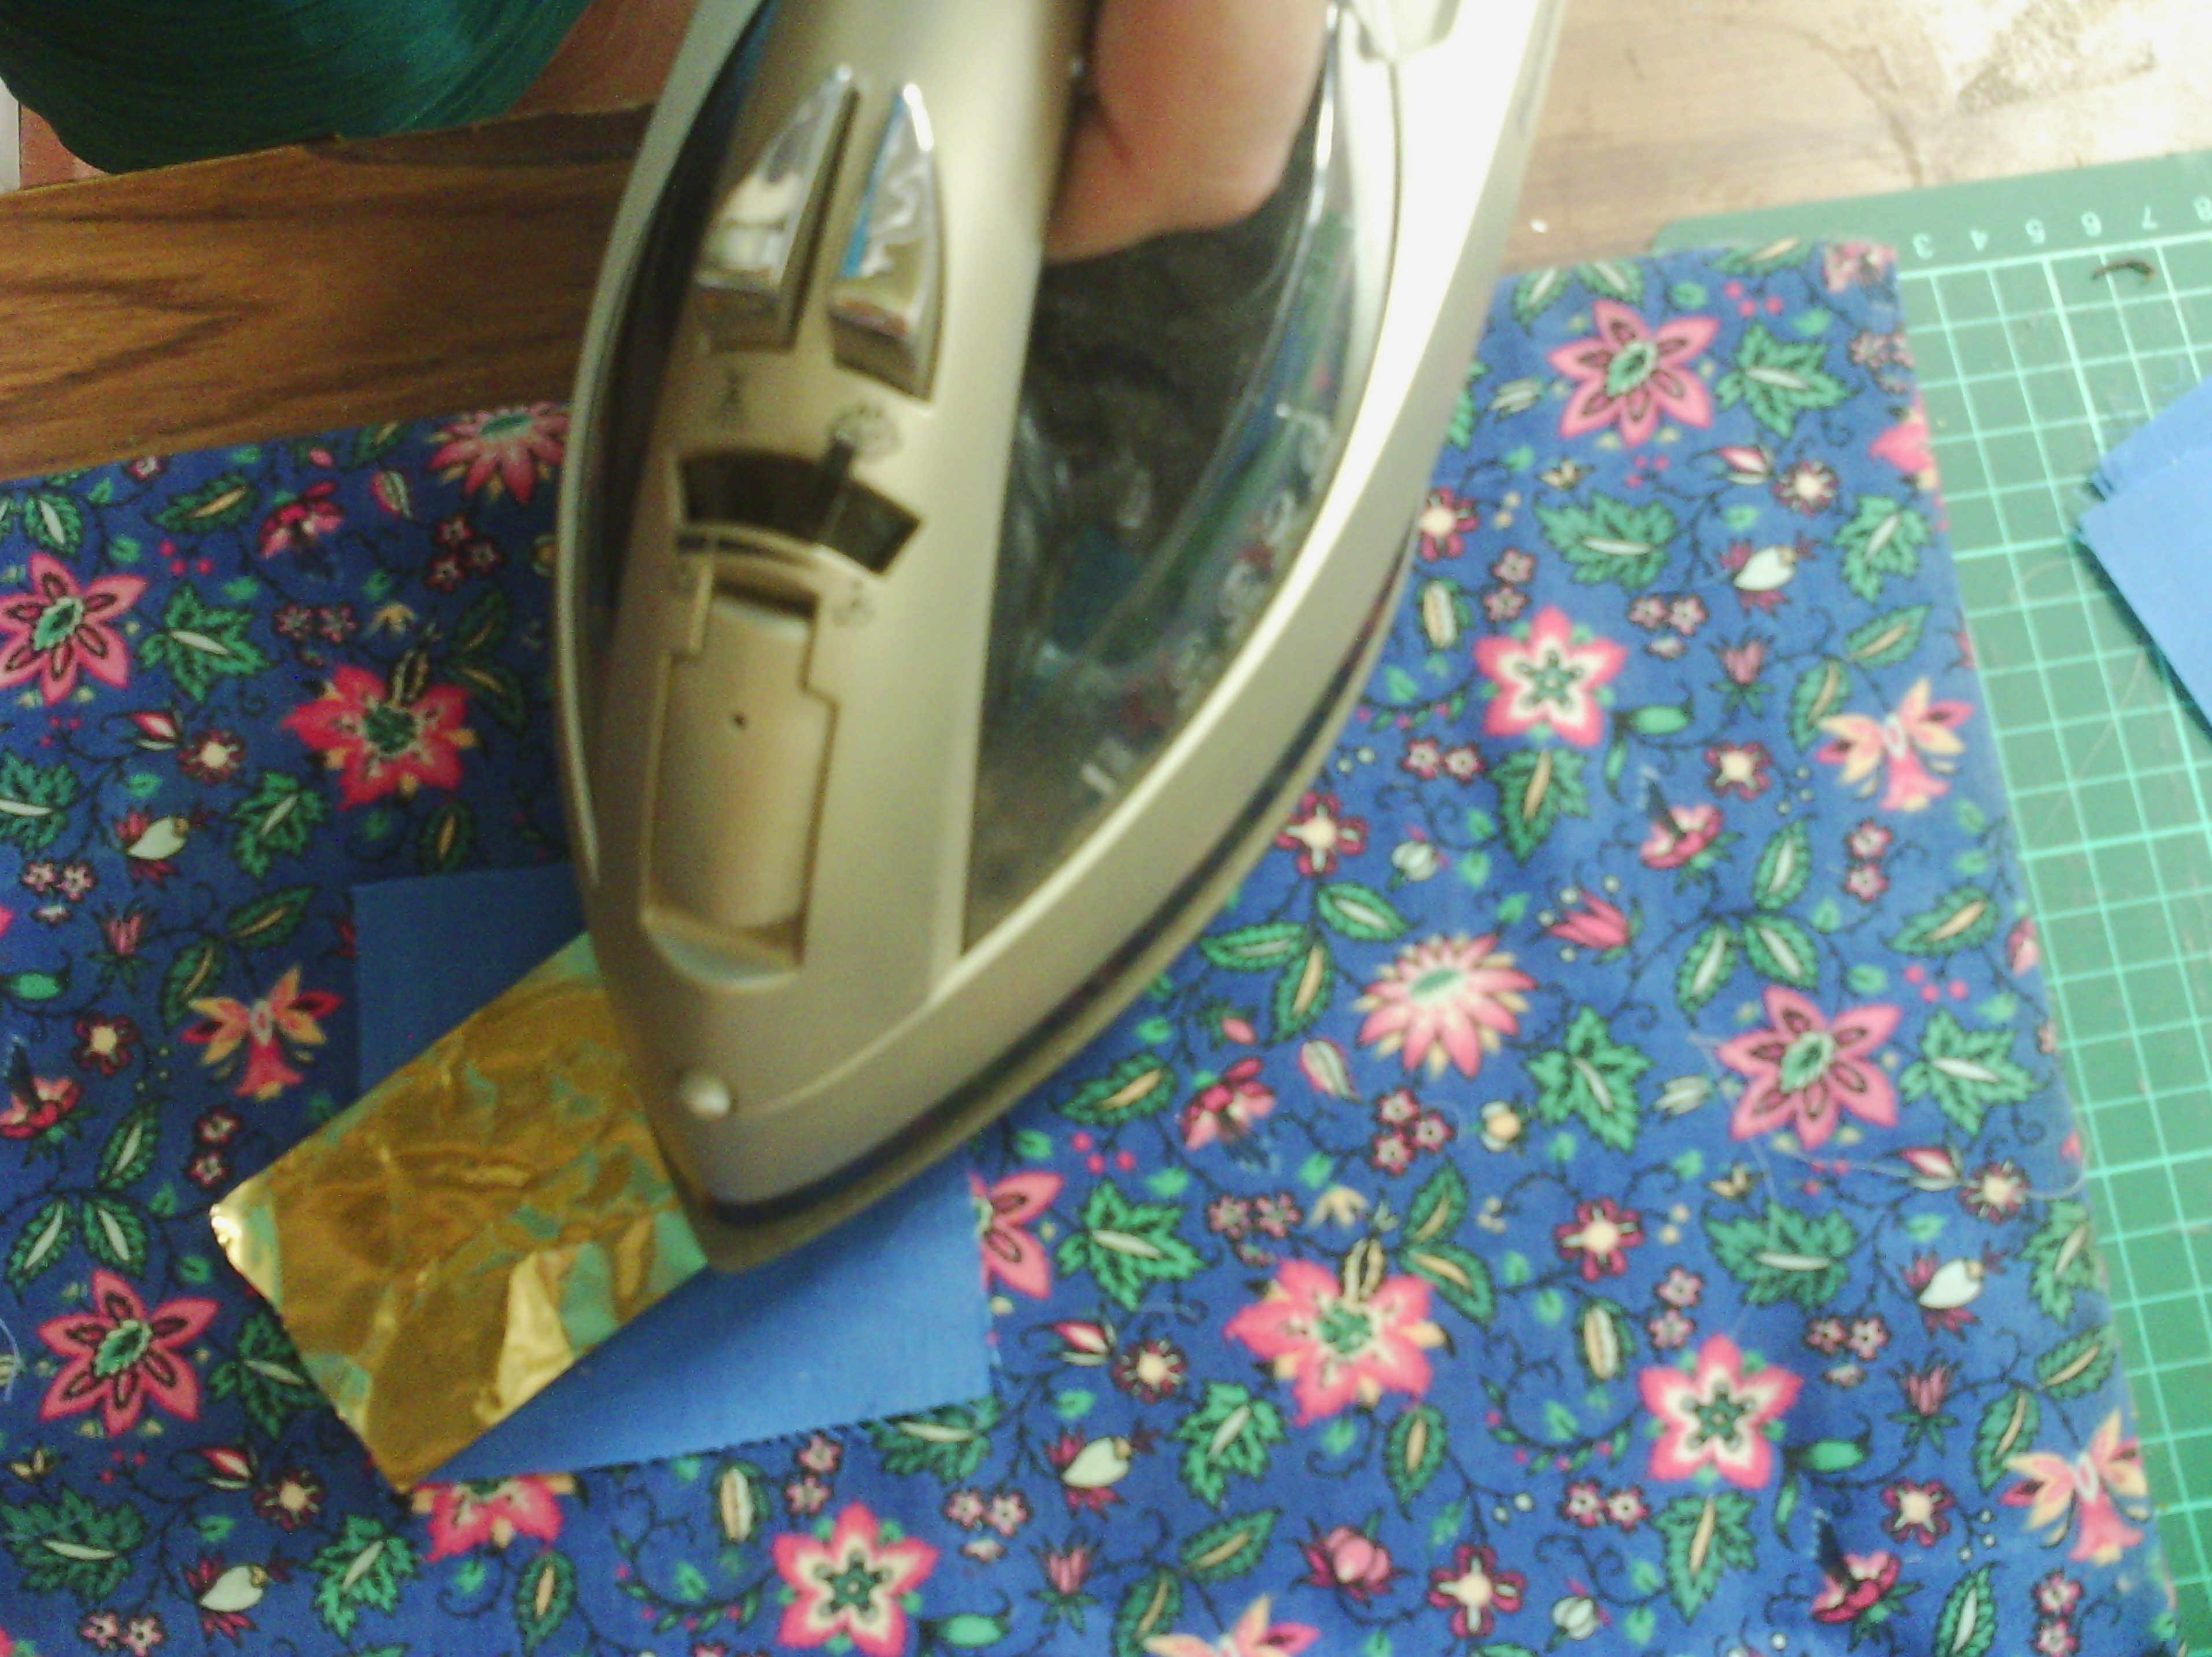
Next you get a piece of foil.  This is transfer foil, not metallic wrapping paper, it is a special type of foil used by printers - and textile artists!.  You can see the foil is laid coloured side up.  This is important, if you use it the wrong way up, it won't work.
Iron the foil onto the glue layer.  Again, it is best to use baking parchment, so your iron does not get messed up.
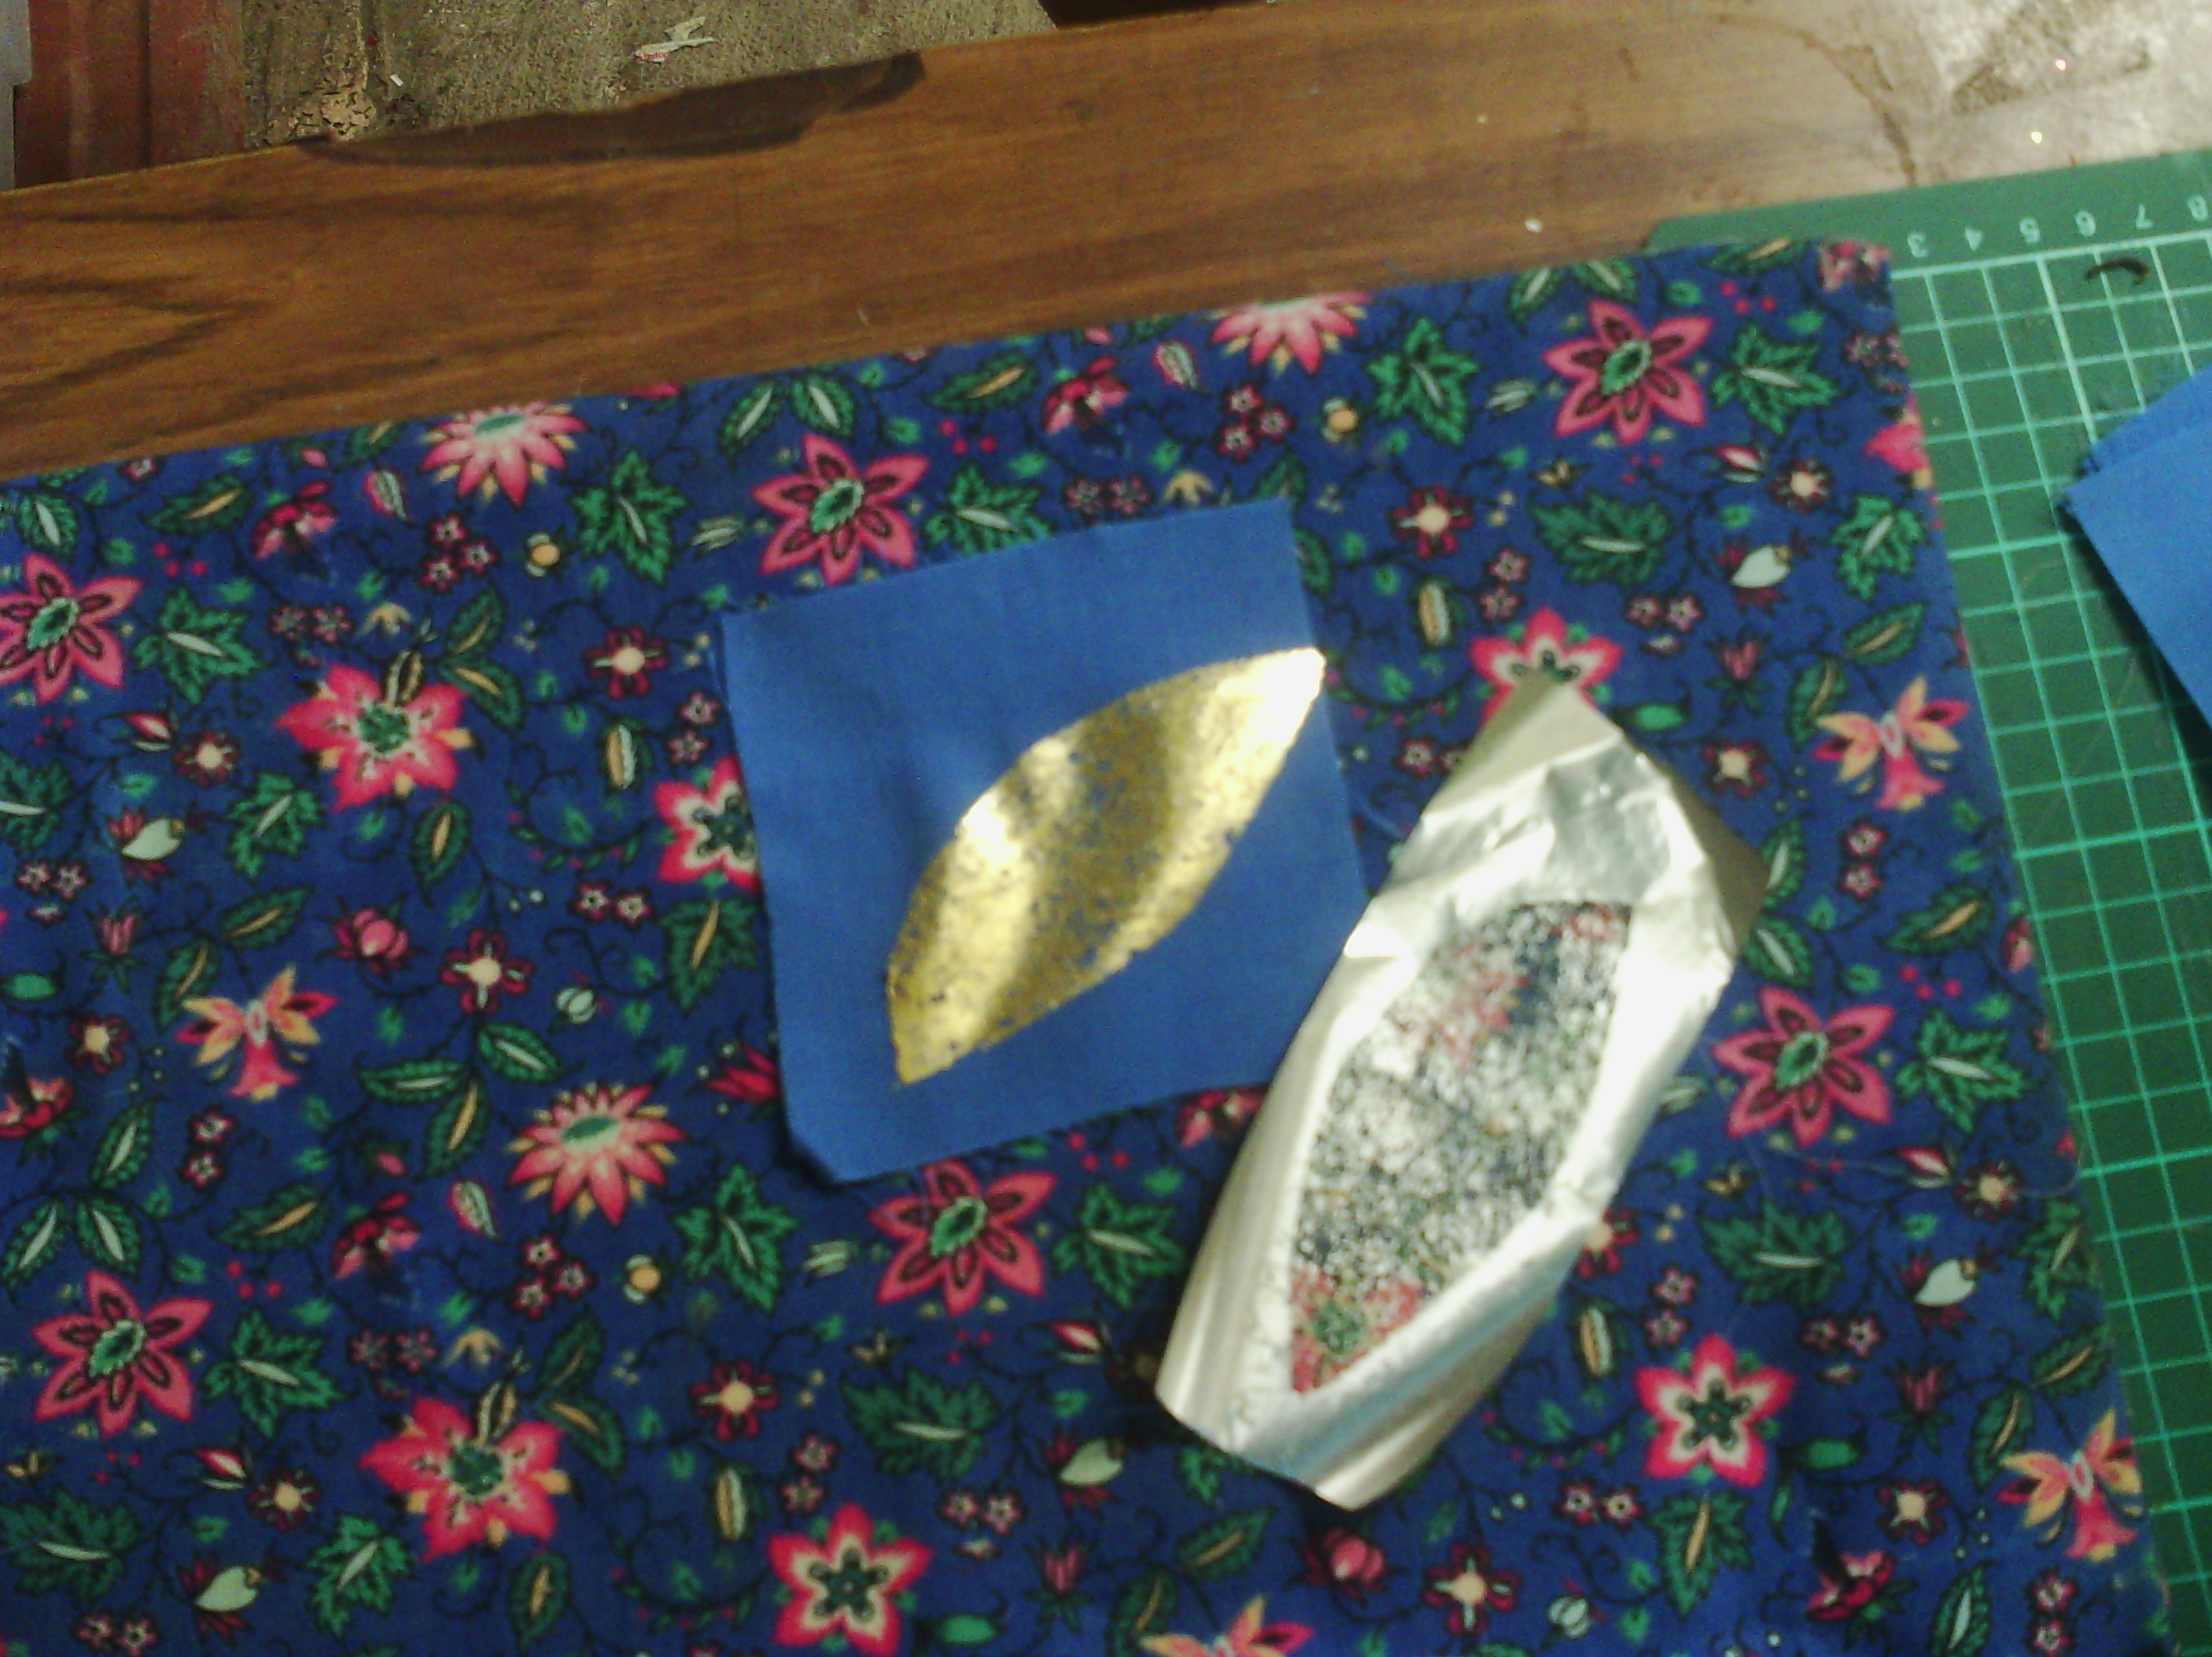
When the fabric is COOL, you can peel off the foil.  You can see on the right, above, that where you ironed onto the glue, the gold has come off the foil.
So that is how you use foil.  You can wash it (gently), but you must remember that every time you iron it from now on, you need to use baking parchment, or you will get a totally messed iron.

Now for painted fusible.
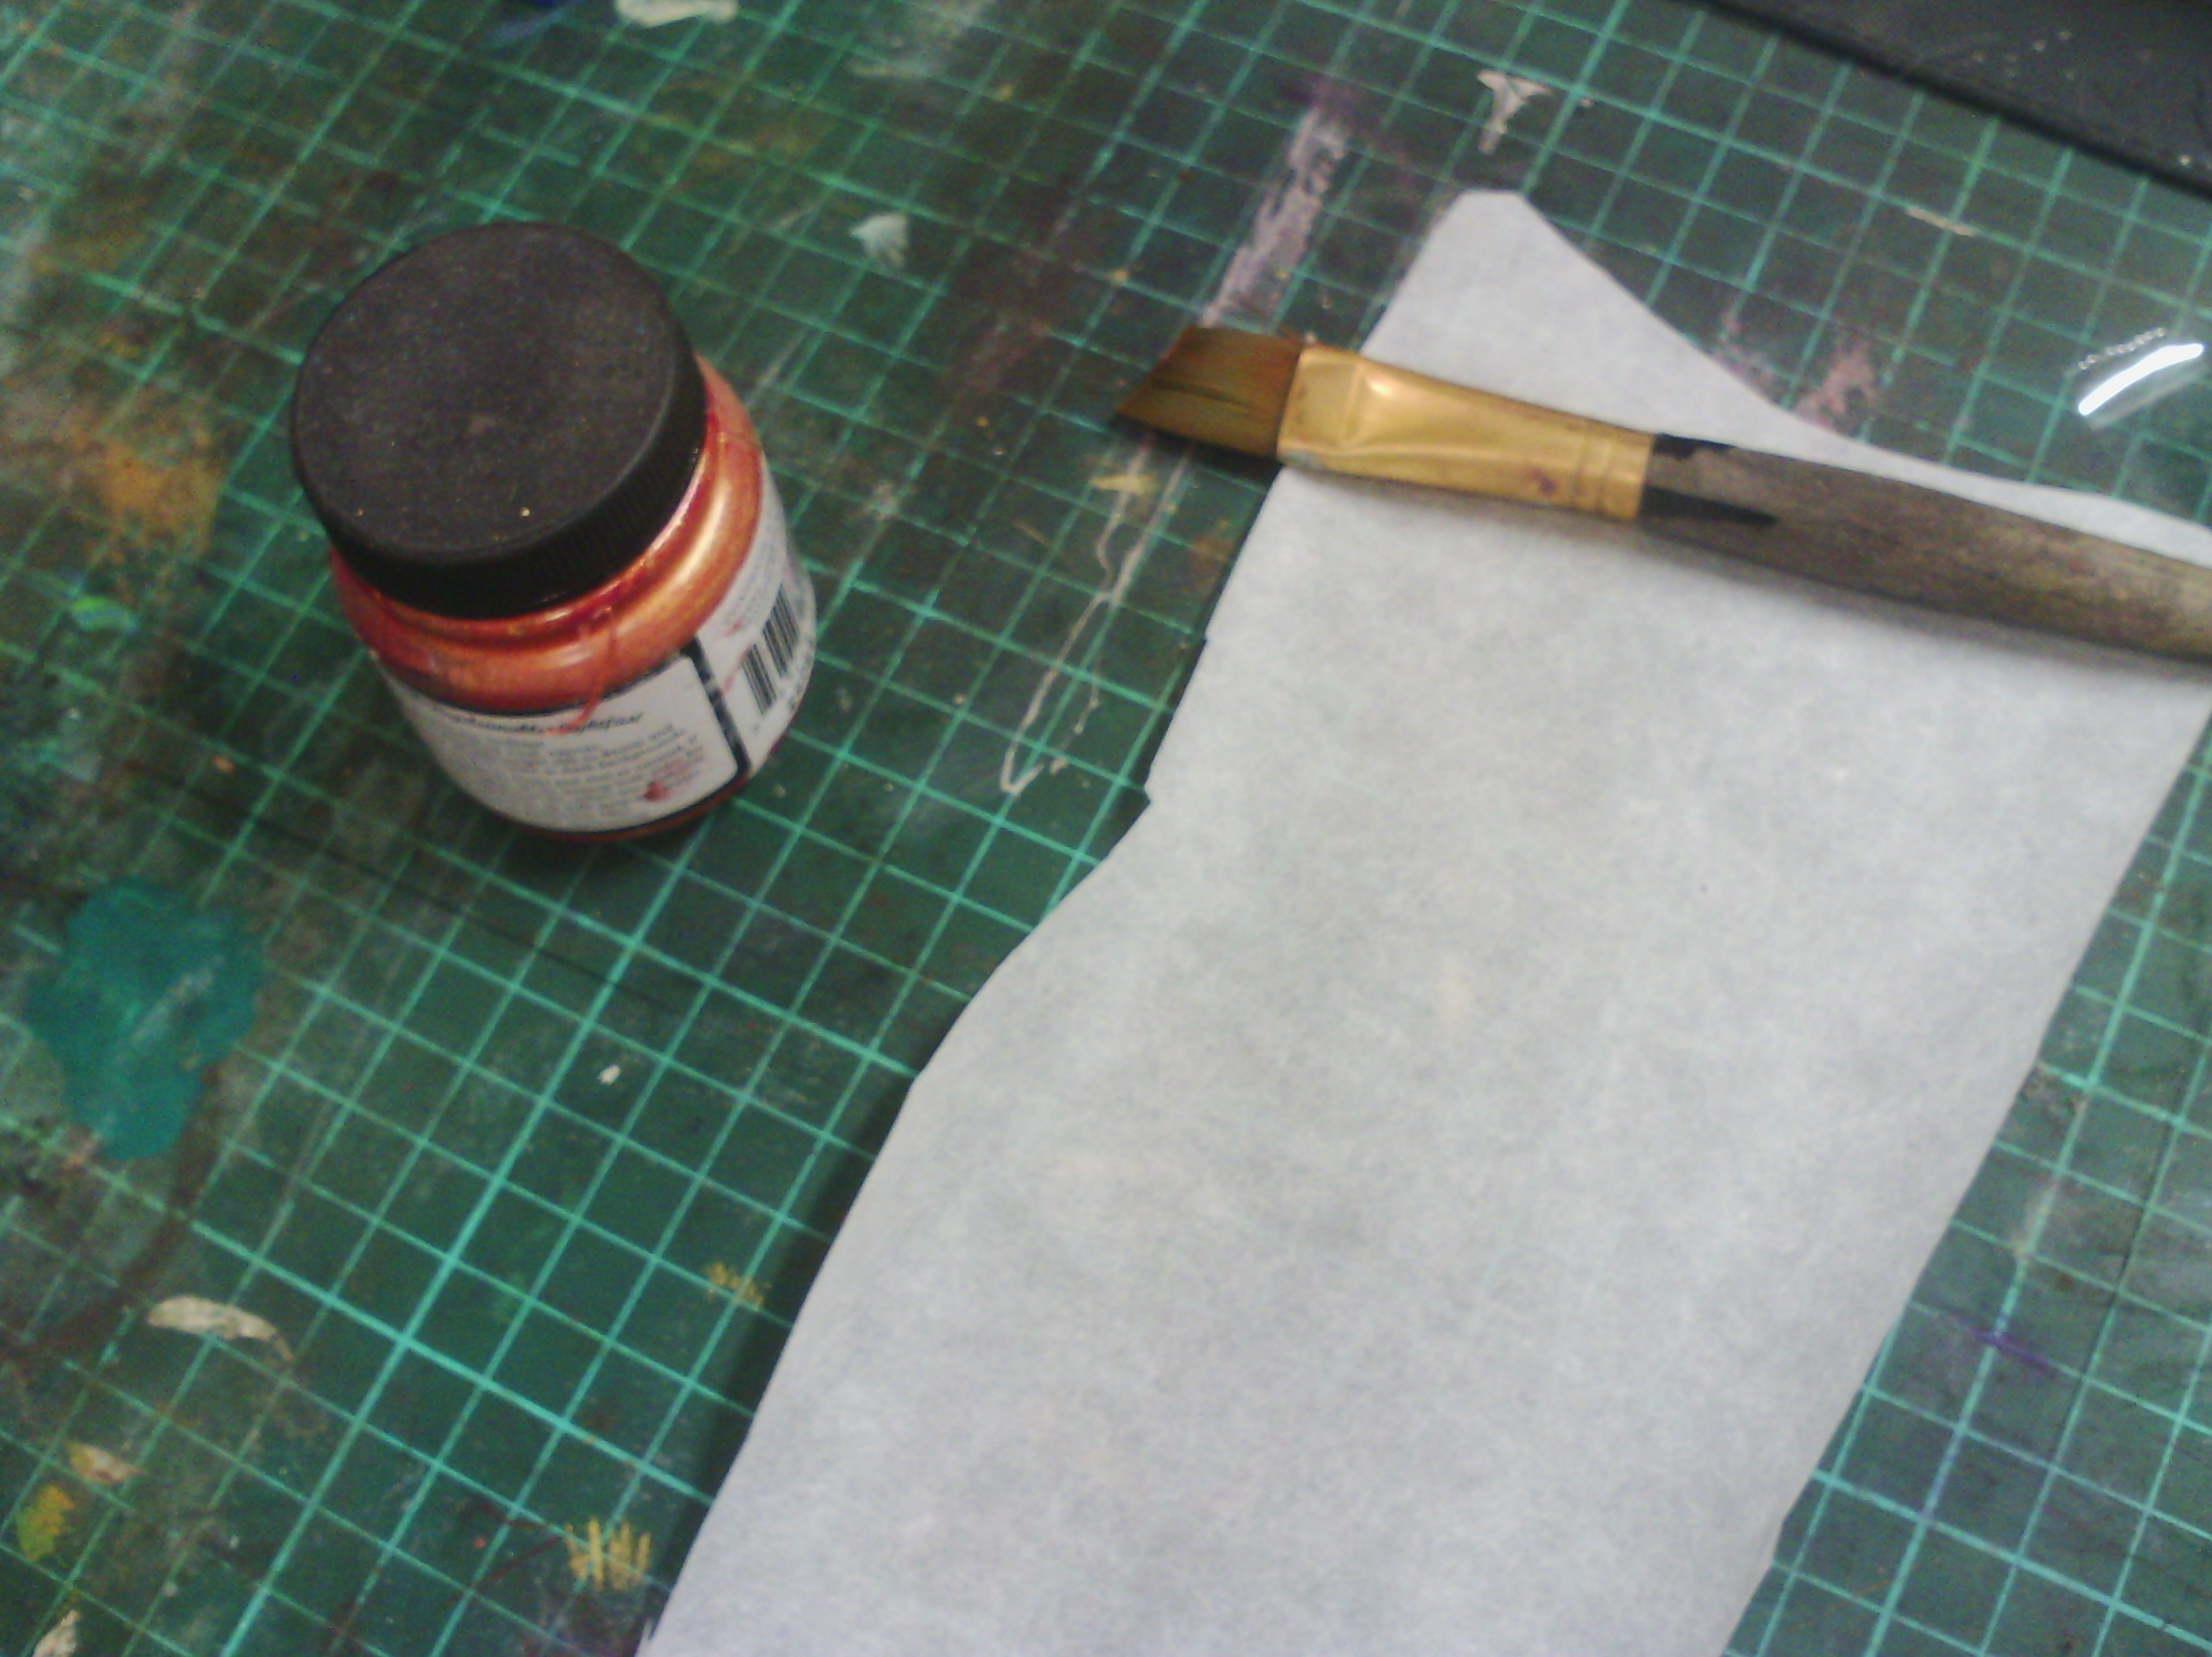
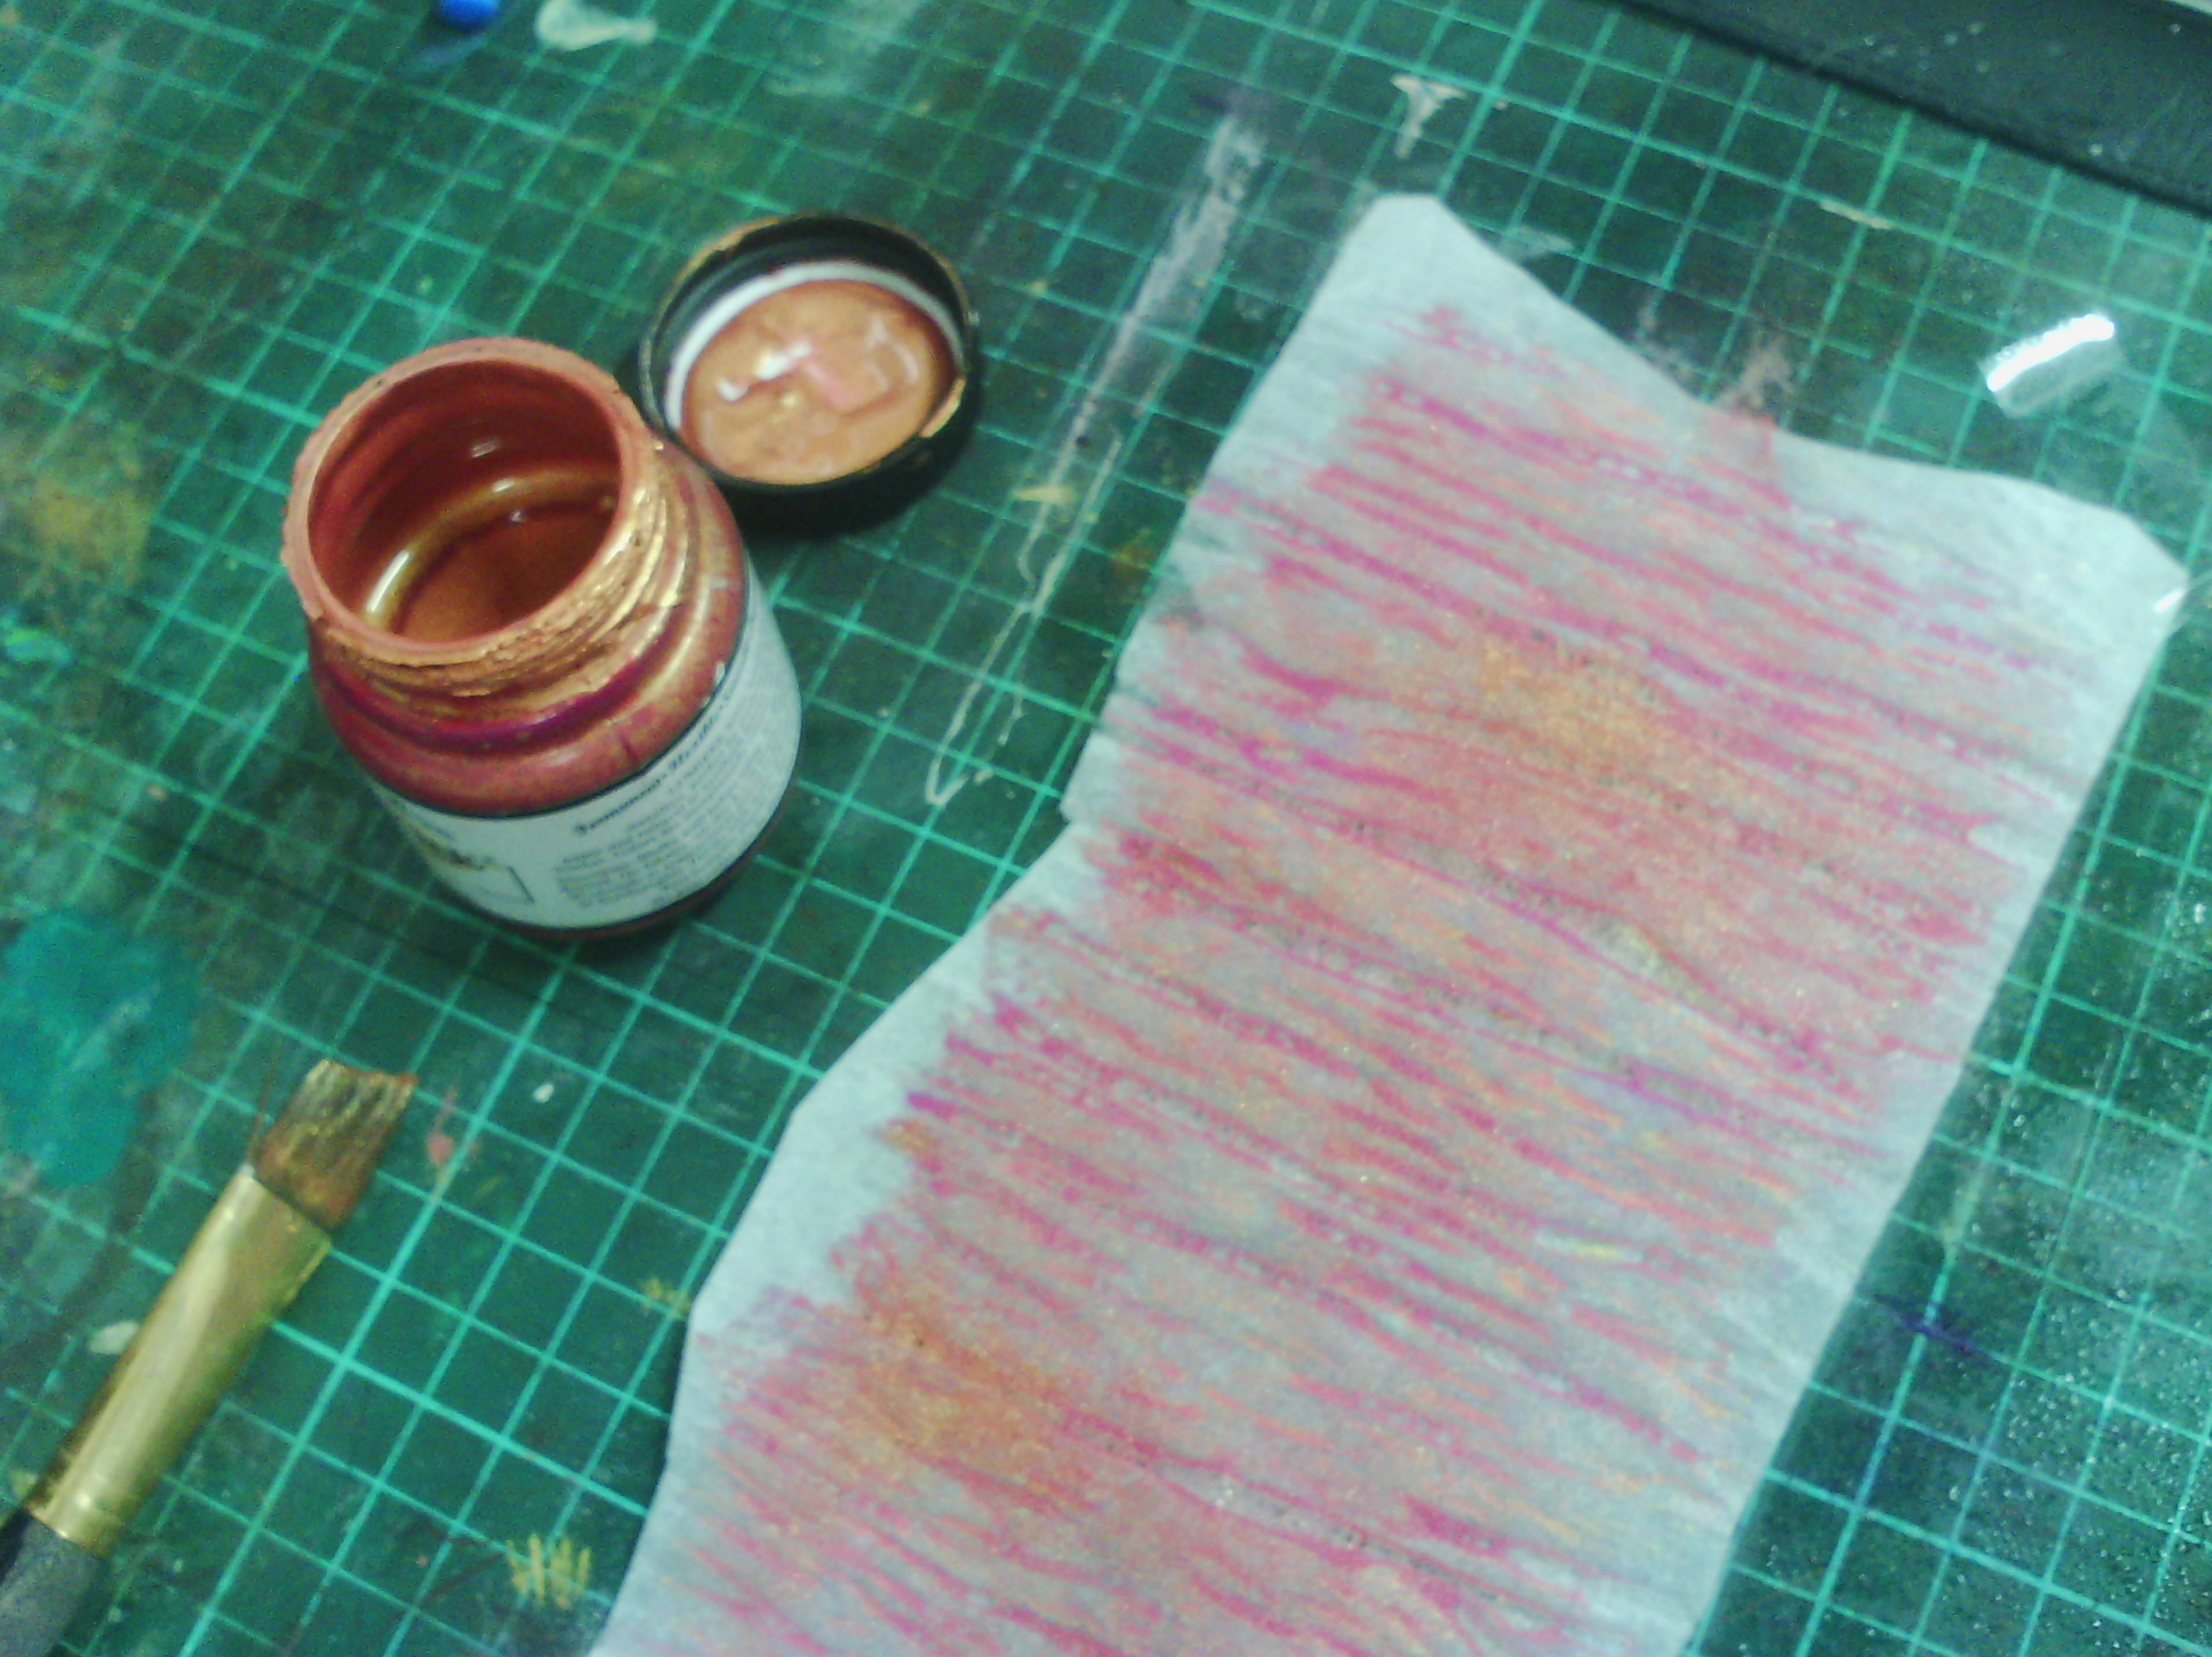
Above, I have taped a piece of fusible glue or rough side up to my painting area ( it tends to roll up).  I have some acrylic paint (I like to use lumiere by jacquard as it is lovely and metallic) and a brush.
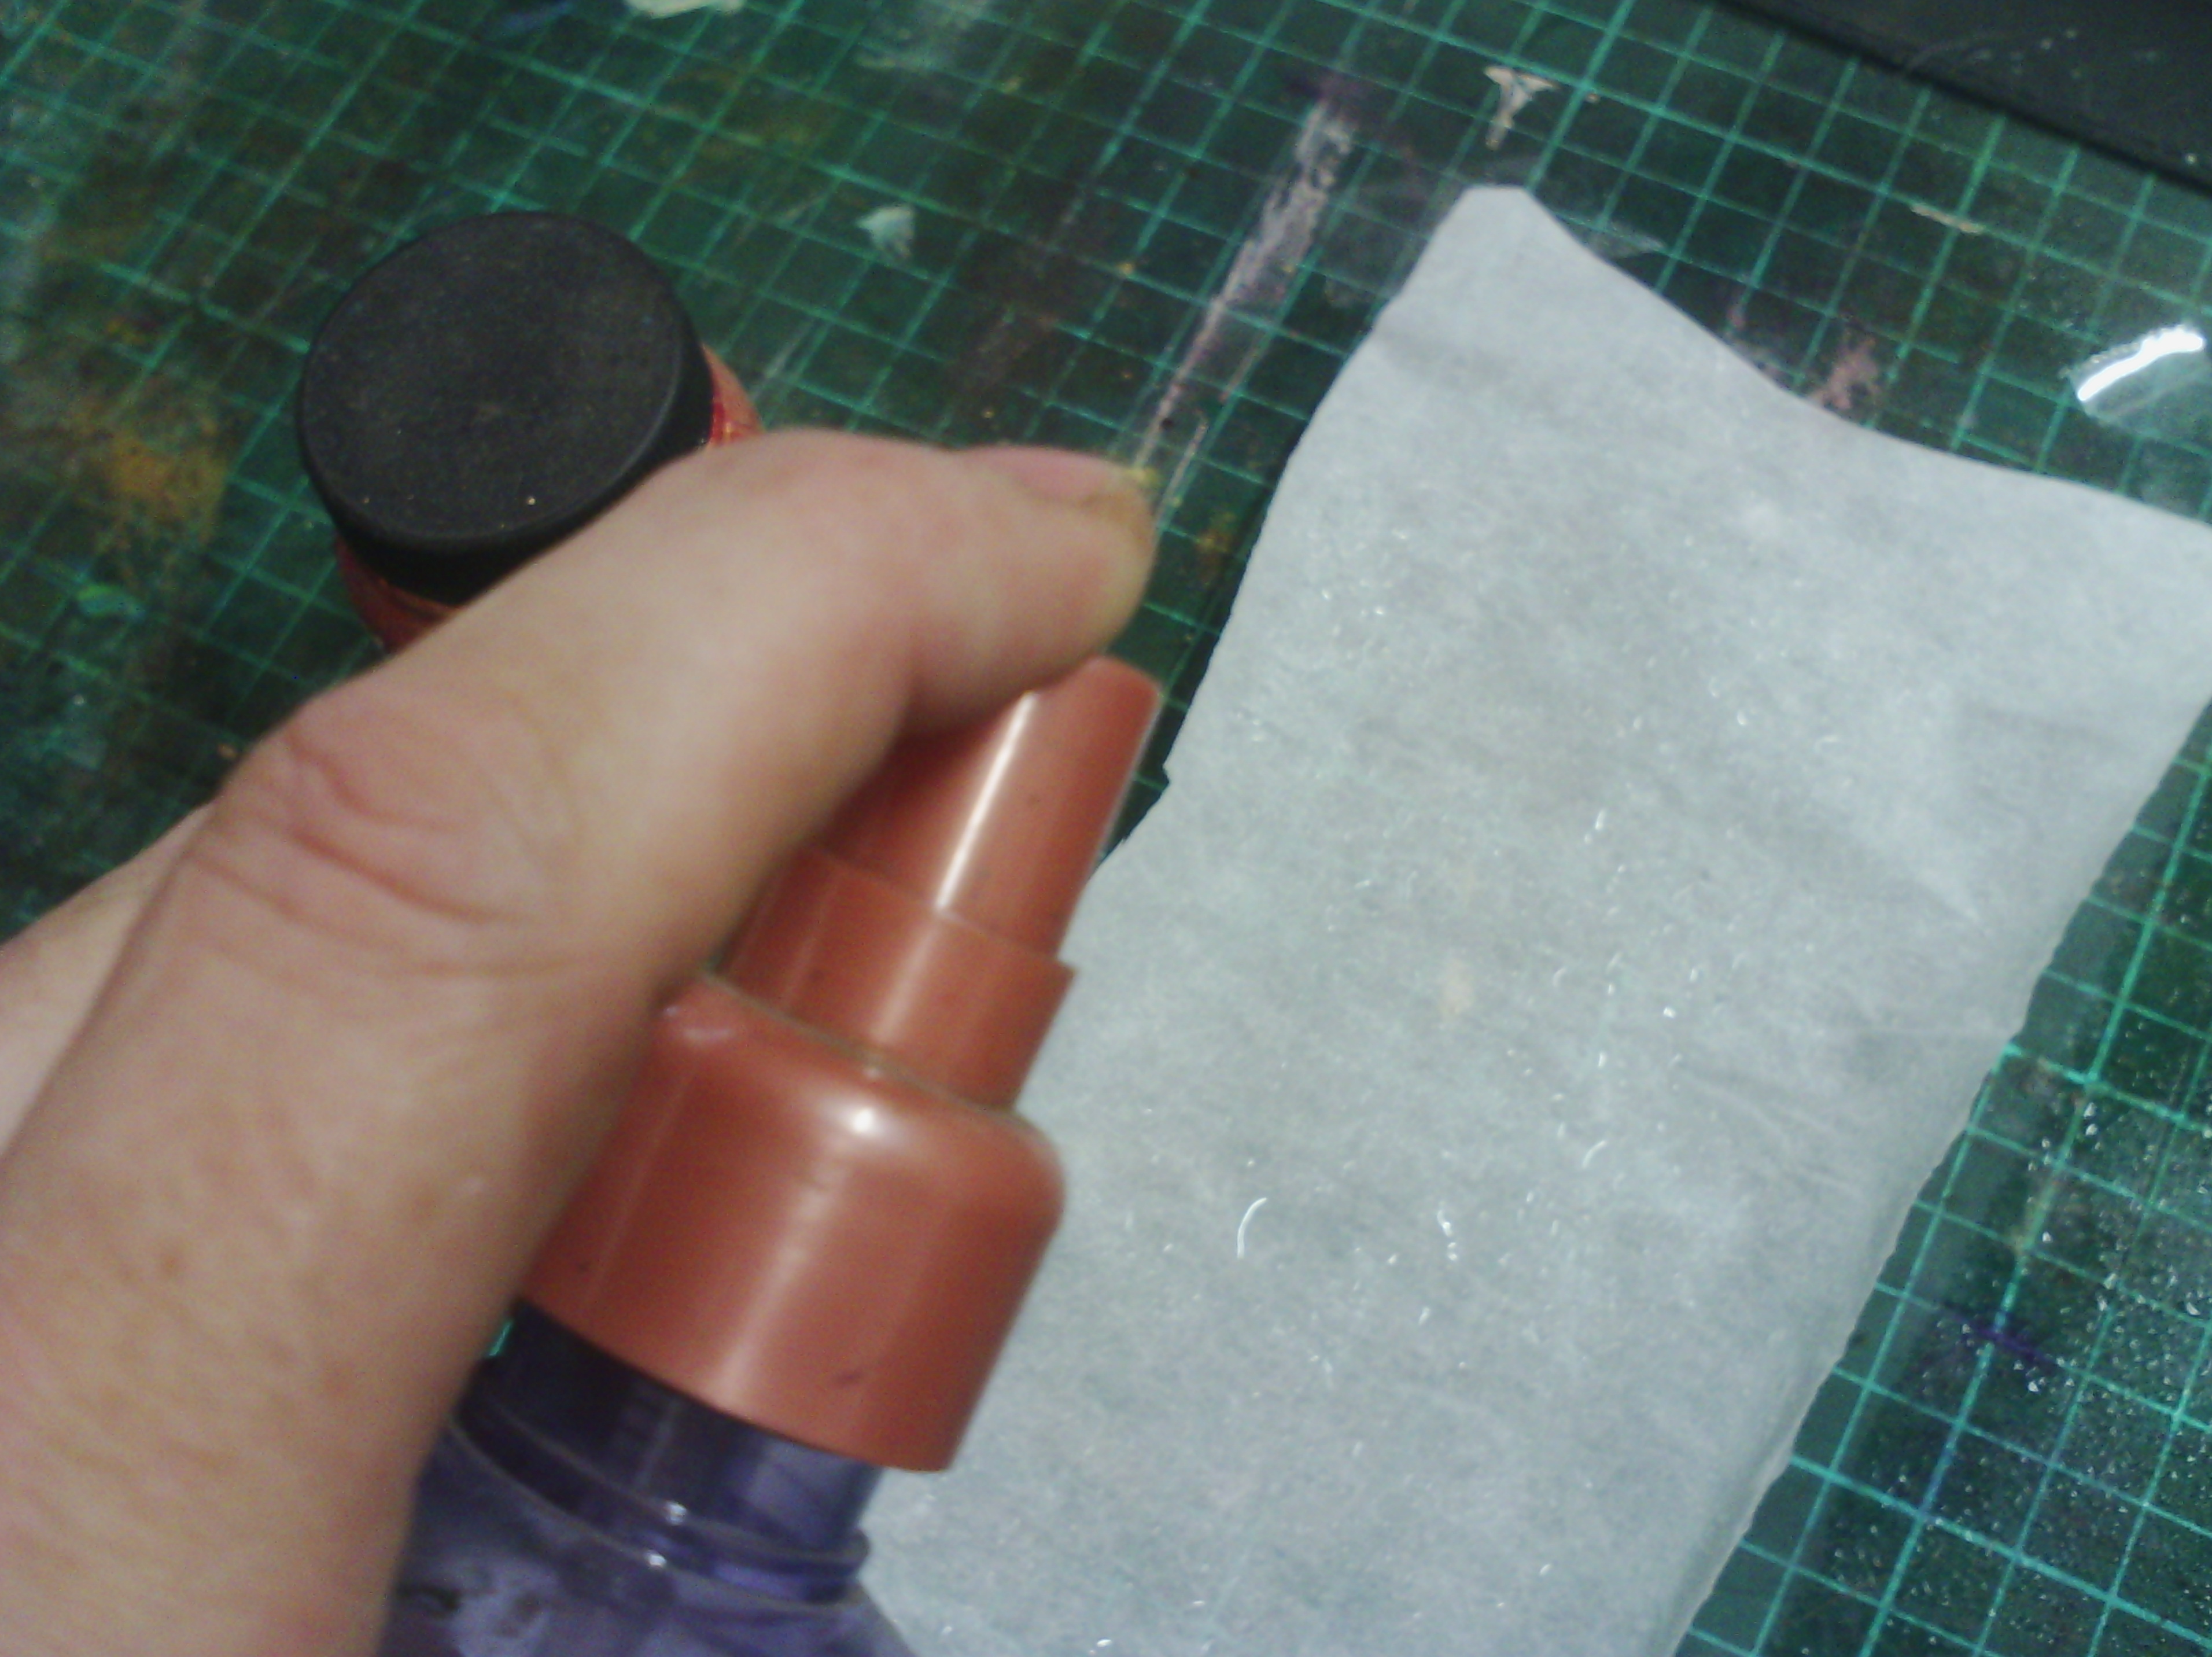
Next, I spray my fusible with water.  some people dilute their paint, but i find I get the most texture by spraying with water first.
Here, you can see me painting onto the fusible and you can see how the paper backing is wrinkling up and creating texture.
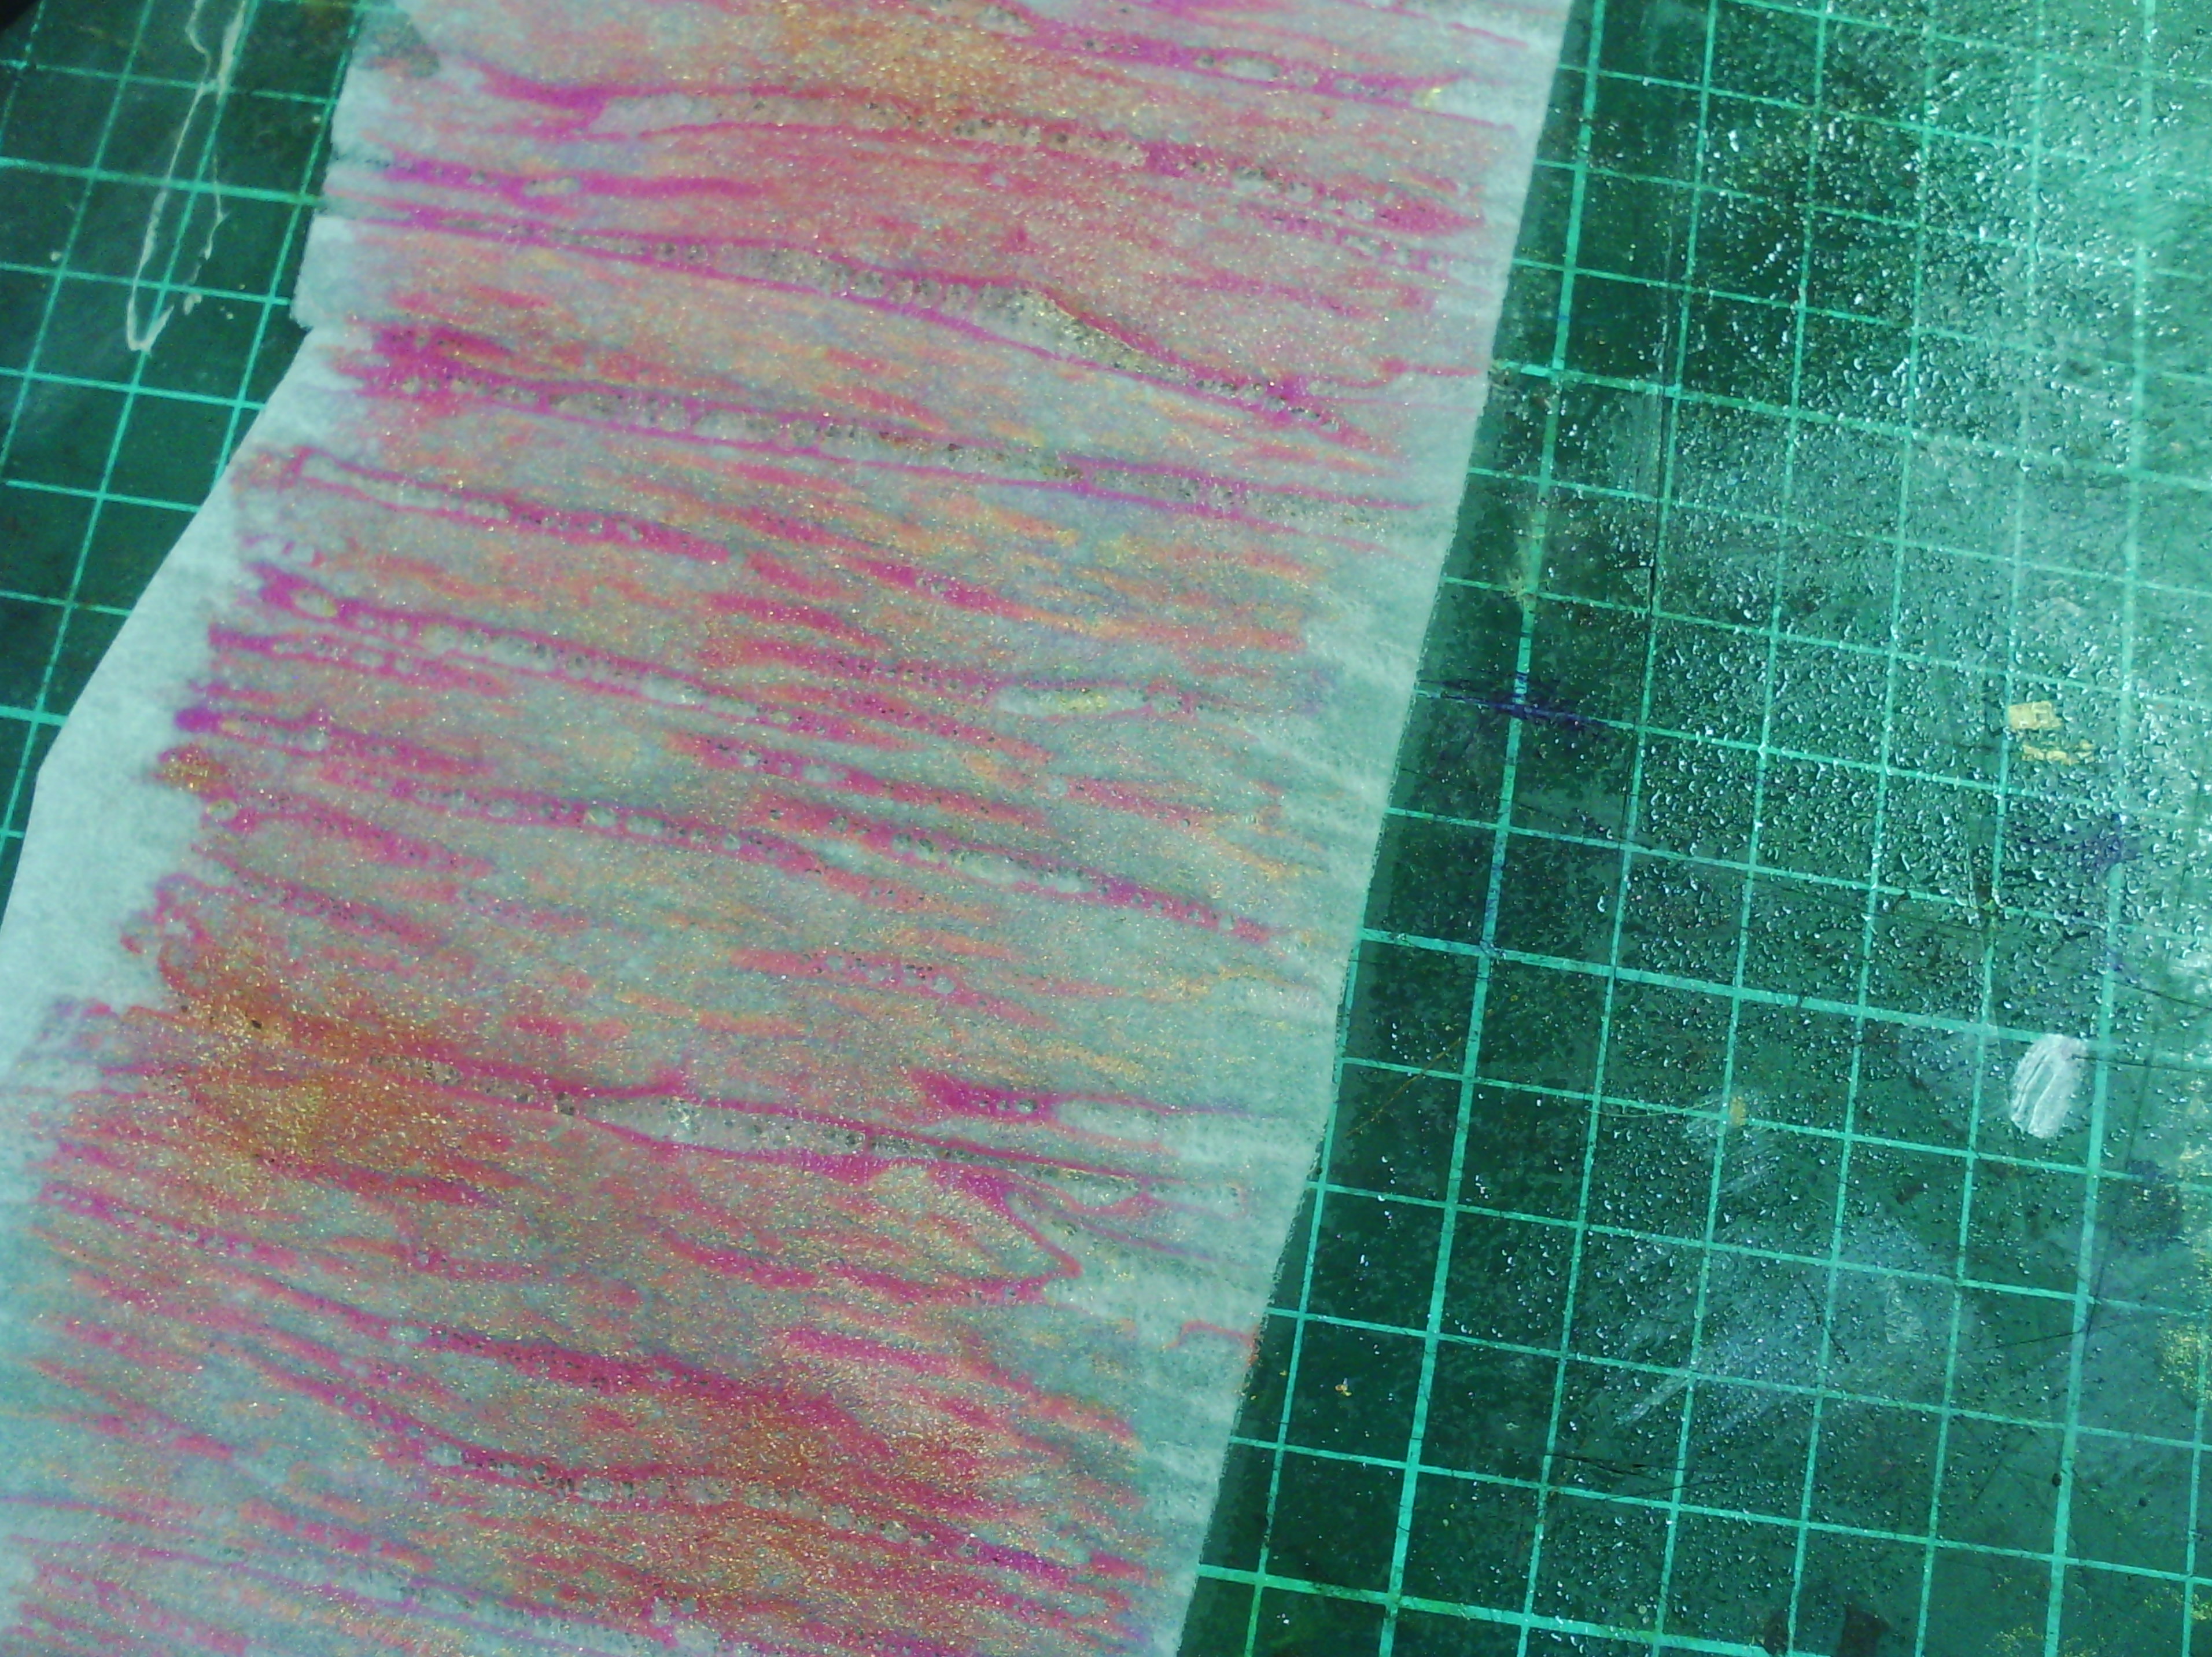
Here is the fusible painted.
And here is a close up of the gorgeous texture.  This needs to totally dry before you use it.
Now for how to use it.
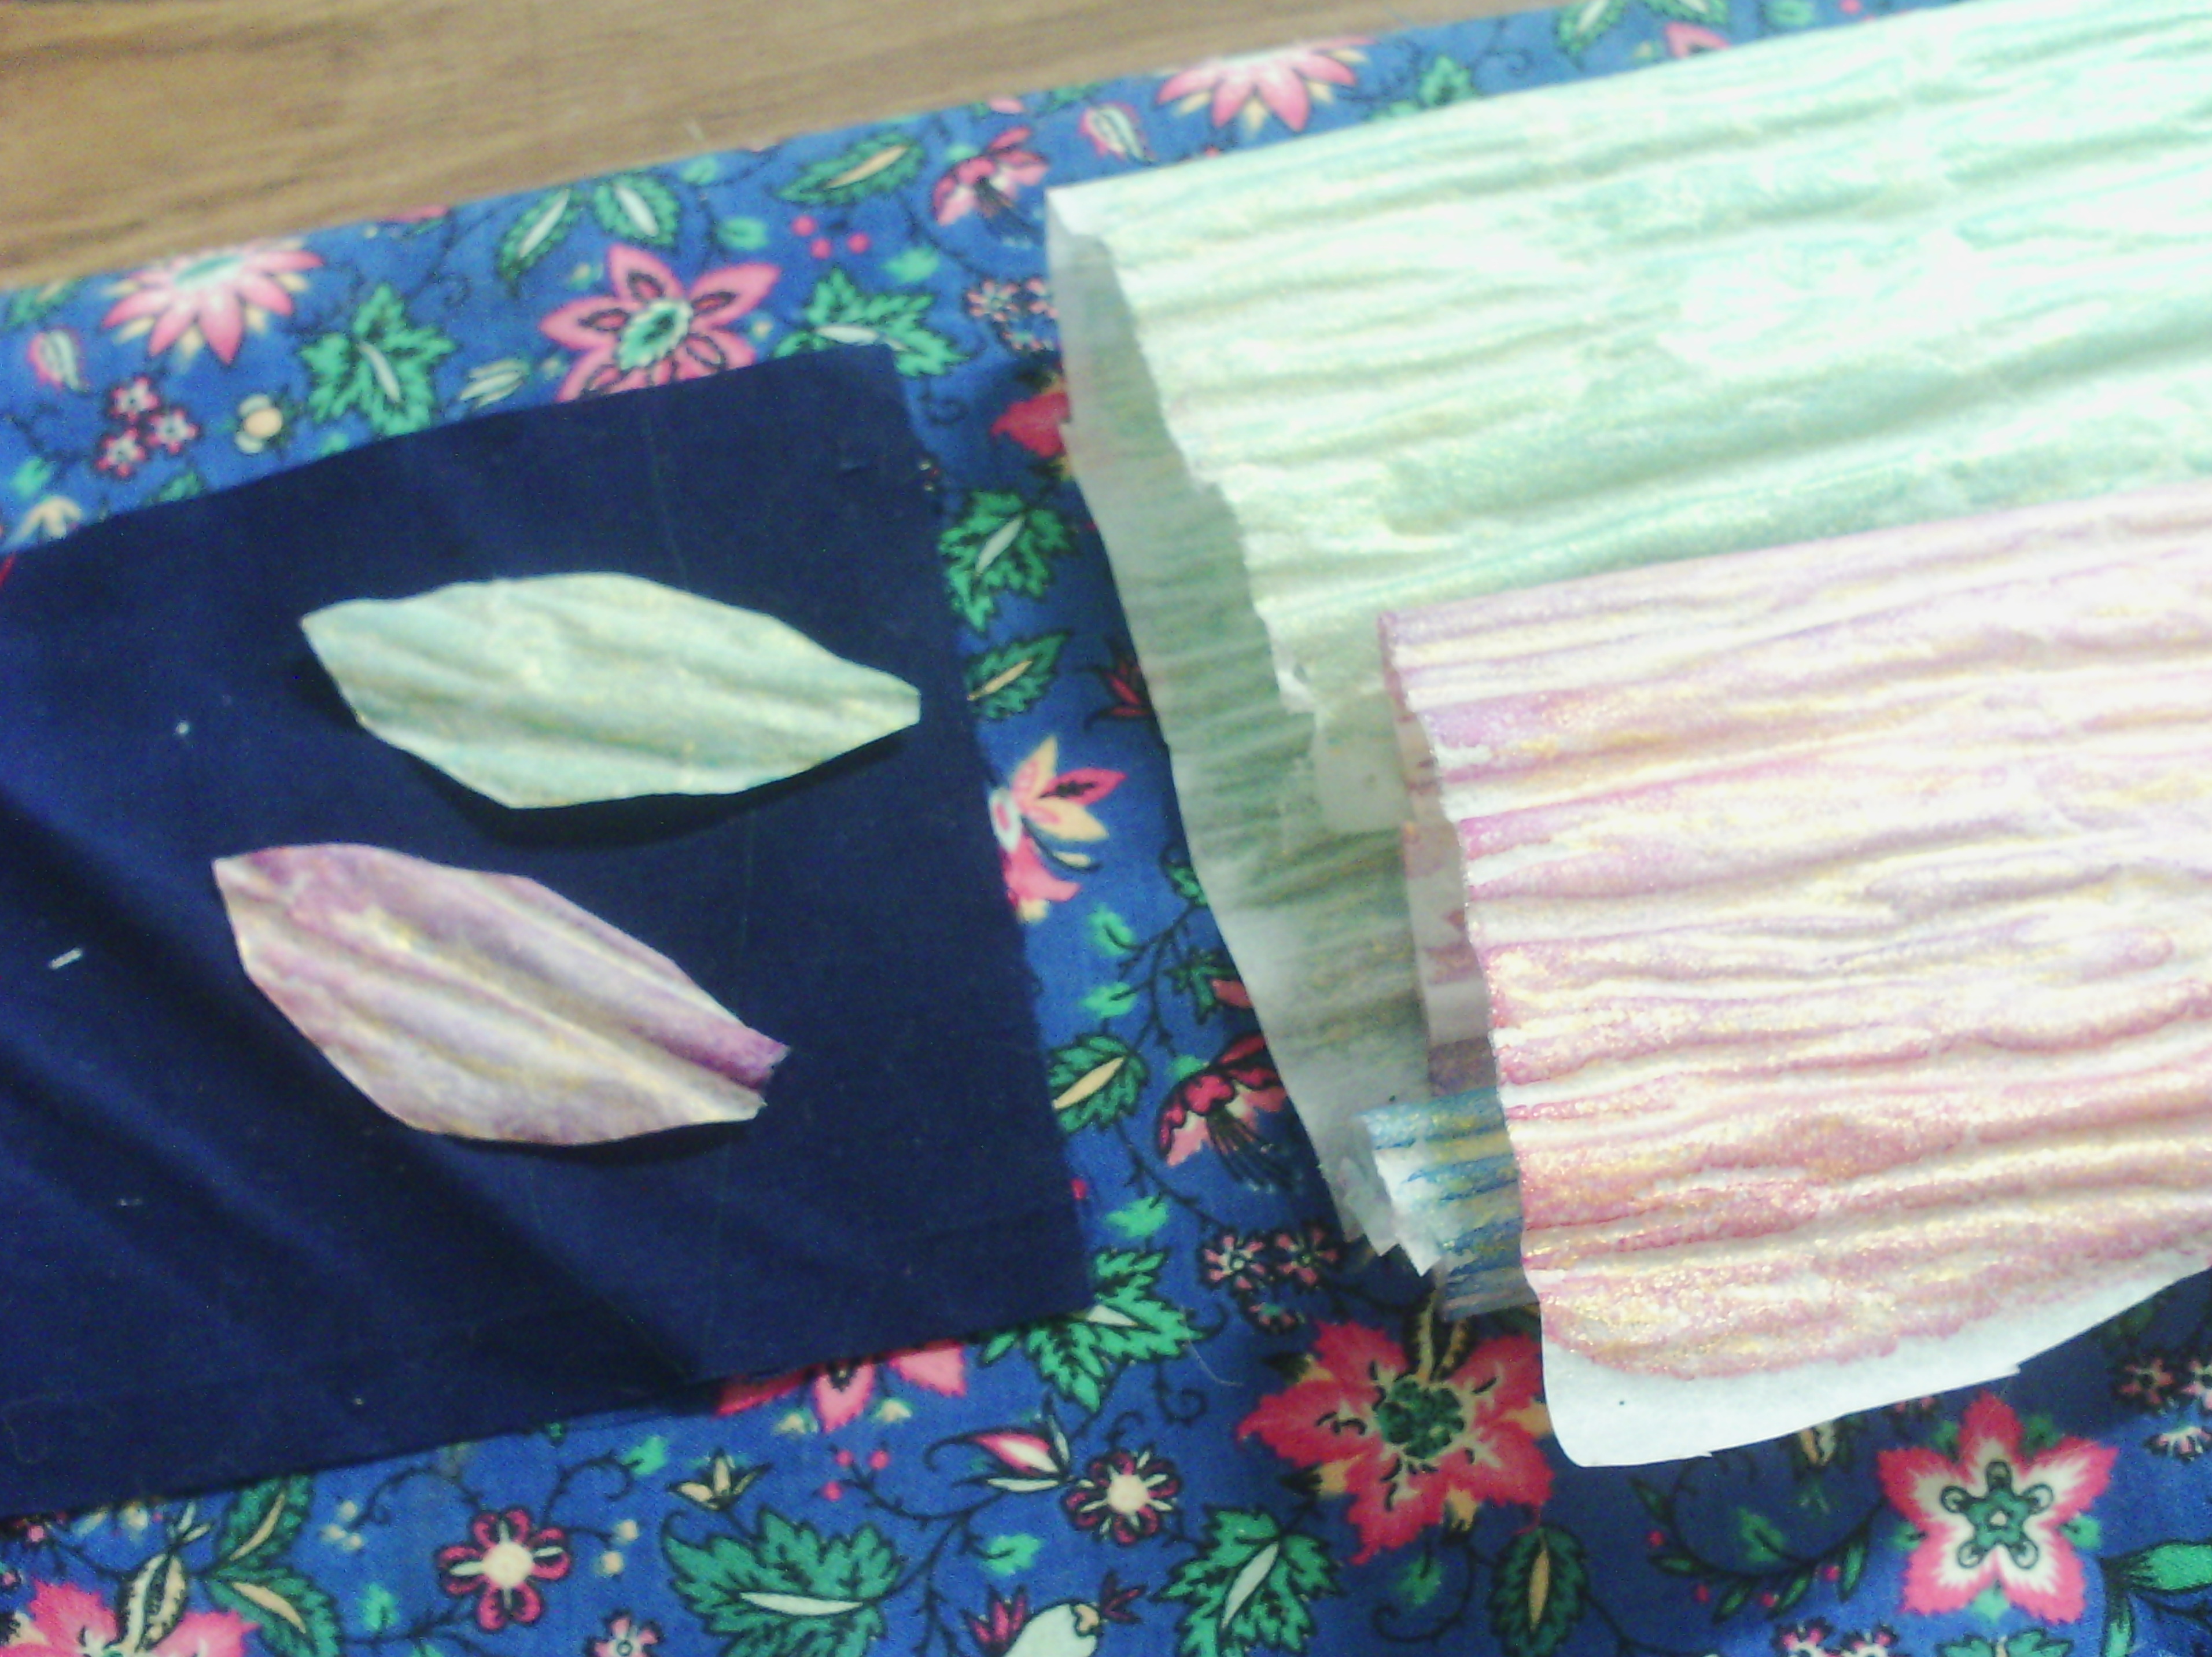
Here is some dry fusible on the right.  You can see how wrinkly it gets.  this is the way it should be.  Some fusibles don't do this and give a very flat textureless colour.  On the left you can see I have cut some leaves from the fusible.
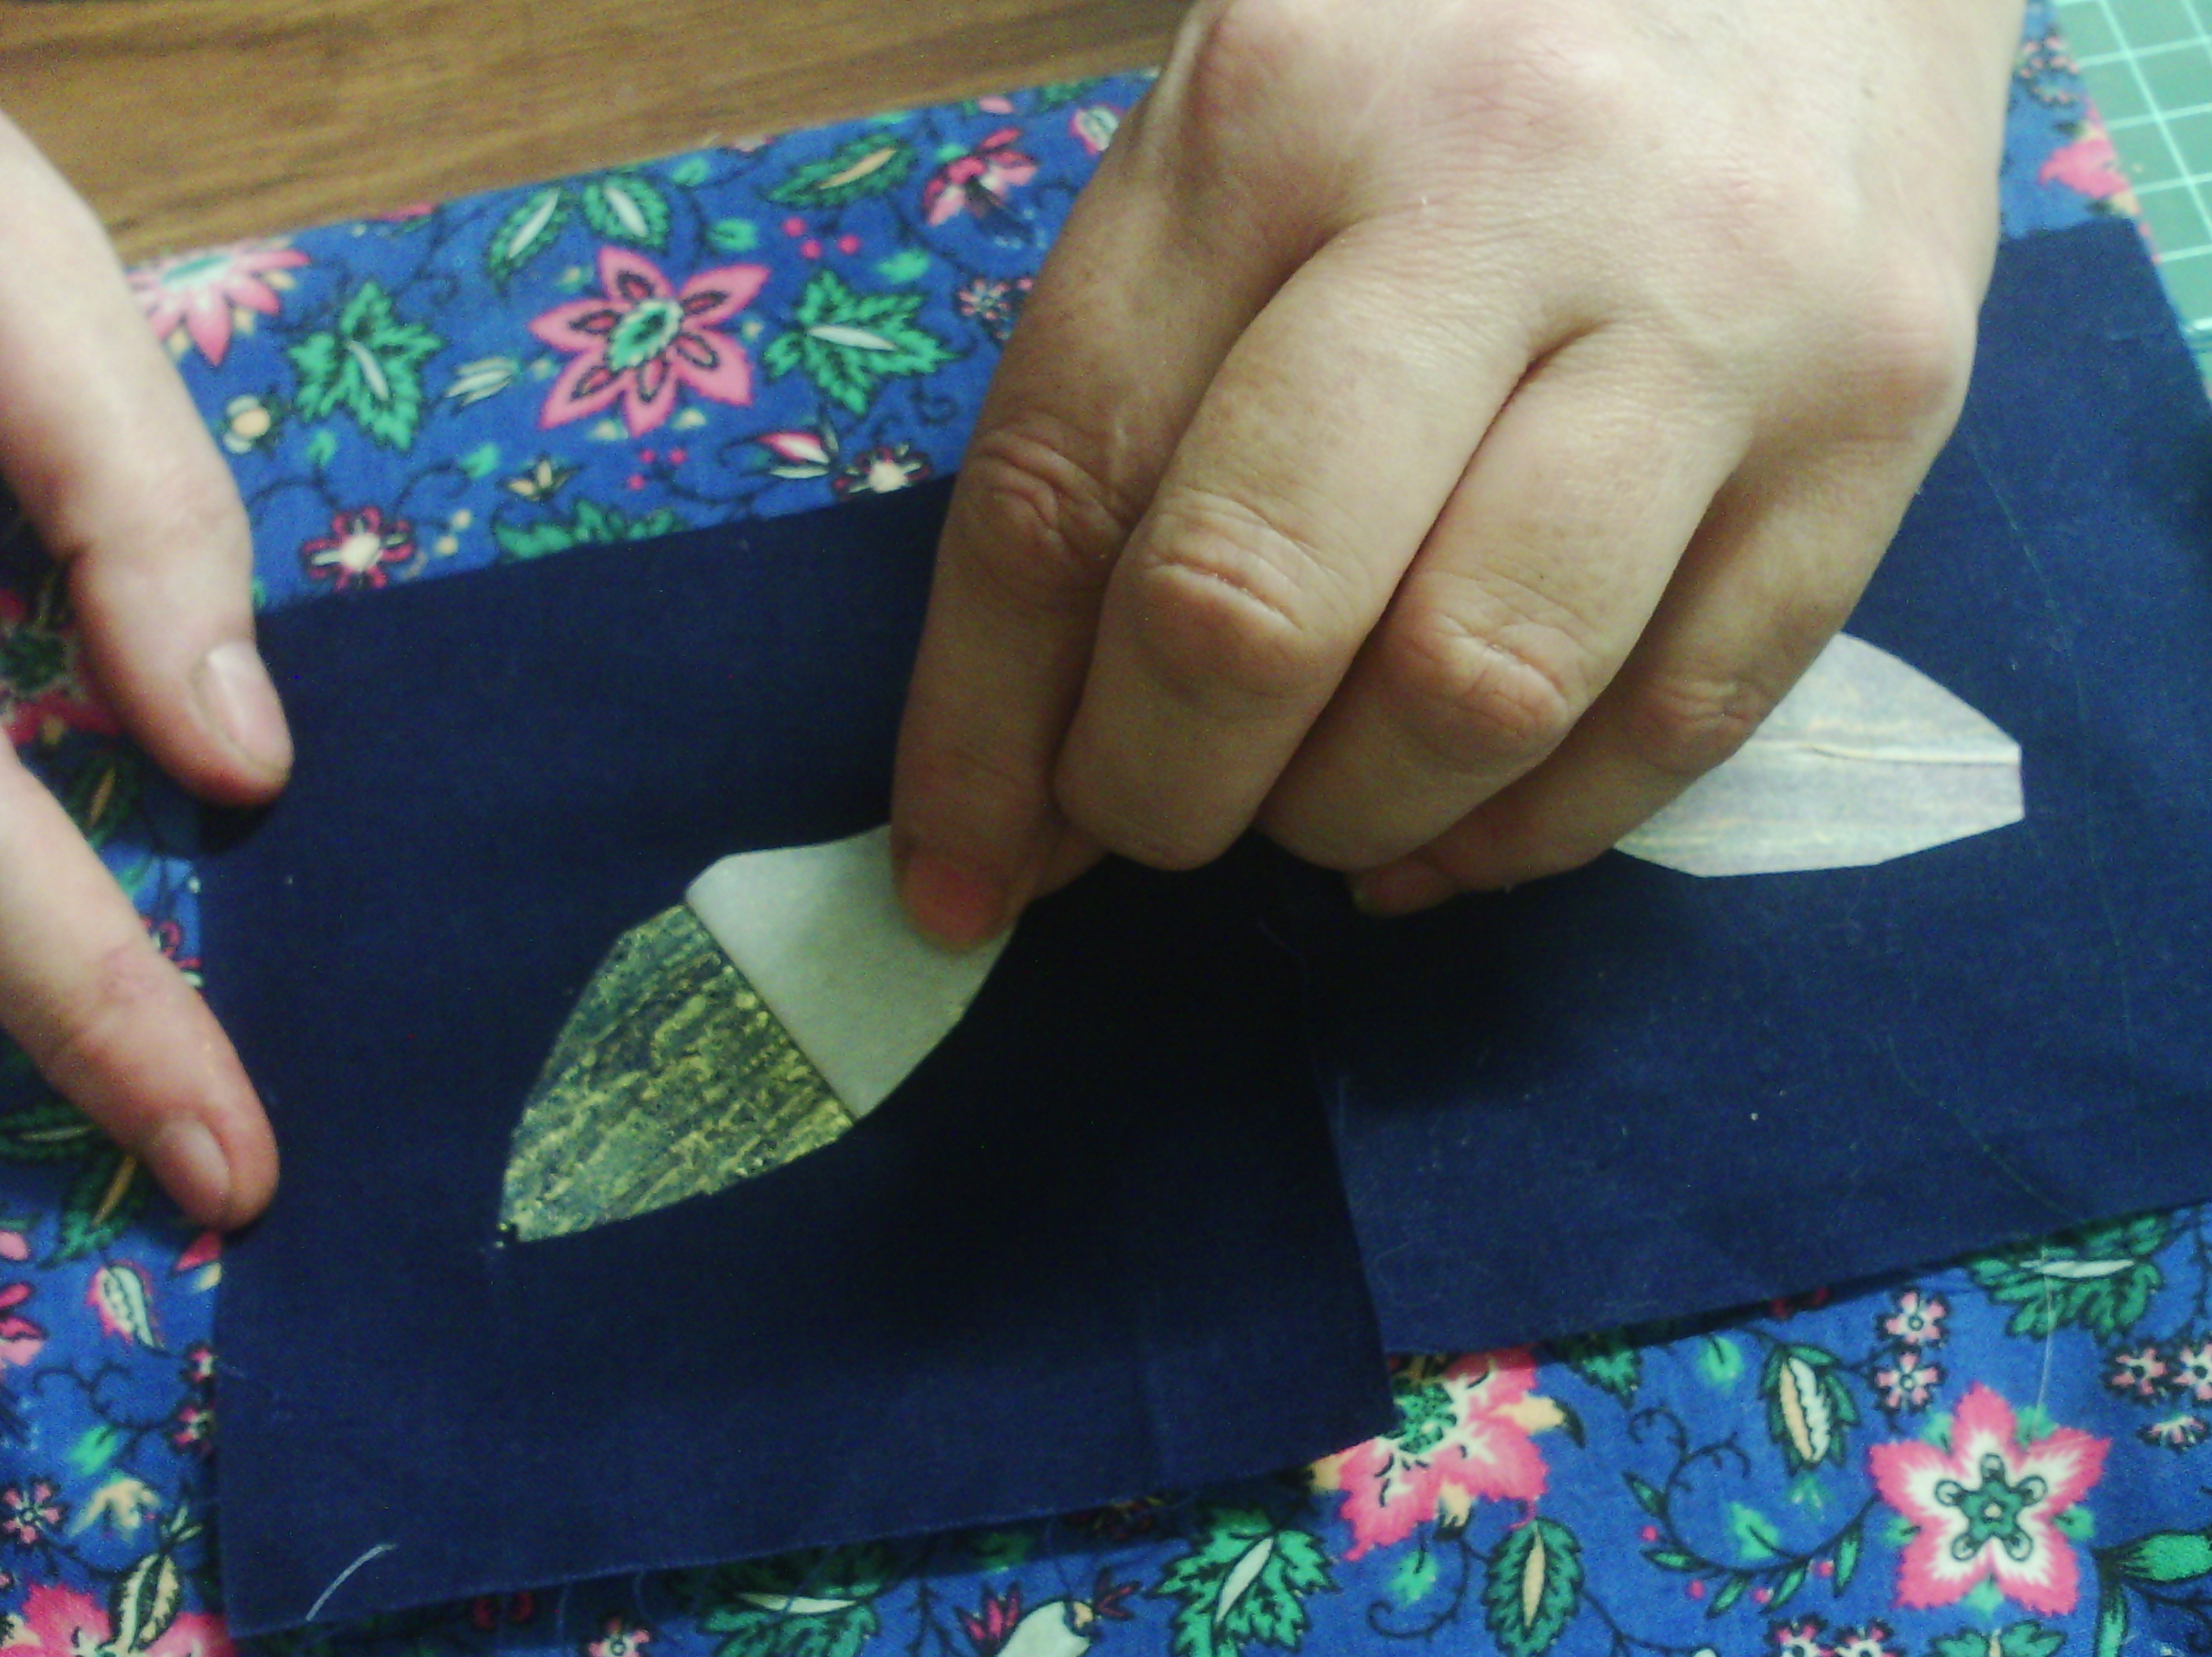
Again, you iron the leaf shapes down.  Remember to iron with the paper side up, or you get a gluey mess on your iron, and use baking paper over the top as well.  The one on the right has been ironed down already
When the fabric is completely cooled, peel off the paper as above.
and you get a beautiful textured metallic leaf.
This is not the only way to use the fusible.  I used some torn strips of fusible on one of my collages
This is a very simple collage.  I have used painted fusible as the whole background, but you can also see another feature of the painted fusible, and that is, that because it is fusible, you can still iron more on top (using baking parchment for sure) Here I have ironed on a few bits of wool fluff and a little organza sun, but you can iron sequins, glitter, loose threads and even some foil onto it ( I would be careful with the foil as too much will cover all the lovely painted texture).


I hope you enjoyed this tutorial

Happy creating!


Monday, February 6, 2012

A harlequin and some painting messes

This one was inspired by lisa's one here 
When I found these little bits of card already cut into diamonds, I knew what I had to do!  Luckily they fit nicely across one way.  When I was looking at it deciding whether to put another row cut in half, I had a lightbulb moment and thought about the stitching.
Black cotton, glitter coloured card, perle thread.

And some more painting!!!
After I had printed on all the different surfaces, I decided to paint the scraps to use in collage.
Light Lutradur.  I liked the way the watercolour bled here.
A few face wipes.  I was dropping watercolour onto damp fabric from dropper bottles.  With these, I scrunched them afterwards to blend the drops a bit.
A gorgeous piece of inferfacing.
A piece of fusible.  This might come in handy as an overlay in a landscape as it is so subtle, but really, my watercolours were too dilute for the normal painted fusible effects....... but
This is the release paper. and I am in love with this!  I will just have to try and repeat it.  Obviously, if the paint is too dilute, it just settles into the paper, but this paper is gorgeous.
A nappy liner, which is very pastelly and had a similar problem to the fusible.  Too many holes, but is very filmy and nice.
and a last piece of interfacing, which was a bit too wet, but again had lovely edges where the watercolour dried.
At least with these,  I can always add more layers if  I'm not happy, but all in all it was a productive session.

Lots of materials for fabric collages!  Perhaps I'd better make a few.
I am going away for a few days, to visit with my mother, but will still be posting.

As Lisa says, be creative

Sunday, February 5, 2012

Some origami and some more printing

mono printed fabric, origami hexagon in white satin, bead, transparency transfer The transfer is the japanese character for 'folding'.

When I was printing on the tissue paper, I also tried some other surfaces that I had been going to do for a while.  And, yes, Judy, one of them was fusible, lol.  thanks.

This one was printing on light interfacing.  The main problem I had with this is that the rollers pulled the fibres off the surface and jammed the machine.  In the end, I had to fold a piece of tissue and fix it at the top, so the fibres didn't catch, and as you can see, I got a good print - missing the first inch or so of course.
 This one was on Tyvek and it worked extremely well.  The print was really sharp and clear.
This was on nappy liner, and although it looks as though it printed well, most of the ink went straight through and only a wer faint print remained.  This is just too thin!
This one was on fusible and printed really well.   This is one of the things I had been wanting to try for ages.
This picture also highlights something I learned whilst doing this.  The paper you use as a carrier does not have to be a full lenght.  you can see here, I have reused a piece of paper and it is shorter because I cut off the previously glued  bit at the top (which is now the bottom)
This one is on a polyester non woven (or light lutradur)  This tended to bleed a bit.  After I had done it, I remembered that it is better to coat it with some medium or PVA before you print to get a sharper print.  I'm pretty sure you told me that, Judy.  As you can see a lot of the ink went straight through - although this paper will make a nice distressed print for collaging.
This one is a heavy Lutradur and i didn't use a carrier for it.  It went through and printed well, except, where it had been folded in the packet, tended to pick up ink from the heads.  I will have to work out a way of getting the folds out, perhaps a warm iron with a bit of mist?  or pressing under some books.
The last one is tyvek paper, which also did not need a carrier.  It has a totally different texture to tyvek fabric and appears more like a very smooth lutradur, which has been pressed.  (Which it probably basically is as they are both polyester fibres.  Although the image was good, it did bleed a little.

So now, my poor printer has printed on just about everything over the last year!
As you can see, I have done most of my prints at around ATC size, so you will probably see many of these prints cropping up through the year.  I'm sure to manipulate them in unimaginable ways, so you might have too look hard to recognise them, lol.


“It is better to have enough ideas for some of them to be wrong, than to be always right by having no ideas at all.” — Edward de Bono