Showing posts with label layering. Show all posts

Thursday, May 28, 2015

Layered Gelli Printing

I have been doing a few courses and posting in facebook groups lately, and a few people in the gelatin printing enthusiasts group asked how i did my layered prints.  For those who are familiar with this, my video below will tell you nothing new, but if you are new to gelli printing, the video might be of some help.  Unfortunately, my voice over is a bit soft, so if you are watching, turn your volume up.  I will try to be a bit more outspoken  if and when I do another one.
For those of you who just want eye candy, here are the prints I did
And a few other prints I did at another time


I have been posting the leaf prints in a challenge group, 100 Artworks challenge, also on Facebook, but I embellish them first.
Here is an embellished one.
And now, my imperfect video


Happy Creating!

Thursday, October 3, 2013

More monoprinting - feathers

My favourite shape from my enormous monoprinting session, was the feathers.
Here are a few prints.
As I said, L loved these prints the most and so I did a bit more work on one of them.
I added some detail with a gold pen and also a poem.  Below is a close up.
I also added one of the prints which was on tissue to my journal.
And that's all for now.

Tuesday, October 1, 2013

A bit of monoprinting - butterflies

Over the last week or two, I have been engrossed in gelatin printing.  I have amassed over 100 prints, a few of which I will take further, and many of which will become journal fodder.  I won't go into detail about the process, but you can watch Julie fei fan Balzers recent video for some pointers
So let's have a look at a few butterflies.
Most of the prints are three layers, but this one has only two. The background layer is the third print off from a butterfly stencil.  What this means is that after I had printed the green butterfly only on some other pages, I lifted the stencil off and printed a negative print - the butterfly is pale, with not much paint as this had been removed, whilst the background still had plenty and created the subtle green layer, which I then printed over with the black stencil.
This one had the requisite three layers. The first was just a mix of two colours brayered on to the gelatin plate
The second was the positive butterfly print, then third, was the black print.
Here is another three layer one.  The pink layer was just magenta paint, but I swished around in a circle with a BBQ basting brush before I printed, then, again, the second and third layer are the same as the print above.
This one has only two layers as I did not add the third accent layer.
This is a different three layers.  In this one I started with just  the purple and orange layer.  I overprinted with the green using a tree MASK, so the tree remained the orange and purple.  Then I overprinted the butterfly in gold.
This one is the ghost print of the above tree print.  Each layer was a ghost print of exactly the same plate as above, but still gives a great effect.
This one is a bit different.The tree was printed from the same green plate above, but after I had removed the mask.  The background was a little pale, but under the mask there was lots of paint, making the tree darker.  The edges of the mask picked up a lot of paint, resulting in the very pale halo around the tree.  The gold butterfly was the second layer.
I think that is enough for today, but as you can guess, I have a lot more to post.  I even got to brinting on fabric and have started work with those prints on the sewing machine.
My husband wanted to know what I would do with so many prints, but really, I am not actually concerned about that.  This is another example of  the artistic process bring about the process, not the product.  In making so many prints on so many different papers with diffferent layers and different colours, I have learnt a lot in a short time about colour mixing, layereing, contrast, and value that even if I never used any of the prints, it was still worth it.  I will talk more about that inmy next posts.

Monday, February 27, 2012

Growing and cracking

Today's ATC is part of an experiment I did in my laboratory, lol.
You won't believe the ingredients I used.
Mattboard, Tile adhesive, smoothed with a spatula, pigment solution (like liquid watercolour) and diluted gold acrylic dropped with a dropper while the tile adhesve was still damp, glitter,  distress ink, rub on word, white gel pen.
The white gel pen was an afterthought, when the rub on 'R' didn't adhere properly, so I made it into a feature instead!

The other day, I finally got around to doing some experimentation with making PVA/white glue crackle (only because I had a project I needed to finished, which also needed it!)  I had watched lots of videos and looked at lots of blogs and decided to just to do it.
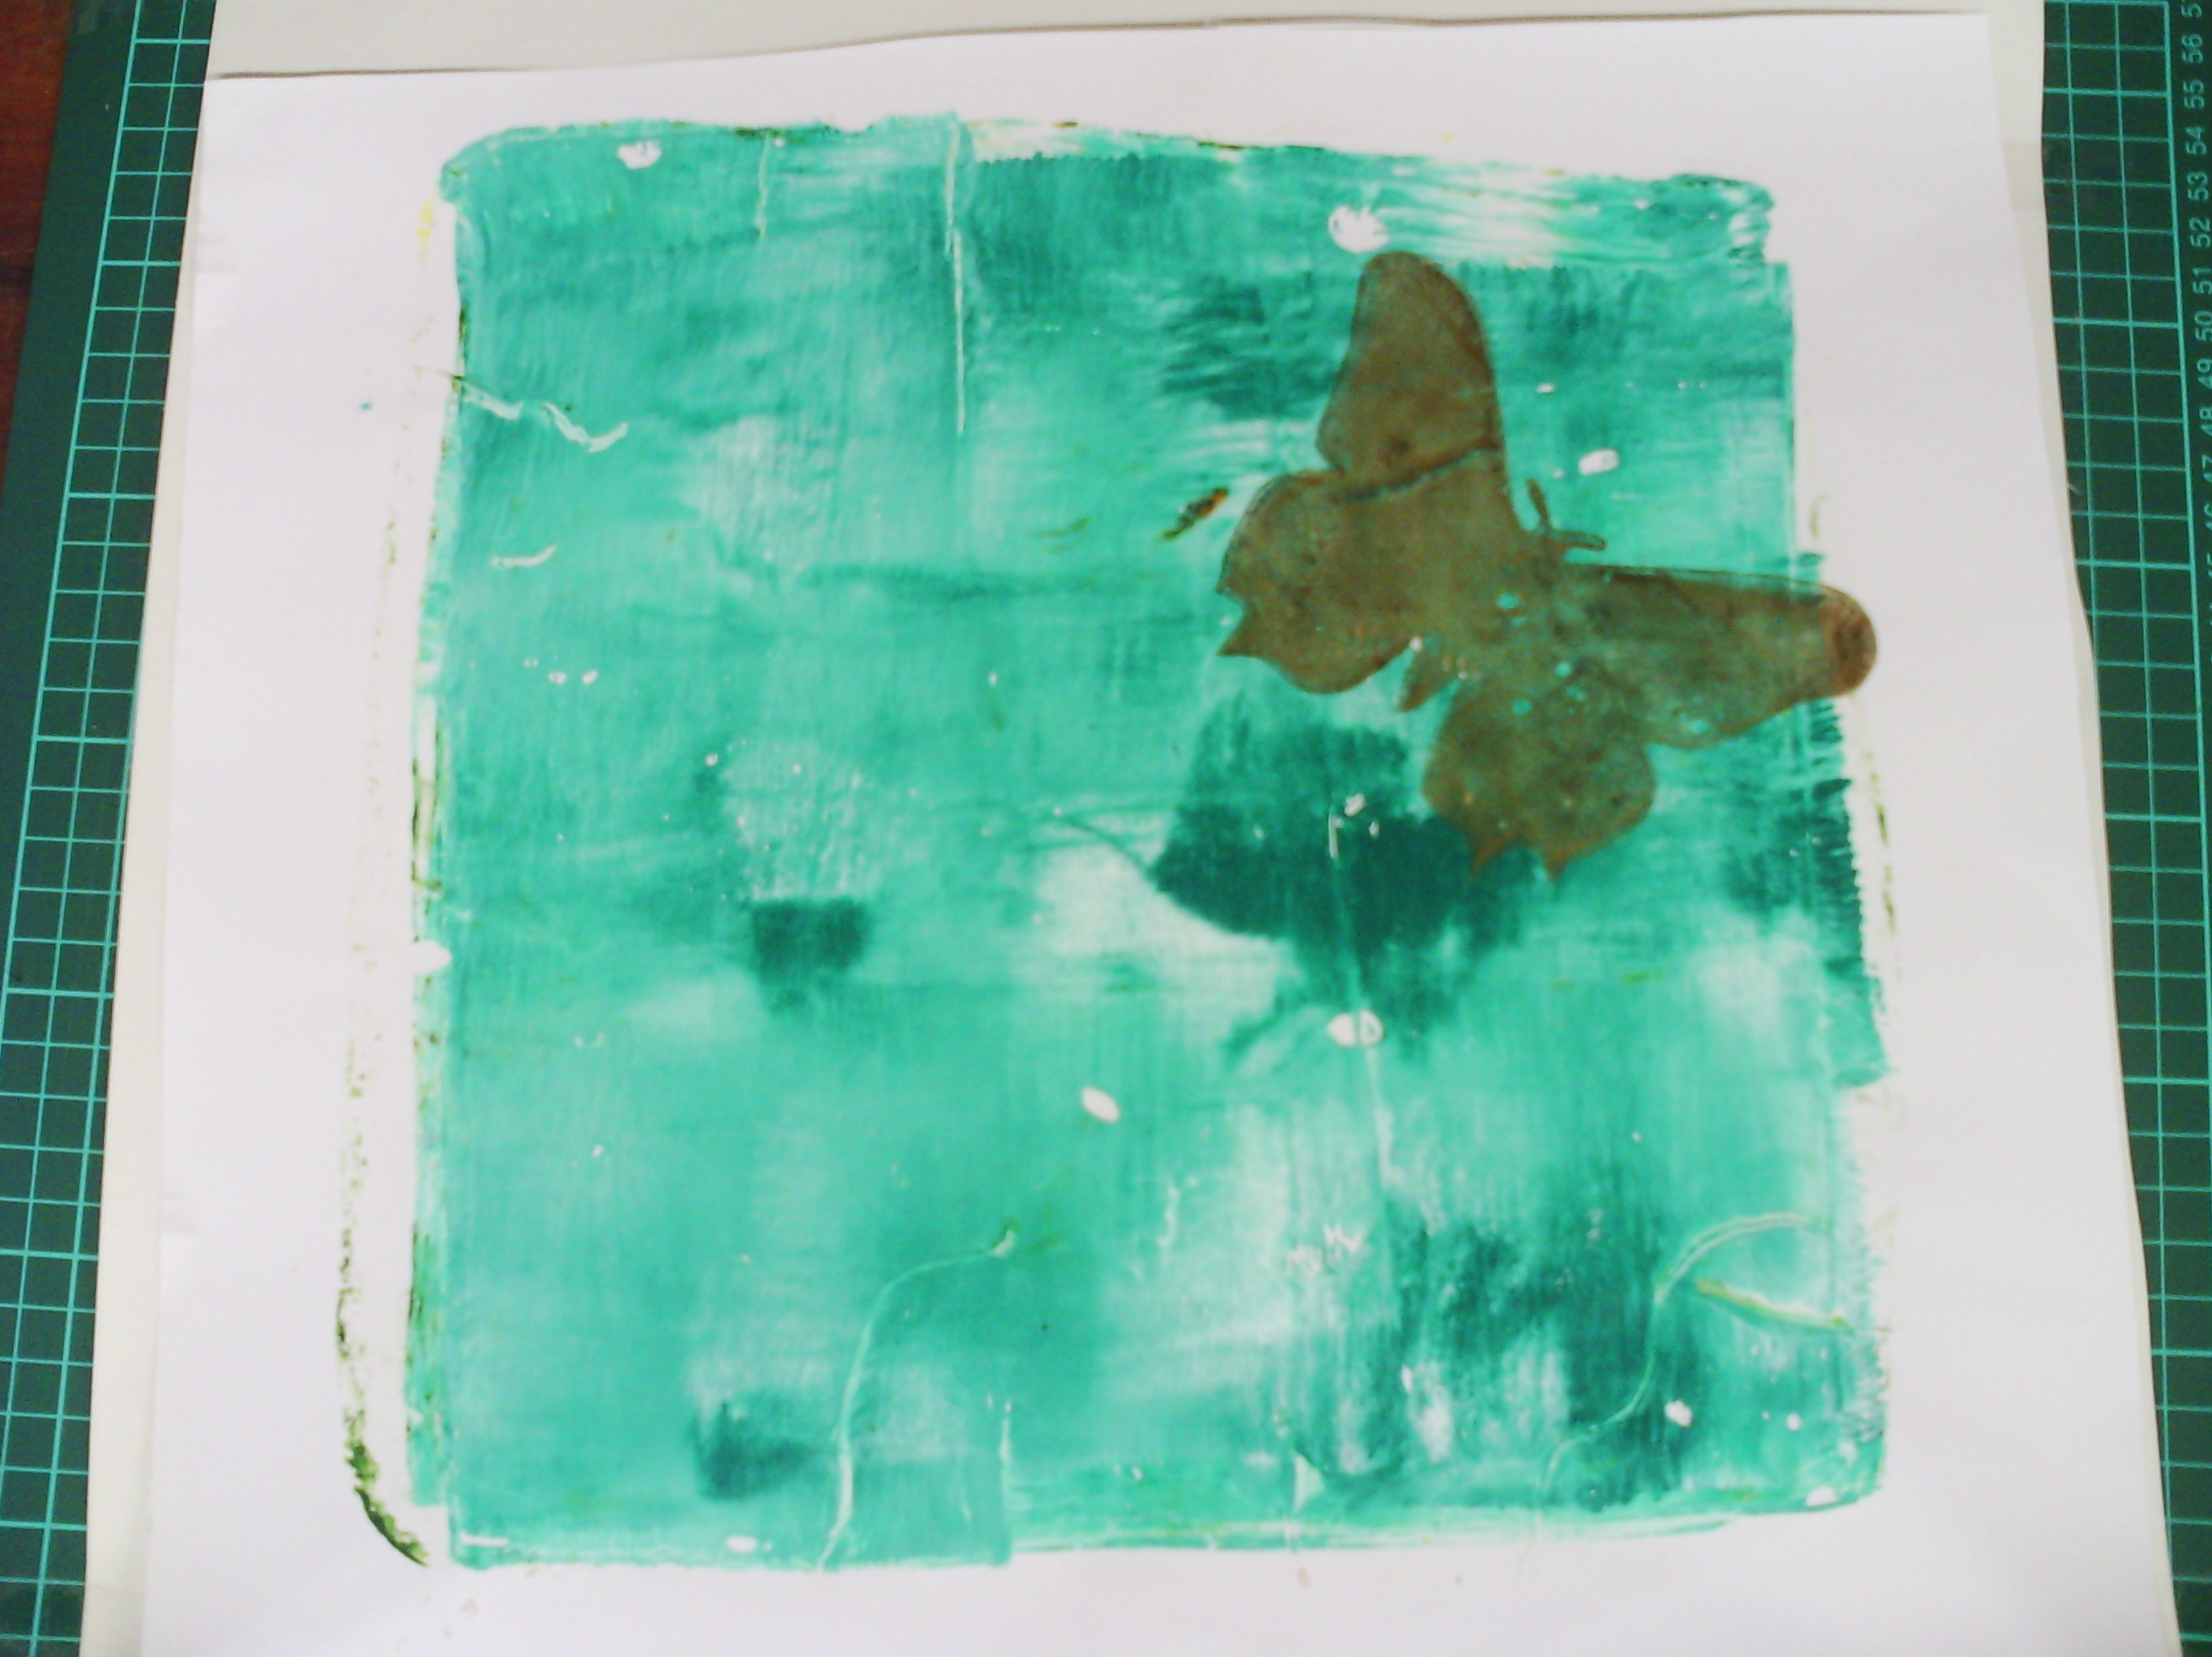
This is one of my altered books, which I often use to try out new ideas in.  I have painted both sides of a spread with blue acrylic paint (You might recognise that there are two ATCs included in the photo and one of these - the dud, became the fishy business ATC)
I treated the two pages separately.  Here I have covered the left one with a thick layer of PVA.  I didn't wait wery long before the next step, no more than five minutes and it was still wet.
I forgot to photograph this step, but on the top half of the page, I used watered down lumiere gold and on the bottom watered down white acrylic.  I used my heat gun to hasten the process a bit, but if you hold it too long or too close, the PVA will bubble and this is not really what we want.
The lumiere did not crack at all in this experiment, but what I did here was brush over the dry surface and move some of the top skin of dried paint around.  It made an interesting textural effect.  Perhaps I just didn't wait long enough, but even now, days later after the page has been turned and flexed, there are no cracks.
The watered down white acrylic, however made gorgeous cracks!
On the right hand page, instead of PVA, I used Paste.  In Australia, we call it Clag, but it's really just a cooked cornflour paste, like we used as kids.  I often make my own, but had a jar on the shelf which had been given to me, so used that.  I thought this would work well, and still think I can make it work, because when this stuff dries, it tends to crack anyway.  I used the Lumiere, which was probably a bad move - so two wrongs don't make a right in this case.
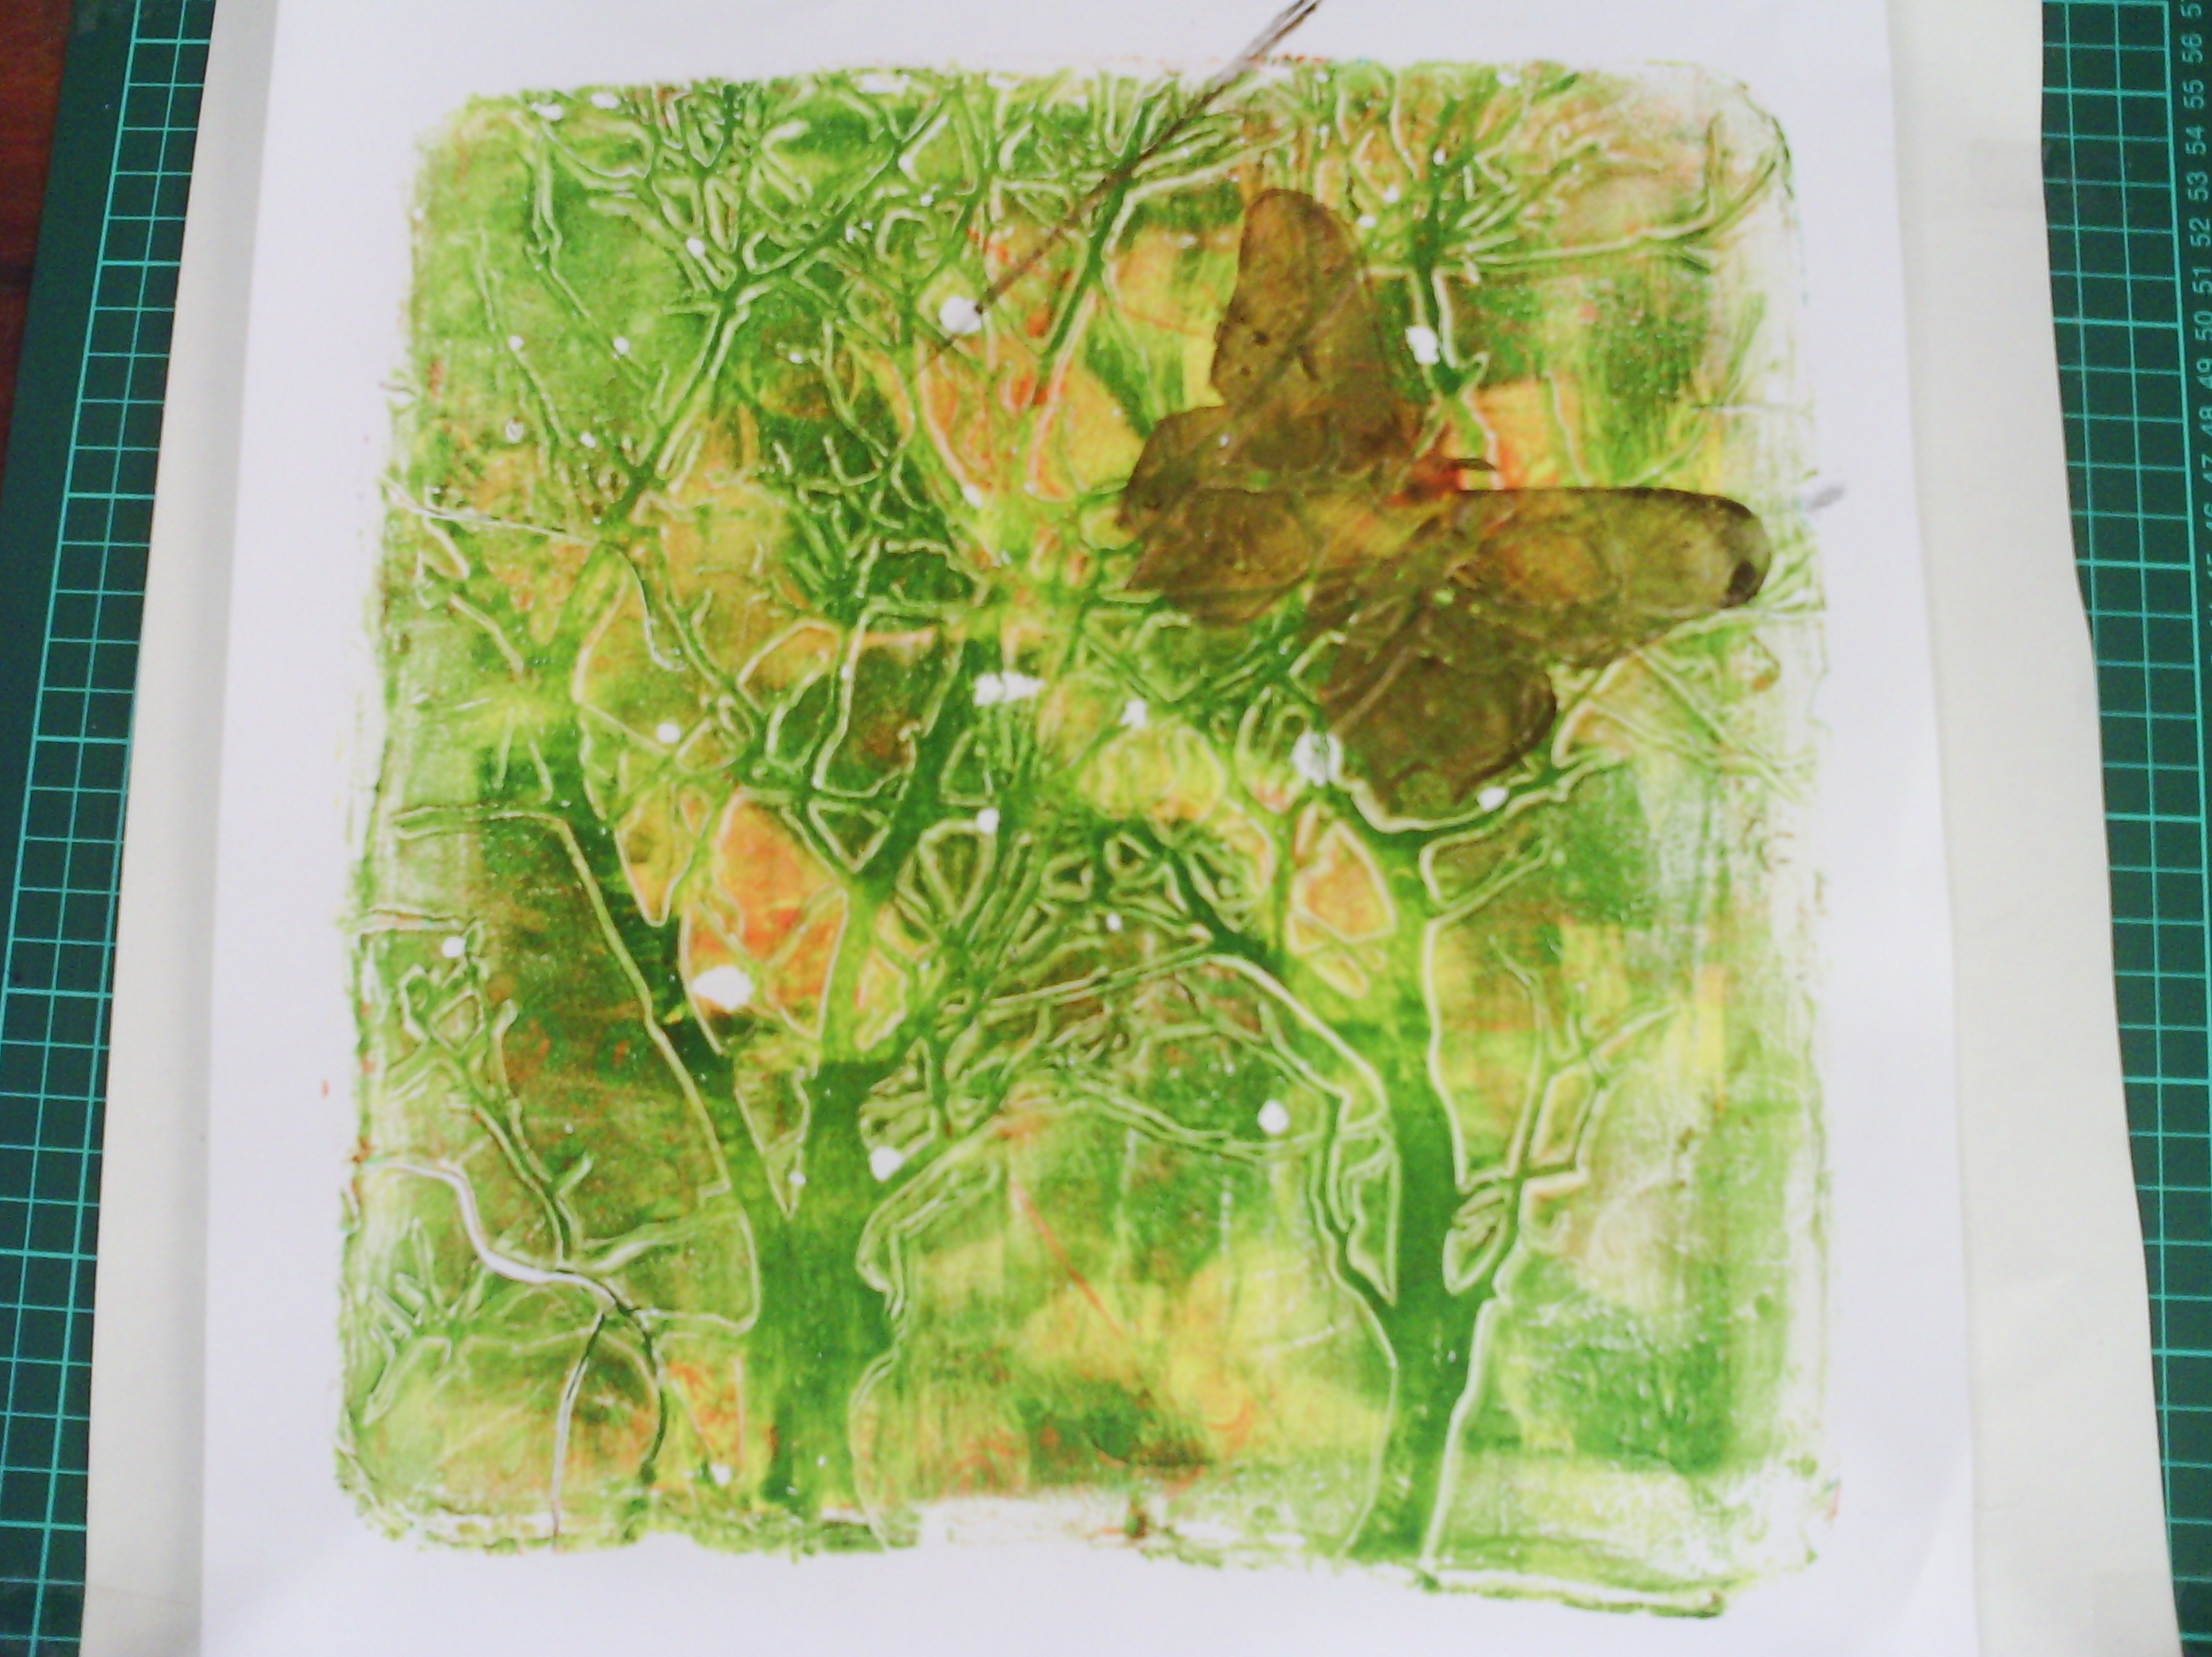
Here are the two ATC backgrounds.  The one on the left is the same as the blue and white sample - neat PVA and watered down acrylic, and it cracked really well.  In the one on the right (which became this ATC), used watered down PVA and this just did not work.  You need lots of gooey stuff, so when It dries it will cause the cracking.

Being an artist is a process of continually making something out of nothing.
(me)

No experience is a cause of success or failure. We do not suffer from the shock of our experiences - so-called trauma - but we make out of them just what suits our purposes.
Alfred Adler

Tuesday, September 6, 2011

Hot Stuff Workshop

As I said a few days ago, before I went MIA over the weekend, on Saturday, I went to Neroli Henderson's Hot Stuff Workshop at ATASDA Vic.  It was a great day and we played with lots of bling. Neroli was a great tutor, giving everyone their own creative space, but at the same time explaining things very well.

First we played with tyvek.  we used a wide range of colouring materials to colour it and lots of angelina and other shiny stuff, then shrank it all.
These are my two pieces of tyvek after shrinking.  I used everything in my box, to experiment with how it colours and shrinks: water colour pencils, crayons, oil pastels, shiva sticks, rub ons, but you know what? the best thing to get a lot of colour on was textas!  Also, on looking at other people's work, the lumiere paint worked really well (must get some!).  I think I could get the same effect with texta and a metallic rub on.
After lunch, we got onto making a layered piece with sheers and synthetics which could be burnt with the heat gun.
This was my workspace, a bit of a mess compared to the tidy space opposite me.
Here we all are watching as one of the pieces is transformed with the heat gun.
And another piece.  Every person's work was different and all were interesting to watch as the layers appeared.
Here is the stitching on the back of my piece.
And after we heat gunned it.
I did a little work on it at home, adding a bit of paint.
And this is what it currently looks like.  I felt the leaf with the puff paint - yes, I finally got to use some puff paint - needed some definition.  I also think this piece would do well with a bit of hand embroidery and beading, so you might see it again in a week or two when that is done.

Since I often burn and distress my fabrics, someone asked me why I went to the workshop.  My answer was simply, that you can always learn something new.  And I did learn lots of new things and met lots of new people.
One of the things I have been thinking on since this workshop, is a way I can tweak this technique to use in some of my work.  I have come up with an extension of this that also uses some of my soldered applique method. I am playing with these and will show you soon.

If you don't live and learn, then how do you learn to live?