Showing posts with label Couching. Show all posts

Saturday, December 21, 2013

Some sea life

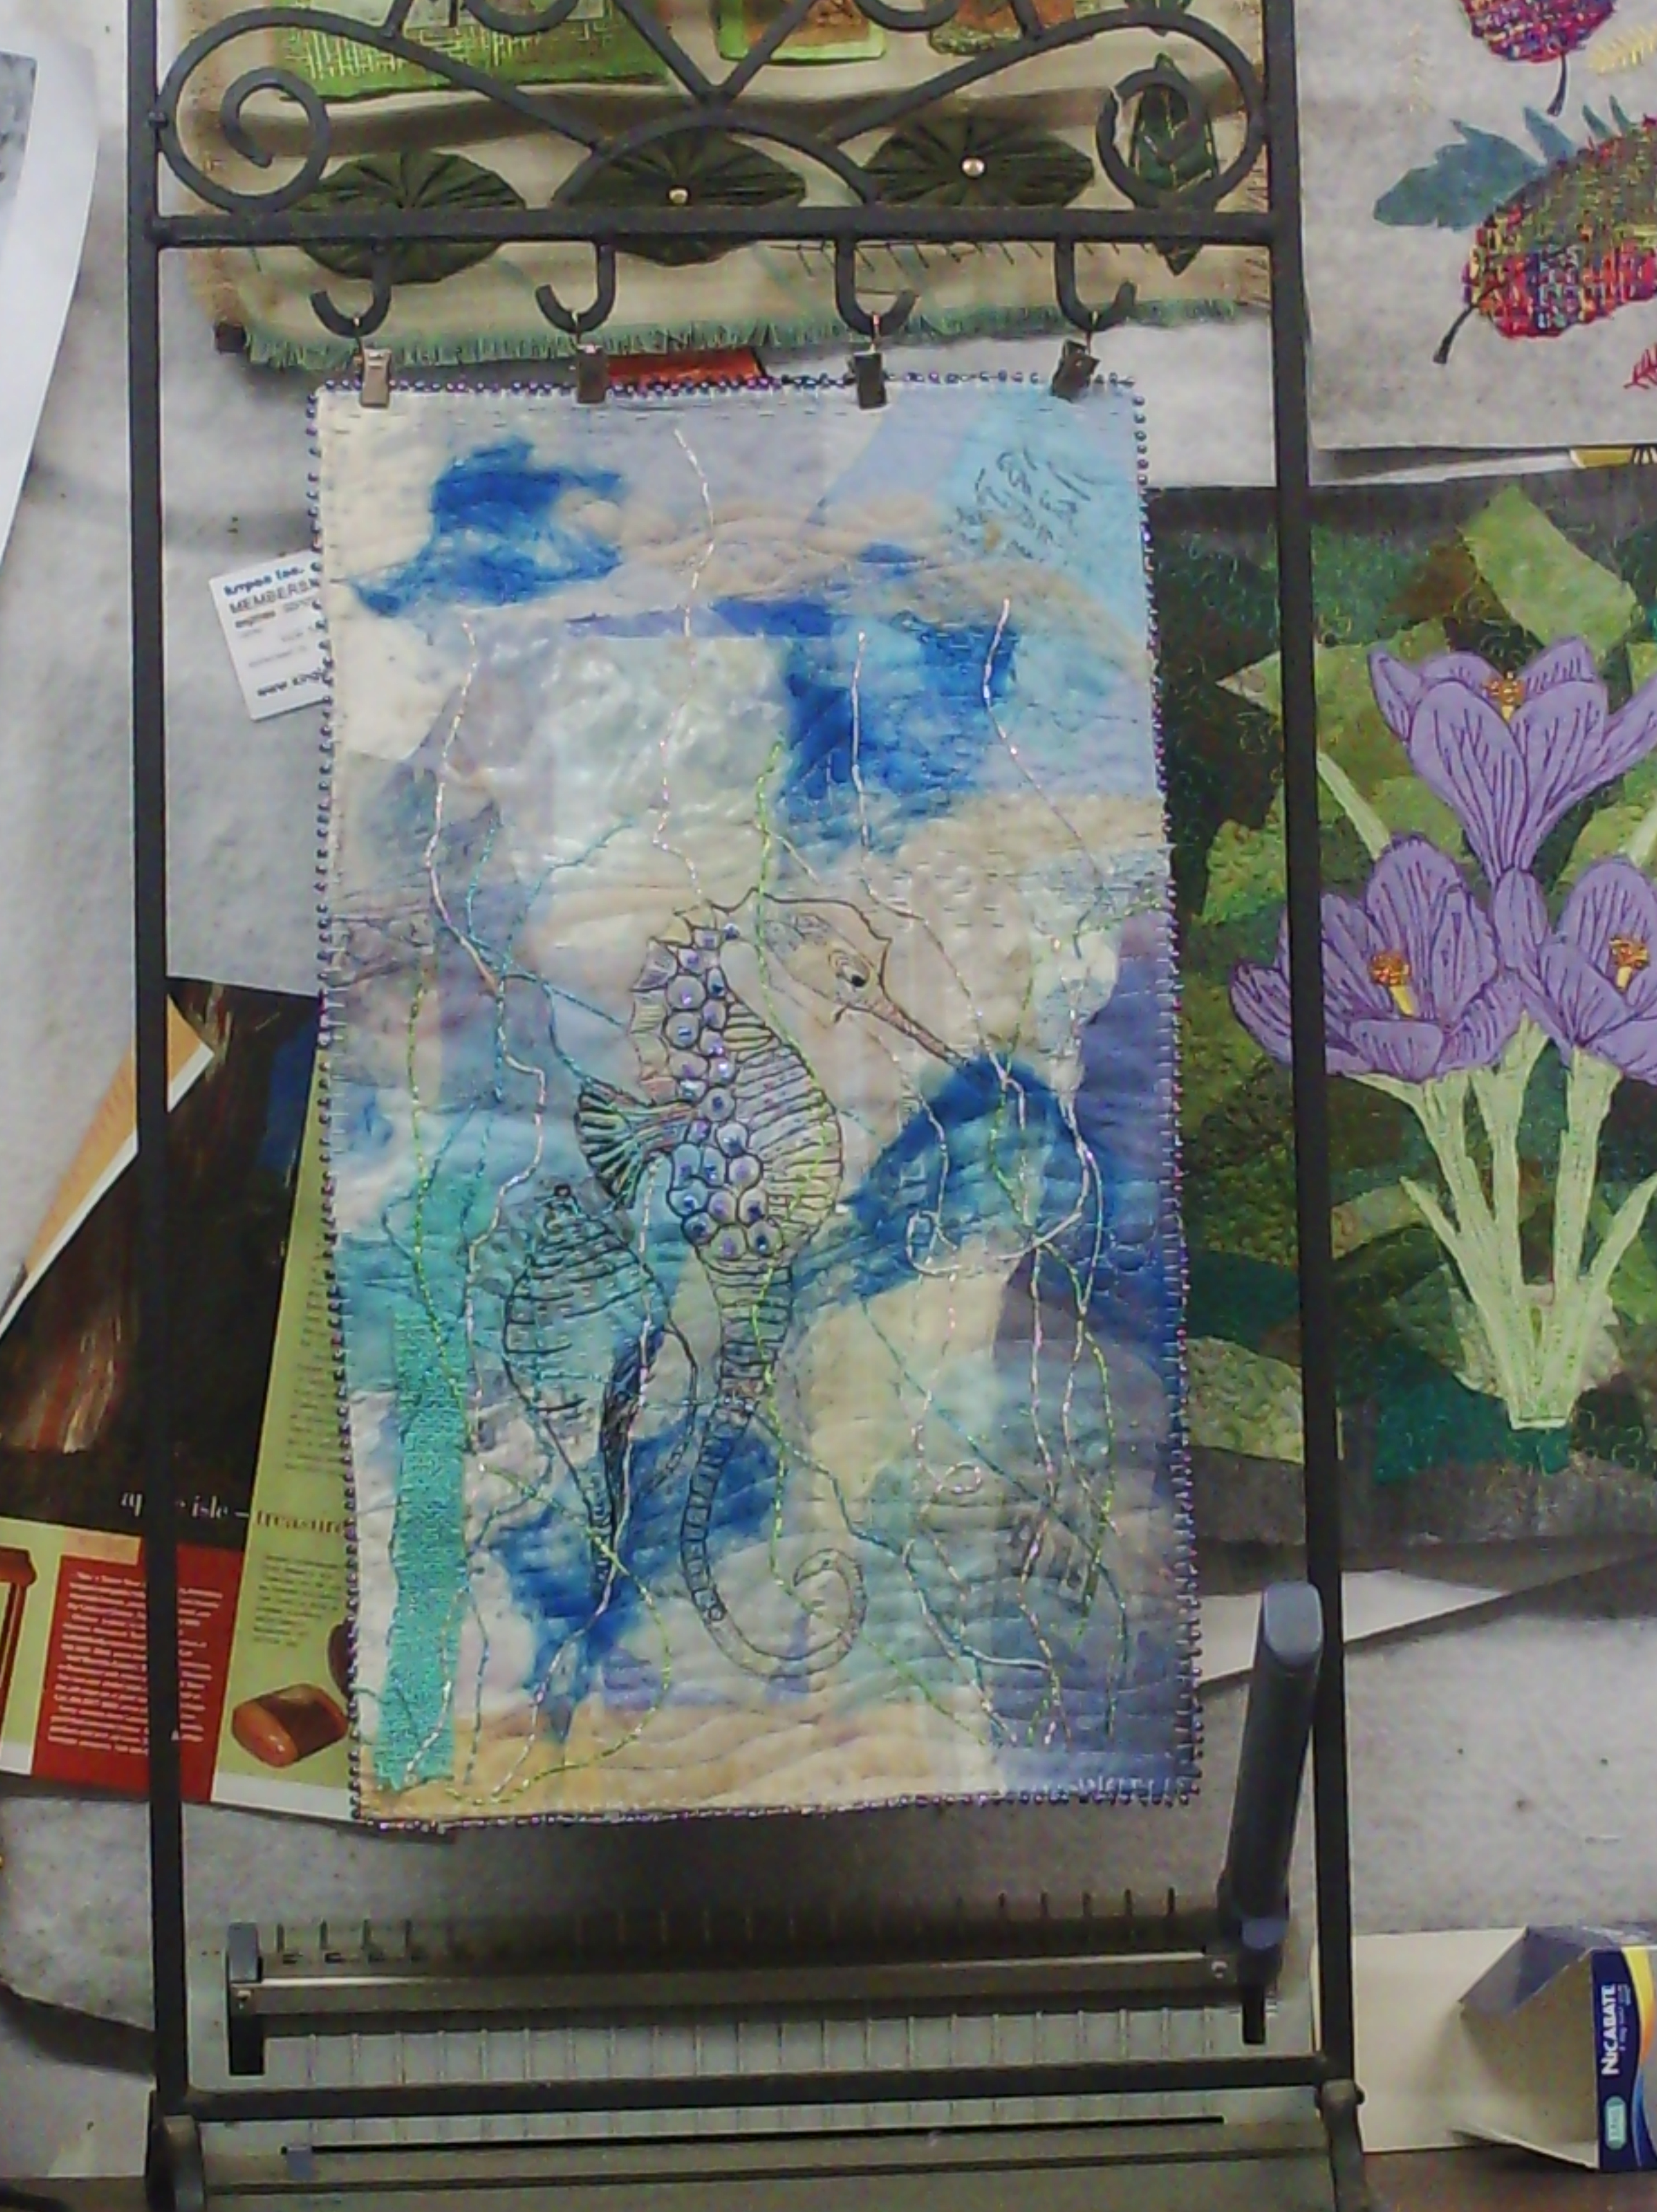
I finished another UFO today.  This one I started quite a while ago, in fact a year ago!


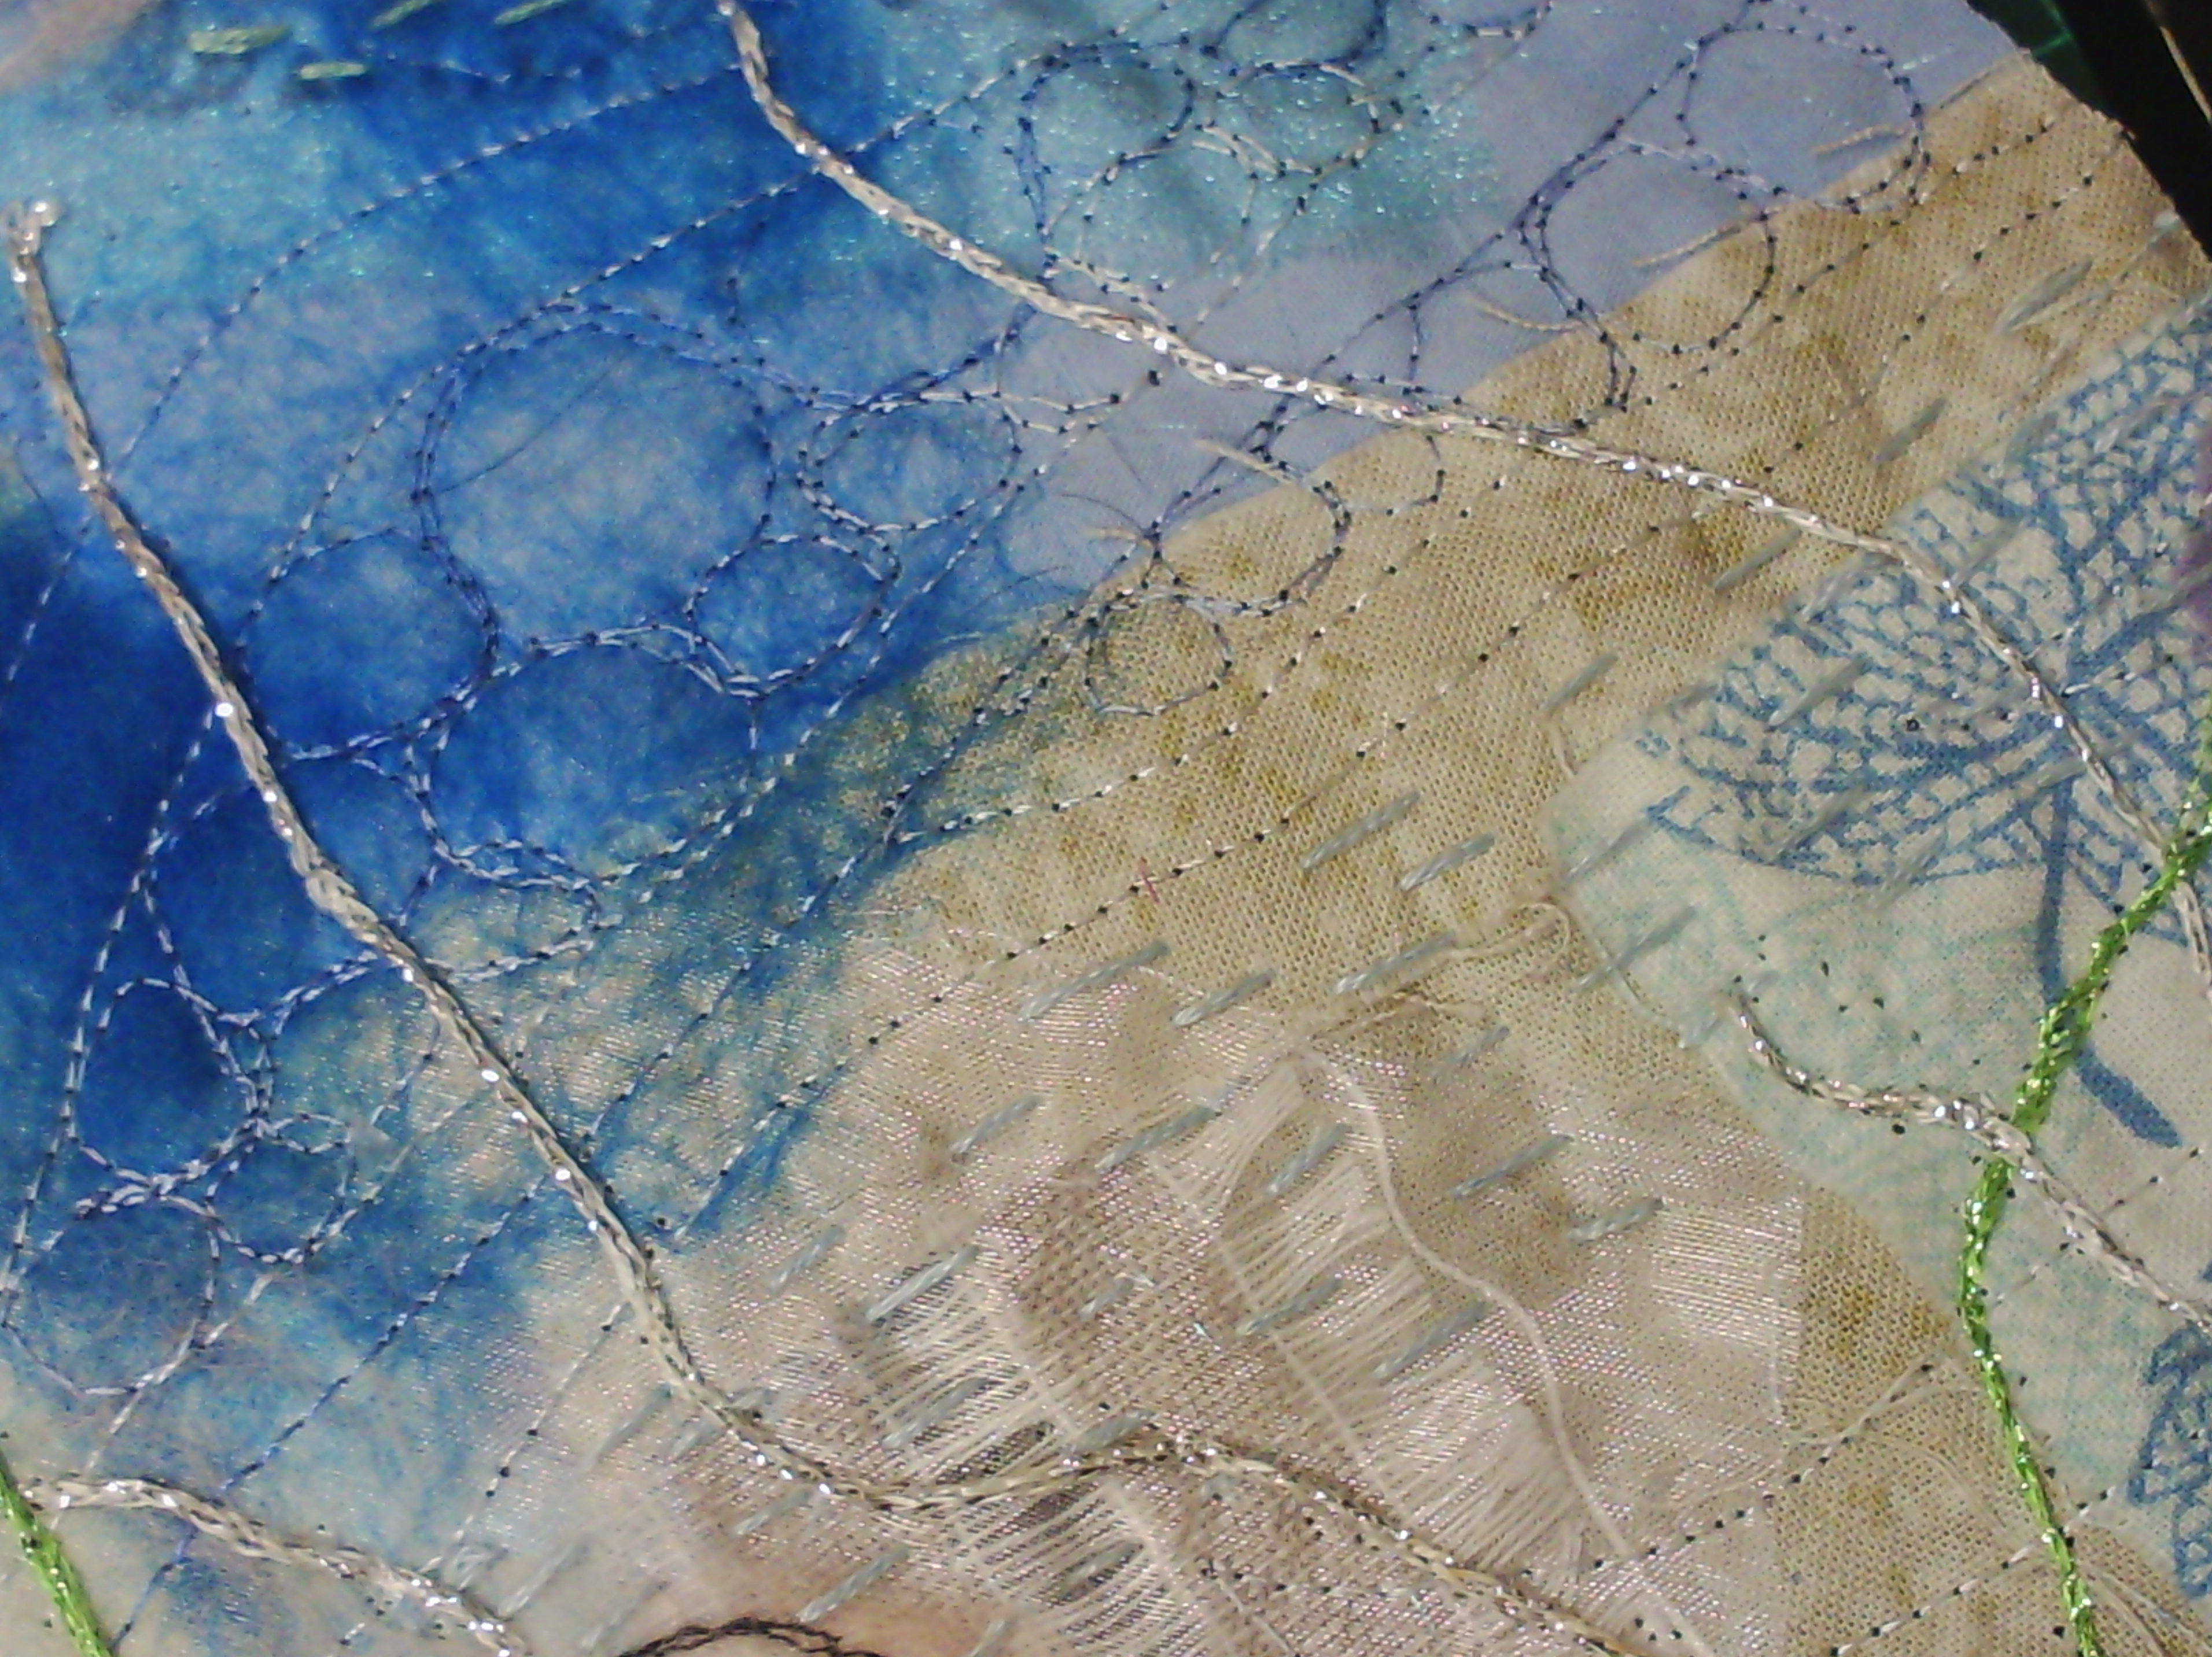
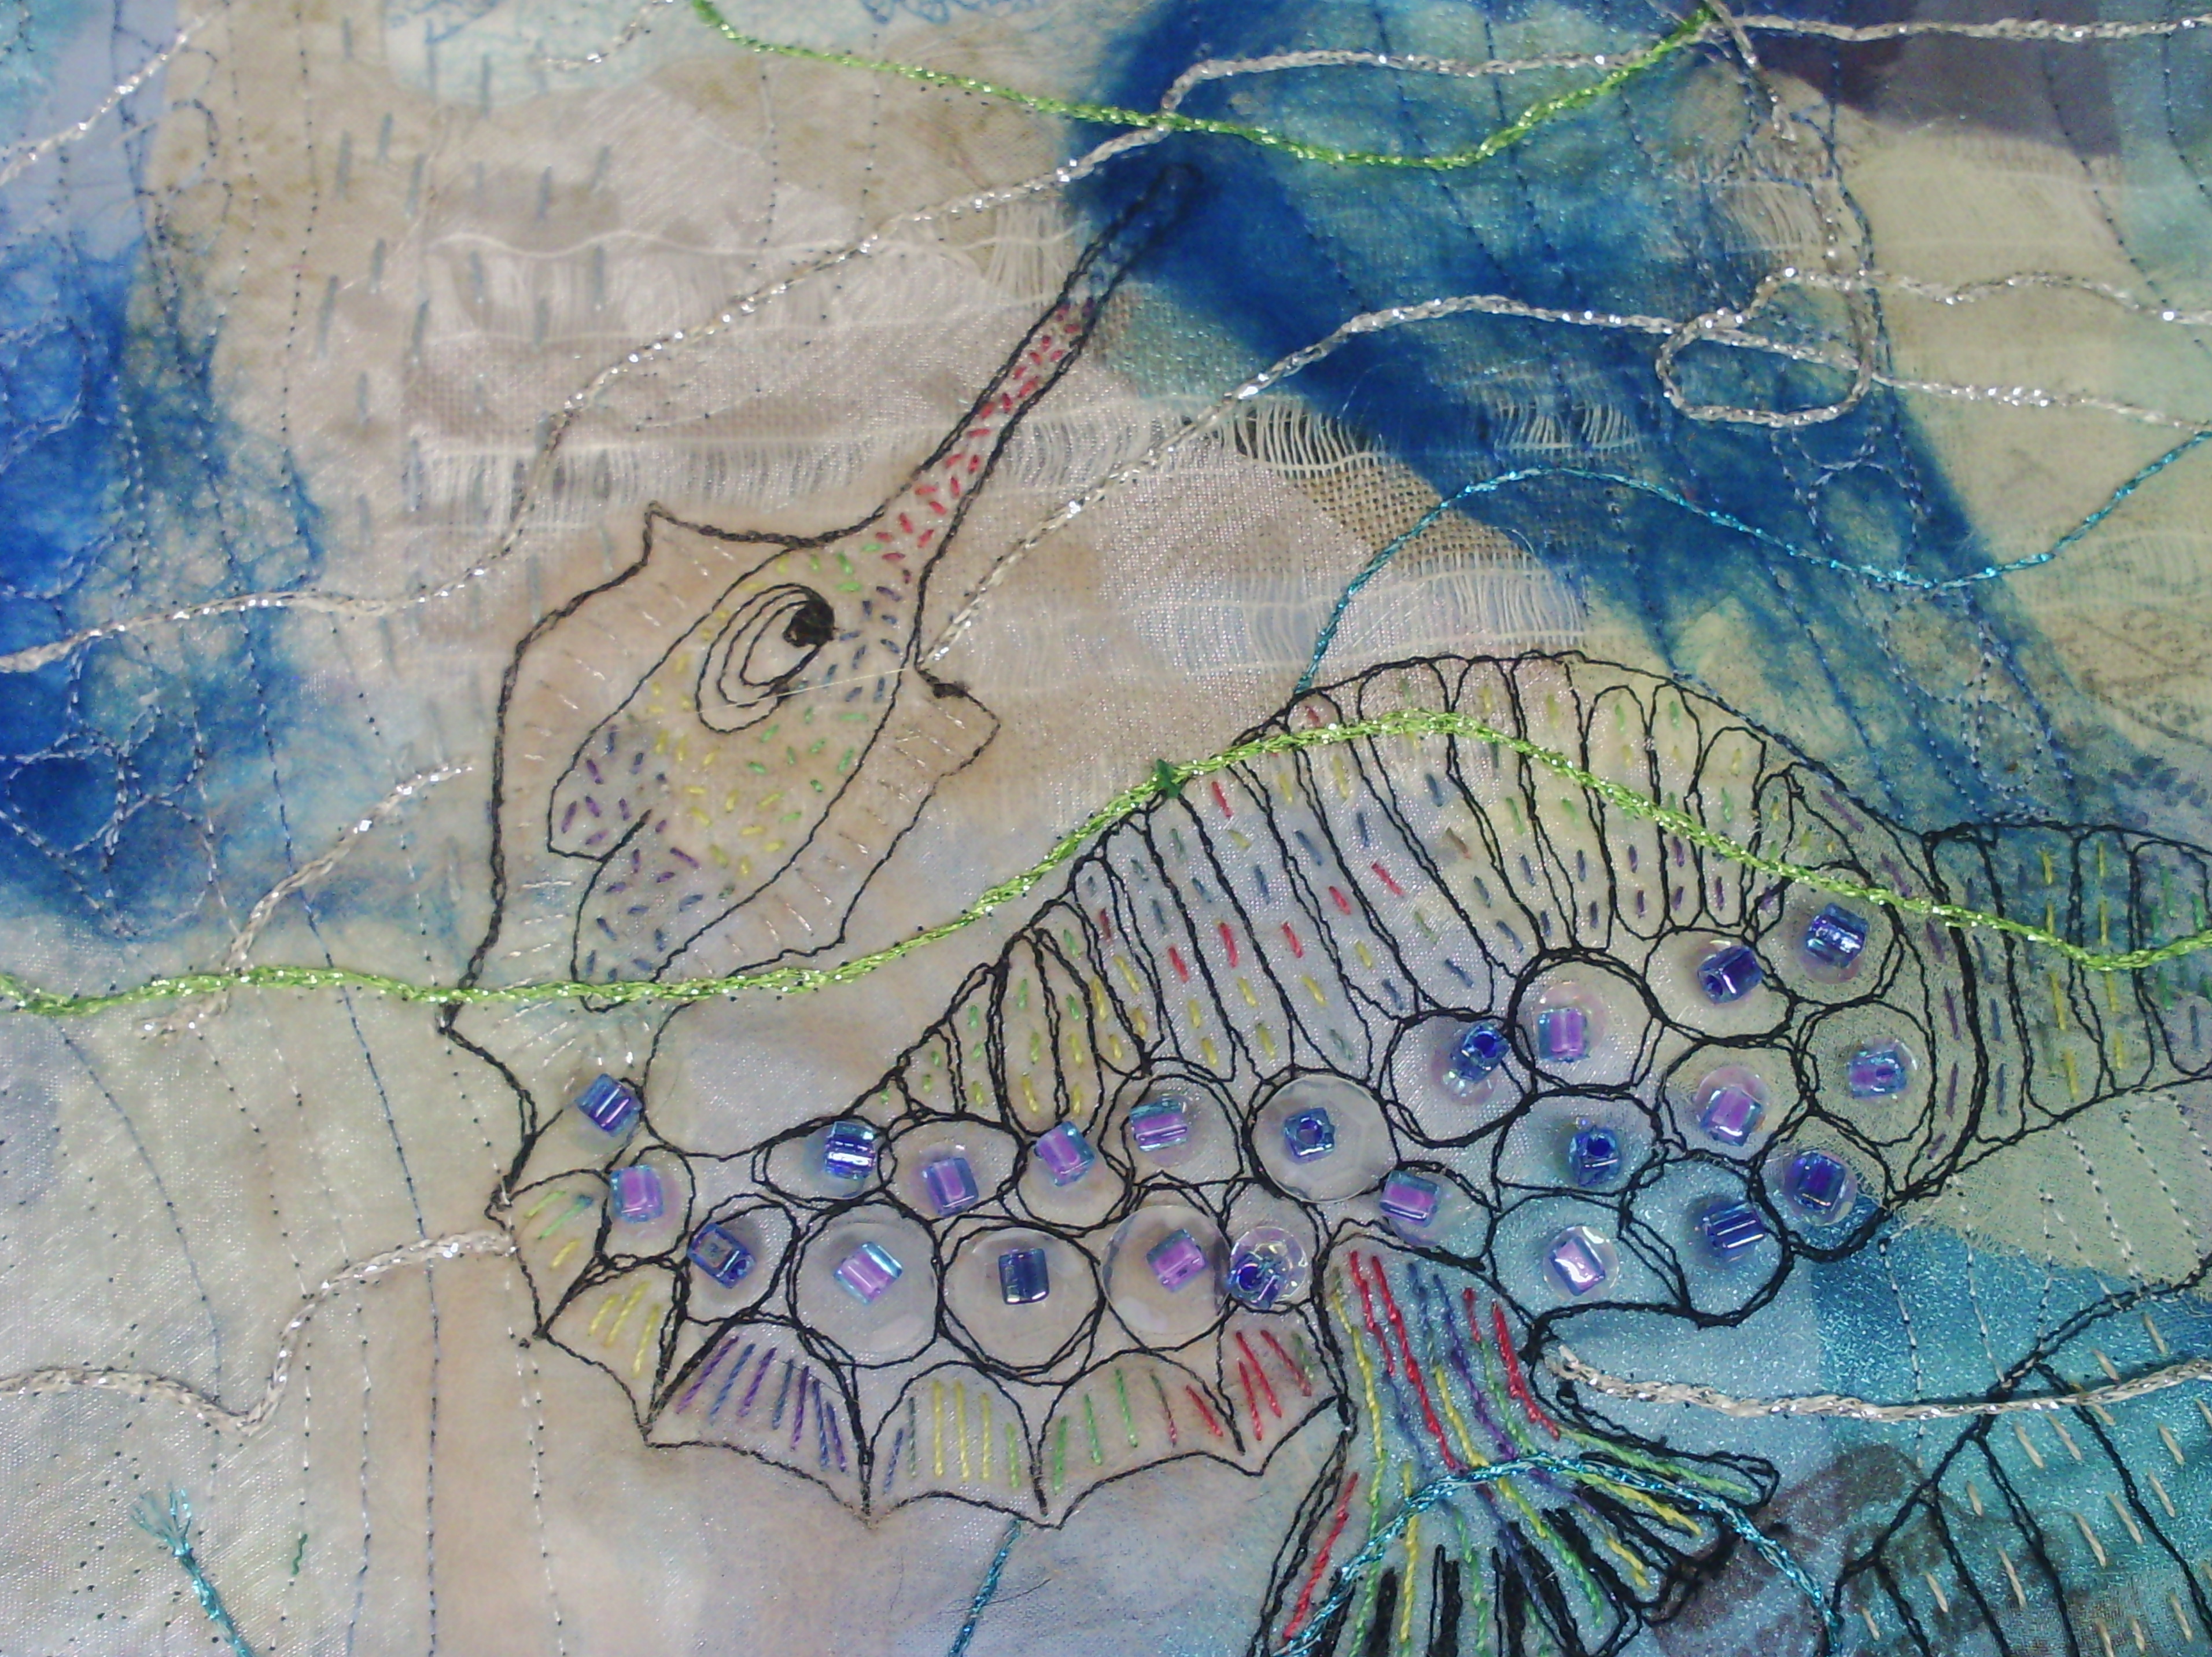
It is a seahorse free motioned onto a blue and white collage.  I have added beads, more free motion, hand stitch and couching.
 Here are some close ups of the stitching
I also finished the edges, beading of course.   Here is the finished piece hanging.
So, that is my art for today.  Hope you like it.

Happy creating!


Wednesday, January 18, 2012

Another leaf and some painting

today's ATC is another leaf!!
Felt, Wire, Silver thread, green stranded cotton, running stitch, couching, chain stitch.

I was looking at  the colouricious site in response to their newsletter, and found a gorgeous landscape by Ineke Berlin.    This one is also gorgeous, too.' 

Ineke uses Lutradur for her landscapes and because it is a non woven fabric, there are no fraying problems.  I thought I would have a go at it.  I have lutradur, but I looked around to see what other nonwovens I had.
I found some nappy lines, some face wipes and baby wipes and for good measure, I added some tea bag paper.
Since they were all very thin, I layered them up, so that ant paint going through would go onto the fabric below, and I decided to use the kids paint brushes I bought the other day. (Instead of throwing out the paint - nothing goes to waste around here!)
Here is a baby wipe painted.  I was using primary colours, nothing very nature like about that, but I will show you how I changed the contrast and colours in a bit.
Tea bag paper - very translucent and yummy!
and some nappy liner - you can see here the colours are much more natural and the contrast is more blended in.  I did this by doing something I often do when painting fabrics for landscape.  I roll the fabric together to blend the paints.  In these two above, I rolled the fabric into a sausage and then rolled it between my hands.  In other samples, I scrunch and roll into a ball and roll between my hand, and this gives a more blotchy pattern rather than the streaks you see here.
My group of tea bag papers.  Because these were so see through, I didn't blend the colours by scrunching.)
Here are some of the face wipes and baby wipes.  you can see the bottom right, green one was scrunched rather than rolled.
More baby wipes and some nappy liners.  The two nappy liners at the bottom show clearly the difference between rolling and scrunching with these very thin materials,

All in all, a very successful session.  Now, I need to do a bit of work on my sketch of the creek, which is what I want to use this for.  and start cutting ripping, arranging and sewing.  Hopefully, I'll have something to show by next week, although I still have one deadline today week to get done!  (It will be down to the wire as usual for me)

An ATC a day keeps the world at bay!
Go see lisa's ATC

Friday, December 30, 2011

Art books

 Just a quick mention, that I am going to start posting an ATC a day as a way to play with lots of techniques.  This was an idea put forward by my friend, Lisa  and I have decided to join her in her venture. we shall see!  She also has a great list of techniques which she wants to try.

My art books, as I have said, are recycled/altered books which I use to create little bits of art and experiment in on different themes.
Here are a few pages I have worked on recently.

This is a page from my bird theme book.  The backgrpound is newspaper painted with gesso and then a watercolour wash, which I find easy to paint and draw on and is a cheap and easy way to cover up the page contents underneath.  The bird was inspired by a card.  It is a little hard to see because it is drawn with a metallic pen, but basically each piece of the bird is doodled with a different free motion quilting design.  I have a small quilt based on this page in process, so you see the books are a great design resource..
This is a page in process in my water/oceans book.  Again the background is painted newspaper/gesso.
The seahorses are molding paste applied through a stencil, then painted gold.
This page will be layered again to add some more weeds and depth before it is finished.  I already have ideas about using painted fusible in a small quilt like this.
These ferns in my leaf theme book are stencilled with oil pastel.  Next, I will put a watercolour wash on which will be resisted by the pastel.  This can be mimicked on fabric using shiva sticks and fabric paint, so i do see a batch of fabric comming up.
I have shown this page before.  It is a ripped printout pasted to the page, but here, you can see I have begun to sketch out the missing parts.  I think this page needs a wash for the background, so the leaves will brobably be completed with oil pastel.
Another page from the leaf book, this is a simple layout for a small motif (about 4") I made using couched copper wire on a piece of woven wool fabric.  This page has a piece od non woven paper/fabric (the type florists use on their posies) pasted directly to the page.  It is semi transparent, but I actually like the little views you can see.  The pink/orange paper is paste paper .

I have actually been doing a lot of sewing an textile work, but haven't quite got to the point of something to show yet and a couple of my WIPs are things I can't show until a certain date, but two days untill I start posting ATCs!!!!

Wednesday, July 27, 2011

Scale sample

I have been working on samples for s few projects over the last week or two and today I have finished one.

It is moth scales on a leaft background.  I had been thinking a lot about fabrics to use and how to do it and finally settled on simple shapes.  I wanted to create depth between the leaves which were the background and the scales which were the moth's wings, so I tried out a few different ways to construct the two.
In this first sample, I covered the leaves and scales with netting and free motion stitched over the top.  Although the leaves are about how I wanted them, the net dulled and flattened the wing scales on the right too much.  Even with the couched line between them, there is not much difference in value between the two sides and certainly no difference in texture.
 In the sample above, the leaves and scales have been both free motion stitched.  Whilst I waspleased with the dimensionality of the wing scales using this method, again the value and texture of both sides is too similar.
This is my final sample.  Again the leaves have been covered in net and free motioned, whilst the wing scales on this sample were hand stitched, using fly stitch. The value difference between the two sides is quite striking and the texture is very different. This is very close to what I want to do.  Now, I just have to decide whether I want to stitch several hundred wing scales on by hand or by machine. 
Another difference I will make in the final piece will be to make the leaves more random and perhaps use tulle instead of net (and of course be a little more careful with my stitching, mmmm)

Have fun creating

Wednesday, March 9, 2011

waterfall 2

Well, i have done a little on my waterfall since last week.  At the moment I am busily preparing to go away for a few days.  I have had to put my planned blogs back a bit, I will still be blogging, only they will be some blogs I prepared earlier, then back to normal on Saturday.
I have couched the falling water in place, although I will add a little more, including some angelina to the waterfall and the foam.  The white of the foam is too stark, and needs to be added to.  The ripples in the pool turned out well.
Even though I see things that I feel need altering, I will not do it until I can see the whole piece together.  The dark cliff and the ferns and other lace that need to go on will alter the movement and the focus, so it is best to wait.
Welcome to my new followers, you brave things, keep tuning in as I have a few things ready to post whilst I'm away.

Wednesday, March 2, 2011

Waterfall WIP

As I said, Wednesdays will be work in progress day. The day when I show you how I go about creating my fibre art pieces.
Today I worked on a landscape with waterfall collage that I designed for my Quilt uni course.
 This is the original idea sketch in my journal.  It is a simple scene with only a few elements and uses the golden rule in composition.  There is a rocky cliff on the left, A waterfall with pool in the centre, and rainforest and ferns on the right.  The ferns are in the foreground, covering the other side of the cliff.  There will also be a dragonfly buzzing around somewhere.
This is my sketch on interfacing 18x14 in.  I have already placed some hand dyed fabric for the sky.

The brown fabric, another hand dye, is what I will use for the cliffs.  On the left is a close up of my sketch of the rocks on the fabric.  This fabric will be extensively thread painted, then trapuntoed to give dimension before I put it on the background.
The green mottled fabric will go under a large amount of FME lace representing trees and ferns in the foreground on the right.

This is my tucked fabric for the pool at the bottom of the scene pinned ready to sew the ripples in, and on the right, pinned in place.  The pool is contructed of an organza overlay over a navy blue piece of cotton, so that when the ripples are sewn in, it will appear to hane depth.

These are a variety of yarns and threads which will be couched in place for the waterfall.  In the picture on the right they are sitting in place and also to the right of them, is some of my Fibre film from yesterday which will form the moss at the edge of the pool.

As you can see, Most of the pieces require some work before the piece can be assembled, and at present it is still only a plan and looks like quite a mess.
Creating art is always about give and take.  At this stage I like how I imagine the pieces will fit together, but you must always be open to change.  Our minds are always learning new things and new ways to do them, so when you look in next week, I cannot guarantee my plan will be the same, however, I hope the piece will be a little closer to being finished and starting to look like more than a mess!

Thursday, February 24, 2011

wallhanging

After an hiatus trying to get my bad back behaving, I have started back working, but of course, it played up pretty soon after.  However, I have done a little work on my sample for the wallhanging.


In the sample I tried both free motion and  general, feed dogs up couching.  Remember the white is water soluble, and will be a lace and fringed bottom.  I have put the skeleton in for this but I will do more work when the couching is finished.
in the enlargement above:

  • the first thread is a black and metallic mix and is obscured by the fluffy red stuff, I will remember not to put it in such a place in the real thing.  This is what samples are for, sorting out the problems.  This first thread is chain stitch, but as i said you can't see it.  
  • next is an orange boucle, also obscured, 
  • then the red eyelash, 
  • followed by a brown cord.  
  • On the other side of the curve are four more textured threads.  
  • All of these were attached free motion using a narrow zigzag.  
  • the next threads were done using the feed dogs up.  
  • The gold one used a narrow, long zig zag. 
  • the next two ribbon like yarns were done using a straight stitch down the centre.  
  • They are followed by a decorative cross stitch. 
  • The gold and the red threads next up used a narrow long zig zag in black thread 
  • and the orange ribbon used zig zag with monofilament.
I am pleased with the way these threads look on the back background, but as I said, I will have to do more work on the lace at the bottom, so it is not just swallowed up.
Another reason I worked on this sample was to create some couching samples for a Quilt uni course on embellishing with Susan Brittingham as I am very far behind due to my back.

Let's see what creativity tomorrow brings!

Tuesday, February 22, 2011

FME stitches

Here are a few new stitch try outs I did recently.


This one is a heavy garnet (or granite) stitch using a wide zig zag.  This is really good for filling large areas, like the poppies in my itty bitty landscape.  The next one is the same, only a little bit lighter.
It is good for shading and merging different colours.
The next one is also a garnet stitch, however it is bobbin work, working on the bottom of your fabric using the bobbin. a thicker thread (sorry, I had white to hand at the time) is wound on the bobbin and the bobbin tension loosened to compensate.  This thread (a no 10 crochet cotton) is at the limit of my bobbin screw, anything larger must be bypassed, which creates a nice mess of moss stitch on the bottom.

Another bobbin technique, is called cable stitch,  this is the same as the one above, however it is not a circular stitch
This is good for outlining and embellishing.  Once tension issues are solved, it is easier than couching, since you don't need to control where the thick thread goes.  And this leads us natually to couching.


My sample is not the best.  I have used FME, however if you are using this in a straight line, or in a manner that allows the feed dogs to be up, you can get a much smoother look.  The top one is showing a dense zig zag, while the bottom is a longer stitch and shows the thread.  Obviously, you would not use a dense zig zag if you wanted the thread to be a decorative element, and in this case you would probably use a monofilament thread, so the couched thread could be seen in all it's glory.  The dense couching, I would use to create dimension, as the lines of satin stich would be raised.  It would not really matter what thread you couched, 'cos you wouldn't see it.  another thought, is that using the feed dogs up, you can couch with a variety of decorative stiches, which is what I will be doing on my wall hanging
The last stich is another couching stitch, which I first learnt from Quilt in a day.  It is called chain stitch
This technique is also used in machine ribbon embroidery.  Generally, you use a pretty thread for the chain (not white!) and monofilament for the top and bobbin.  Basically you fold the thread in half and attach it to the base with a few stitches. Cross the thread or ribbon in fron to the needle, not pulling too tight, sew a few stiches forward to anchor the crossover, cross again and so on.  This is another technique which can be done with the feed dogs up.
So, there's a headful!