You might remember a while ago I made a start on my Tangled Textiles piece, which is about Vincent van Gogh, here and here.
.
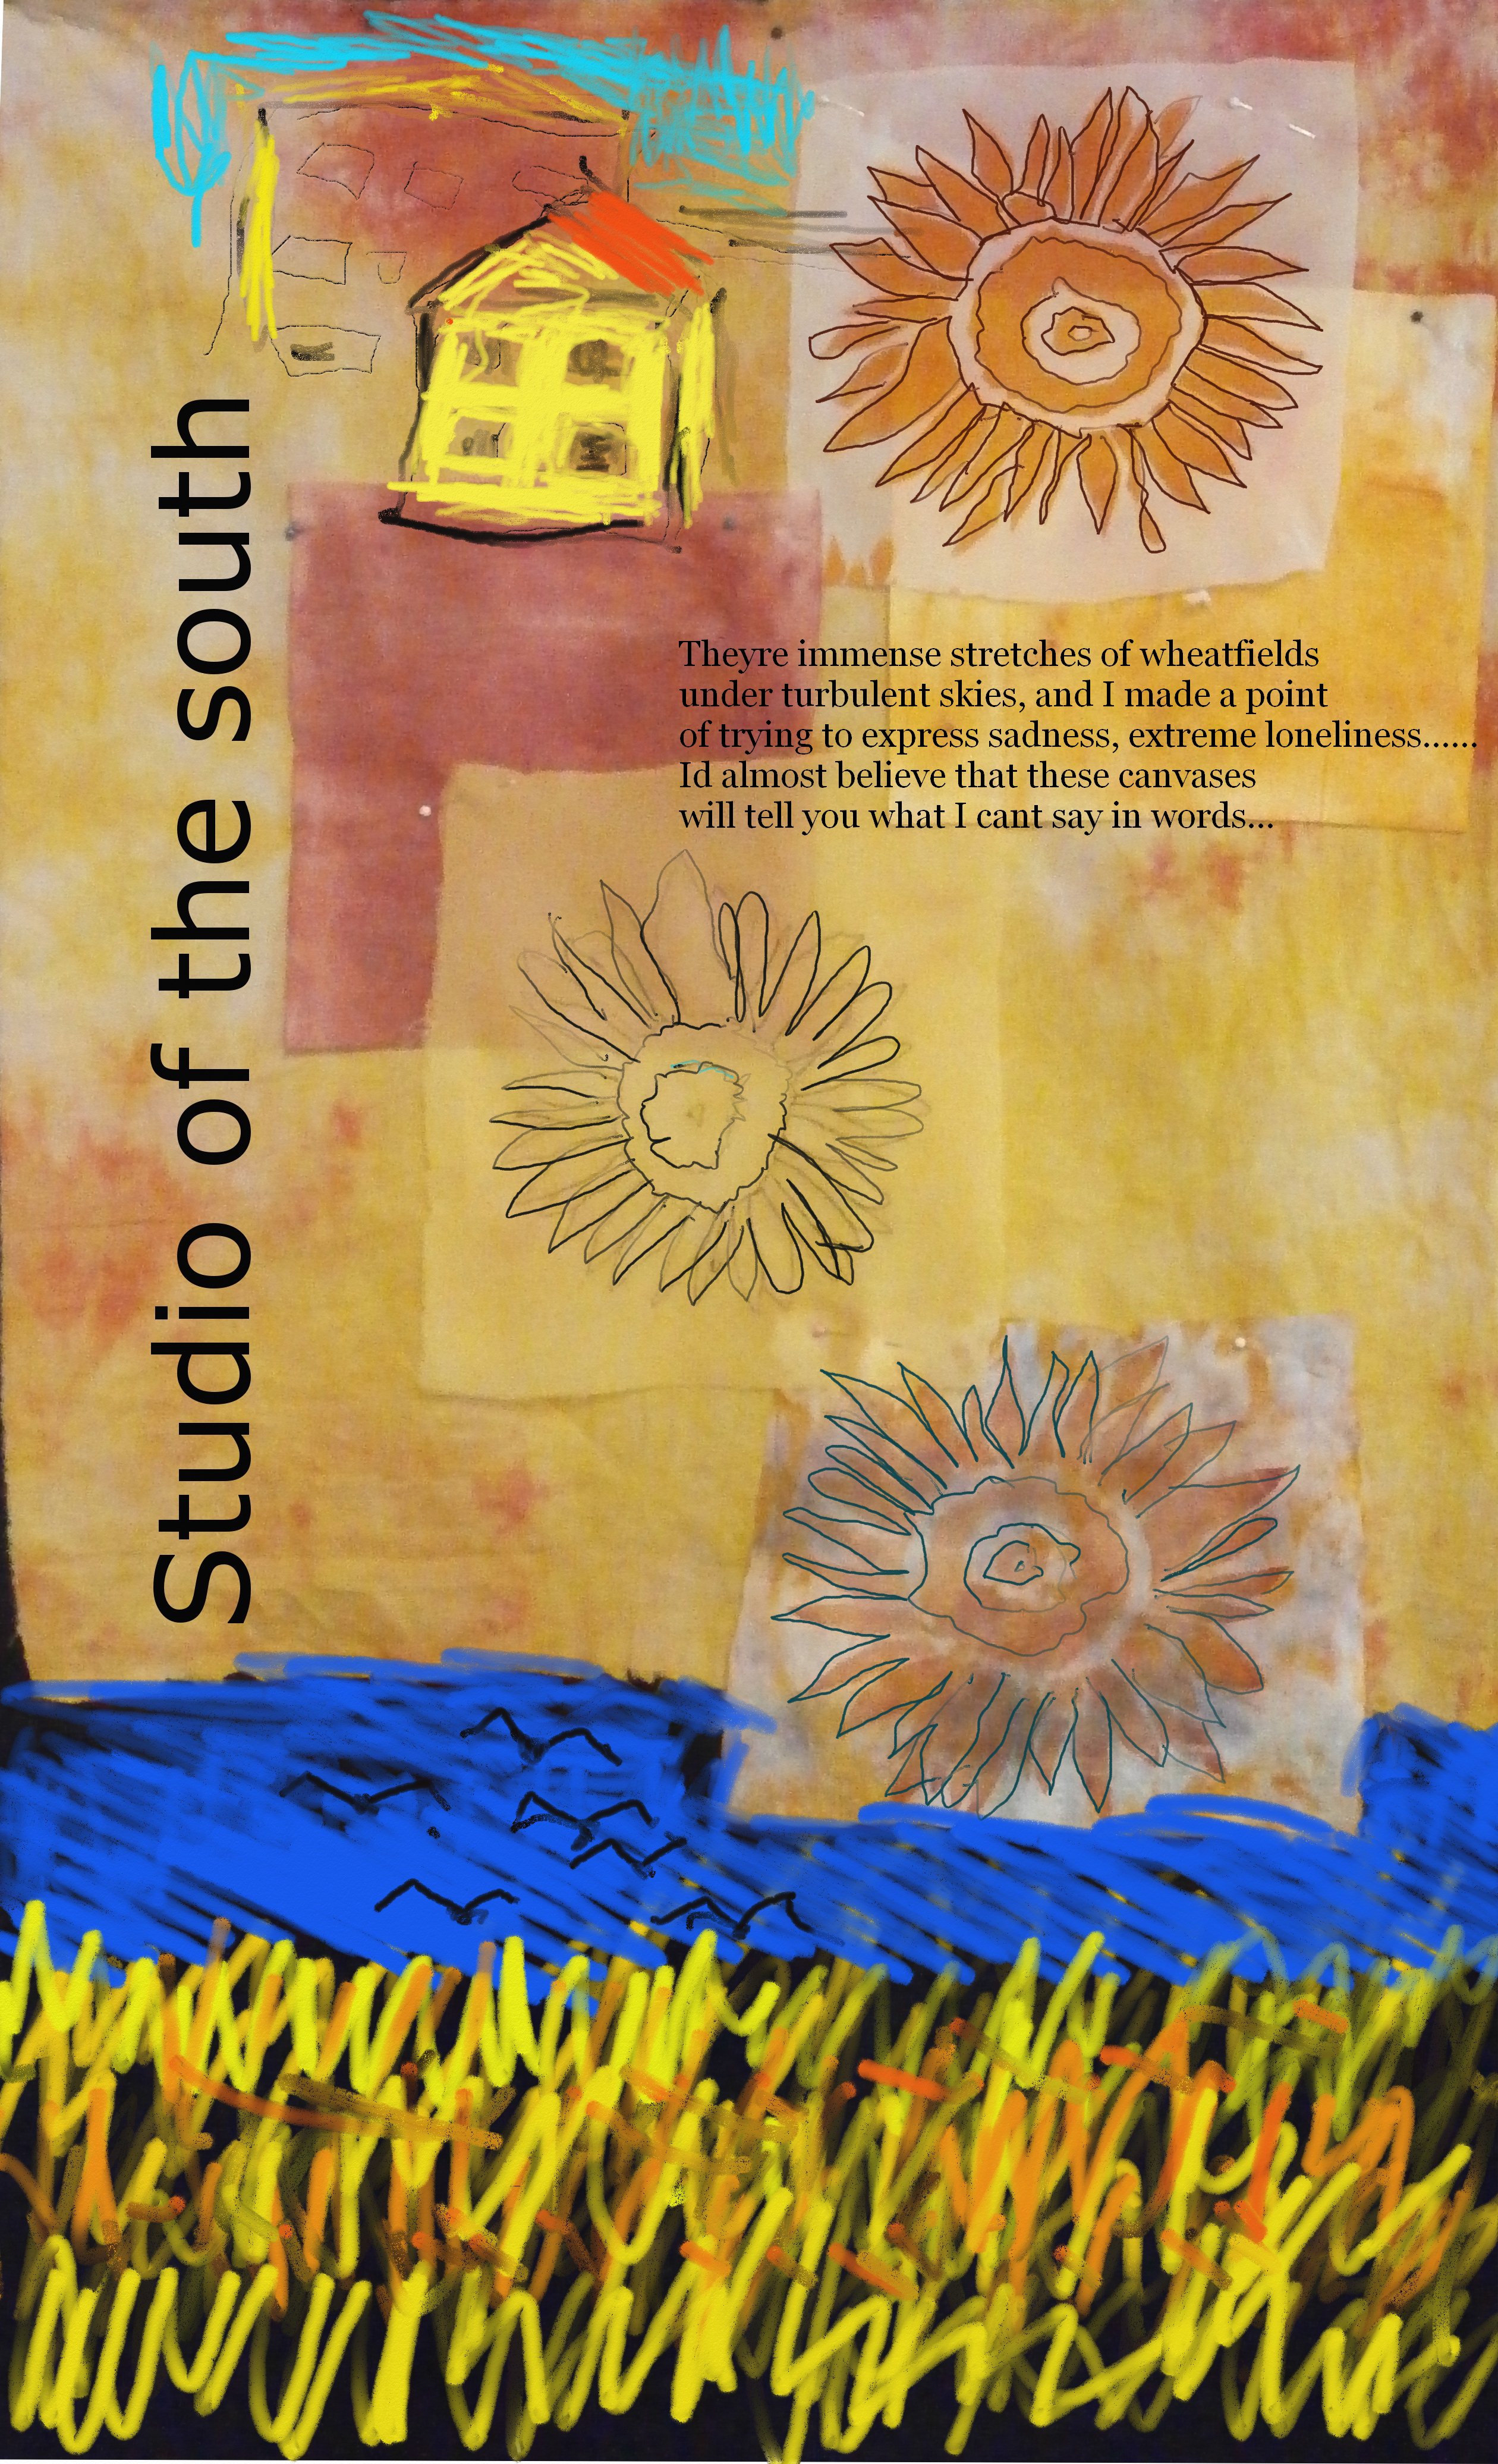
This was my digital mock up of what I intend At the top I intend a thread sketch of the yellow house where Vincent lived in Arles. At the bottom I want to needlefelt an impression of one of his last paintings (wheat field with crows) and under the top sunflower I want to transfer and embroider a section from one of his letters.
Here is where I am at today
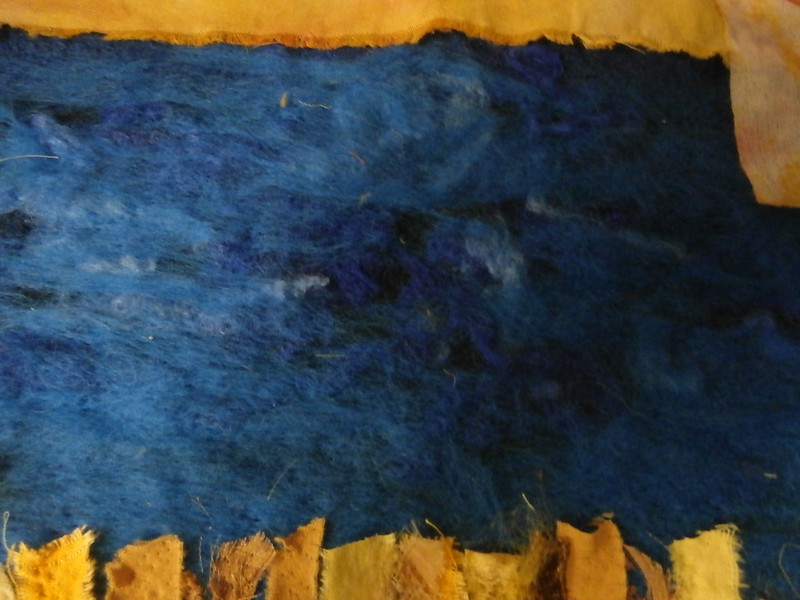
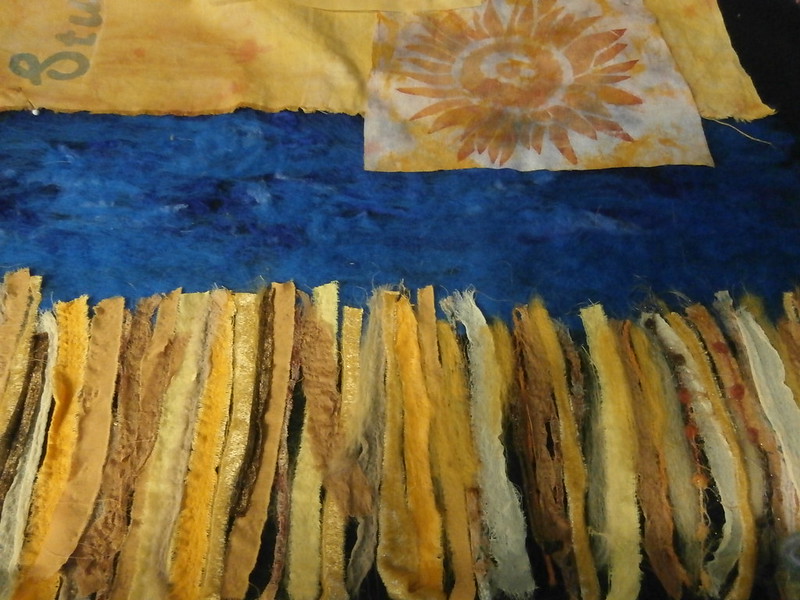
Here is my needlefelted sky and wheat field. the sky is finished other than thread painting the crows in, but the wheat field needs more layers, and more needlefelting then thread painting to finish.
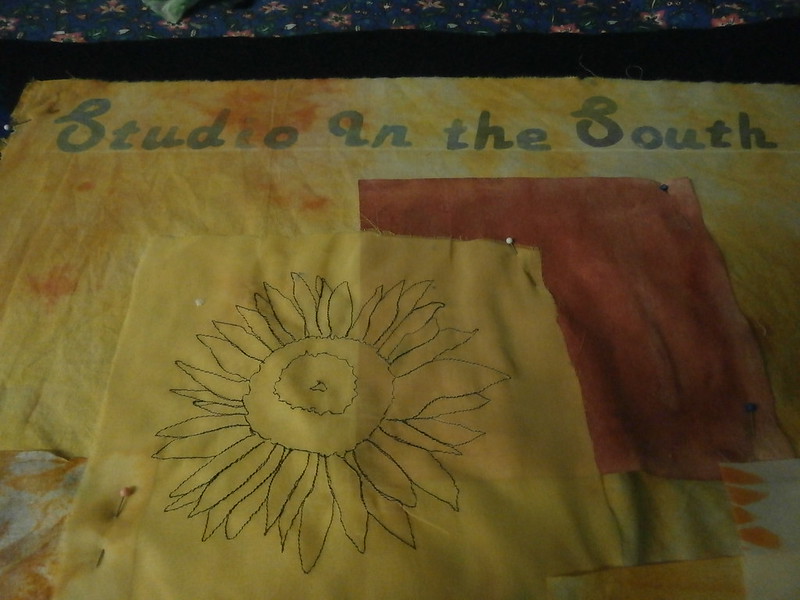
To make the 'Studio of the south banner, I traced the text on the back of some painted fusible web and cut it out.
Then I fused it to the side of my work as in the mock up. As you can see, I still have a lot of work to go with stitching! But I am liking how it is looking!
Happy Creating!
Showing posts with label painted fusible. Show all posts
Showing posts with label painted fusible. Show all posts
Thursday, March 13, 2014
Sunday, January 12, 2014
A little magpie
The little, or not so little magpie, of course is me. anything shiny or metallic gets my attention.
I have been plating with foils and painted fusible lately. It is not something new, I have done tutorials on it in the past, but unfortunately a lot of my old, old posts have lost their photos. Perhaps that should be an aim for this year, to redo those tutorials???
Anyhow, here is my collage a day using these lovely things.
If you are not familiar with these techniques, they both use fusible web, but in different ways. This sample is on velvet, a la Angie hughes, but these techniques can be used on just about any surface that won't melt with an iron such as paper or wood.
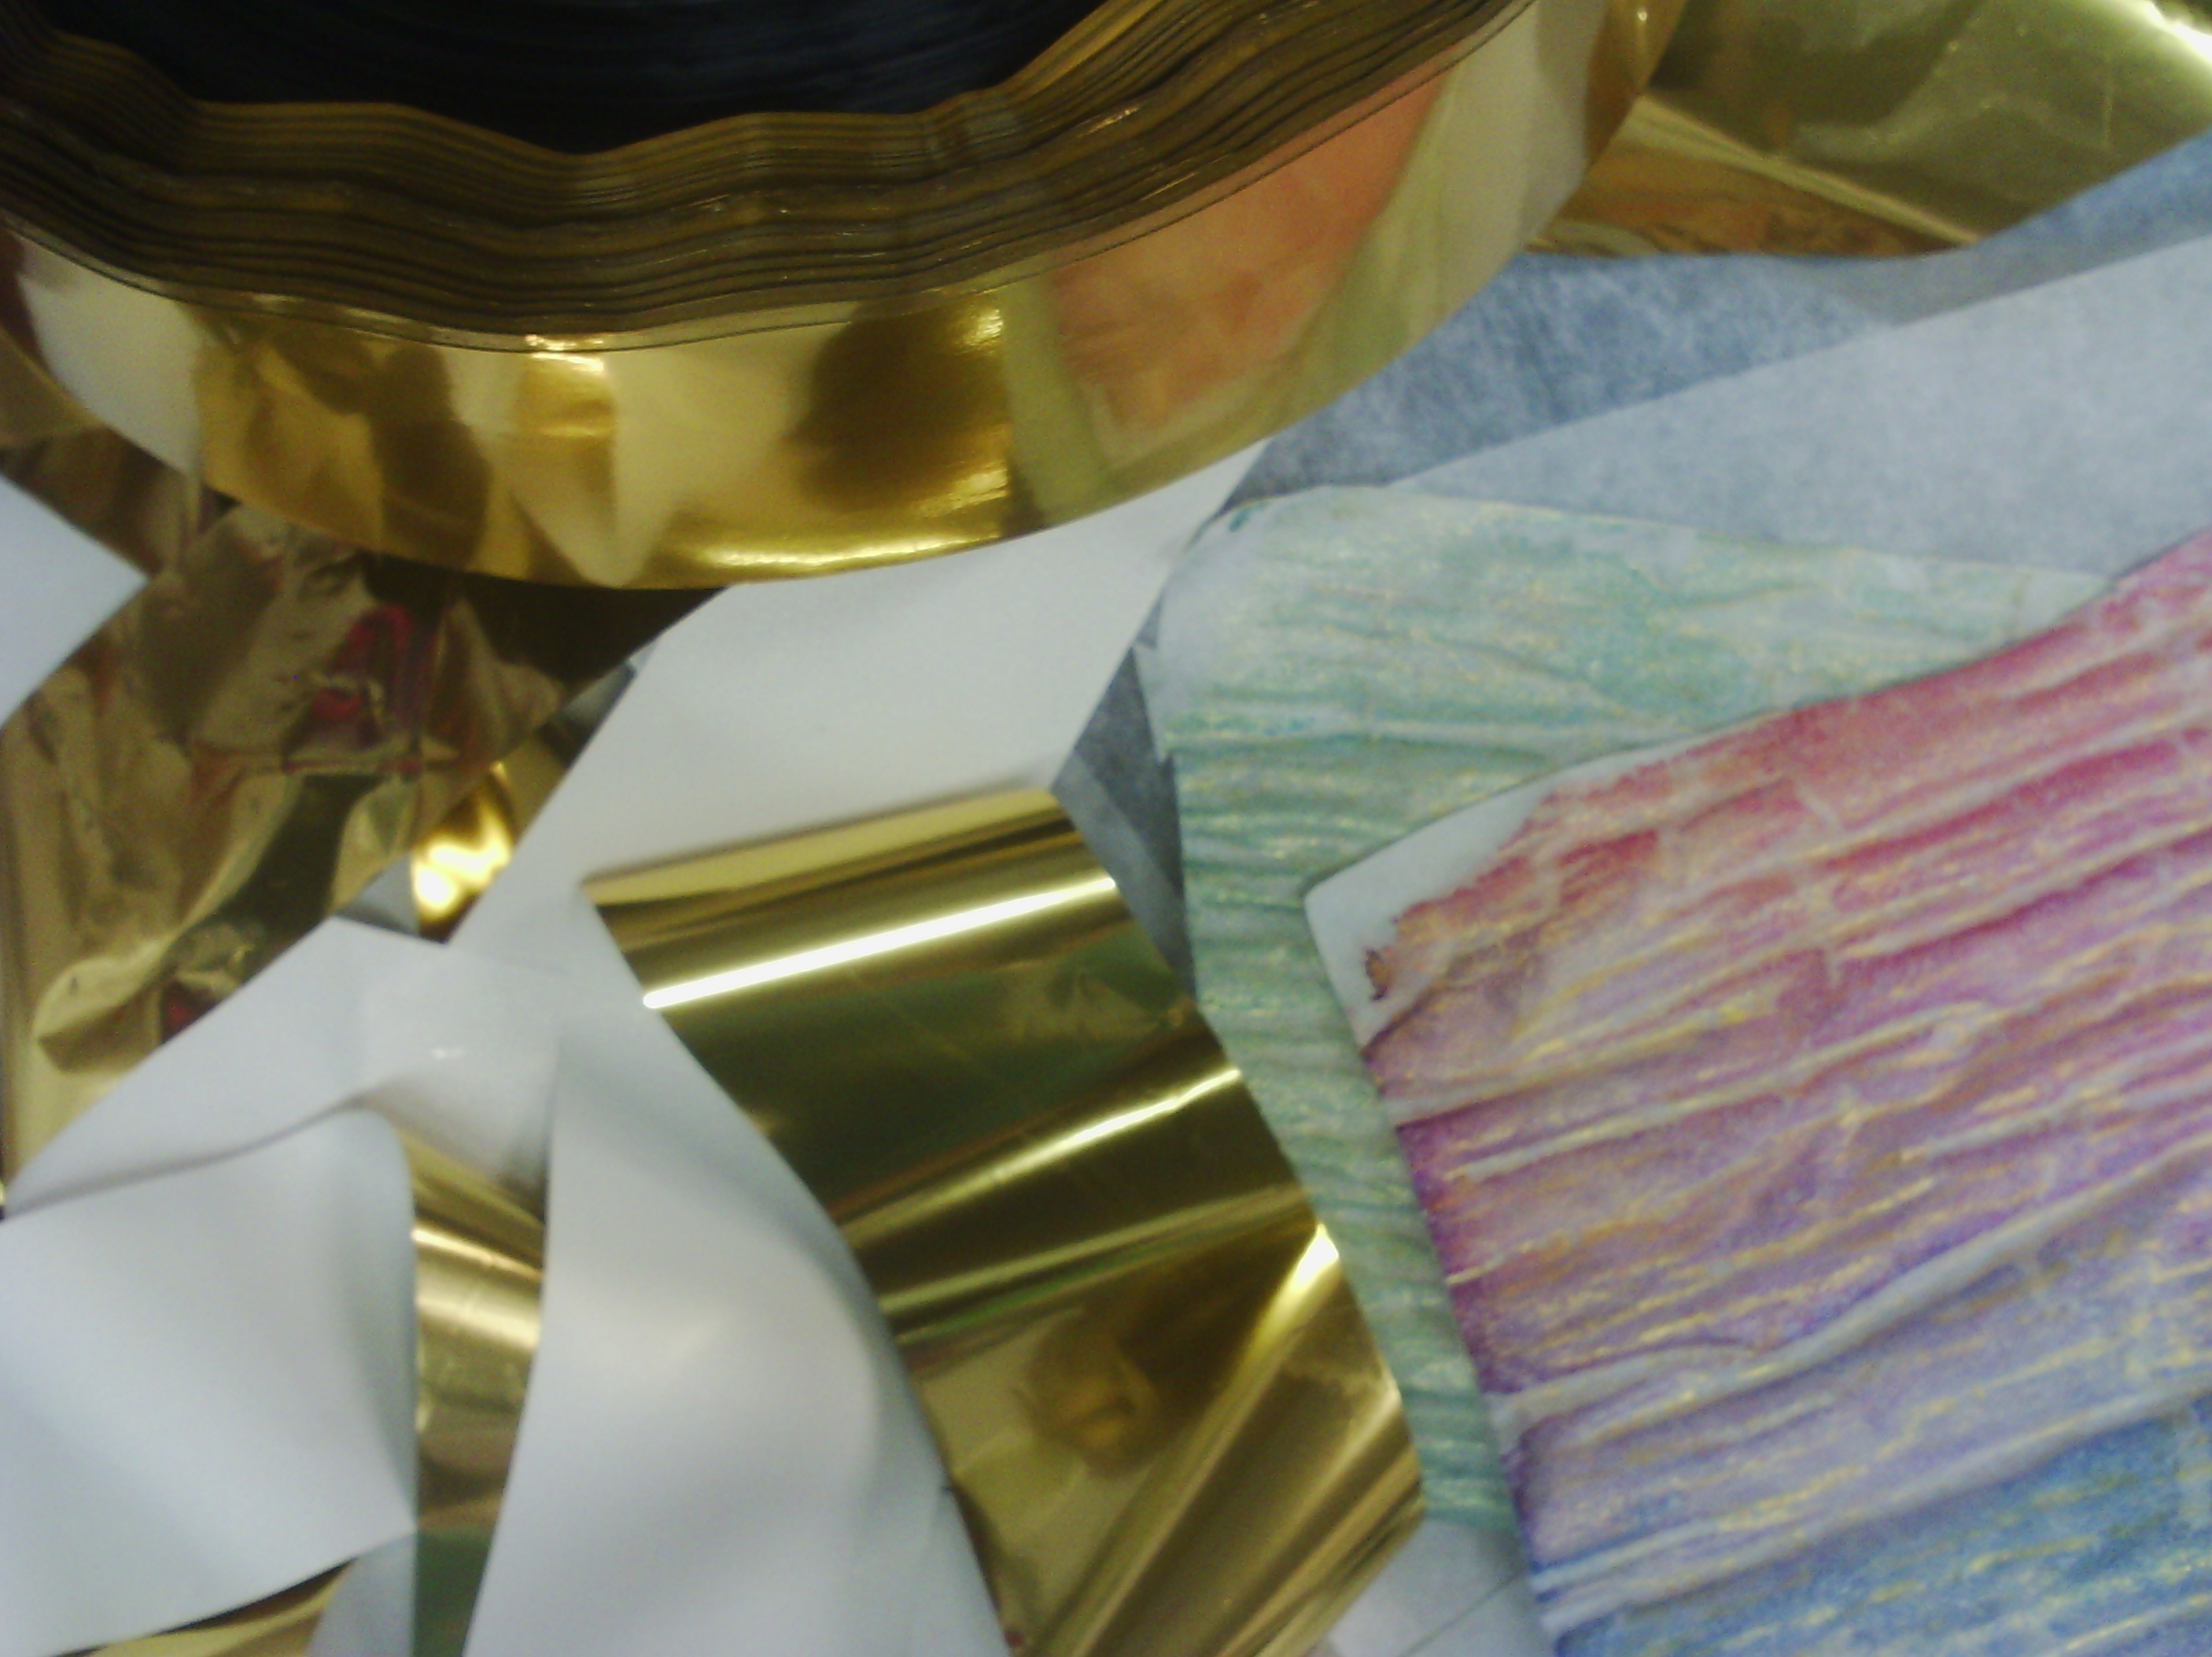
Above are the offending items. The gold strips with the white back are the foil, which I have a lot of as you can see. I have other colours as well. the wrinkly pink and pale green sheets are the painted fusible.
OK, I took some pictures and here is a tutorial
To use the foil, I cut leaf shapes out of fusible (this is a web of glue on a sheet of silicon paper which comes in rolls and sheets).
The fusible web is rough on one side and smooth on the other. The rough side is the glue and the smooth side is the paper.
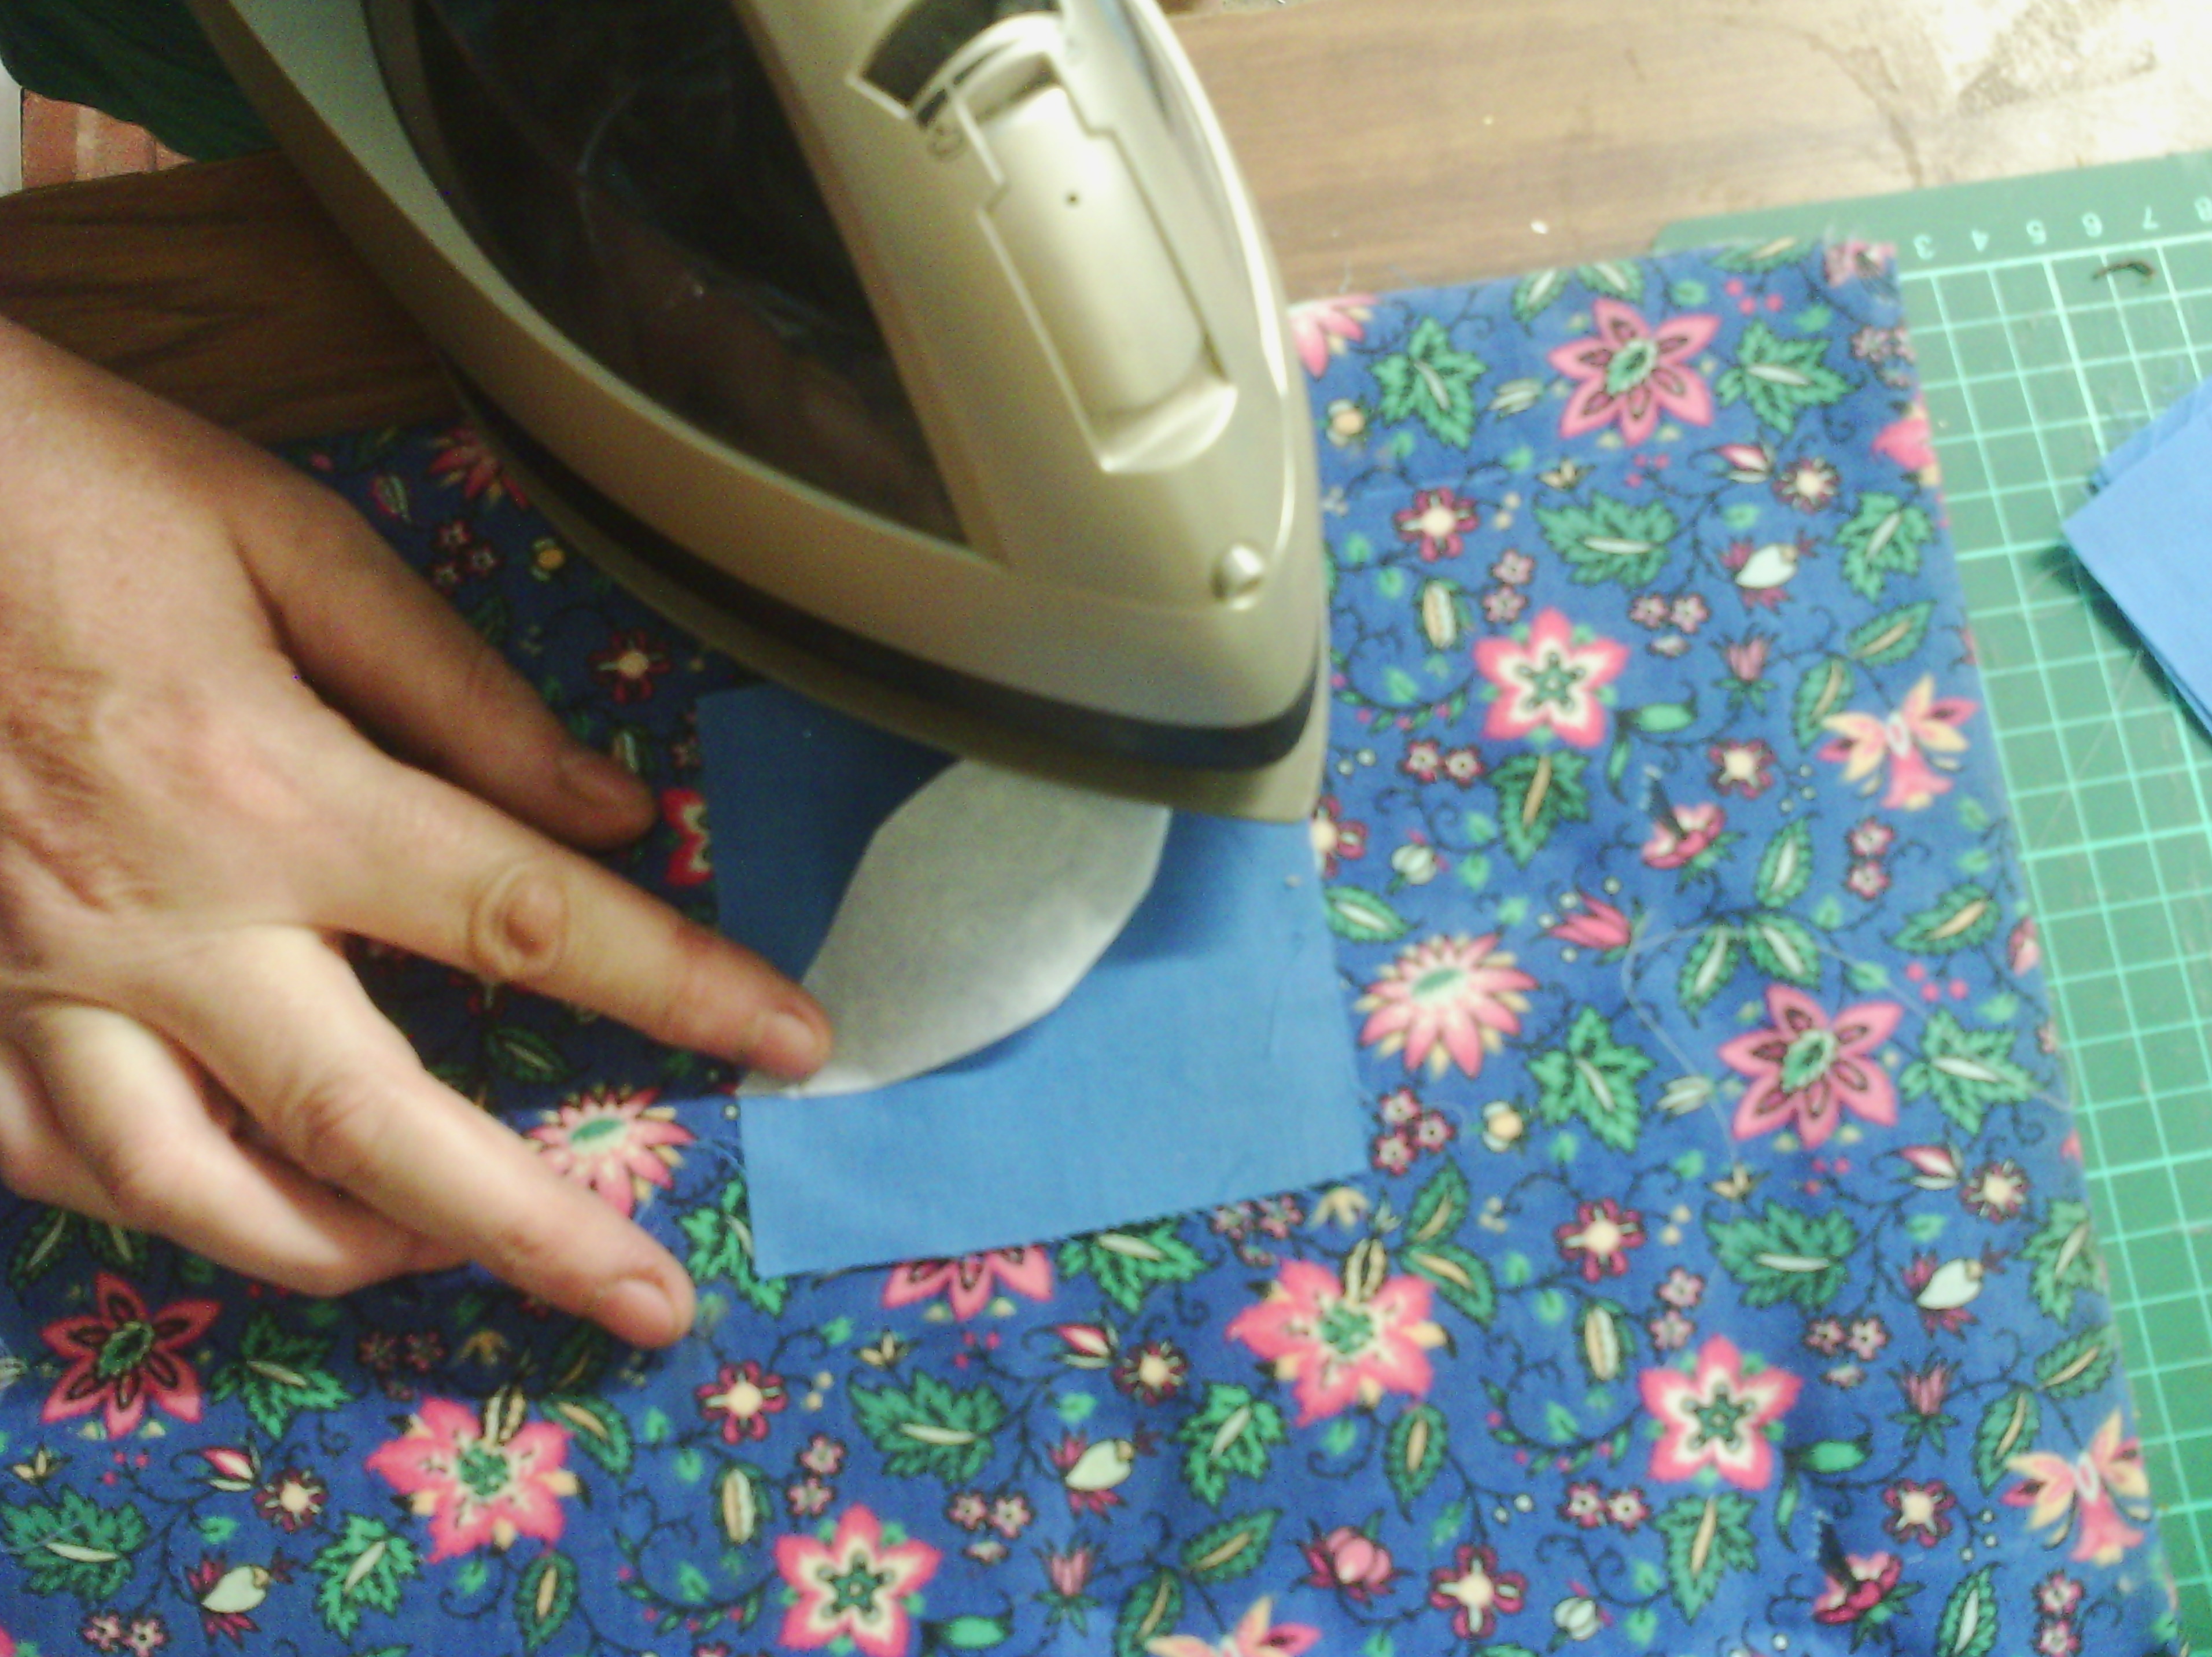
You take the leaf shape and place it fusible (rough) side down and iron it onto the fabric. Use the instructions that come with the fusible to iron it on, but basically I use a heat that the fabric can cope with. I also usually use some baking parchment over the top, but I haven't here so it is easy for you to see.
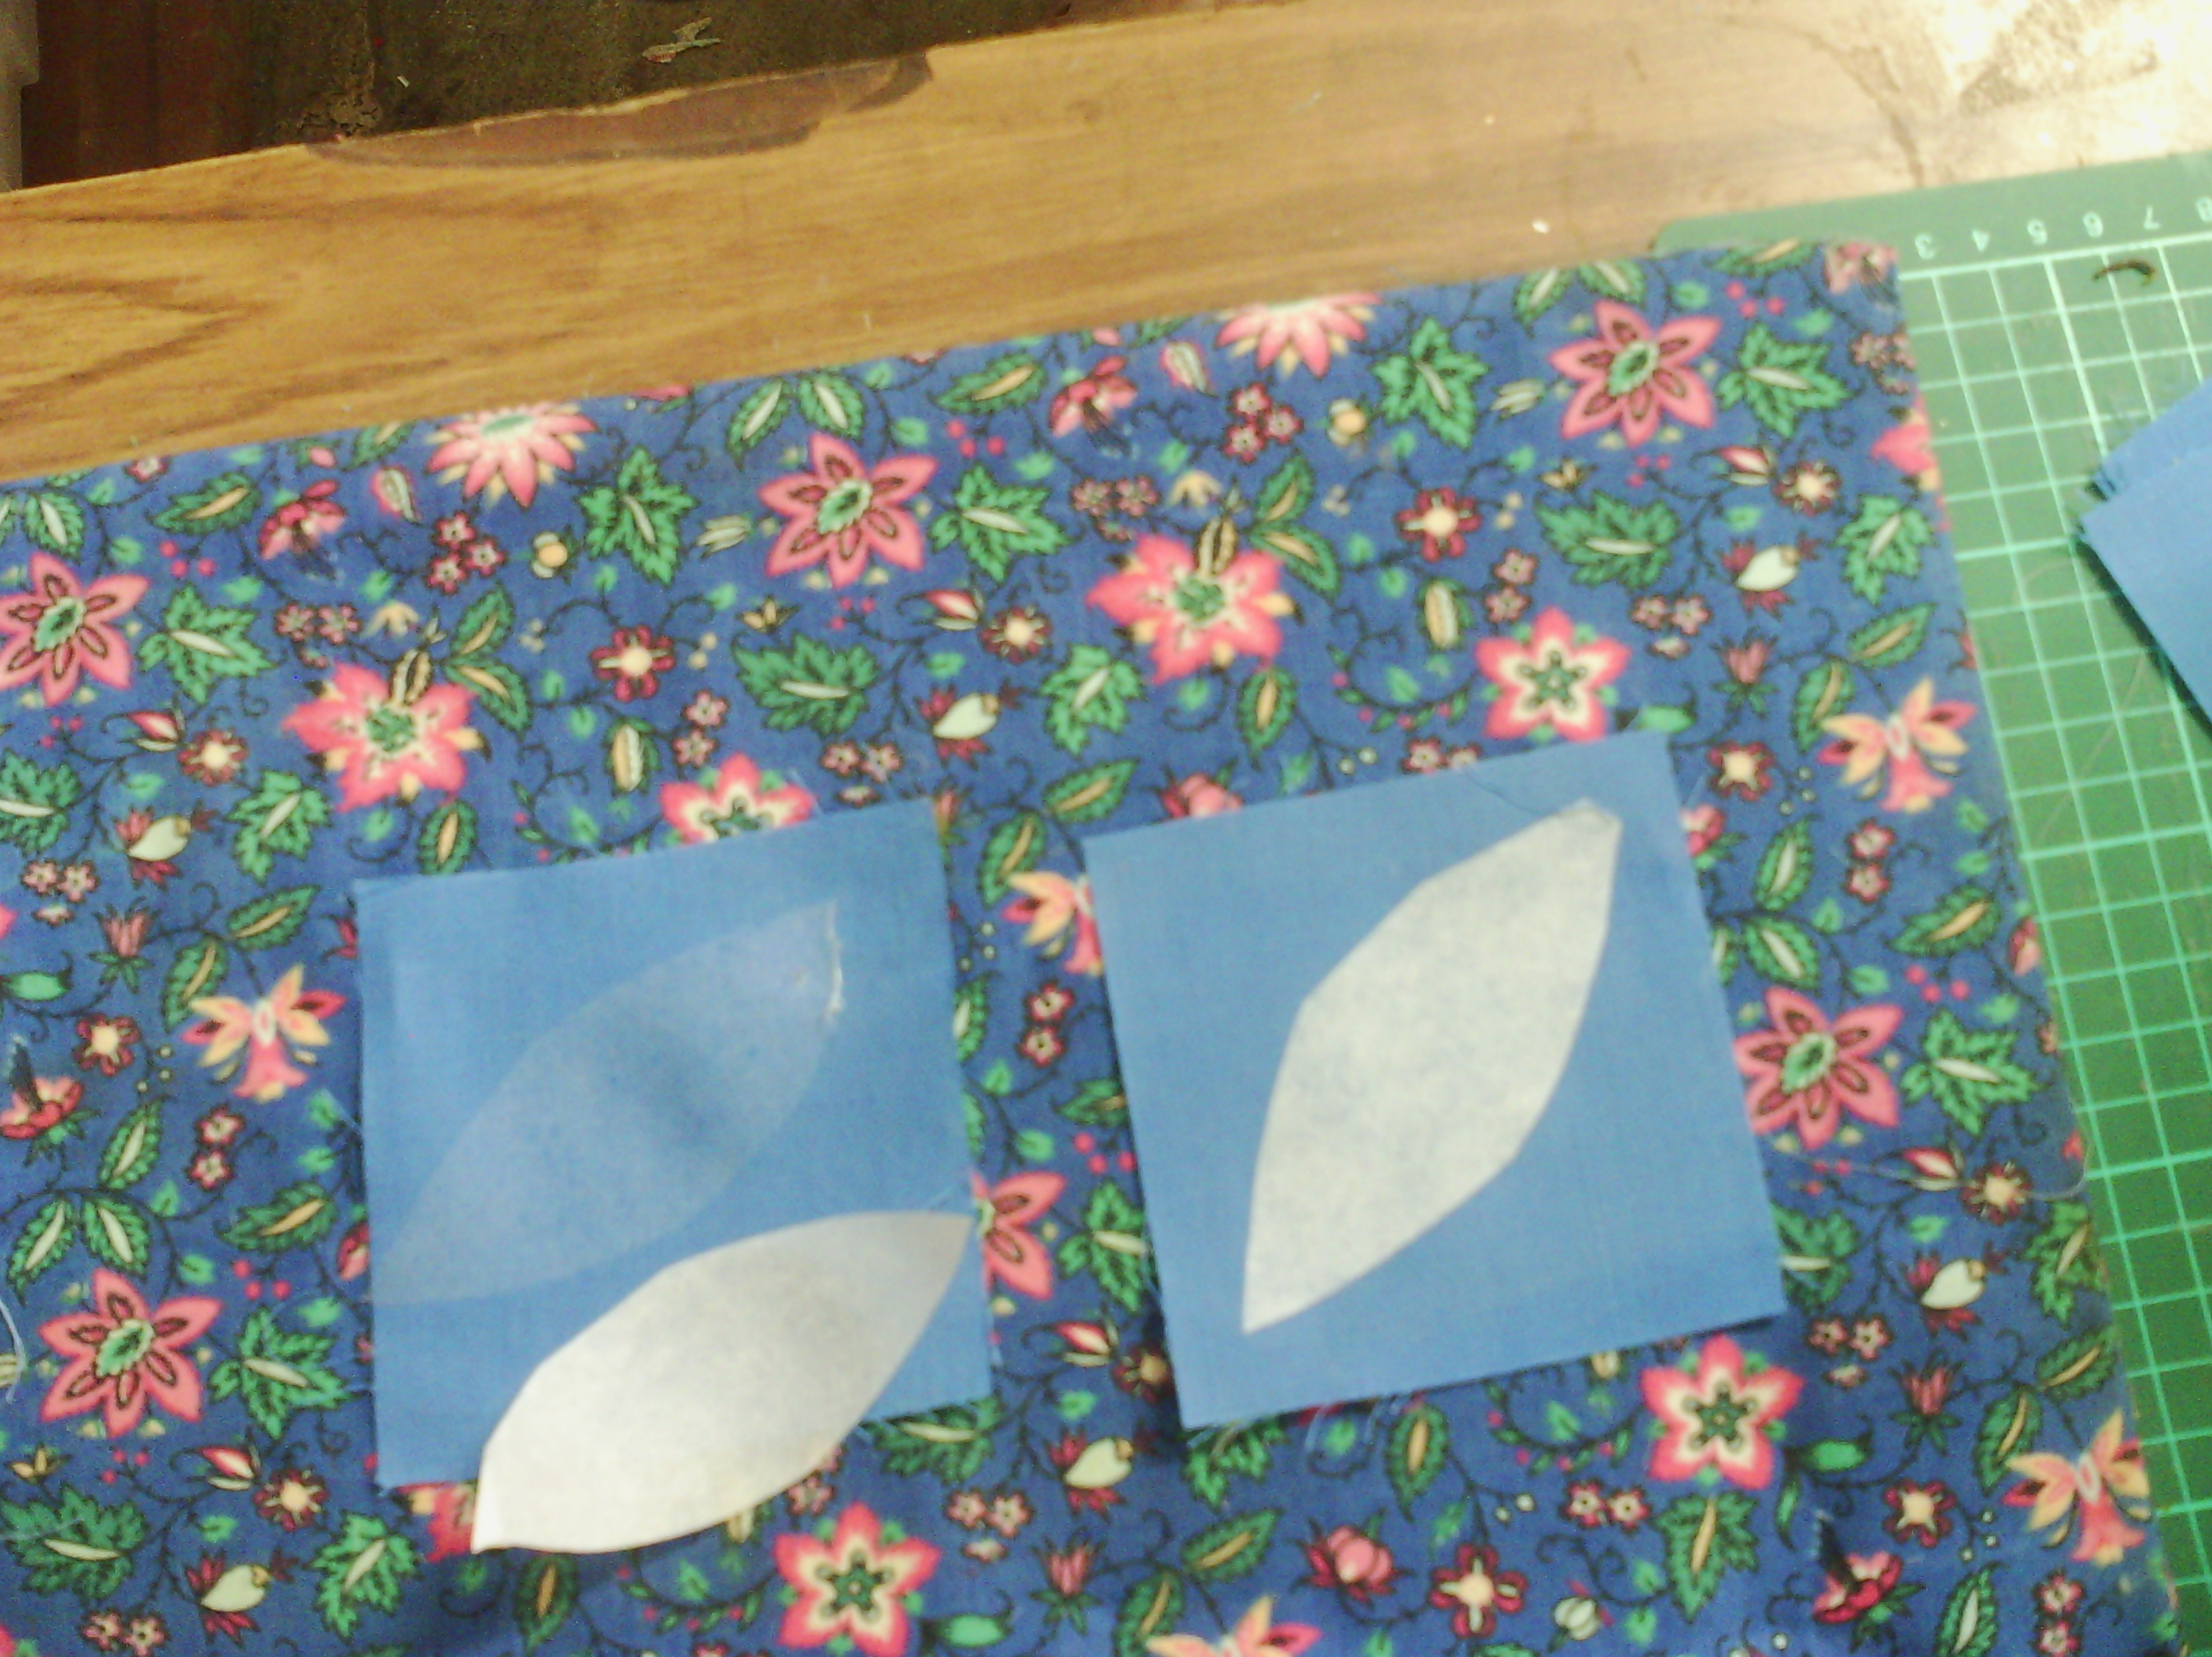
when the ironed on fusible is cool. You peel off the paper. Above you can see on the left, the paper has been peeled off leaving a thin layer of glue on the fabric.
Next you get a piece of foil. This is transfer foil, not metallic wrapping paper, it is a special type of foil used by printers - and textile artists!. You can see the foil is laid coloured side up. This is important, if you use it the wrong way up, it won't work.
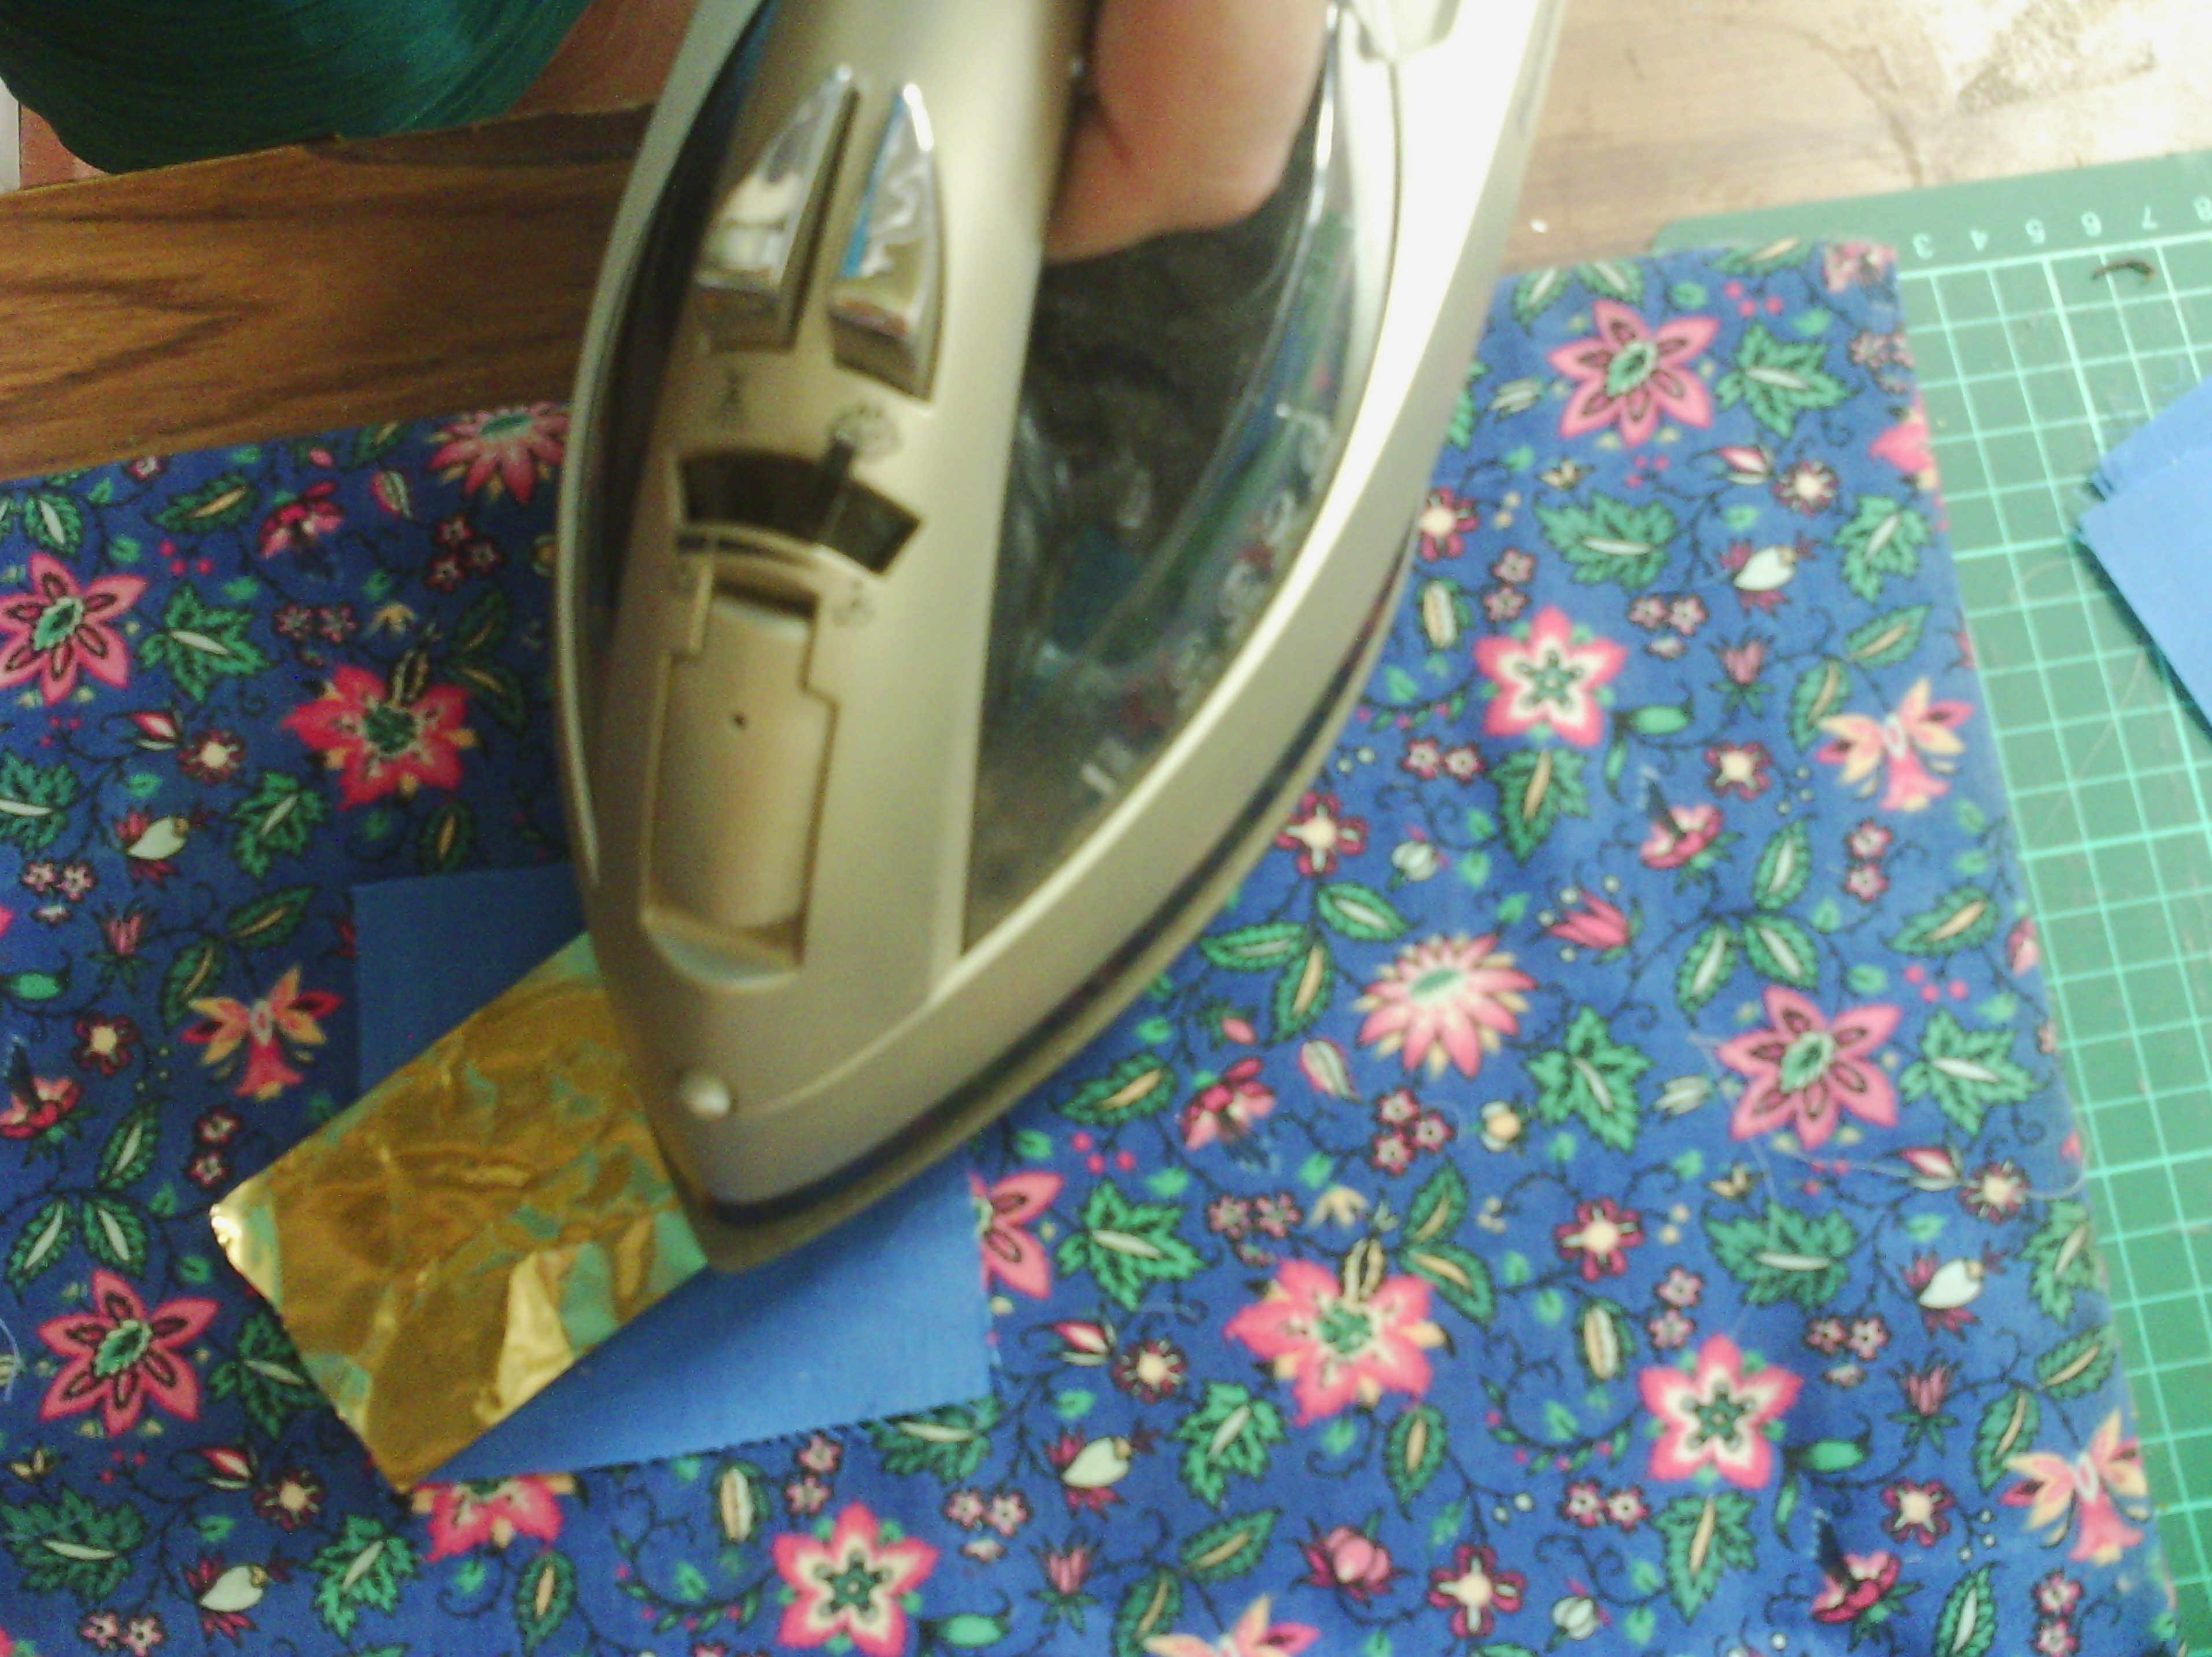
Iron the foil onto the glue layer. Again, it is best to use baking parchment, so your iron does not get messed up.
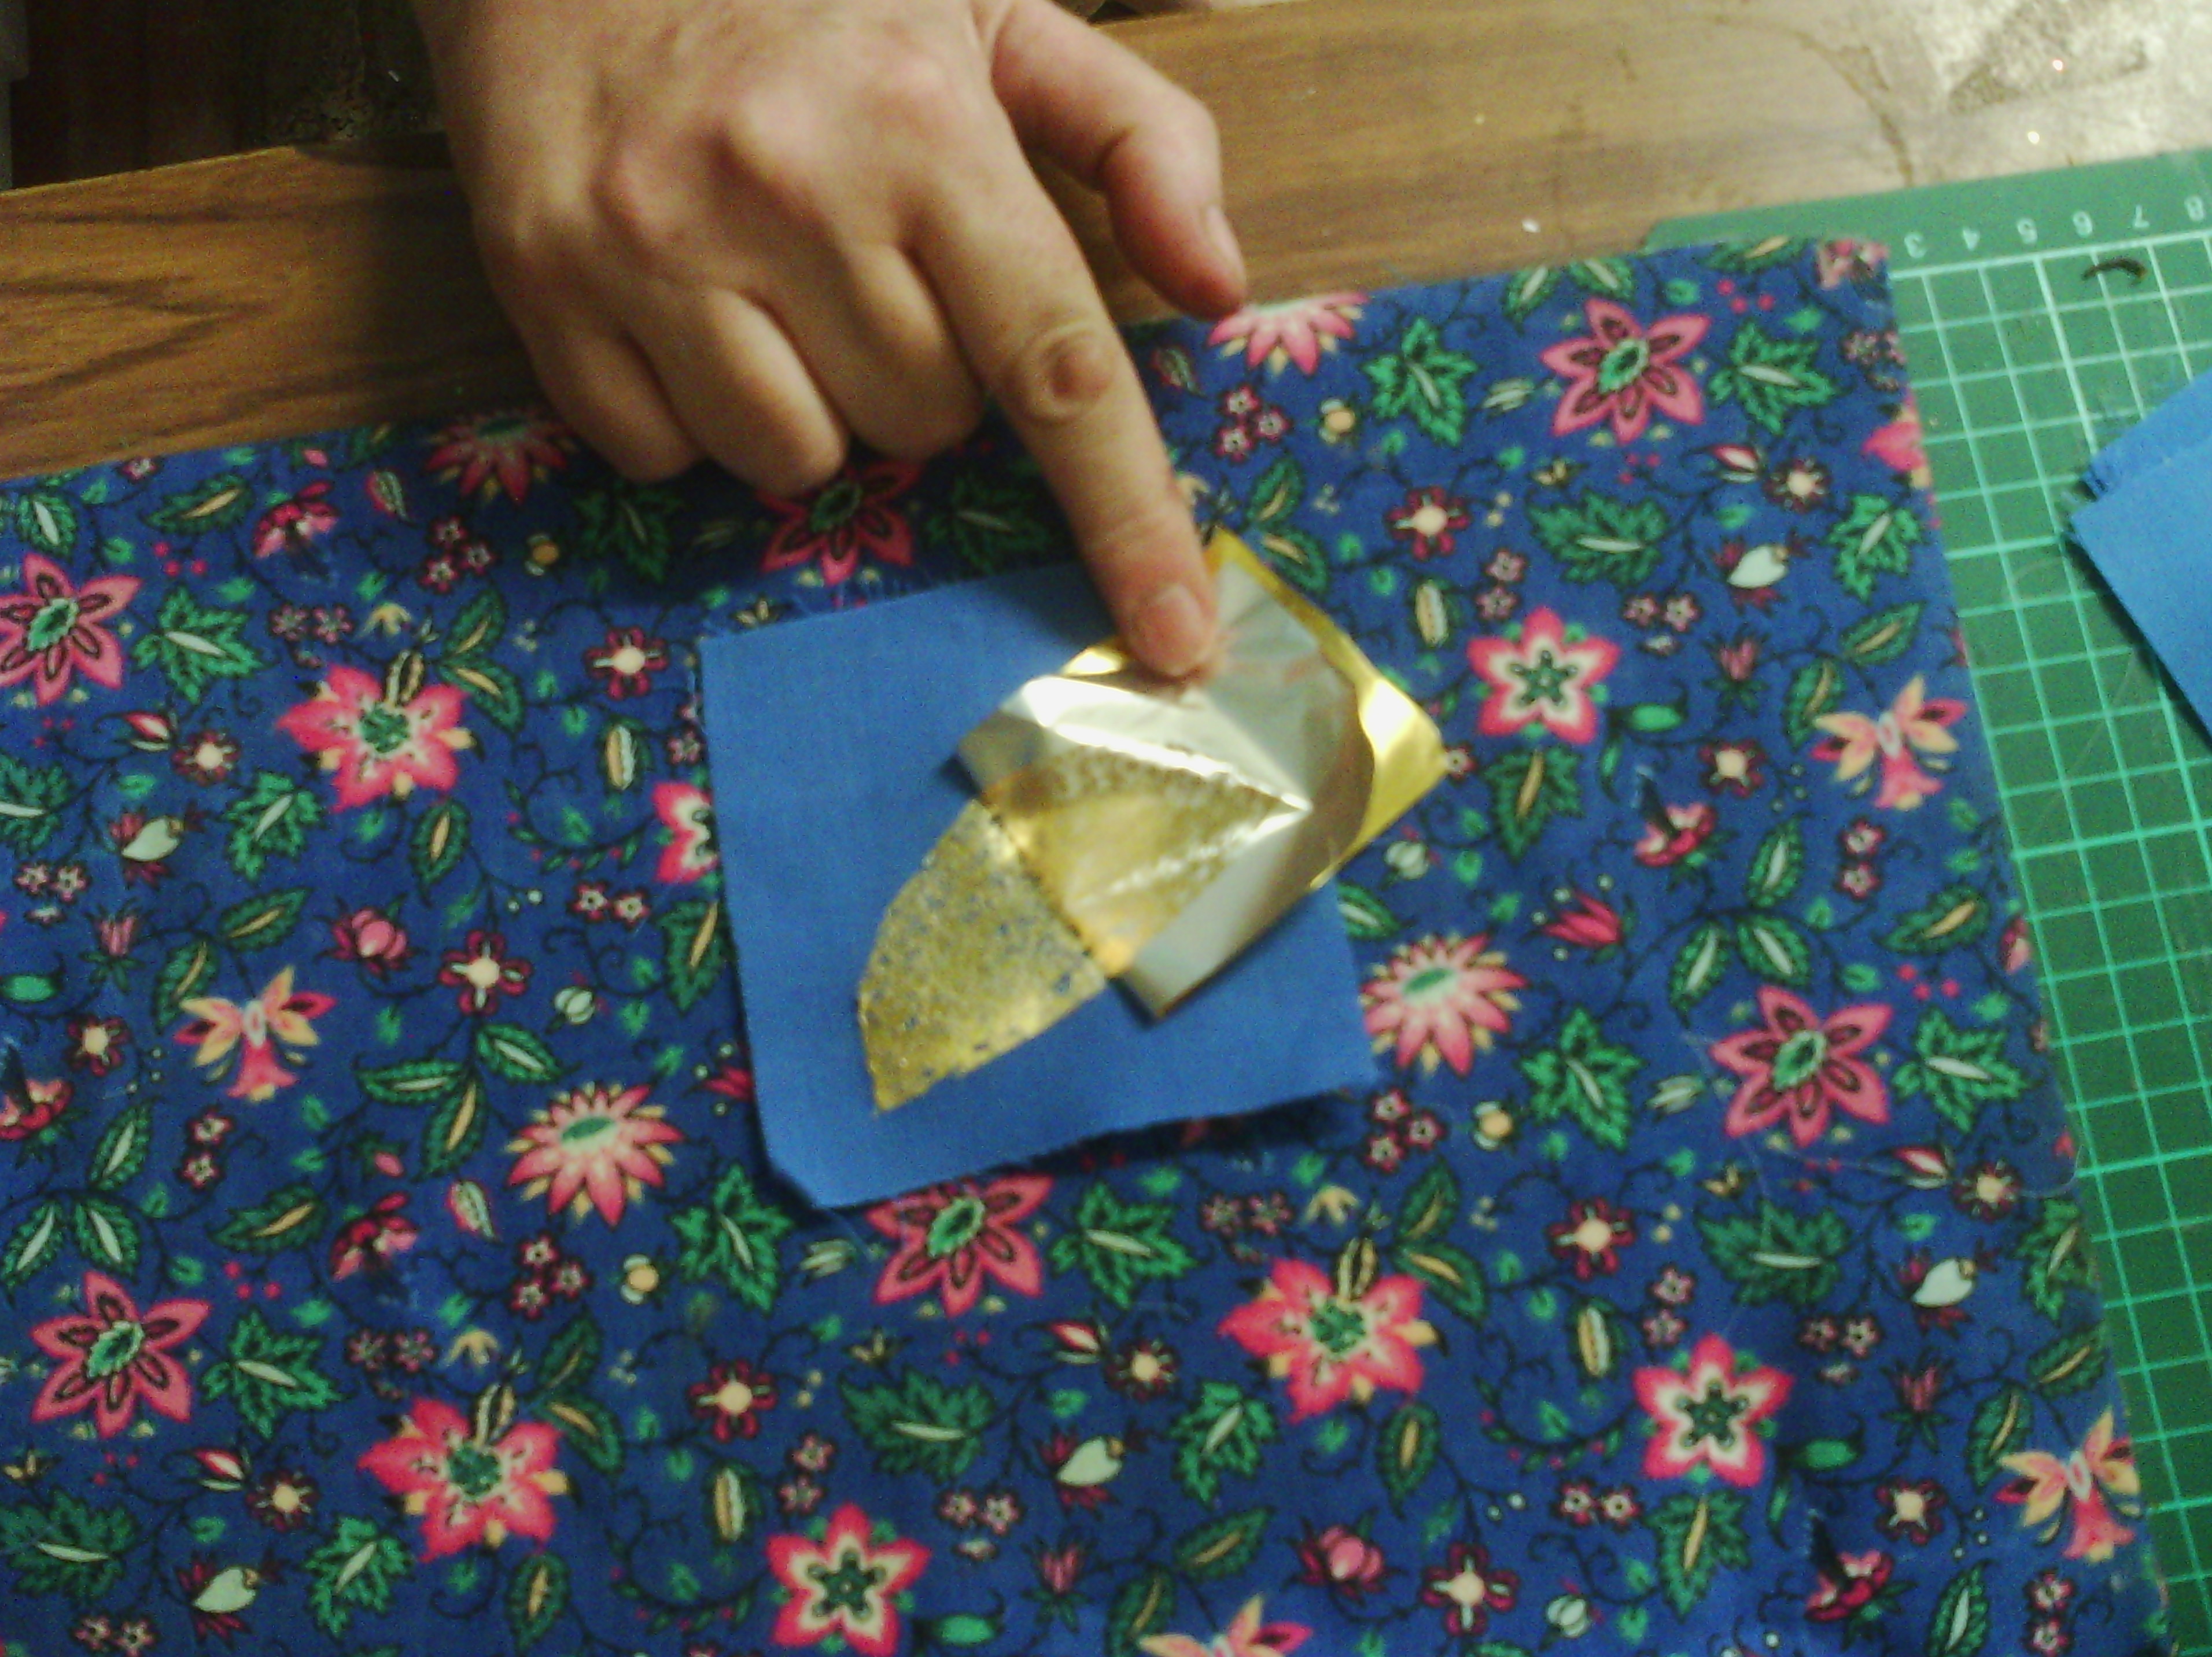
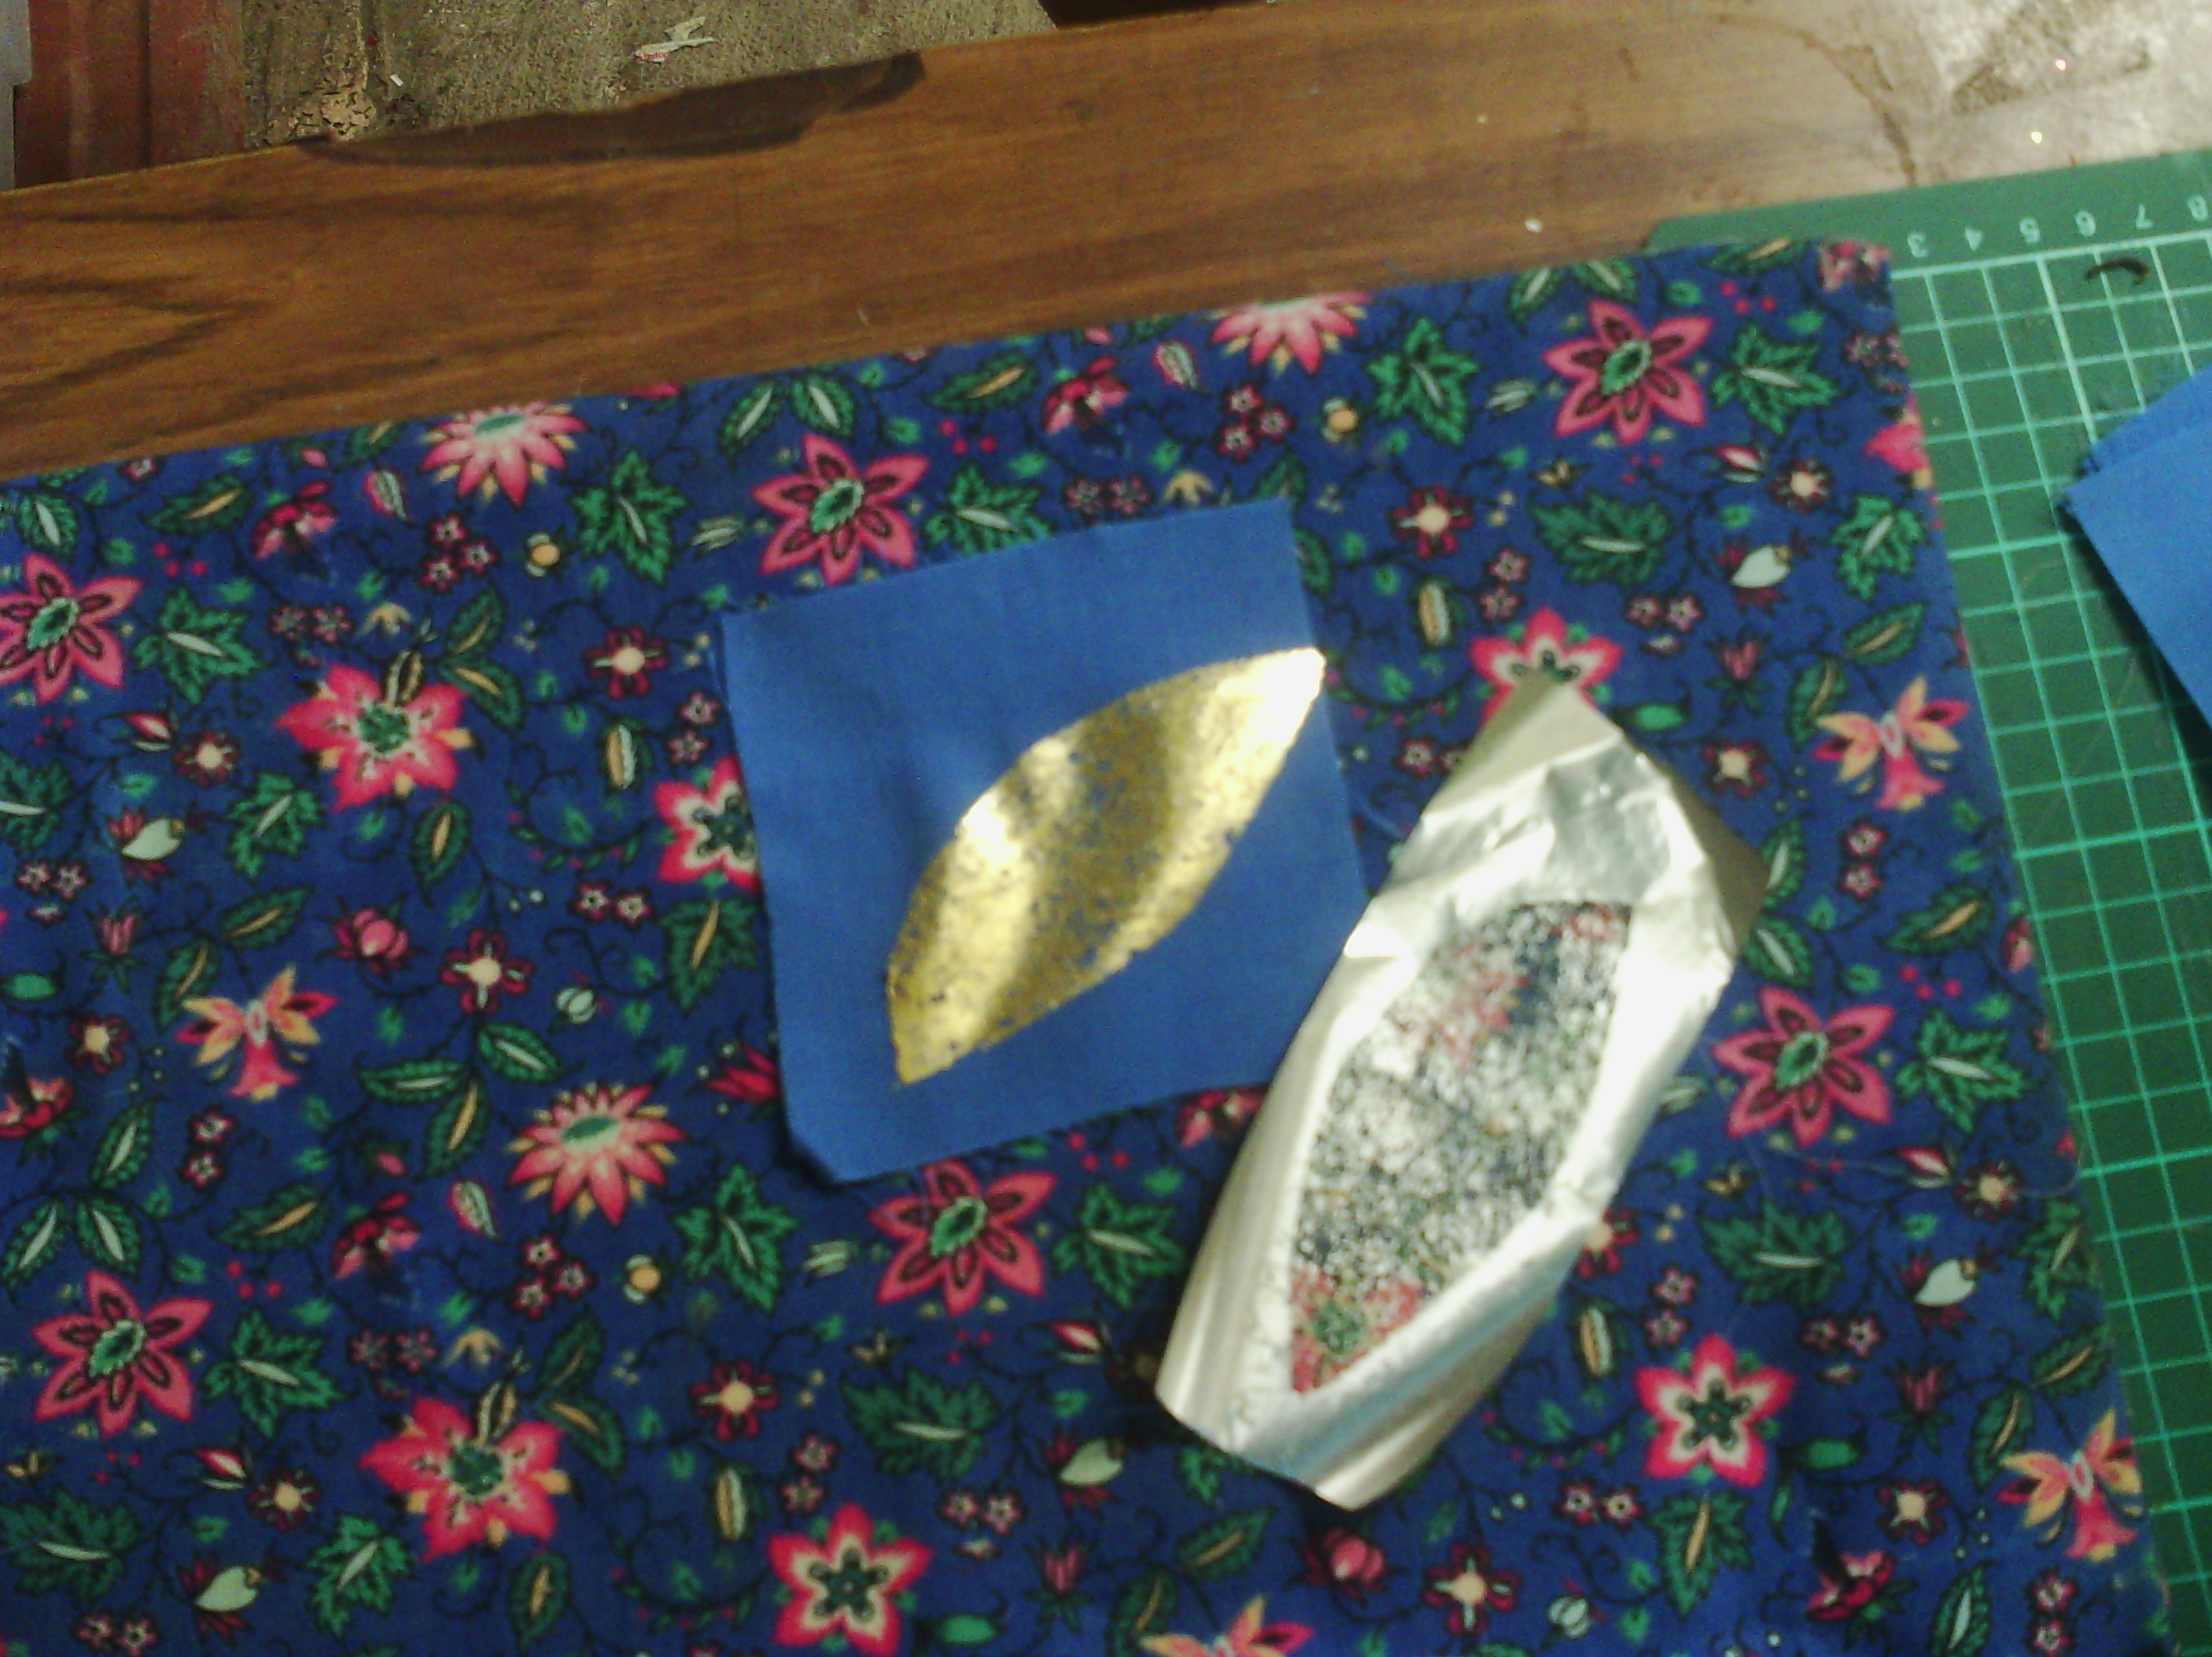
When the fabric is COOL, you can peel off the foil. You can see on the right, above, that where you ironed onto the glue, the gold has come off the foil.
So that is how you use foil. You can wash it (gently), but you must remember that every time you iron it from now on, you need to use baking parchment, or you will get a totally messed iron.
Now for painted fusible.
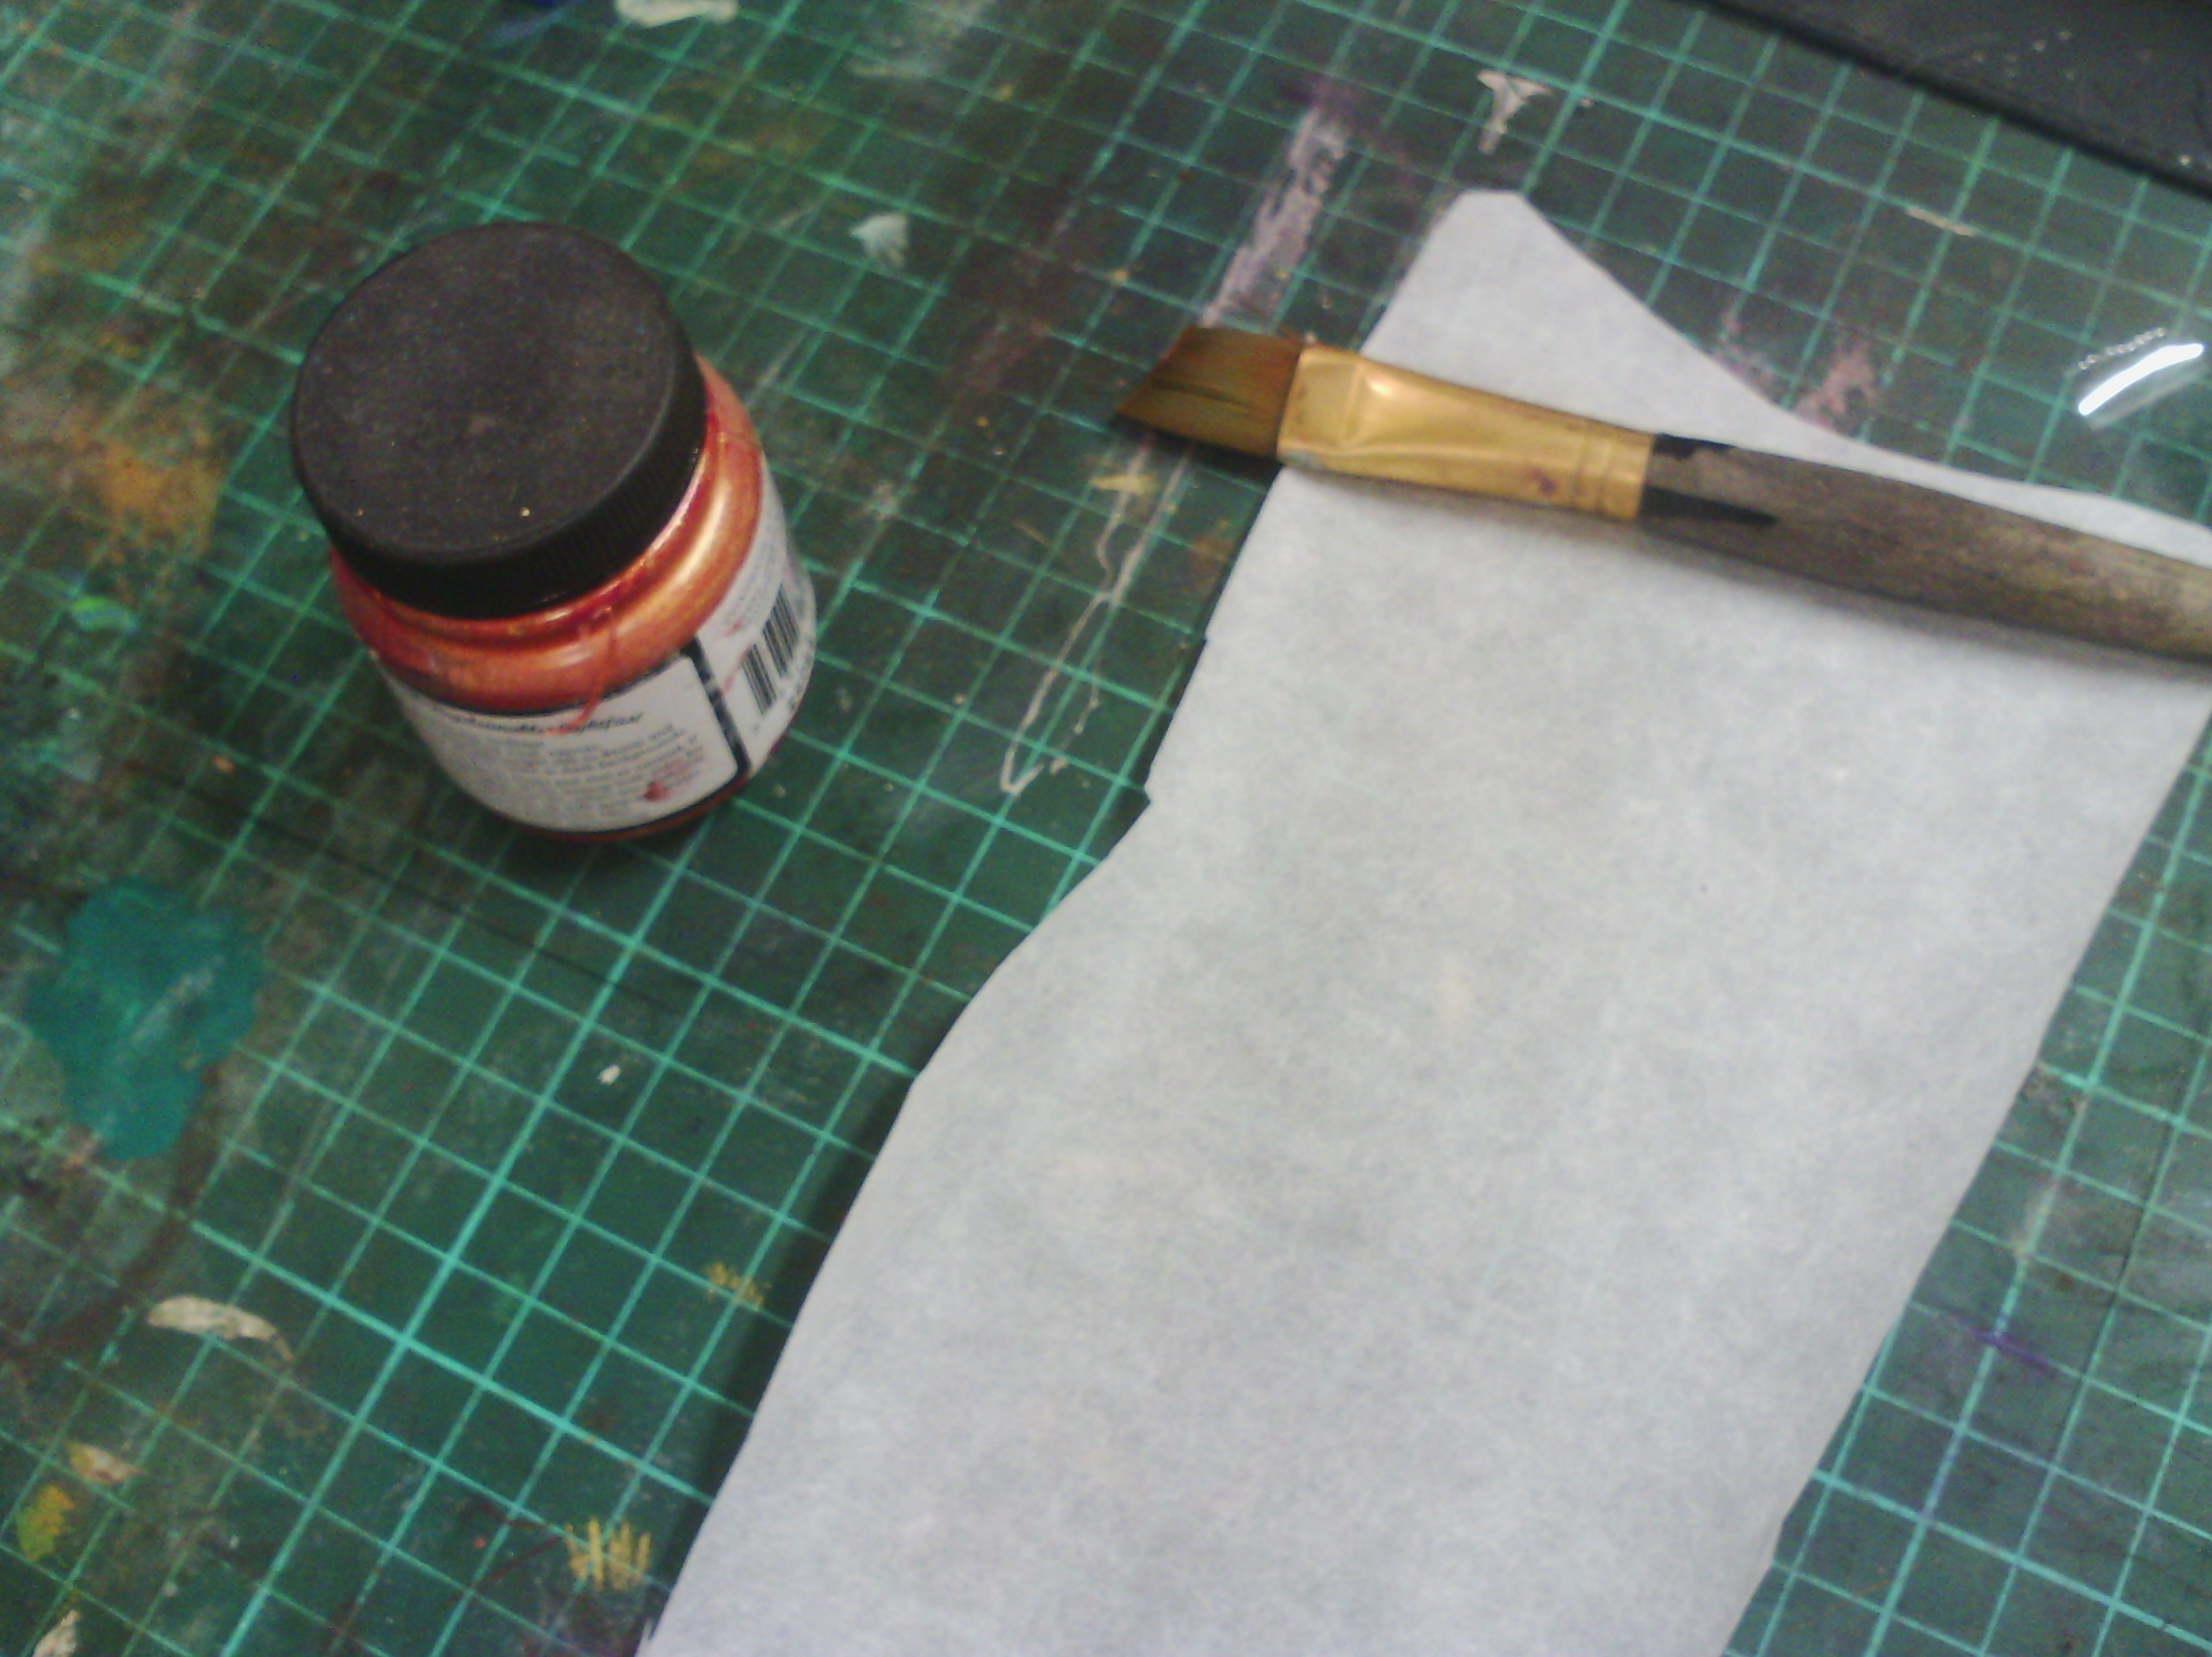
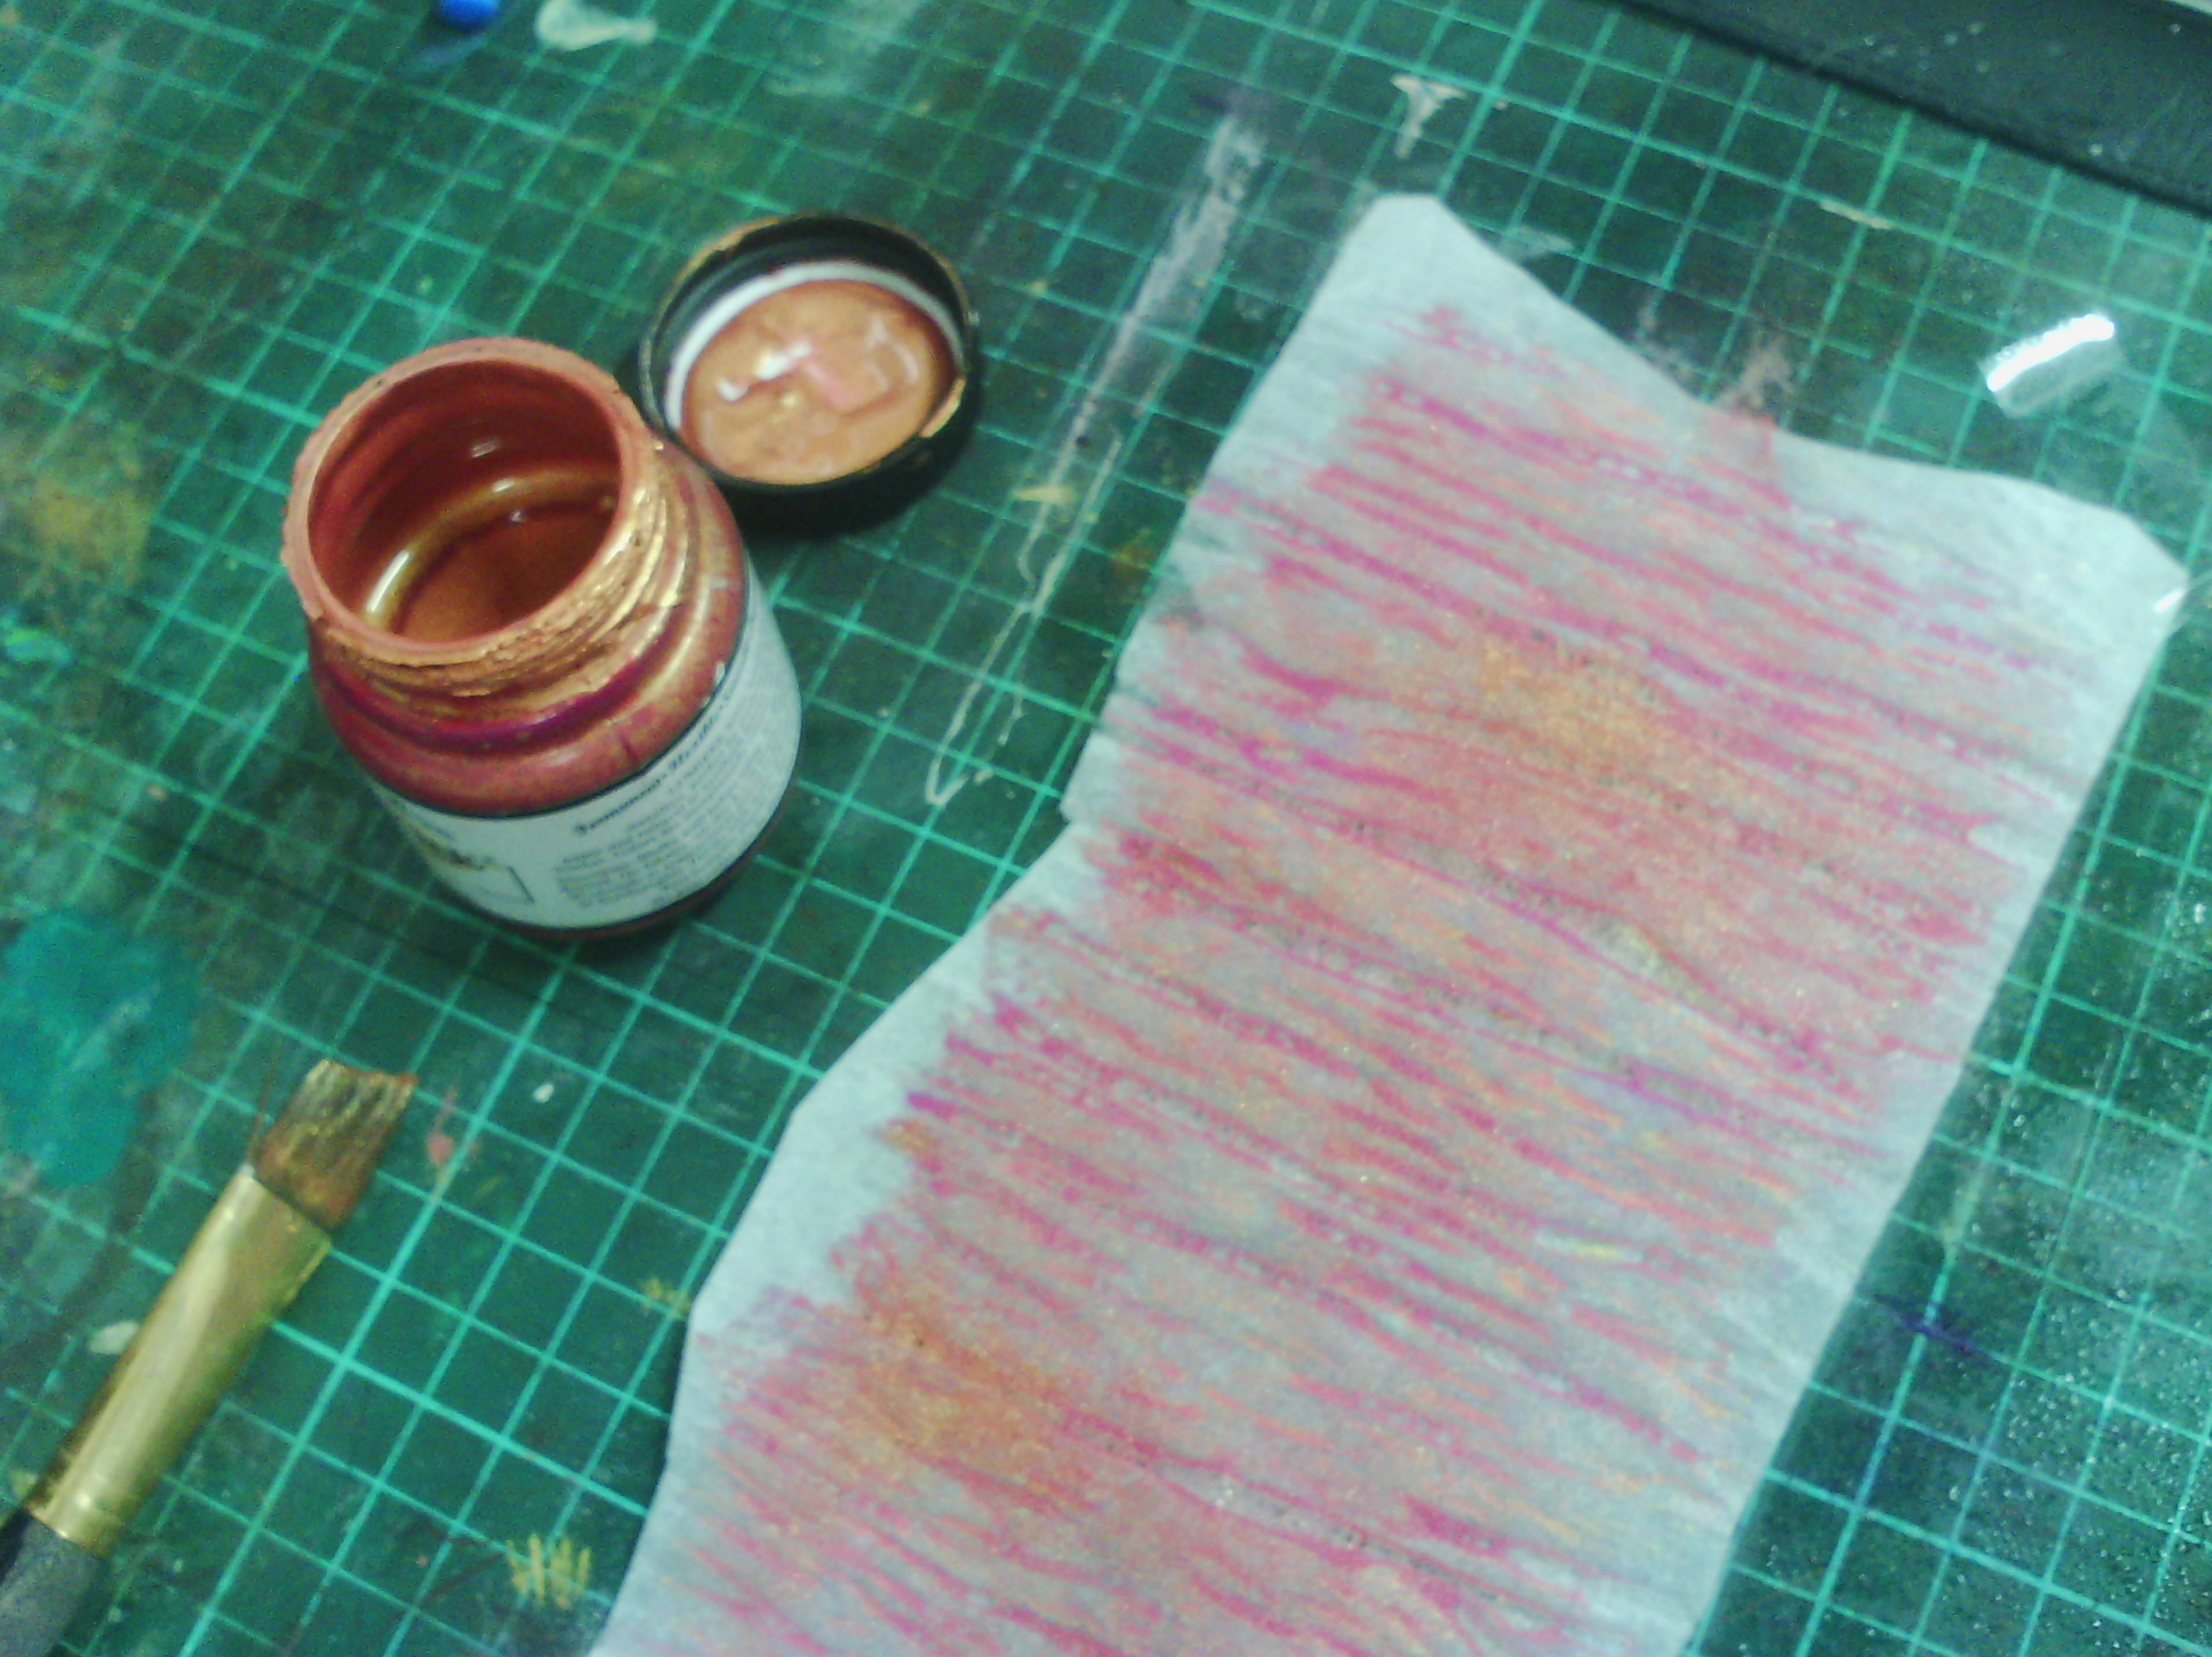
Above, I have taped a piece of fusible glue or rough side up to my painting area ( it tends to roll up). I have some acrylic paint (I like to use lumiere by jacquard as it is lovely and metallic) and a brush.
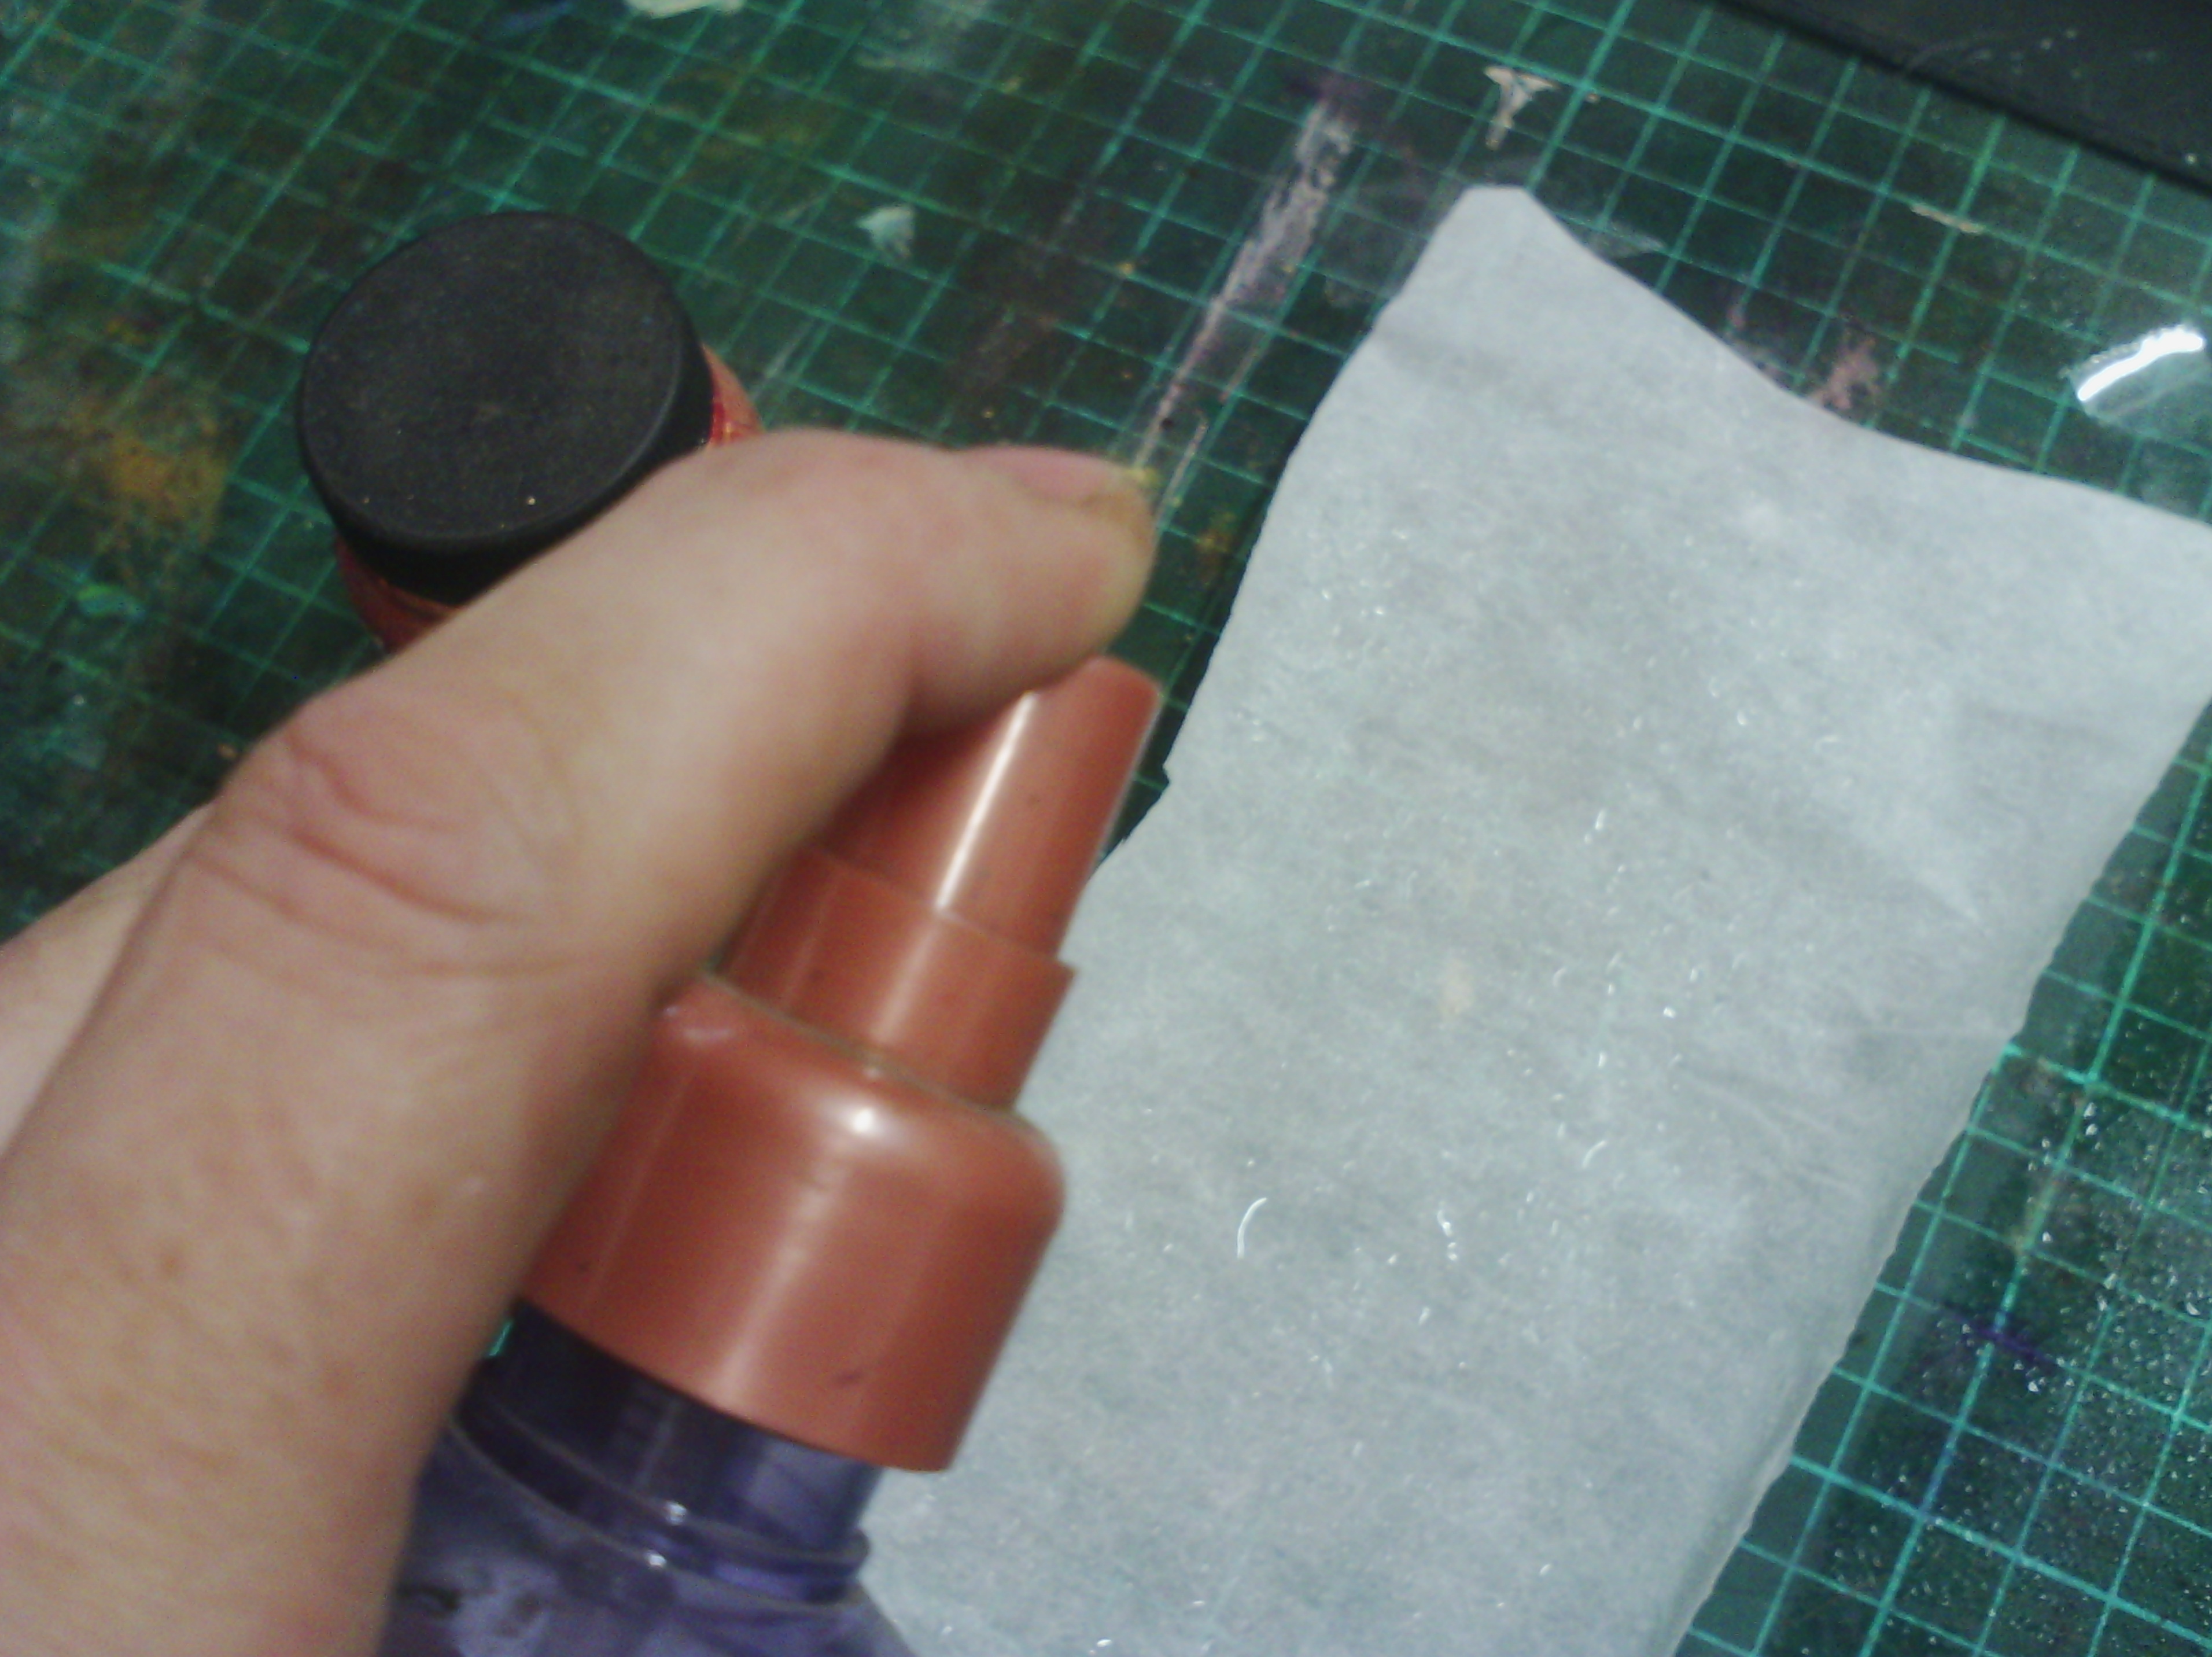
Next, I spray my fusible with water. some people dilute their paint, but i find I get the most texture by spraying with water first.
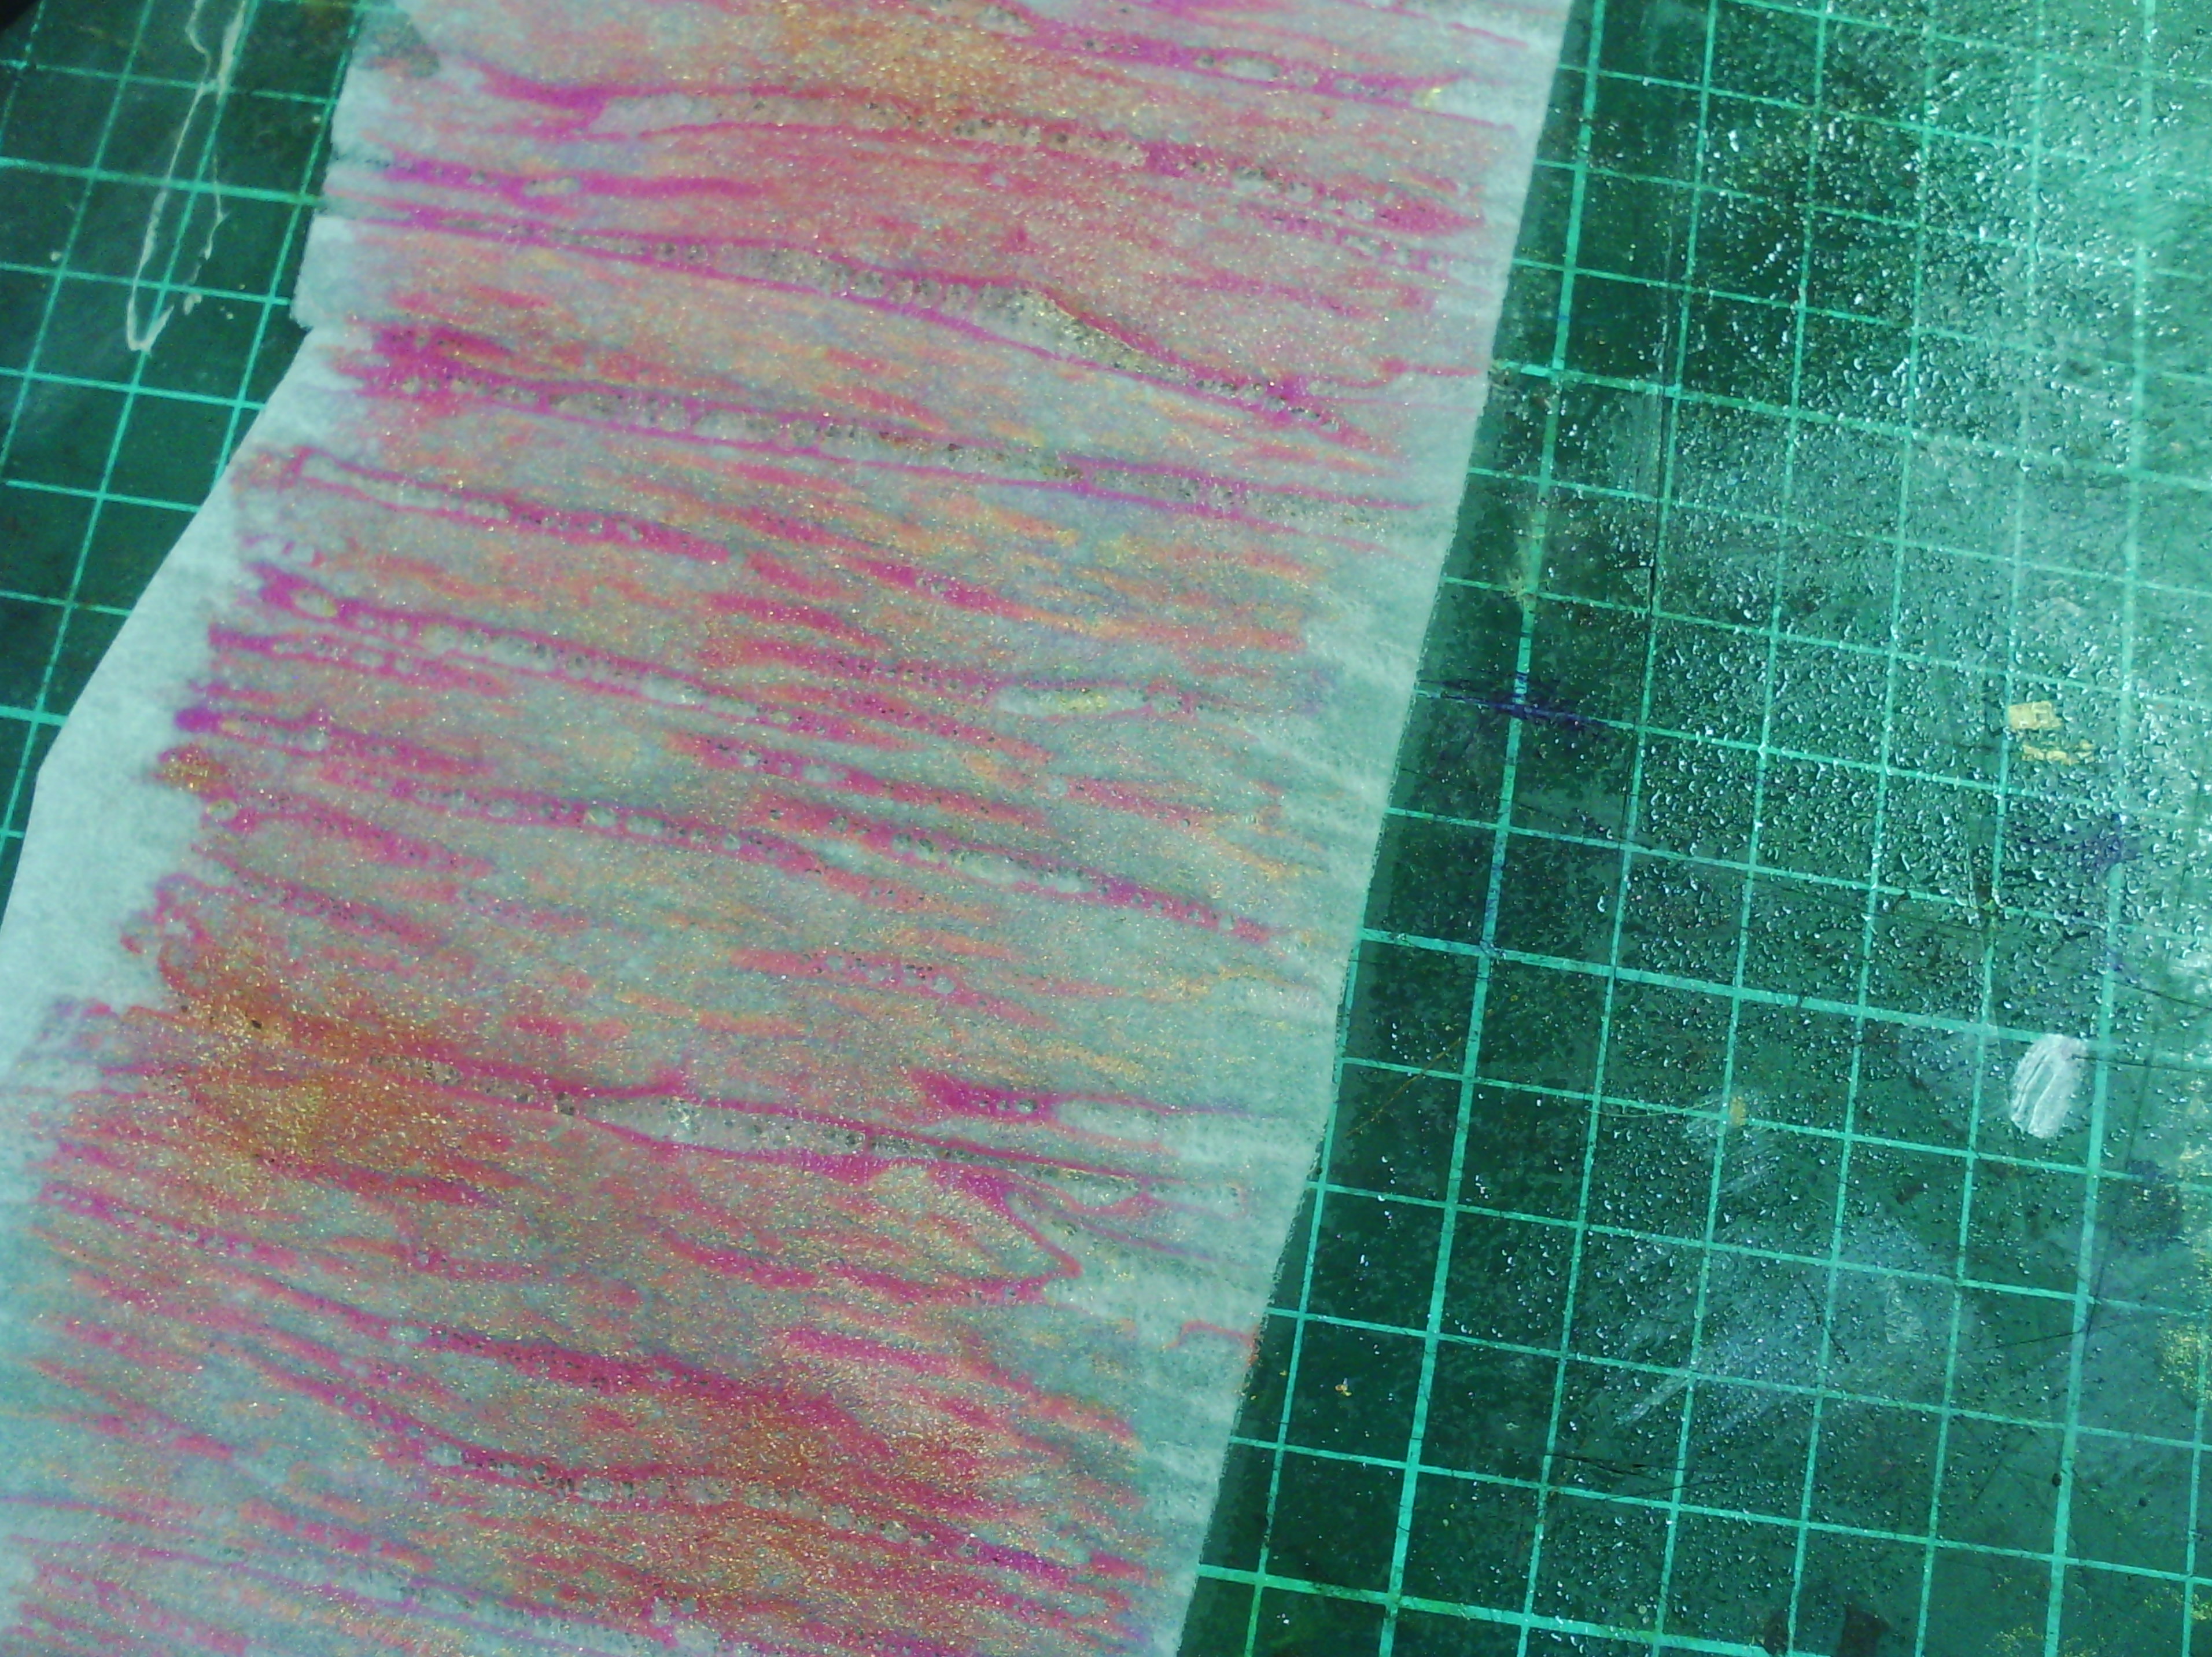
Here, you can see me painting onto the fusible and you can see how the paper backing is wrinkling up and creating texture.
Here is the fusible painted.
And here is a close up of the gorgeous texture. This needs to totally dry before you use it.
Now for how to use it.
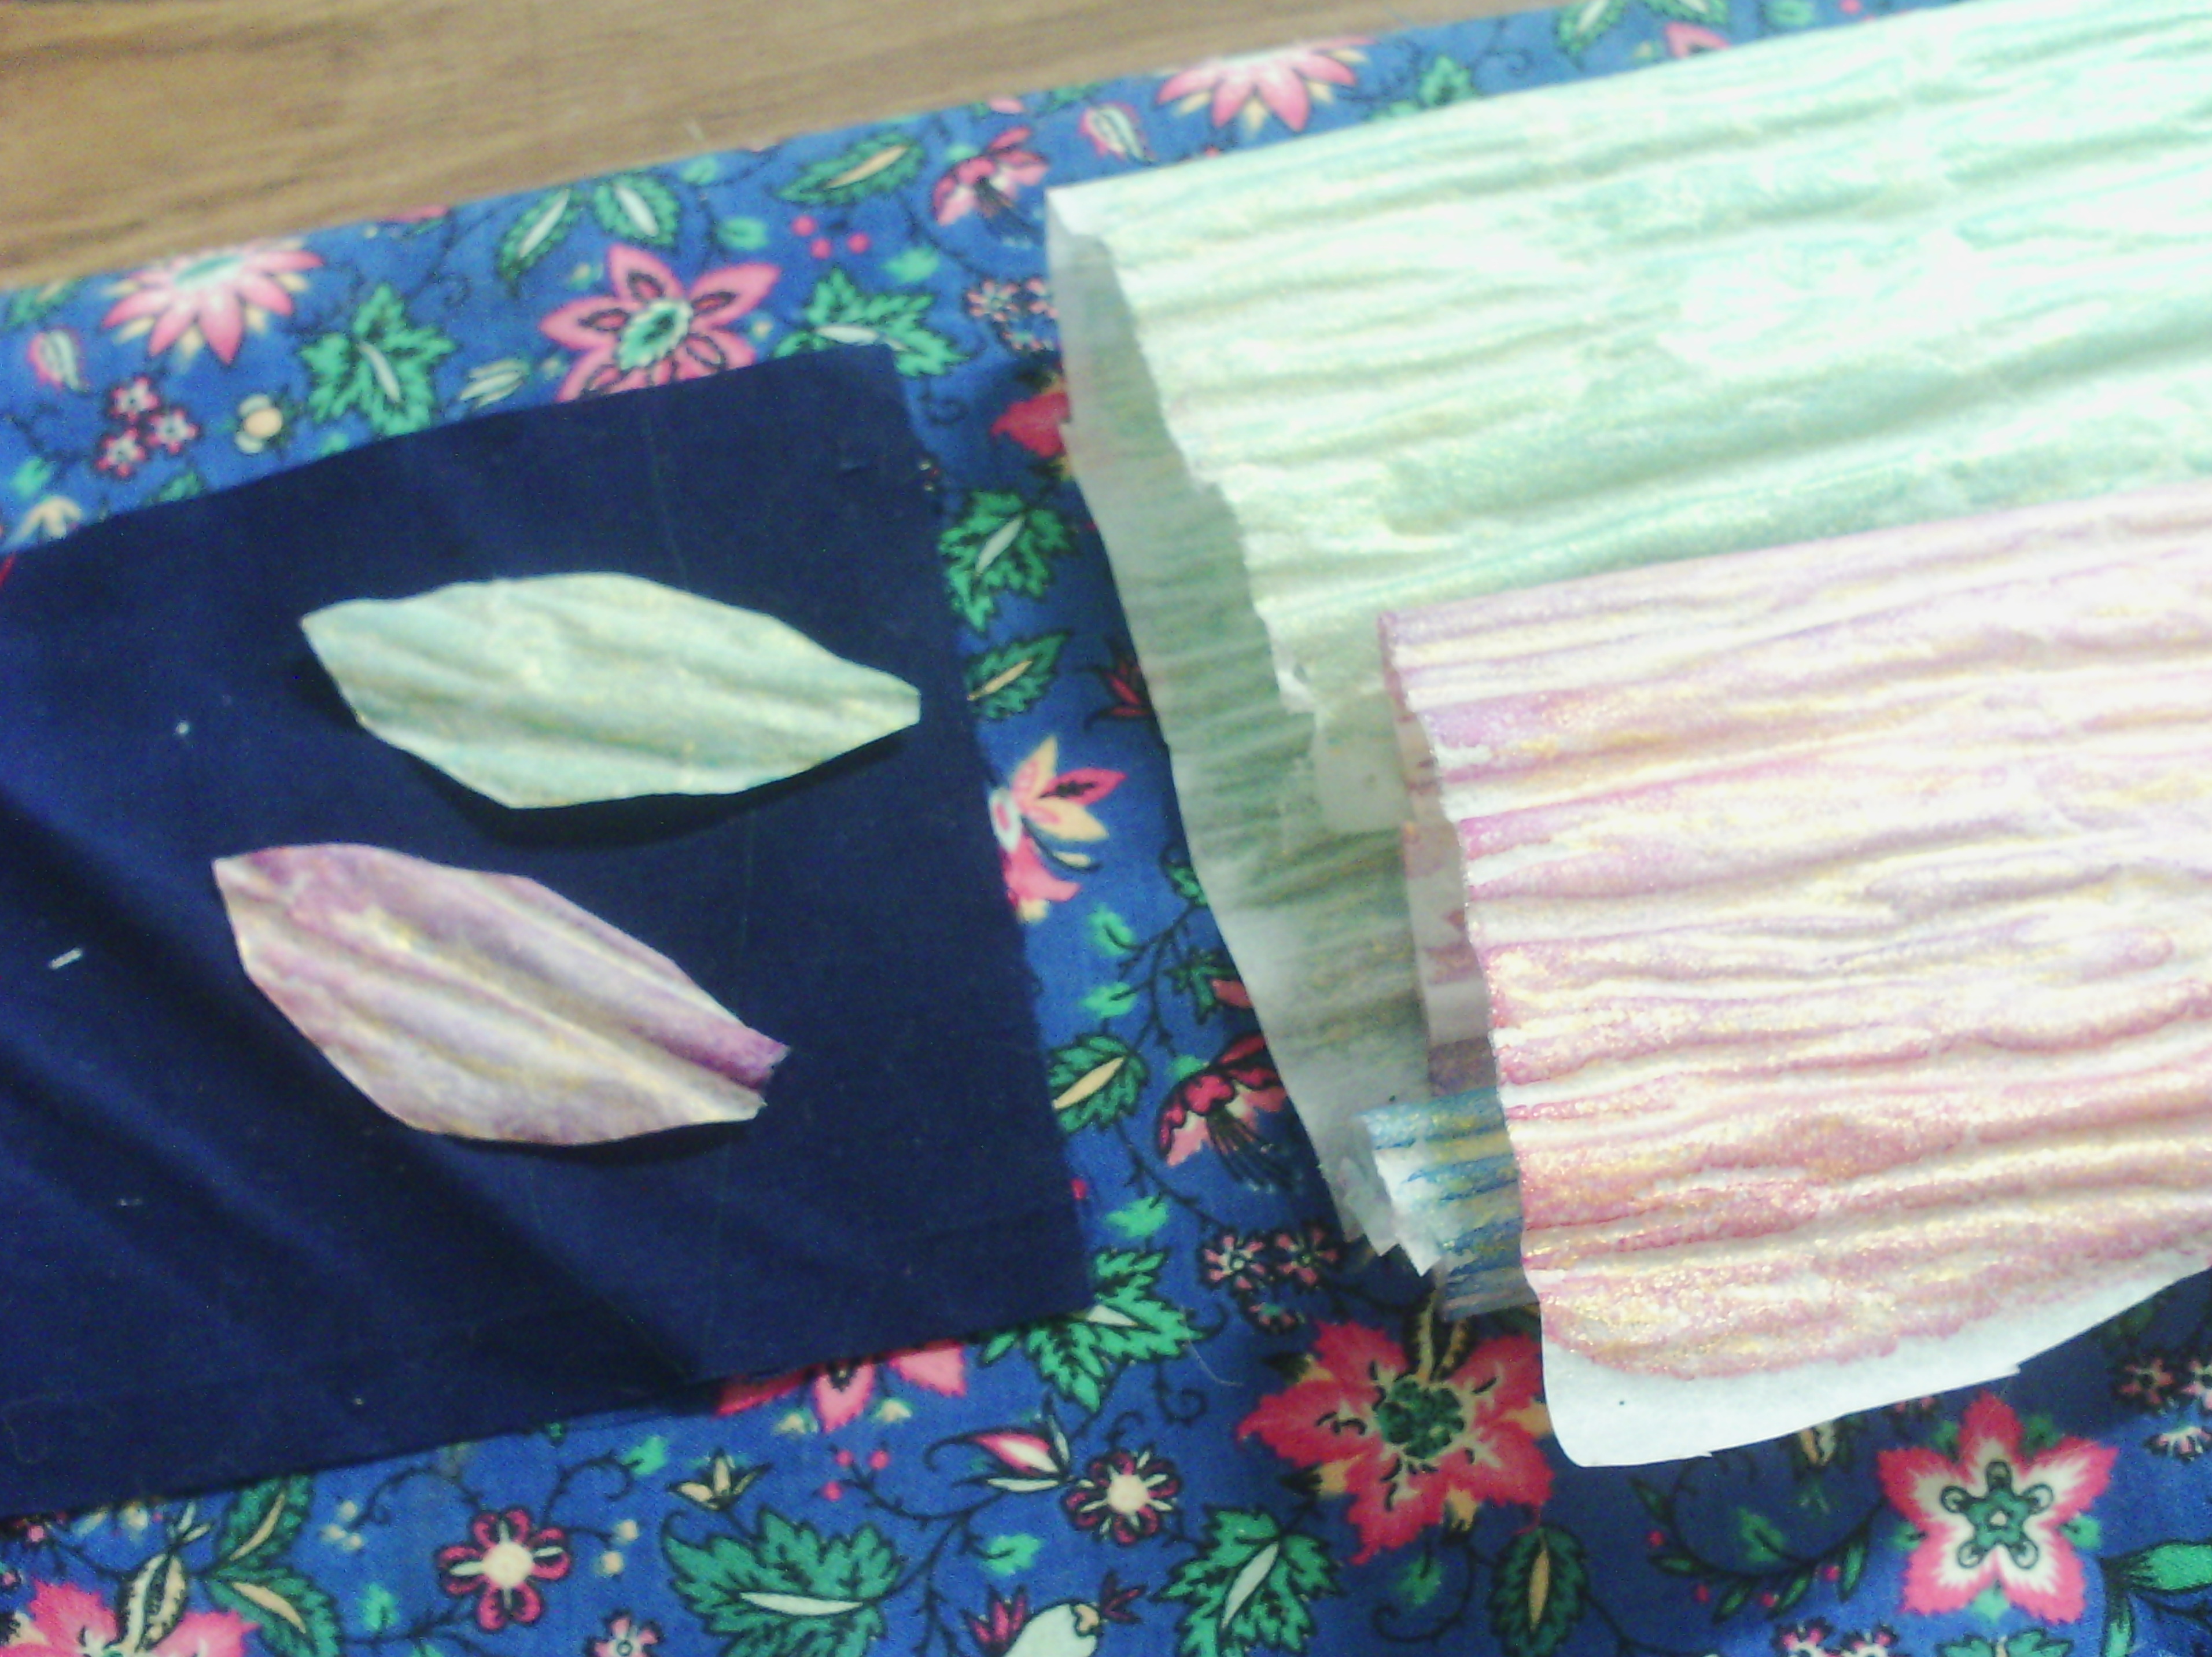
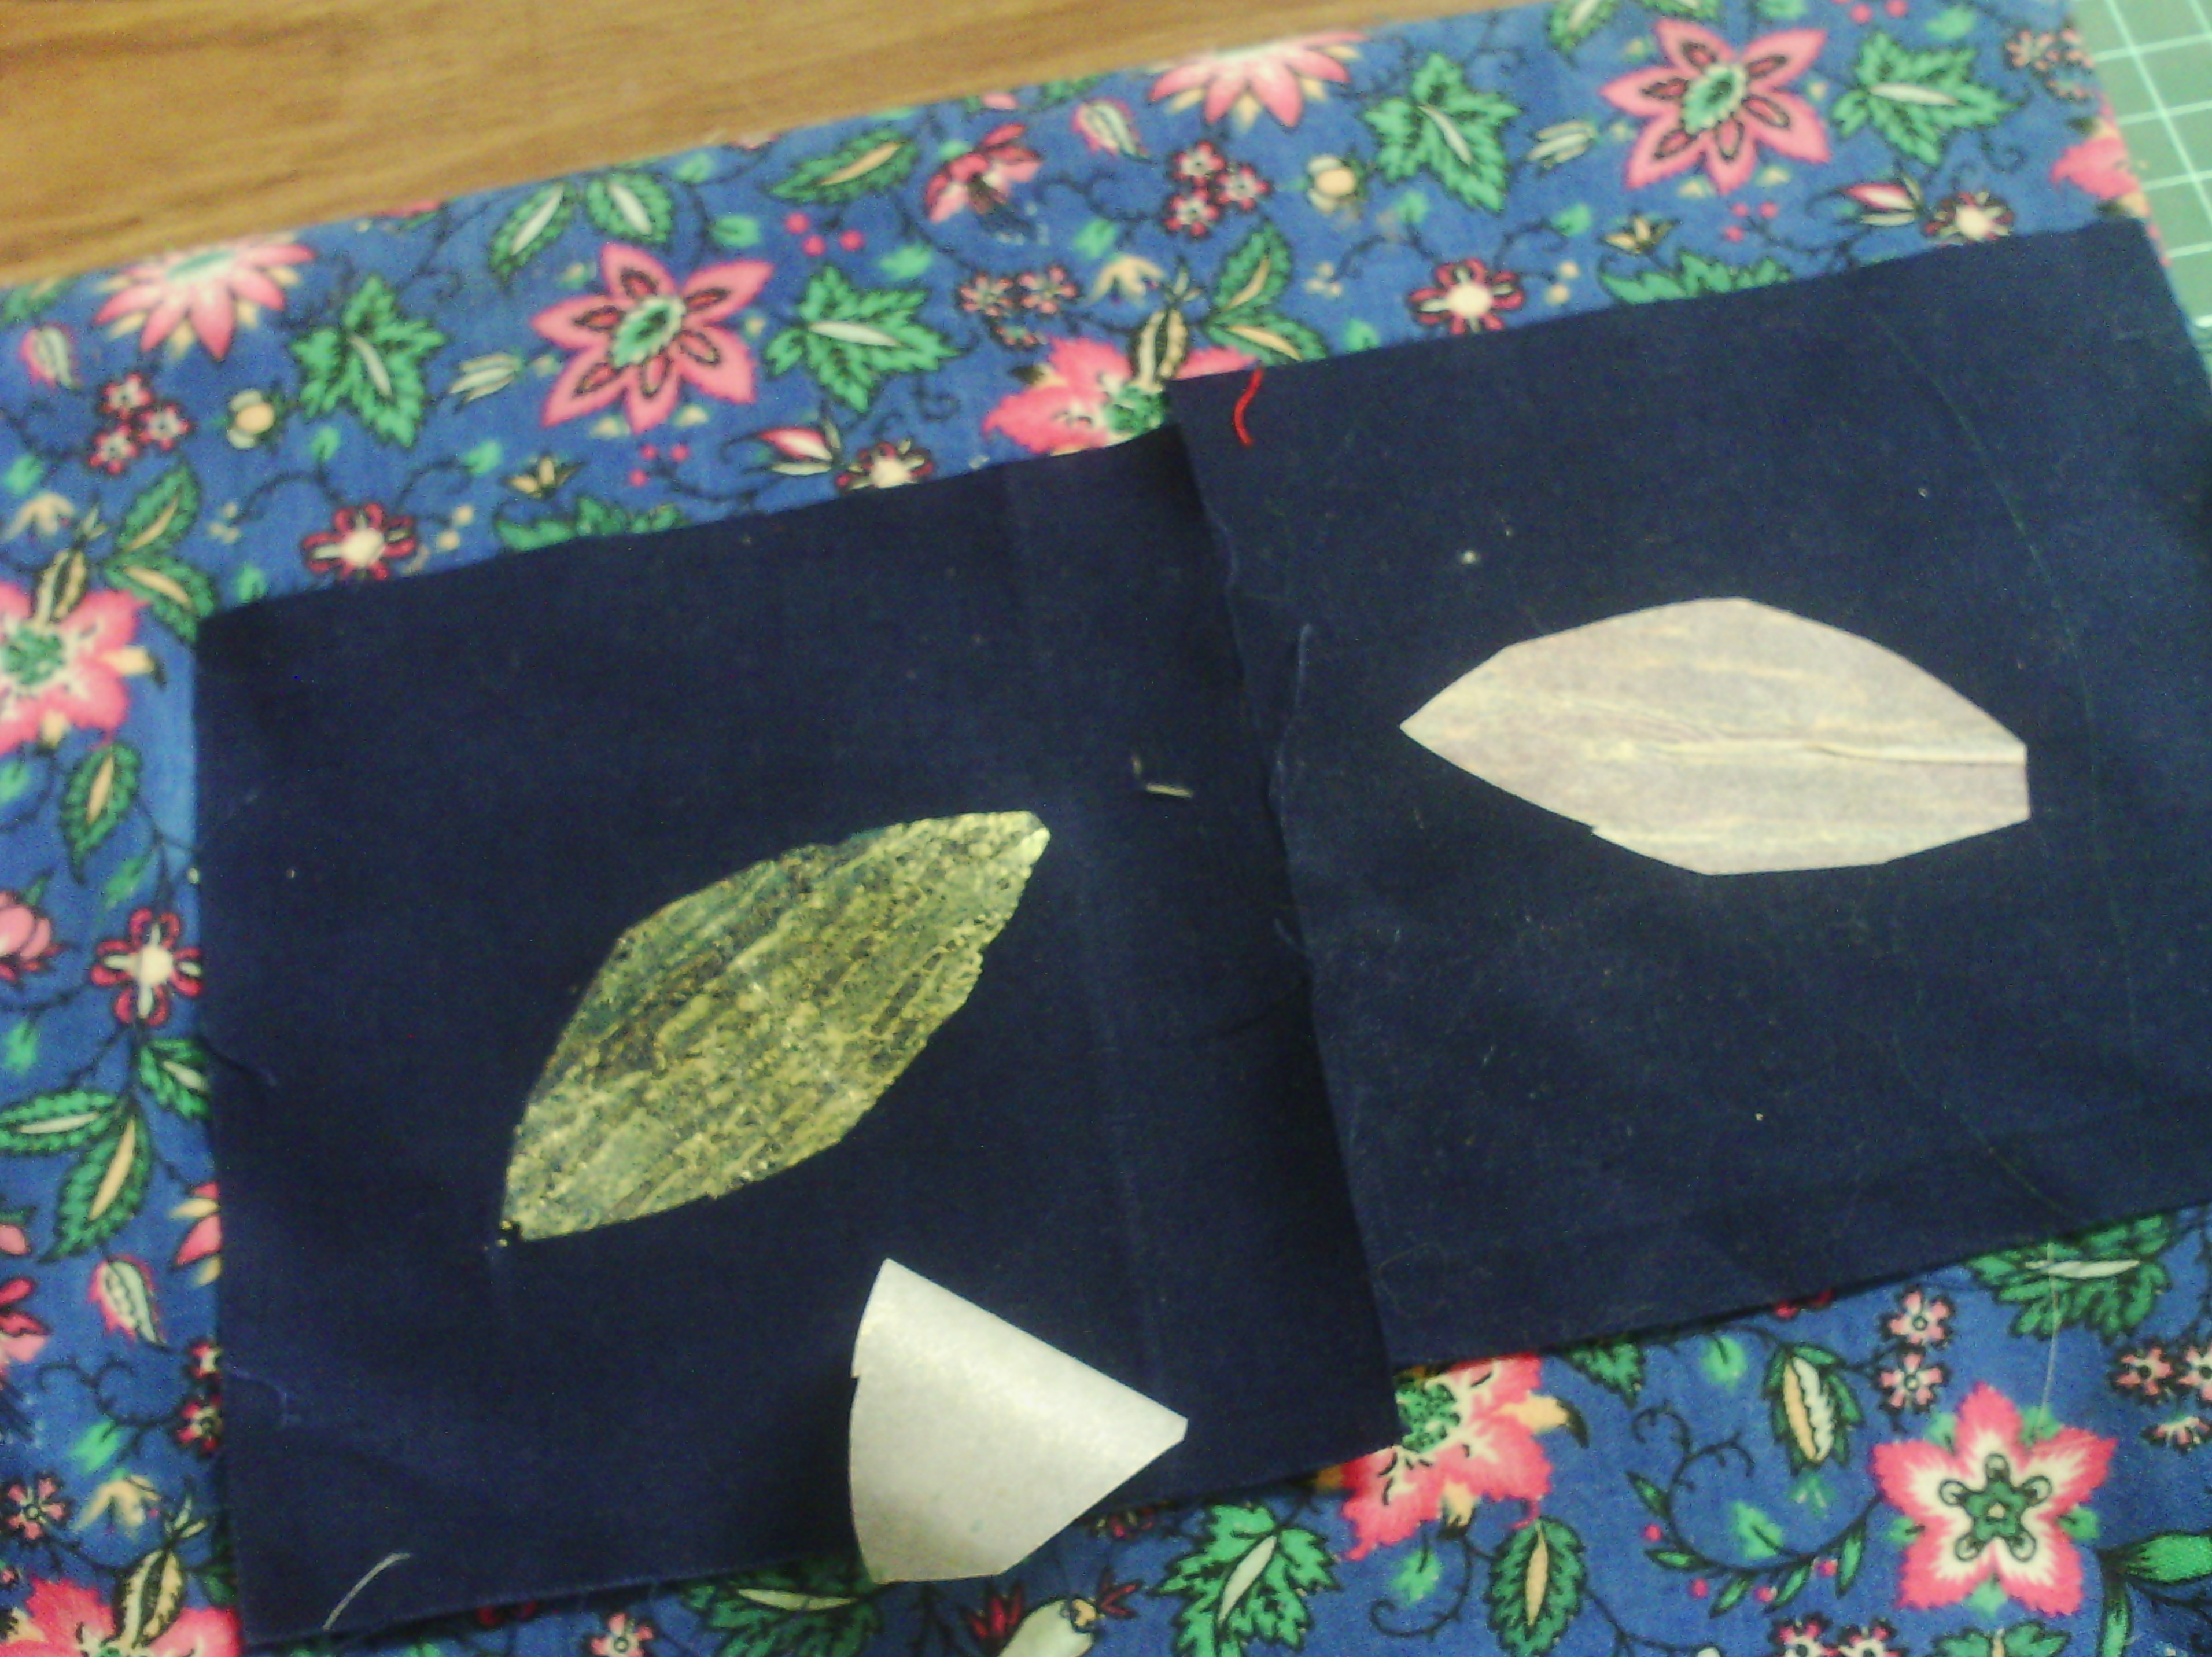
Here is some dry fusible on the right. You can see how wrinkly it gets. this is the way it should be. Some fusibles don't do this and give a very flat textureless colour. On the left you can see I have cut some leaves from the fusible.
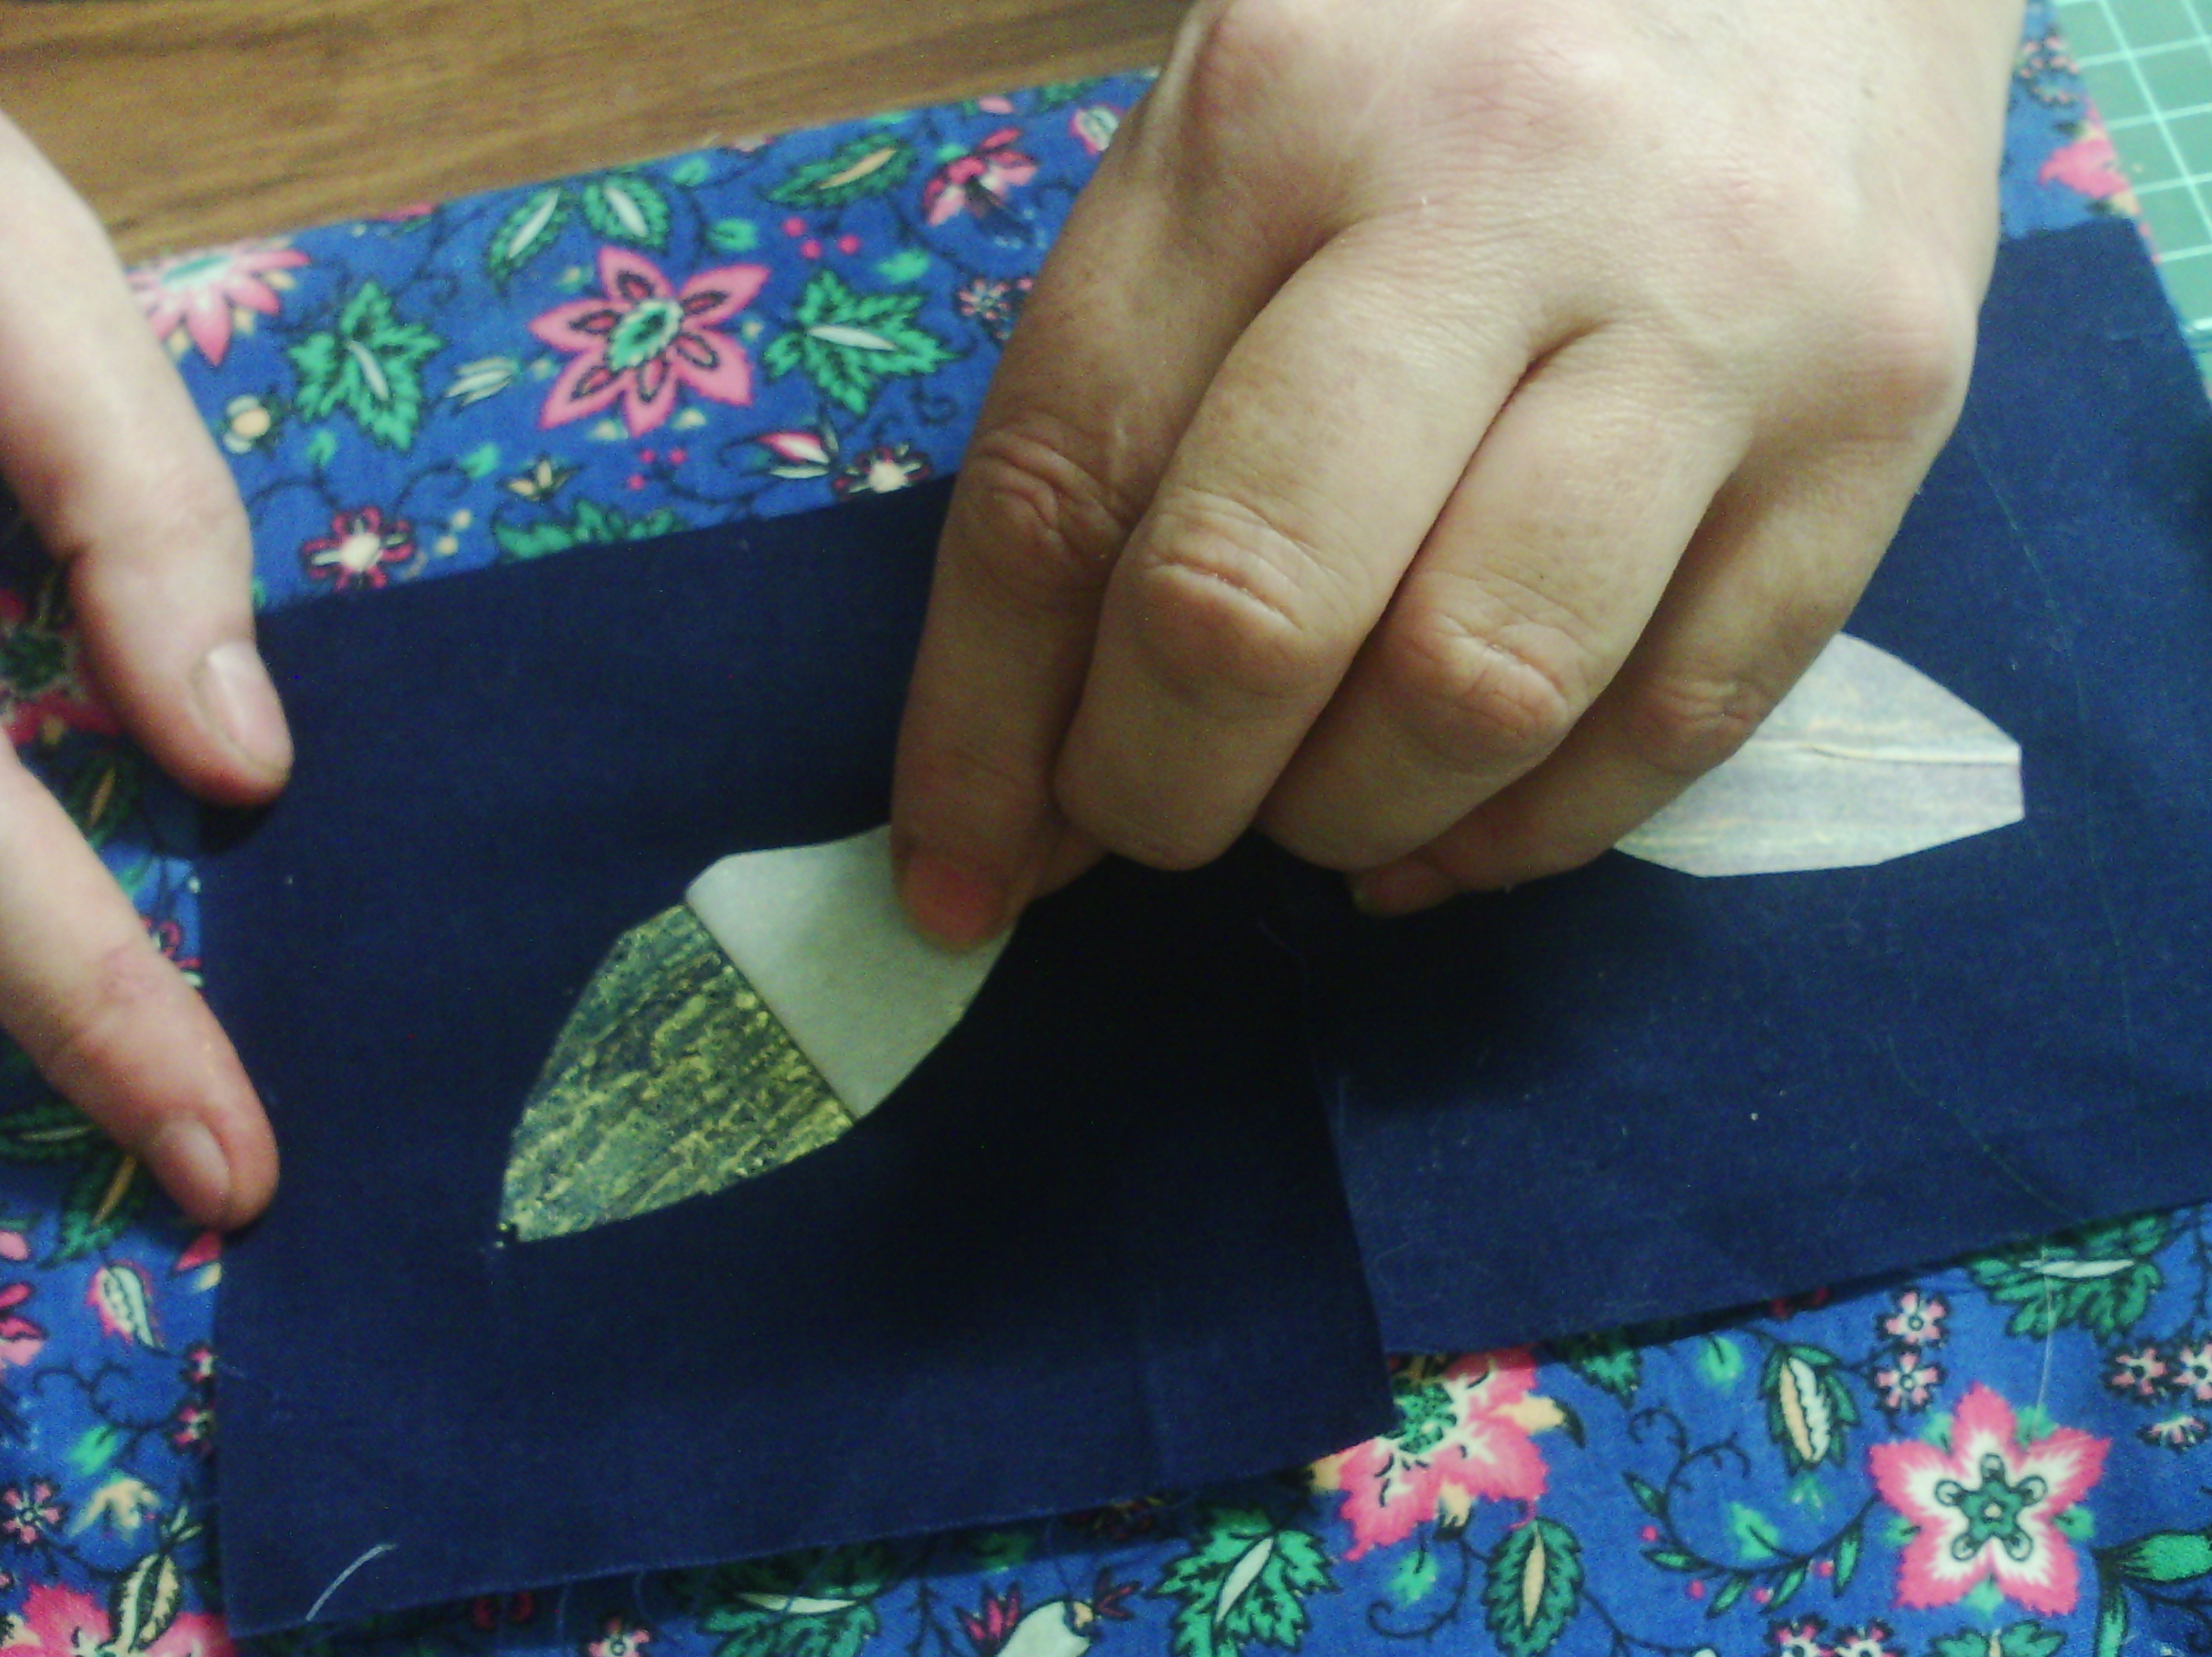
Again, you iron the leaf shapes down. Remember to iron with the paper side up, or you get a gluey mess on your iron, and use baking paper over the top as well. The one on the right has been ironed down already
When the fabric is completely cooled, peel off the paper as above.
and you get a beautiful textured metallic leaf.
This is not the only way to use the fusible. I used some torn strips of fusible on one of my collages
This is a very simple collage. I have used painted fusible as the whole background, but you can also see another feature of the painted fusible, and that is, that because it is fusible, you can still iron more on top (using baking parchment for sure) Here I have ironed on a few bits of wool fluff and a little organza sun, but you can iron sequins, glitter, loose threads and even some foil onto it ( I would be careful with the foil as too much will cover all the lovely painted texture).
I hope you enjoyed this tutorial
Happy creating!
Monday, August 6, 2012
A little bit of everything
I have not really been very productive lately, although I know some of you won't believe that, however I have really been doing a lot of reading and staying away from the computer. I recieved two books from Kim Thittichai recently- "layered Textiles" and "experimental textiles", which I have been enjoying immensely. Layered textiles is about creating wonderful textures using many layers, heat tools, stitching and lots of other stuff. To that end, I have been painting non woven fabric such as light lutradur, fusible, nappy liner, tyvek and rainbow spun.
These are a few samples. The top one is nappy liner, which I spayed with my air gun. The bottom two are fusible, painted with acrylic. You can see on the middle picture I have ironed some glitter onto the fusible.
I wanted to create a water effect and tried a few different ways with the nappy liner.
I ironed the nappy liner down after cutting it with a heat tool. It created an interesting effect, but as you can see in several places, I was a bit impatient waiting for the baking paper to cool and some came away with my blue nappy liner still attached.
In the sample on the left, I ironed the pieces onto interfacing, but the iron was too hot and the interfacing wrinkled up. Ah well, we live and learn. In the right hand sample I just layered strips of coloured nappy liner on cotton and cut into it with the heat tool. This created while lines, and might be useful if I want to make foam on the waves in a sort of heat tool reverse applique.
I used some of the fusible in this piece. I ironed it onto a yucky beige fabric, which I had painted ages ago and it created the orange squares behind my leaves. In fact when I had ironed it on the fabric, I loved the marble like effect so much, I had to create something with it, so I cut lots of leaves from my huge collection of baby wipes which I use to mop up my paintin messes, then dry.
This piece is just fused down and sitting next to my free motion machine for stitching.
This is my sample for the stitching, which I made from left overs. I used purple and turquoise thread, but I think a little orange and gold will not go astray as it is a little flat at present.
The stitching was inspired by "retro inspired stitch samplers" by Jackie Cardy in the jun/jul 2000 issue of Quilting arts, which has been sitting in my to do pile for a long time.
I didn't forget the other book I was reading, "experimental textiles", it is full of yummy samples and is really about sketchbooks for textile art. I have been reading it together with another two books, "sketchbooks for embroiderers and textile artists" by kay greenlees, and "dreaming from the journal page" by Melanie Testa as well as doing Melanie's online course "dream Journal".
Wow, that was a mouthful and a lot of links to paste in! But I am, as you might gather, spending a lot of time in my sketchbooks at present. I also am watching "Internationally inspired" from donna downey, so I suppose I am doing stuff, it's just it's all very paper oriented, lol.
This is a quick sample from Melanie's course, where I am testing out different media, like watercolour, watercolour pencils, pastel pencils, water soluble wax and oil crayons, and crayola slicks, which are a bit like gelatos.
These two are pages from my journal, where I was just playing.
This page from my sketchbook is a few insects I was playing with.
At our art group at our community house we have been doing some beading, and these are two little bits I made. I have made a few more, but haven't photographed them, and will show you next time.
I think that's enough for one post.
Friday, May 18, 2012
foil and leather and some mail
Thanks for the comments about the drawing, guys. I should be good, I've been practicing for a bout forty years. lol. but thanks.
This ATC uses velvet, polyester, leather, painted face wipes and textured synthetic, layered with painted fusible and foil, then a bit of leather strip to top it off.
I thought I would share someone else's work with you today, a couple of items I got in the mail this week.
This absolutely gorgeous and colourful piece of blackwork embroidery is from a very talented friend in Spain.
and this beautiful fabric page, interpreting my theme of leaves is from a friend in Queensland. notice the three large leaves made from wire and green stocking. Love it! I am really missing my embellisher since the rabbit chewed the cord :-(
Sunday, April 1, 2012
soldered leaves and ironed cellofoil
Synthetic scraps layered on cotton, covered with satin, stitched then soldered to reveal the scraps. Satin stitched edging - yay! finally got it!
I will show you a bit more on this technique ina day or so.
I have a growing collection of cellofoil. This is the plasticky foil that comes as candy wrappers, on crisp/chip packets and on rice cakes. I use rice cakes, so these packets yield a large piece of cellofoil, whilst the candy wrappers, although colourful are very small.
I have been thinking of ways to use these in my mixed media, so the other day, I got experimenting.
This is cellofoil, with plastic bags (preironed to fusible) ironed on top. Since the plastic bags are very thin, and break up when you iron, the cellofoil peeps through and looks very nice.
This one has some painted fusible ironed on and it looks absolutely gorgeous. My fingers are itching to use this sample.
This one has a painted nappy/diaper liner fused to it. I used a sprinkle of fusible granules, only a tiny bit, to get it to fuse. Since the liner is so thin, the metallic cellofoil is visible and looks lovely.
After I used the nappy liner, I went off on a whole other tangent with the liners, but I'll get to that in another post.
These pieces of cellofoil are certainly going to feature in some of my pieces. It's a great feeling when you have a successful experiment. But all experiments are useful.
Friday, December 30, 2011
Art books
Just a quick mention, that I am going to start posting an ATC a day as a way to play with lots of techniques. This was an idea put forward by my friend, Lisa and I have decided to join her in her venture. we shall see! She also has a great list of techniques which she wants to try.
My art books, as I have said, are recycled/altered books which I use to create little bits of art and experiment in on different themes.
Here are a few pages I have worked on recently.
This is a page from my bird theme book. The backgrpound is newspaper painted with gesso and then a watercolour wash, which I find easy to paint and draw on and is a cheap and easy way to cover up the page contents underneath. The bird was inspired by a card. It is a little hard to see because it is drawn with a metallic pen, but basically each piece of the bird is doodled with a different free motion quilting design. I have a small quilt based on this page in process, so you see the books are a great design resource..
This is a page in process in my water/oceans book. Again the background is painted newspaper/gesso.
The seahorses are molding paste applied through a stencil, then painted gold.
This page will be layered again to add some more weeds and depth before it is finished. I already have ideas about using painted fusible in a small quilt like this.
These ferns in my leaf theme book are stencilled with oil pastel. Next, I will put a watercolour wash on which will be resisted by the pastel. This can be mimicked on fabric using shiva sticks and fabric paint, so i do see a batch of fabric comming up.
I have shown this page before. It is a ripped printout pasted to the page, but here, you can see I have begun to sketch out the missing parts. I think this page needs a wash for the background, so the leaves will brobably be completed with oil pastel.
Another page from the leaf book, this is a simple layout for a small motif (about 4") I made using couched copper wire on a piece of woven wool fabric. This page has a piece od non woven paper/fabric (the type florists use on their posies) pasted directly to the page. It is semi transparent, but I actually like the little views you can see. The pink/orange paper is paste paper .
I have actually been doing a lot of sewing an textile work, but haven't quite got to the point of something to show yet and a couple of my WIPs are things I can't show until a certain date, but two days untill I start posting ATCs!!!!
Subscribe to:
Posts (Atom)

