This weeks's theme for digital drawing day from Terry grant is 'green and growing' (I am a day ahead in Aus, the post over there will not be up until tomorrow).
I have been working on some green and growing things in my landscapes for my 'Working in a series' class with Elizabeth Barton, and I have been using the graphics tablet to play with my designs.
Here is a value study of a design I am currently working on.
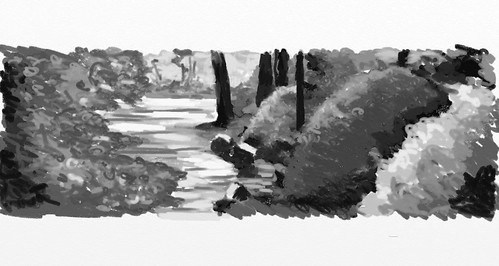
This is obviously not green! even though the subject matter is, but I can tell you a grey scale sketch is very useful especially with picking colours.
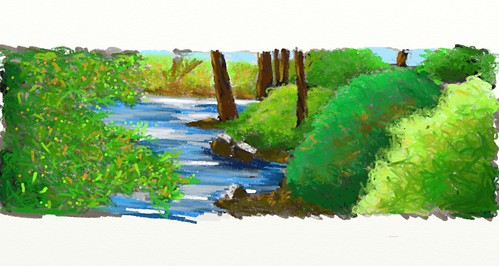
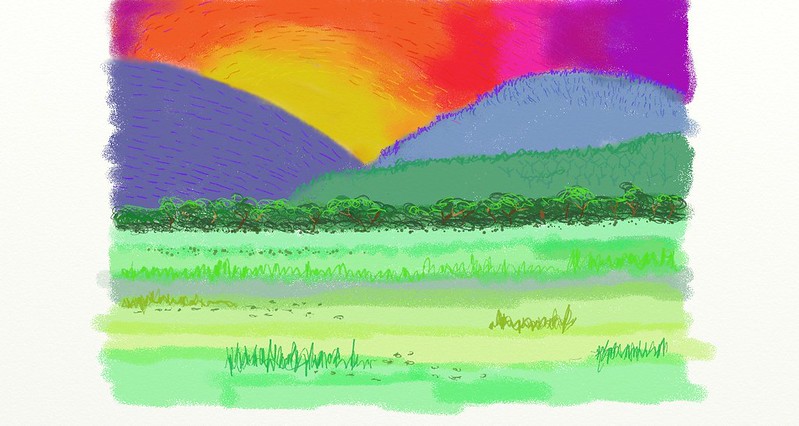
Here it is with the colour added. It is a scene a few minutes walk from my house. The photo I used was quite blurry, but since I know the scene so well, it worked ok.
As usual, I used the pastel tool in Artrage, but I used lots of layers to get colours to lie on top of each other.
I am finding more and more that it is easier to draw these sketches for my fibre work digitally. It is more forgiving and you don't have the limitations of the real thing eg pastel. Also, all you need is computer paper, not thick watercolour paper and sketchbooks! (Although I do love playing in them still)
This one is going to be heavily stitched, so the scribbly mark making is like a practice of free machine stitching and thread painting, which is always a good thing.
Happy Creating!
Sunday, March 30, 2014
Friday, March 28, 2014
Free motion Friday 2
I am continuing my link up for free motion stitchers.
A little bit of preliminary. If you want to use your machine for free motion, you need to lower the feed dogs and put a darning foot on. If you are unable to lower your feed dogs, covering them with a bit of masking tape or card will do the job. A great overview of setting up can be found here.
Above all, relax. It is just like scribbling and you will find your skill improves dramatically as you practice. When you learned to write as a child, no one expected you to do calligraphy straight off, so don't expect to make a masterpiece straight away. Just play and practice.
I am going to continue with more straight stitch techniques. I hope to continue this series as we go along.
Obviously, if you are not new to free motion embroidery (FME), then don't worry about the tutorial, just link at the bottom so we can all share what you have done. It doesn't have to be done today or even this week, just post something you have done.
Straight stitches -2
Hopefully, this will be a short blog today as I have videos!
In the videos, there is a short whiteboard session showing how to do each stitch. I'm sure I've said before, that drawing your stitch on scrap paper before you start will always result in a better stitch out. Of course the other thing to remember, is practice.
Last week, we looked at ways to do straight stitch and started to look at the three main straight stitches in thread painting: Granite, Crazy and Weave stitch. Well let's just recap with a picture of granite stitch
Granite stitch is also called encroaching circles and is basically a way to shade, fill and add thread to a piece of thread painting. Granite stitch is also called Garnet stitch in some places. It is very useful for drawing shrubs or treetops in the distance or when done small, gravel on a path or in a creek.
Here is the video, which I didn't have last week
In the videos, there is a short whiteboard session showing how to do each stitch. I'm sure I've said before, that drawing your stitch on scrap paper before you start will always result in a better stitch out. Of course the other thing to remember, is practice.
Last week, we looked at ways to do straight stitch and started to look at the three main straight stitches in thread painting: Granite, Crazy and Weave stitch. Well let's just recap with a picture of granite stitch
Granite stitch is also called encroaching circles and is basically a way to shade, fill and add thread to a piece of thread painting. Granite stitch is also called Garnet stitch in some places. It is very useful for drawing shrubs or treetops in the distance or when done small, gravel on a path or in a creek.
Here is the video, which I didn't have last week
The next stitch, which is really the easiest to do, is multidirectional or crazy stitch.
Crazy stitch is good for backgrounds, particularly places where you don't want the "shine" of embroidery thread, since as the threads are all in different directions, it doesn't reflect light like, say a satin stitch would. This is why it is good for backgrounds, which need to fade into the distance.
Here is the video for crazy stitch.
Weave stitch
Weave stitch is a very useful stitch and looks as it says - wovenWeave stitch needs a picture because it is hard to describe in words, but here goes. Using straight stitch, draw zig zag lines close together in an up and down motion, but of irregular lengths,
Follow this by doing the same in the right/left direction, then begin again in another area, meshing the two together. I think the whiteboard in the video explains it much better.
Weave stitch is particularly good for creating flat surfaces in a thread painting. Man made things like wooden fences and buildings, especially. It is, unlike the other two, a directional stitch, so you need to make sure you orientate it so it makes sense in your picture, ie a fence post does not have diagonal lines.
Here is the video
Next week we will look at some zig zag stitches.
Tuesday, March 25, 2014
A bit ofplastic
Today's picture for T for Tuesday is one I did a while ago.
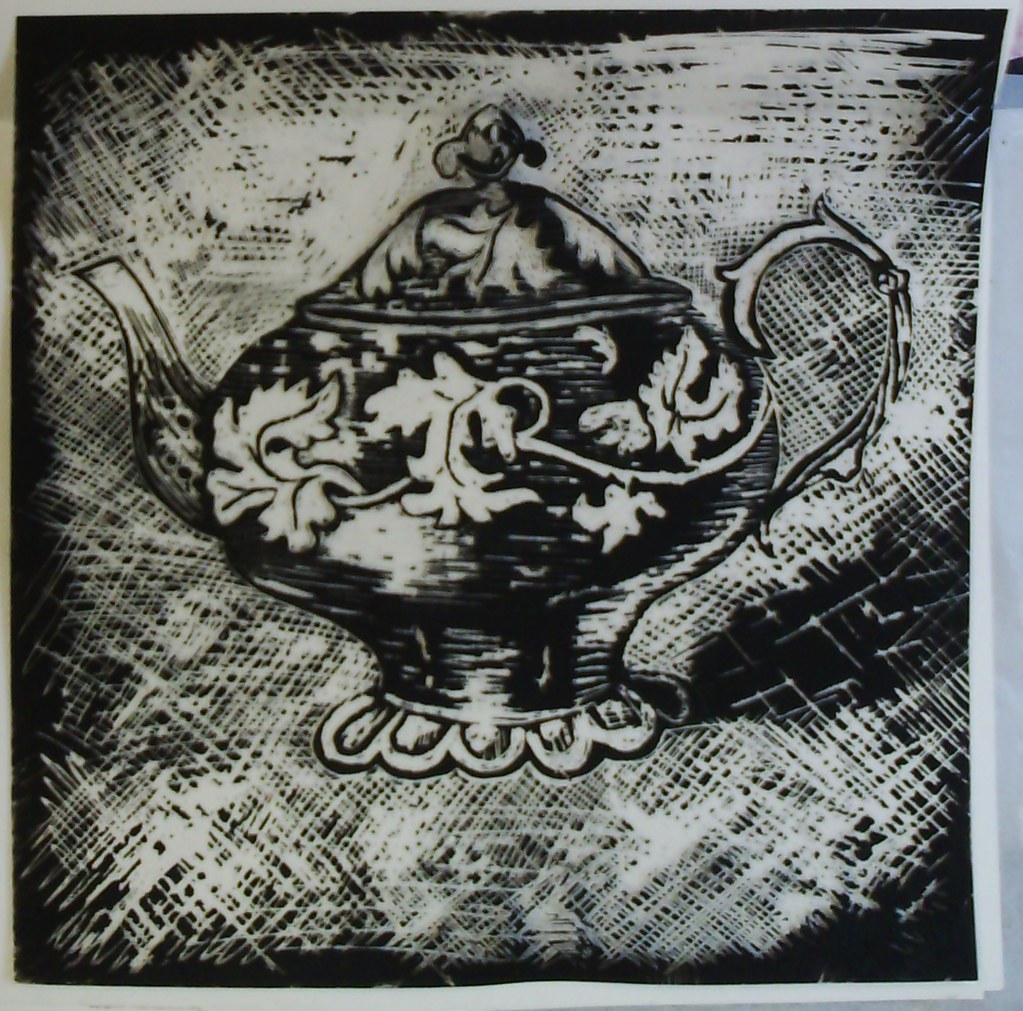
This was drawn by scratching into a piece of acetate (overhead transparency) that had been painted black and allowed to dry. It is of a vintage teapot (my favourite kind). After I had finished it, I sealed the paint with some matte medium so it wouldn't flake off. It was interesting to be removing paint, rather than adding it.
Happy T day!
This was drawn by scratching into a piece of acetate (overhead transparency) that had been painted black and allowed to dry. It is of a vintage teapot (my favourite kind). After I had finished it, I sealed the paint with some matte medium so it wouldn't flake off. It was interesting to be removing paint, rather than adding it.
Happy T day!
Labels:
t for tuesday
Monday, March 24, 2014
Dyed batting
Because I am quite mean with my supplies, or perhaps I just believe in saving money, I like to use up every scrap and if you quilt, you will know how many batting scraps that are not much use it generates! I don't throw these out and use them for stuffing toys and also, for needle felting. Of course they are not a particularly interesting colour for using for needle felting, but they felt extremely well.
I have covered this topic before and you can find a tutorial here.
I have had some landscape ideas in my mind for a while and of course hand dyed felt and prefelts are available, but it is so easy to dye batting (cotton only) and the colours are glorious!
So yesterday I did a huge batch of scraps.
I throw in every little bit, as you can see. With this batch, I used two colours in each jar and scrunched the damp batting quite tightly. This gives the mottling in the colours.
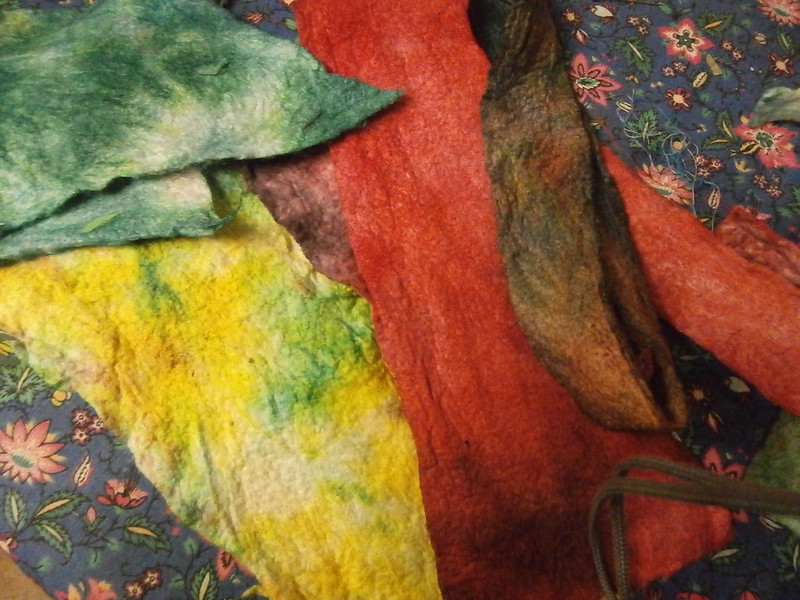
Here are some of the colours I got. Most cotton batting has a thin layer of scrim, or polyester fabric, like a stabiliser on the back, which will not dye. So the batting has a front and back side. the back side is very pale. But I don't find this a problem when needlefelting with the batting.
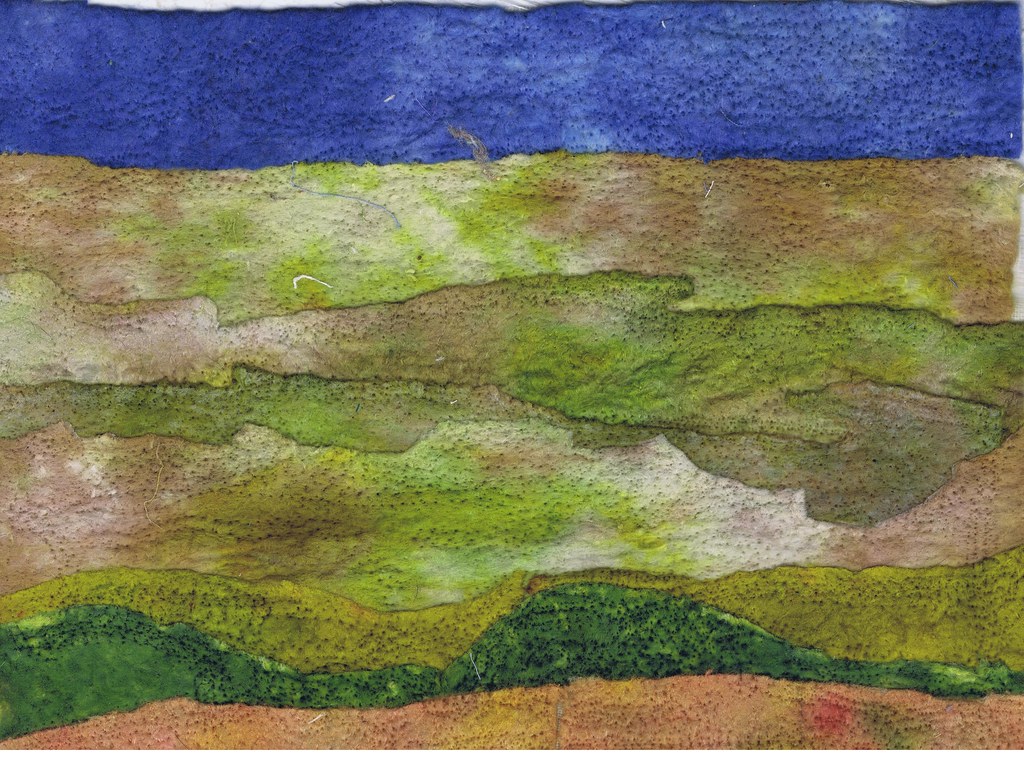
Here is an example of a batting landscape
The batting has only been 'tacked down' or lightly needlefelted at this stage, and will merge more with more work, but you can see how those murky colours turn into great landscapes.
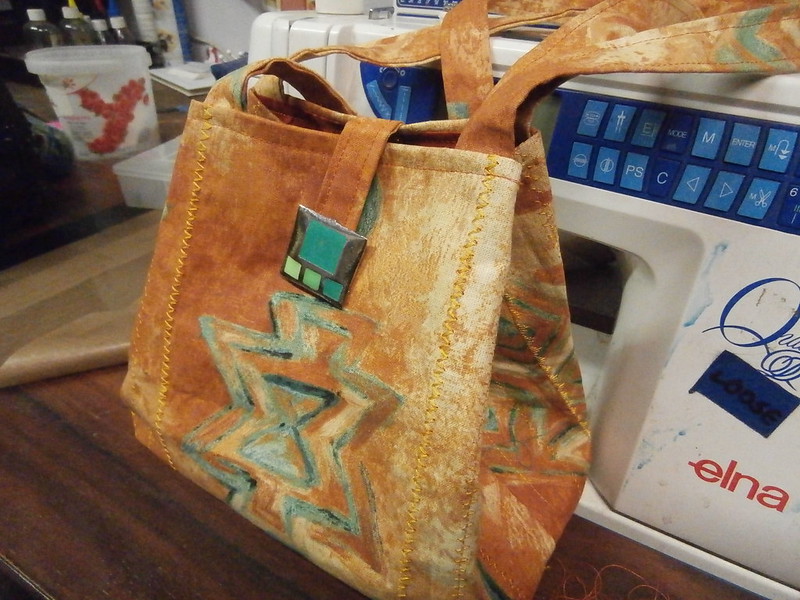
I will also show you a sample handbag I put together for a workshop I intend to teach later in the year. I will post the step by steps later this week. I took lots because I will need them for the workshop.
Happy creating!
I have covered this topic before and you can find a tutorial here.
I have had some landscape ideas in my mind for a while and of course hand dyed felt and prefelts are available, but it is so easy to dye batting (cotton only) and the colours are glorious!
So yesterday I did a huge batch of scraps.
I throw in every little bit, as you can see. With this batch, I used two colours in each jar and scrunched the damp batting quite tightly. This gives the mottling in the colours.
Here are some of the colours I got. Most cotton batting has a thin layer of scrim, or polyester fabric, like a stabiliser on the back, which will not dye. So the batting has a front and back side. the back side is very pale. But I don't find this a problem when needlefelting with the batting.
Here is an example of a batting landscape
The batting has only been 'tacked down' or lightly needlefelted at this stage, and will merge more with more work, but you can see how those murky colours turn into great landscapes.
I will also show you a sample handbag I put together for a workshop I intend to teach later in the year. I will post the step by steps later this week. I took lots because I will need them for the workshop.
Happy creating!
Sunday, March 23, 2014
digital Drawing Day - Something that pleases
The topic for Terry's Digital drawing this week is 'Something that pleases'. since I have been doing so much work on landscapes, that is what pleases me at the moment.
You might remember this transparent landscape I have been working on.
One of the things I like to do when working on a project, is to play with different techniques in my sketchbook. I looked at this challenge as a way to look at my landscape from another point of view.
And this is what I came up with. I put in the colours with the airbrush tool in Artrage. When I set the opacity lower, I found I could get some transparency. You can see in the foreground, where I have overlapped the lines of greens.
Next I used the Marker (Texta) tool to imitate my free motion stitching, doing scribbles for the horizon trees in two colours and scribbles for the grasses. Then I continued to add some simple hand stitch ideas, some running stitches in the sky and some french knot dots in the foreground.
I am quite pleased with how this came out and think I will most definitely use this to create stitch diagrams again.
If you are not a digital drawer, you could simply open your photo of the work in a program like photoshop or Gimp and using the pencil too, just draw all over it, or if you are not computer savvy, you could do as deborah boshert does and just photocopy or print your work and then draw on it with real markers.
I think It is a great way to audition!
Make sure you visit Terry sunday US time to see hers and joan's digital drawings.
You might remember this transparent landscape I have been working on.
One of the things I like to do when working on a project, is to play with different techniques in my sketchbook. I looked at this challenge as a way to look at my landscape from another point of view.
And this is what I came up with. I put in the colours with the airbrush tool in Artrage. When I set the opacity lower, I found I could get some transparency. You can see in the foreground, where I have overlapped the lines of greens.
Next I used the Marker (Texta) tool to imitate my free motion stitching, doing scribbles for the horizon trees in two colours and scribbles for the grasses. Then I continued to add some simple hand stitch ideas, some running stitches in the sky and some french knot dots in the foreground.
I am quite pleased with how this came out and think I will most definitely use this to create stitch diagrams again.
If you are not a digital drawer, you could simply open your photo of the work in a program like photoshop or Gimp and using the pencil too, just draw all over it, or if you are not computer savvy, you could do as deborah boshert does and just photocopy or print your work and then draw on it with real markers.
I think It is a great way to audition!
Make sure you visit Terry sunday US time to see hers and joan's digital drawings.
Friday, March 21, 2014
free motion friday
So, It's friday. Well it is here in Australia. To start my link up for free motion stitchers out there, I am reposting an old post about free motion stitching.
A little bit of preliminary. If you want to use your machine for free motion, you need to lower the feed dogs and put a darning foot on. If you are unable to lower your feed dogs, covering them with a bit of masking tape or card will do the job. A great overview of setting up can be found here.
Above all, relax. It is just like scribbling and you will find your skill improves dramatically as you practice. When you learned to write as a child, no one expected you to do calligraphy straight off, so don't expect to make a masterpiece straight away. Just play and practice.
I am going to start with a number of straight stitch techniques. I hope to continue this series as we go along.
Obviously, if you are not new to free motion embroidery (FME), then don't worry about the tutorial, just link at the bottom so we can all share what you have done. It doesn't have to be done today or even this week, just post something you have done.
Straight stitch techniques in FME
One look at a quilting catalogue, or leah day's project will show you that straight stitch is extremely versatile and can form a zillion different patterns. This is because it is basically a line and lines make drawings, so anything you can draw, you can FME. And let's not forget drawing. Before you start at the machine it is a good idea to draw out what you intend to sew. Not only will this help you remember where to move, it will make the result better.
The first thing you will probably do and this is a good idea, is just scribble. Below are a few examples of just that.
Try a variety of shapes and even some stick figures or leaves and trees, Keep it interesting, because practice is the key.
Some patterns you could try:
Don't look for perfection in your lines,
Granite stitch
Granite stitch for me, is just scribble, the first thing we do as children learning to draw, which is why I chose it to start. Leah day calls it cat hairball, it is also known when done like in the picture above, as encroaching circles in The encyclopedia of Machine Embroidery, or granite stitch by carol shinn, or spiralling straight stitch by Alison holt and probably as many other names as there are FME artists.
Basically, this stitch is used to fill in large areas and shade by overlapping or to make trees in the distance as in my itty bitty landscape, here is a close up of that stitching.
The main thing with granite stitch, is that the circles need to overlap, and if it doesn't look right to you (remember to stand back, no-one looks at art with their nose to it to enjoy it, only critics do that!), then go over it again, or ask someone else, because you will always be over critical of your own work.
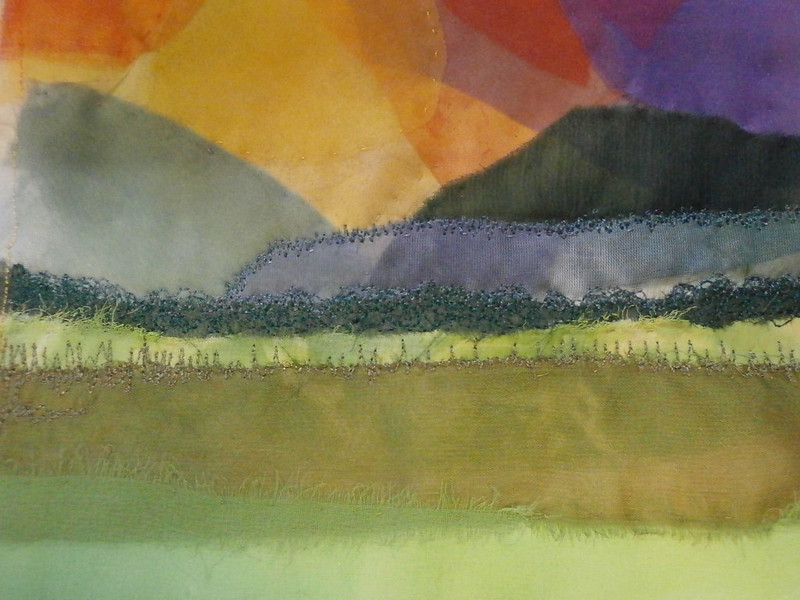
Here are two straight stitch examples on the transparent collage I showed yesterday.
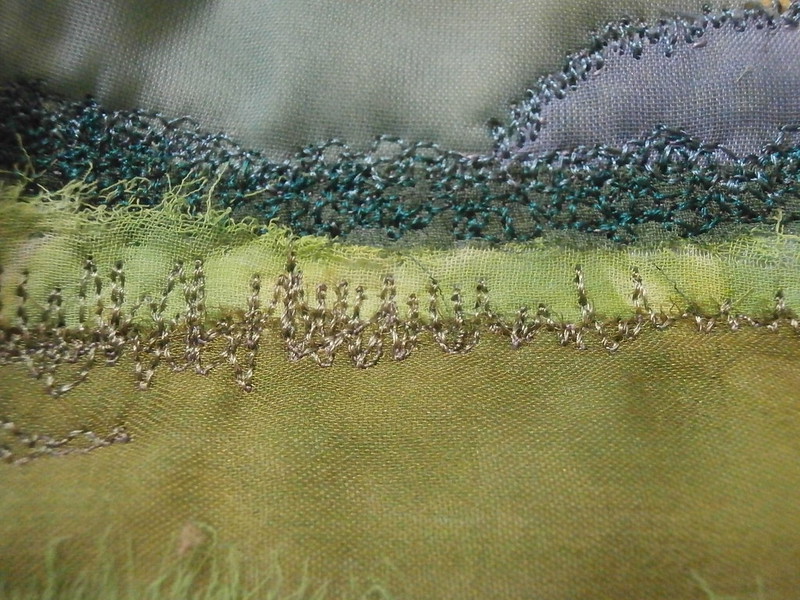
The dark green blue in the thick top line is granite or scribbling. You might be able to see that I went back over with a lighter colour. This is supposed to represent trees on the horizon. Beneath that, in the browny green thread, I have just drawn zig zag lines to represent some grass.
It all looks very messy this close up, doesn't it?
You can see how these simple stitched lines create detail in the landscape, and all it was was a bit of scribble!
Next week I will continue my series. I will also try to visit everyone who posts.
Just to test out the linky, I will link to my itty bitty landscape post, so there is no need to look at that if you have already clicked through above.
A little bit of preliminary. If you want to use your machine for free motion, you need to lower the feed dogs and put a darning foot on. If you are unable to lower your feed dogs, covering them with a bit of masking tape or card will do the job. A great overview of setting up can be found here.
Above all, relax. It is just like scribbling and you will find your skill improves dramatically as you practice. When you learned to write as a child, no one expected you to do calligraphy straight off, so don't expect to make a masterpiece straight away. Just play and practice.
I am going to start with a number of straight stitch techniques. I hope to continue this series as we go along.
Obviously, if you are not new to free motion embroidery (FME), then don't worry about the tutorial, just link at the bottom so we can all share what you have done. It doesn't have to be done today or even this week, just post something you have done.
Straight stitch techniques in FME
One look at a quilting catalogue, or leah day's project will show you that straight stitch is extremely versatile and can form a zillion different patterns. This is because it is basically a line and lines make drawings, so anything you can draw, you can FME. And let's not forget drawing. Before you start at the machine it is a good idea to draw out what you intend to sew. Not only will this help you remember where to move, it will make the result better.
The first thing you will probably do and this is a good idea, is just scribble. Below are a few examples of just that.
Try a variety of shapes and even some stick figures or leaves and trees, Keep it interesting, because practice is the key.
Some patterns you could try:
wiggly lines
zigzag lines
pointy scribble
curvy scribble or stippling
curvy lines that touch
practice the alphabet
write your name
These are not special, perfect examples I made up to show you. They are just my everyday practice. If I don't practice nearly everyday, I get a bit rusty.Don't look for perfection in your lines,
- firstly because most applications of these lines in FME will not require perfection
- secondly, because if it is not fun to do, you are not likely to persist and striving for perfection can be a little boring.
- lastly because my philosphy is that creativity and perfection are opposing forces. Think about your purpose. Is your purpose to create a perfect carbon copy that is cold and lifeless, or is it to create something alive and beautiful that expresses your inner self?
Granite stitch
Granite stitch for me, is just scribble, the first thing we do as children learning to draw, which is why I chose it to start. Leah day calls it cat hairball, it is also known when done like in the picture above, as encroaching circles in The encyclopedia of Machine Embroidery, or granite stitch by carol shinn, or spiralling straight stitch by Alison holt and probably as many other names as there are FME artists.
Basically, this stitch is used to fill in large areas and shade by overlapping or to make trees in the distance as in my itty bitty landscape, here is a close up of that stitching.
The main thing with granite stitch, is that the circles need to overlap, and if it doesn't look right to you (remember to stand back, no-one looks at art with their nose to it to enjoy it, only critics do that!), then go over it again, or ask someone else, because you will always be over critical of your own work.
Here are two straight stitch examples on the transparent collage I showed yesterday.
The dark green blue in the thick top line is granite or scribbling. You might be able to see that I went back over with a lighter colour. This is supposed to represent trees on the horizon. Beneath that, in the browny green thread, I have just drawn zig zag lines to represent some grass.
It all looks very messy this close up, doesn't it?
You can see how these simple stitched lines create detail in the landscape, and all it was was a bit of scribble!
Next week I will continue my series. I will also try to visit everyone who posts.
Just to test out the linky, I will link to my itty bitty landscape post, so there is no need to look at that if you have already clicked through above.
Thursday, March 20, 2014
Transparent landscape
some of you know i am doing two art courses at present, and sometimes thing gell together to create an idea. I had been looking at a lot of landscapes for one course and the other night I was reading Ruth Isset's new book 'A Passion for Colour' I was very interested in her leaf collages, since that is something I love, but she was discussing using transparent fabrics ans I thought, perhaps this would transfer to a landscape! I needed to do some sketches and coloured paper collages for Elizabeth Barton's course, so...
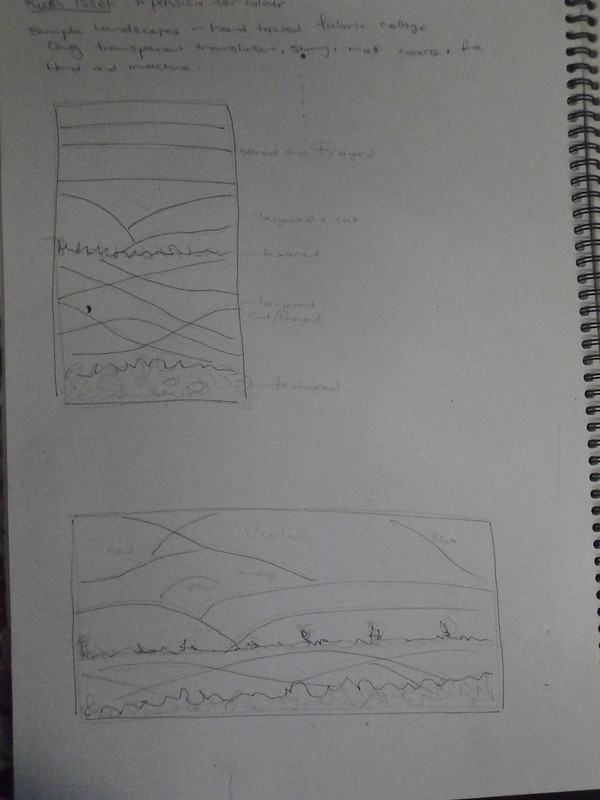
these were the sketches i came up with.
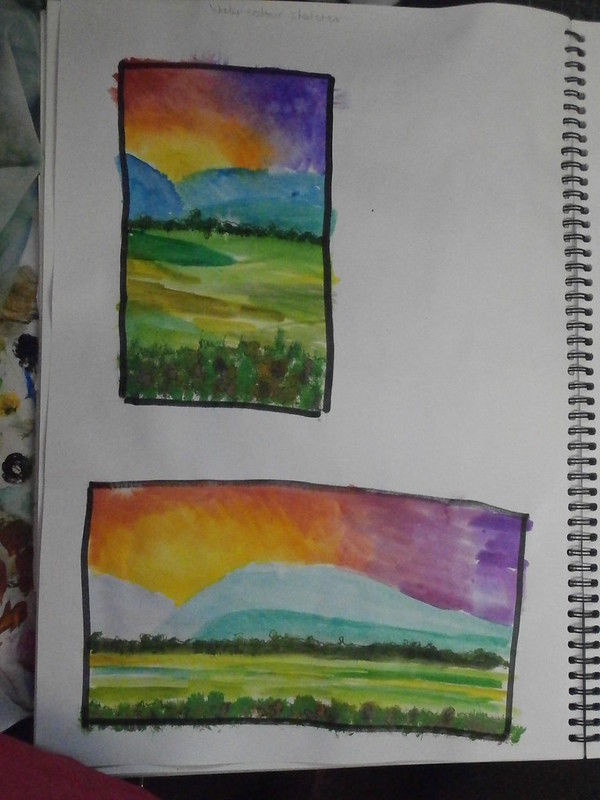
I repeated this as a watercolour sketch, which even though it is transparent, did not give the effect that I wanted.
I repeated it again with coloured and painted tissue and this gave me lots of overlapping colours which is what I wanted.
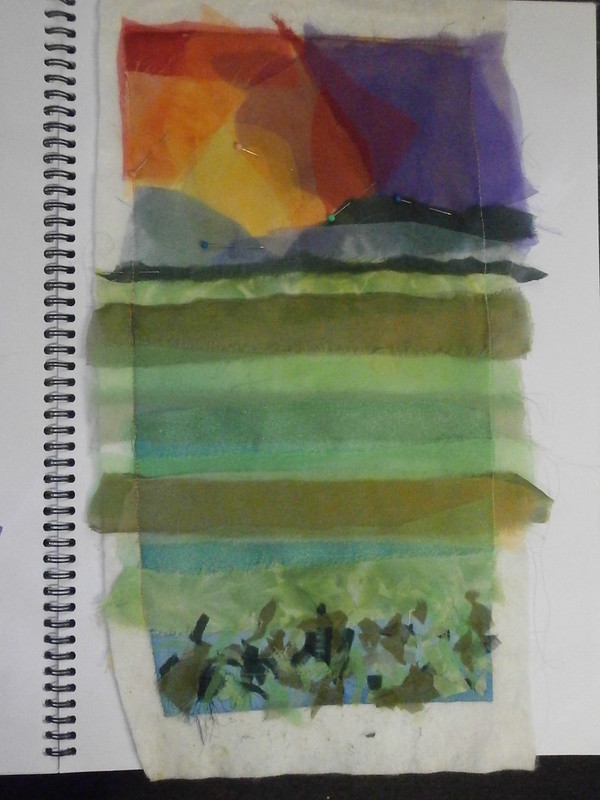
This morning I rummage through all my sheers and put together a fabric sample.
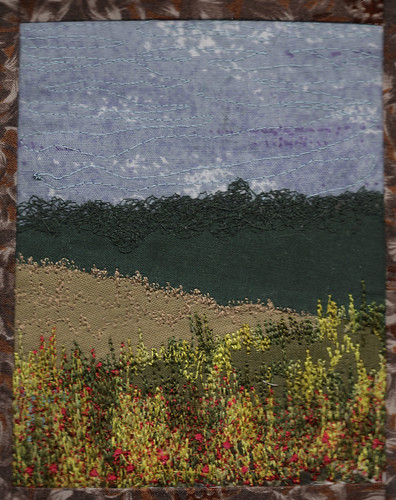
And this is what I came up with. At present, I am tacking all the pieces down with silk thread, then I will be adding lots more stitch, to merge the colours into each other. I will probably be adding more sheers, especially in the mid ground and doing a fair bit of free motion and some needlefelting, but I am happy where this one is going. In real life, the overlapping sheers are really vibrant and much greener than they appear here. Every time I look at it I just get itchy fingers and want to do more stitching!
But of course it is time to cook, or we will starve to death lol!
Happy creating!
these were the sketches i came up with.
I repeated this as a watercolour sketch, which even though it is transparent, did not give the effect that I wanted.
I repeated it again with coloured and painted tissue and this gave me lots of overlapping colours which is what I wanted.
This morning I rummage through all my sheers and put together a fabric sample.
And this is what I came up with. At present, I am tacking all the pieces down with silk thread, then I will be adding lots more stitch, to merge the colours into each other. I will probably be adding more sheers, especially in the mid ground and doing a fair bit of free motion and some needlefelting, but I am happy where this one is going. In real life, the overlapping sheers are really vibrant and much greener than they appear here. Every time I look at it I just get itchy fingers and want to do more stitching!
But of course it is time to cook, or we will starve to death lol!
Happy creating!
Subscribe to:
Posts (Atom)