Showing posts with label origami. Show all posts

Thursday, January 23, 2014

Fabric folding

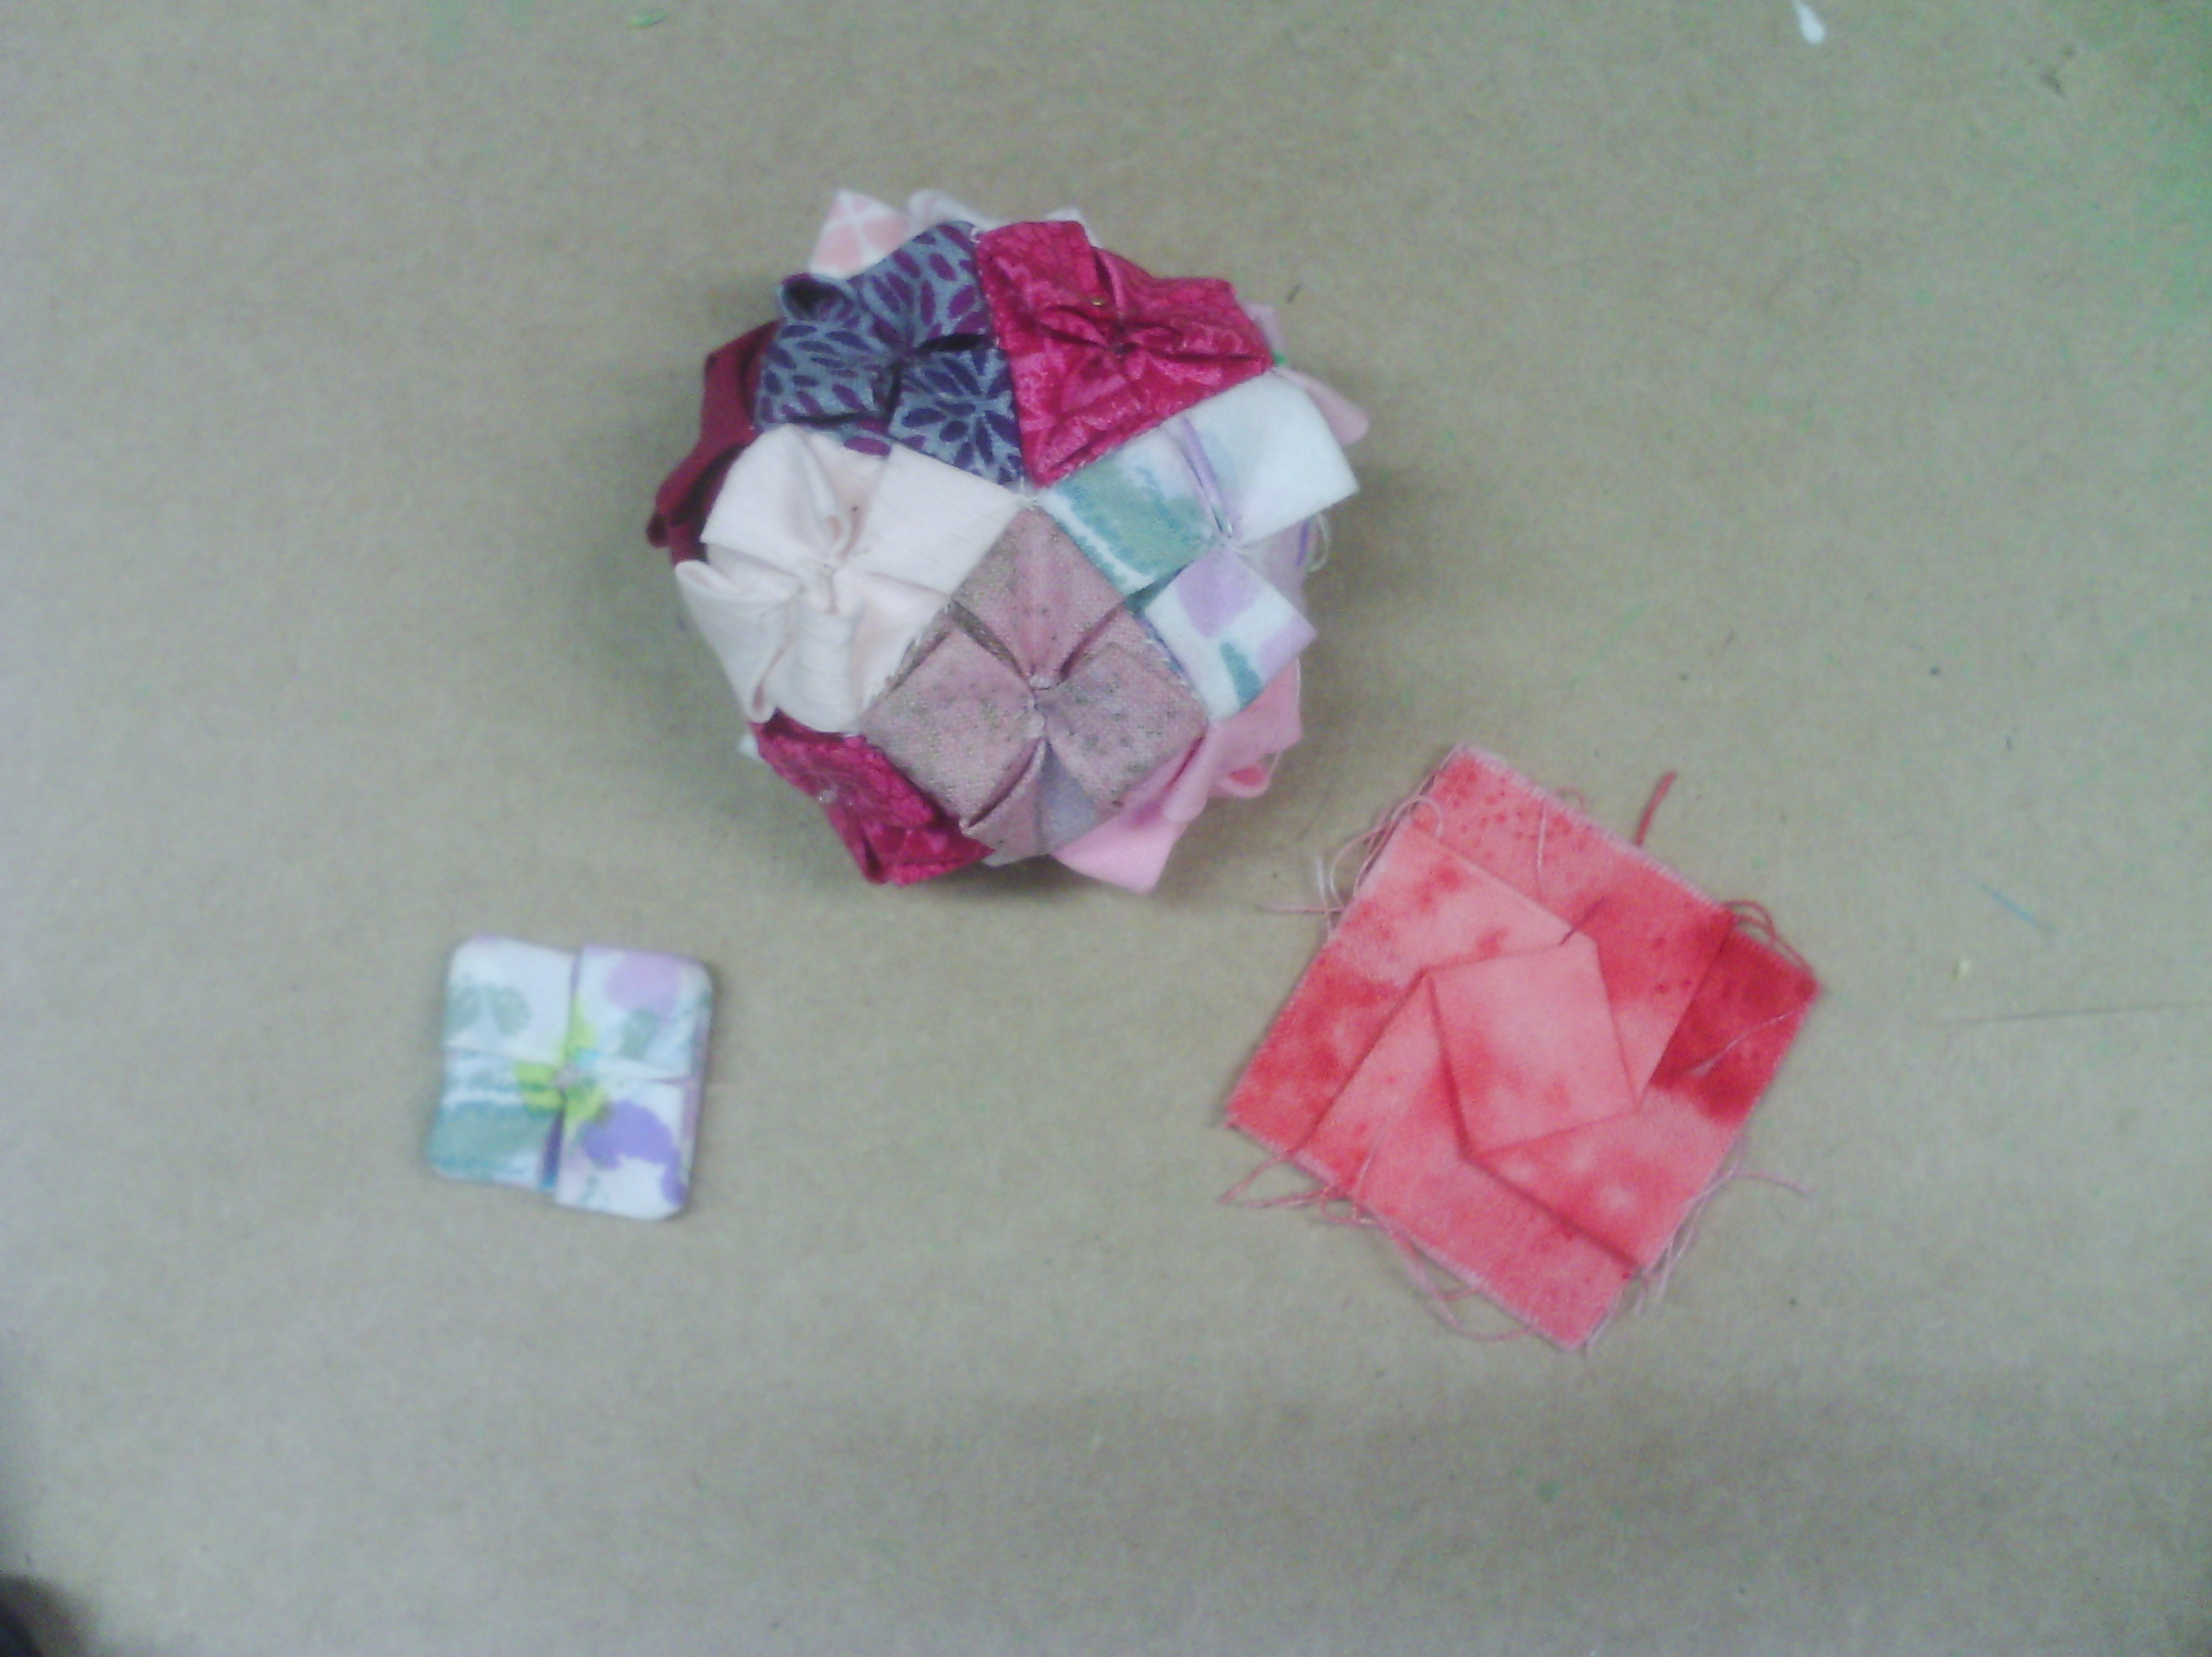
Last year, I posted about some little fabric folding projects I was doing here.  I made a little pincushion from tiny folded units
I love this little pincushion, I think it looks like a hydrangea flower and is very textural.
Today, I have been doing a little more of this, but putting the units together in a flat manner.
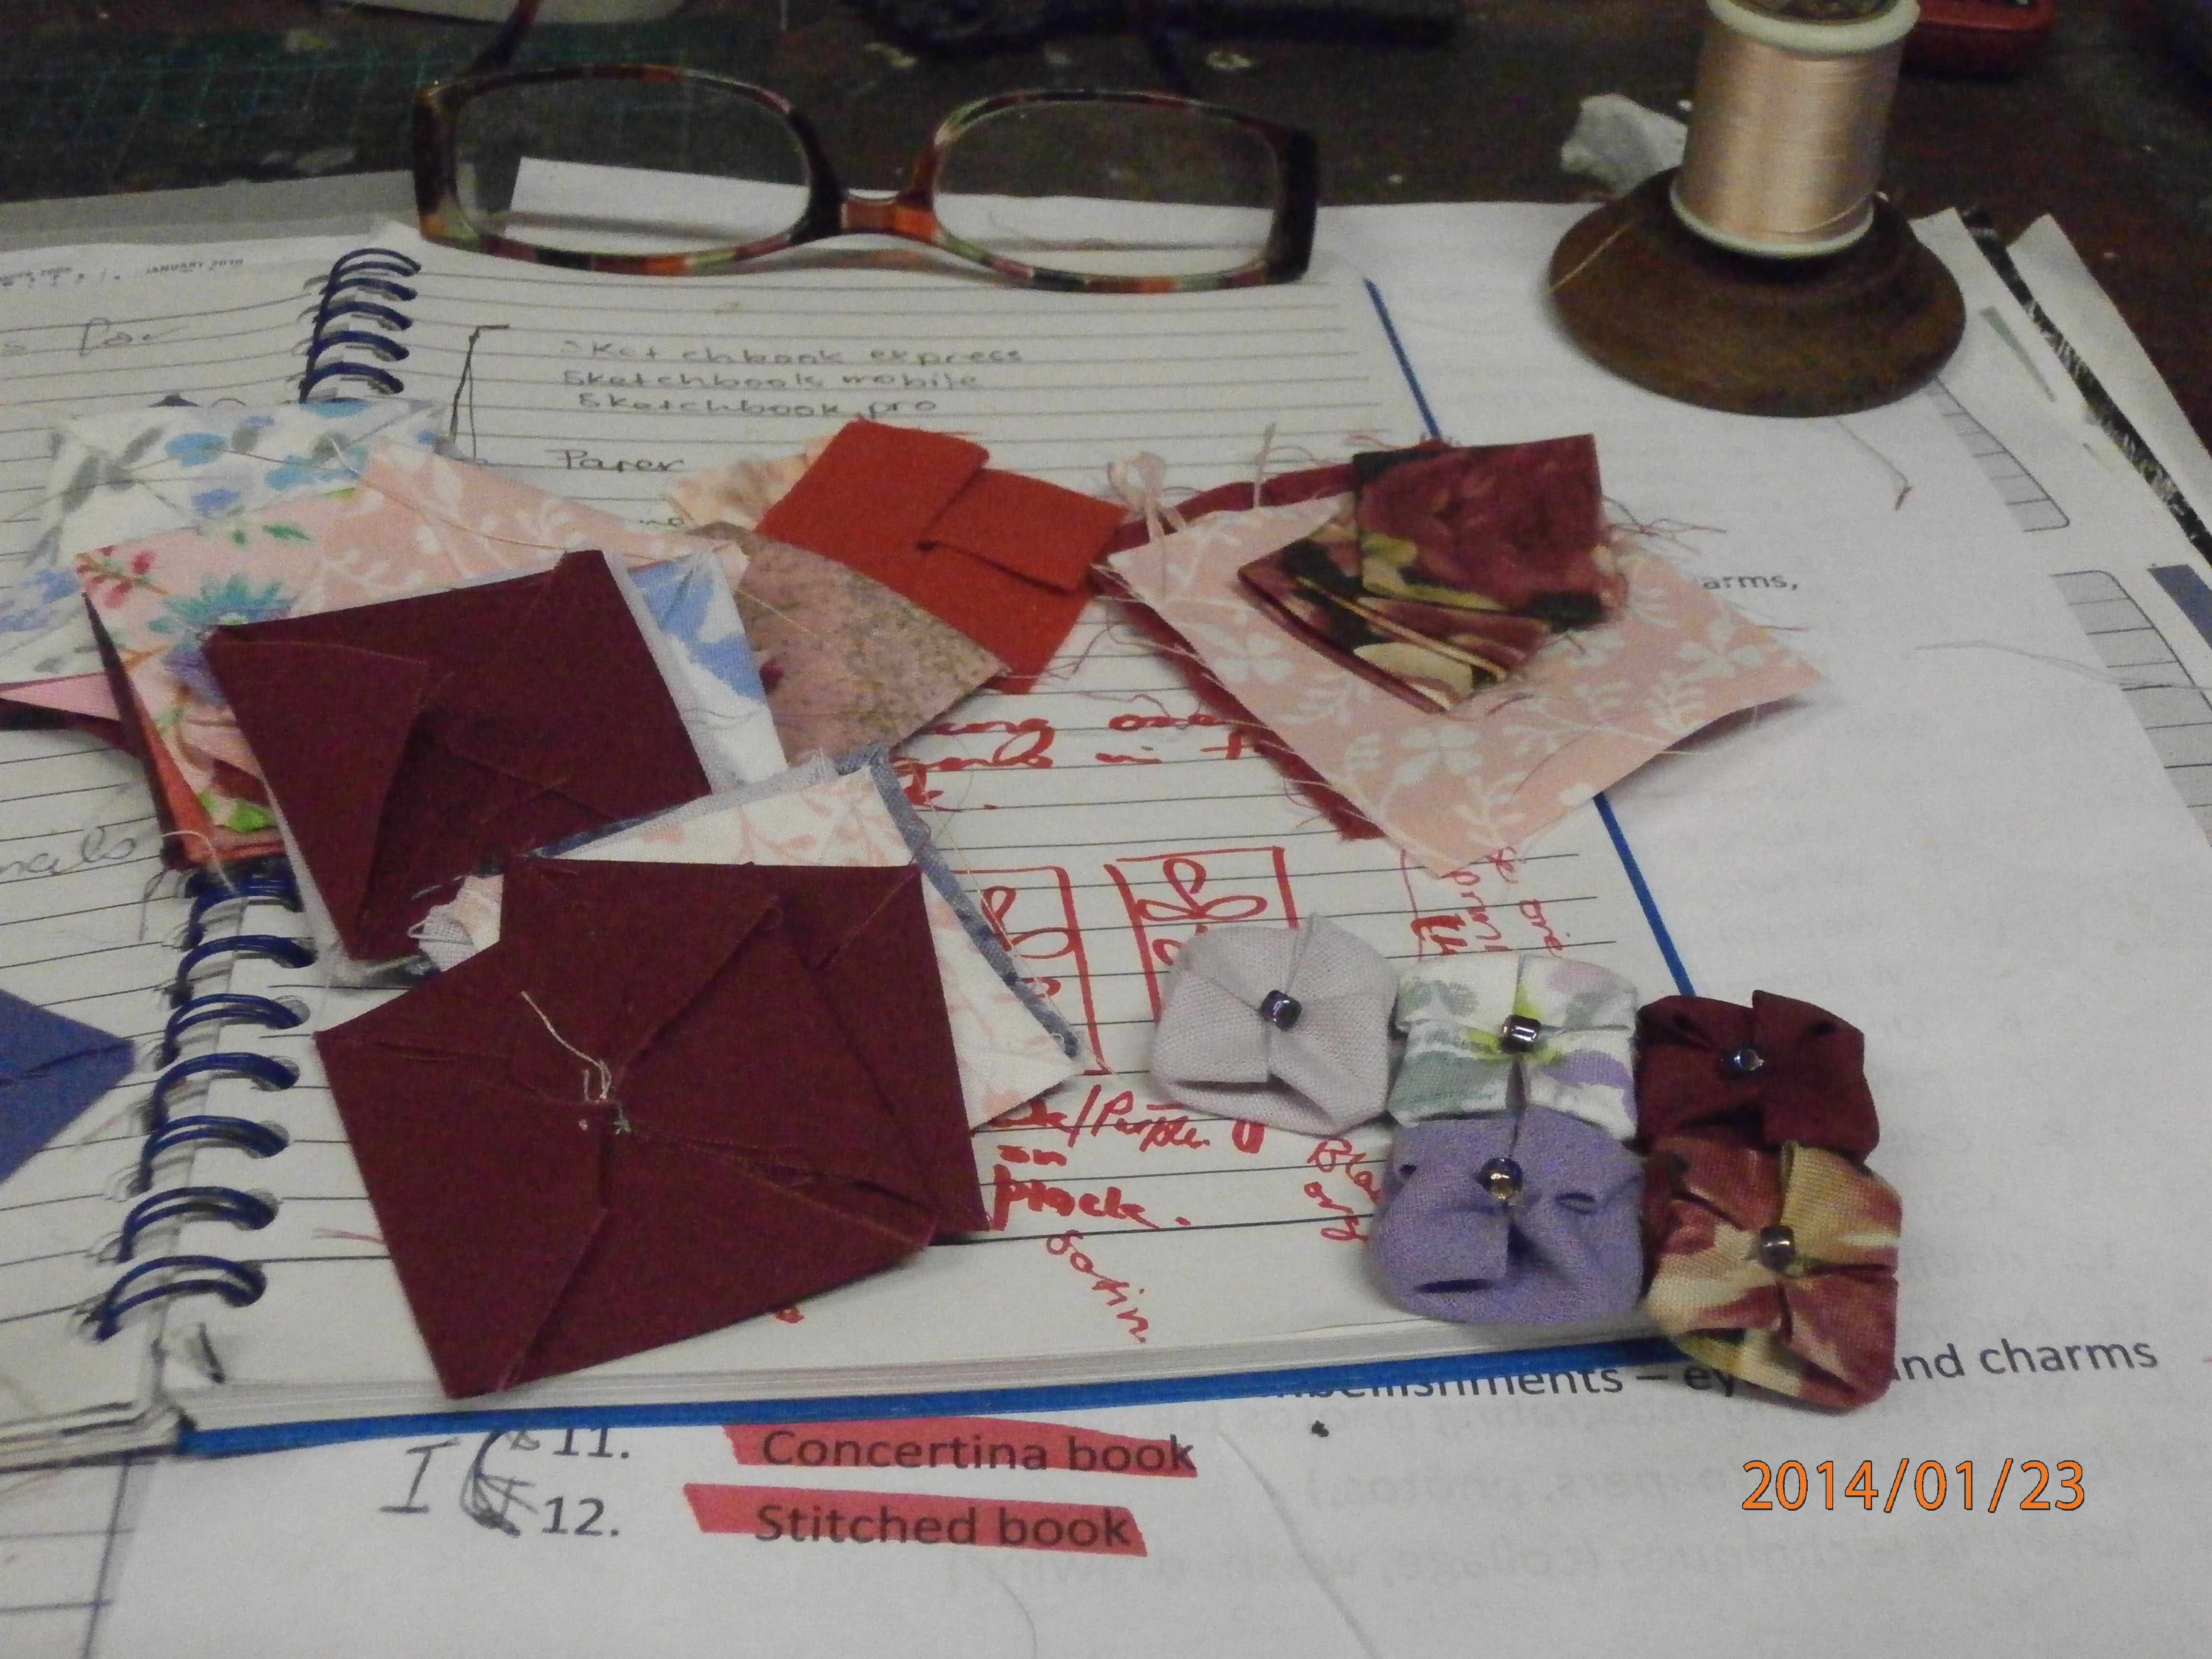
Above you can see all my units in process.  I won't repost the steps as they are shown  here
Here is a close up of the units being put together.  I have covered the sewing in the centre of the squares with a bead and hand stitched them together.  My idea for this is to make a table runner with these making hydrangeas in it.
Another project that is very similar that I have been working on is a folded hexagon table runner, which will go onto our fundraising stall for the quilting group.
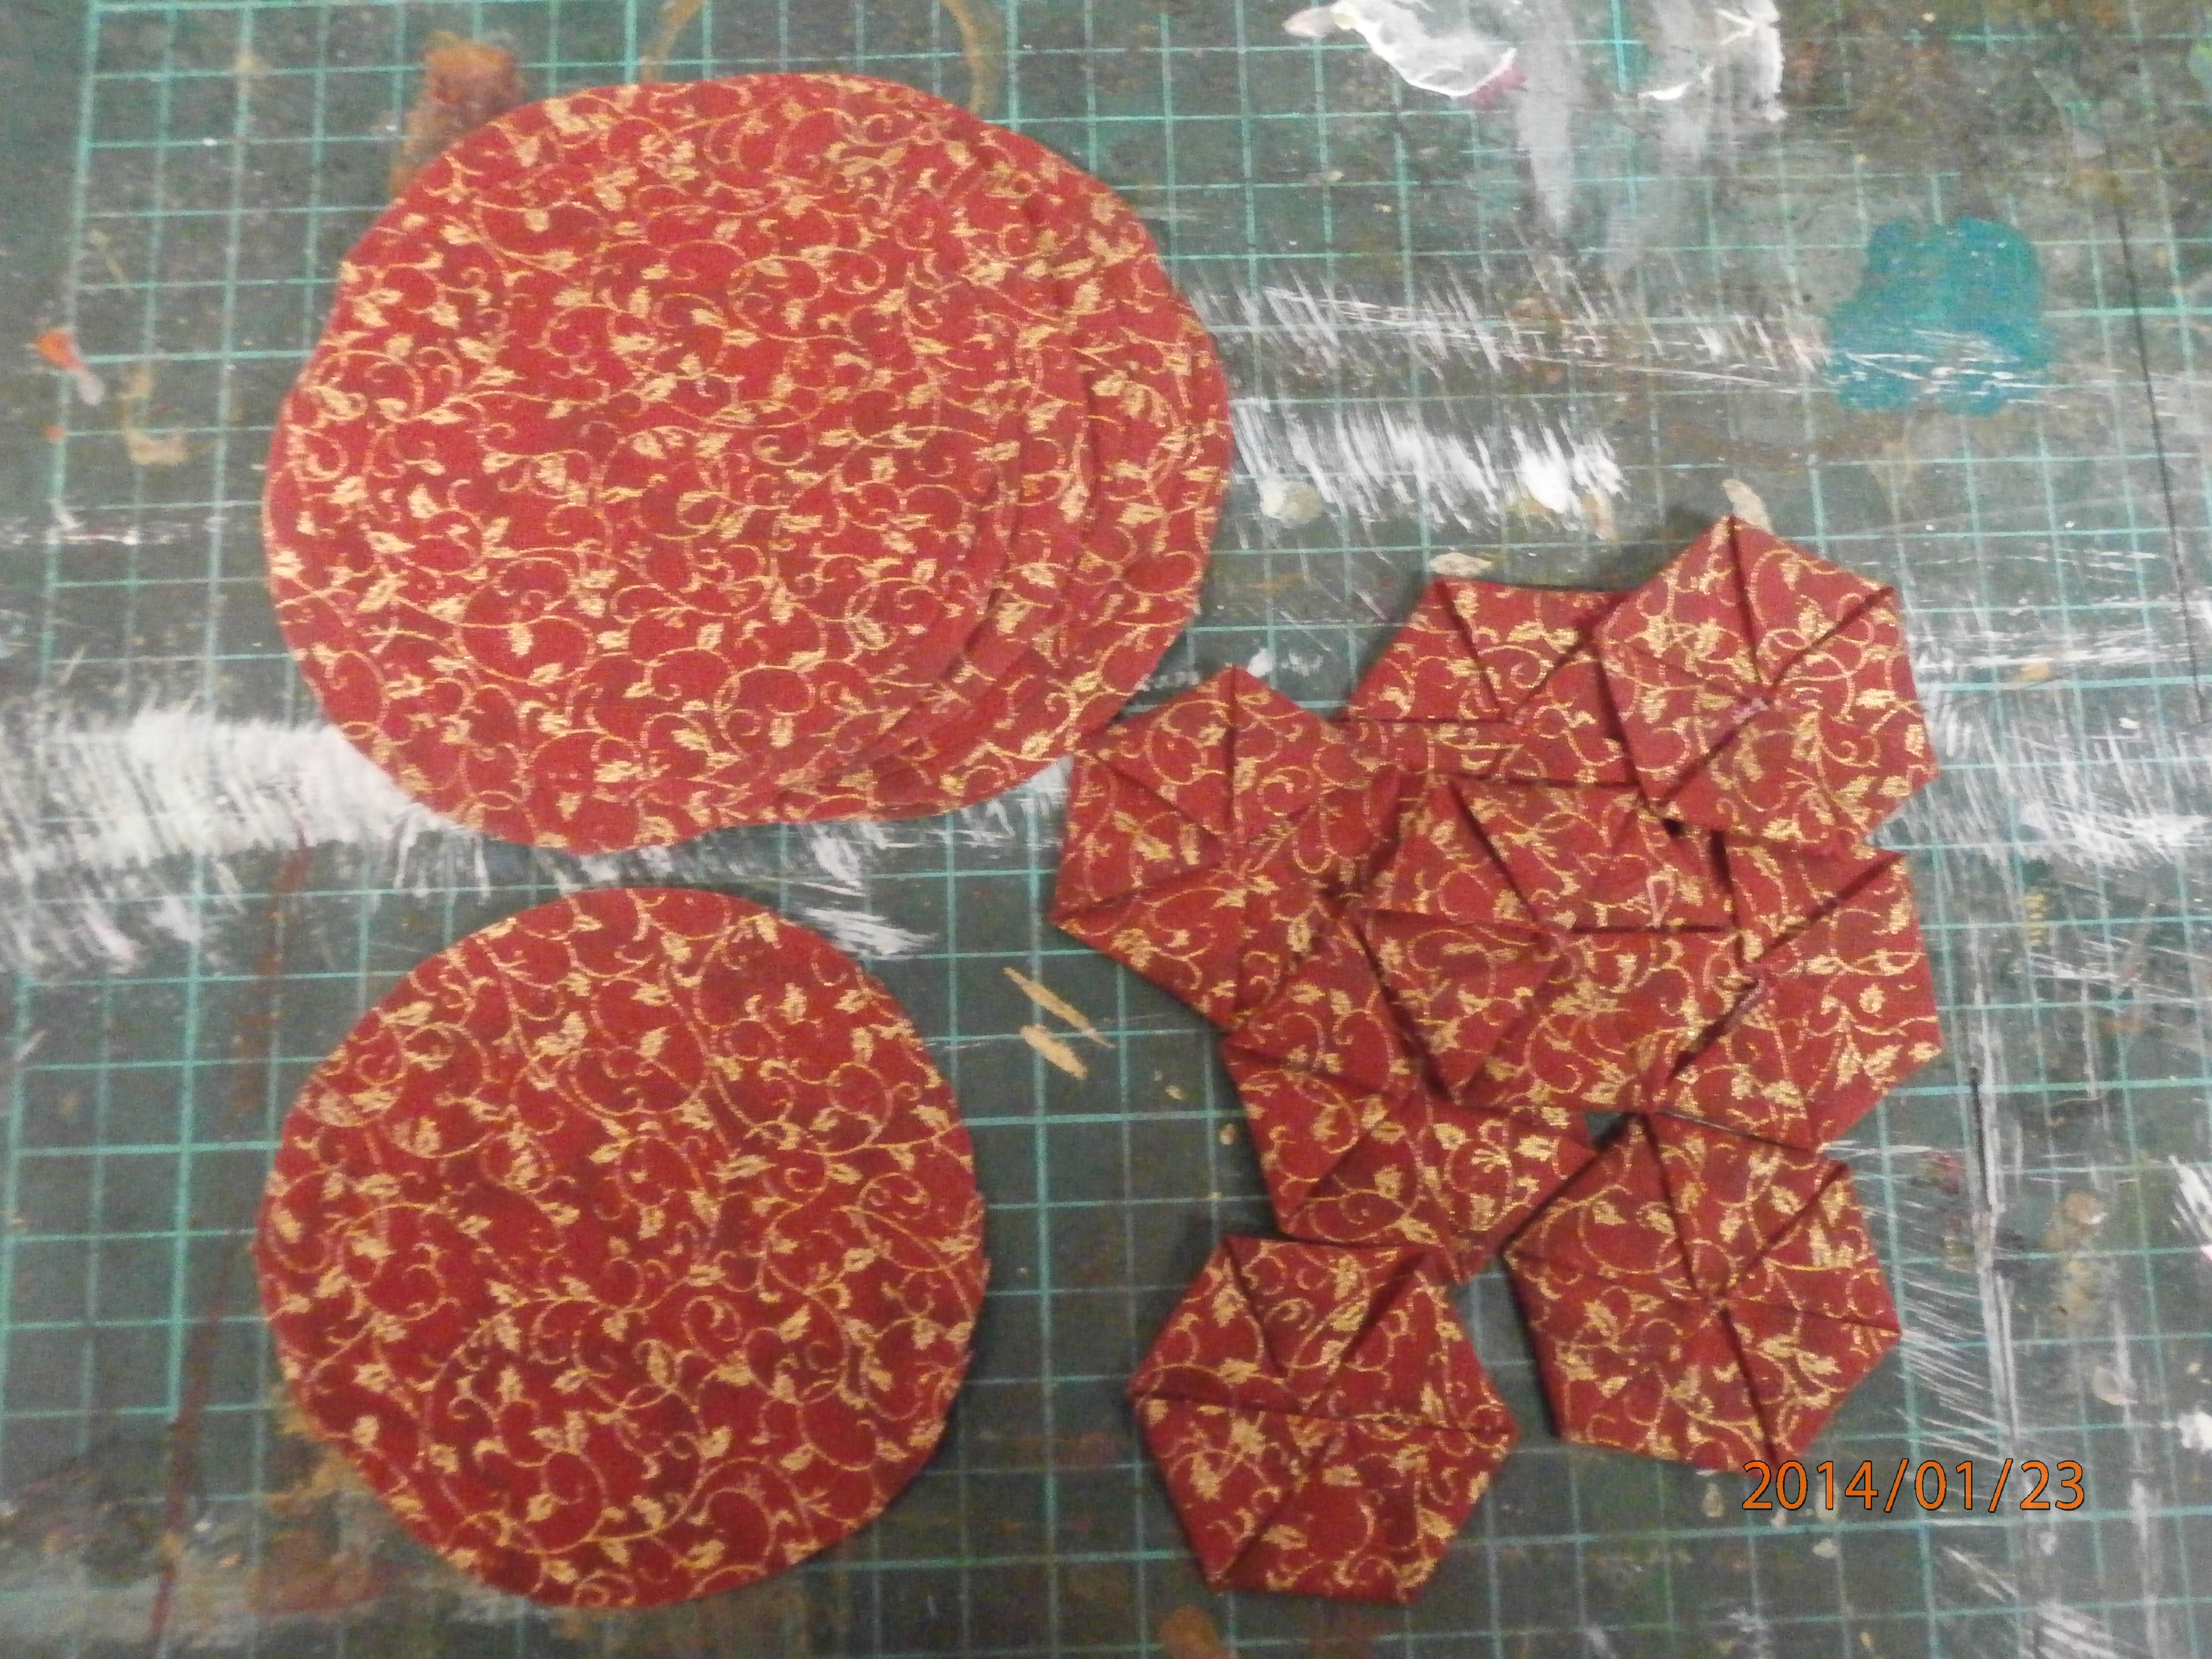
Here are some folded hexagon in a gorgeous gilded red fabric I was given for christmas.  (And elizabeth, you can see I really meant it when I said my workspace was messy!)  As you can see these hexagons are created from circles and are two sided.  The back in this picture (which you can't see) is simply plain, like a normal hexagon, whilst the front which you see is folded and has lovely texture.
I love this technique, as there is none of the tedious papers and basting.  Circles are much easier to cut and the folding is really easy.
On the left is a finished hexagon.  On the right I have folded a circle into quarters to find the centre.  this is where I start my thread.
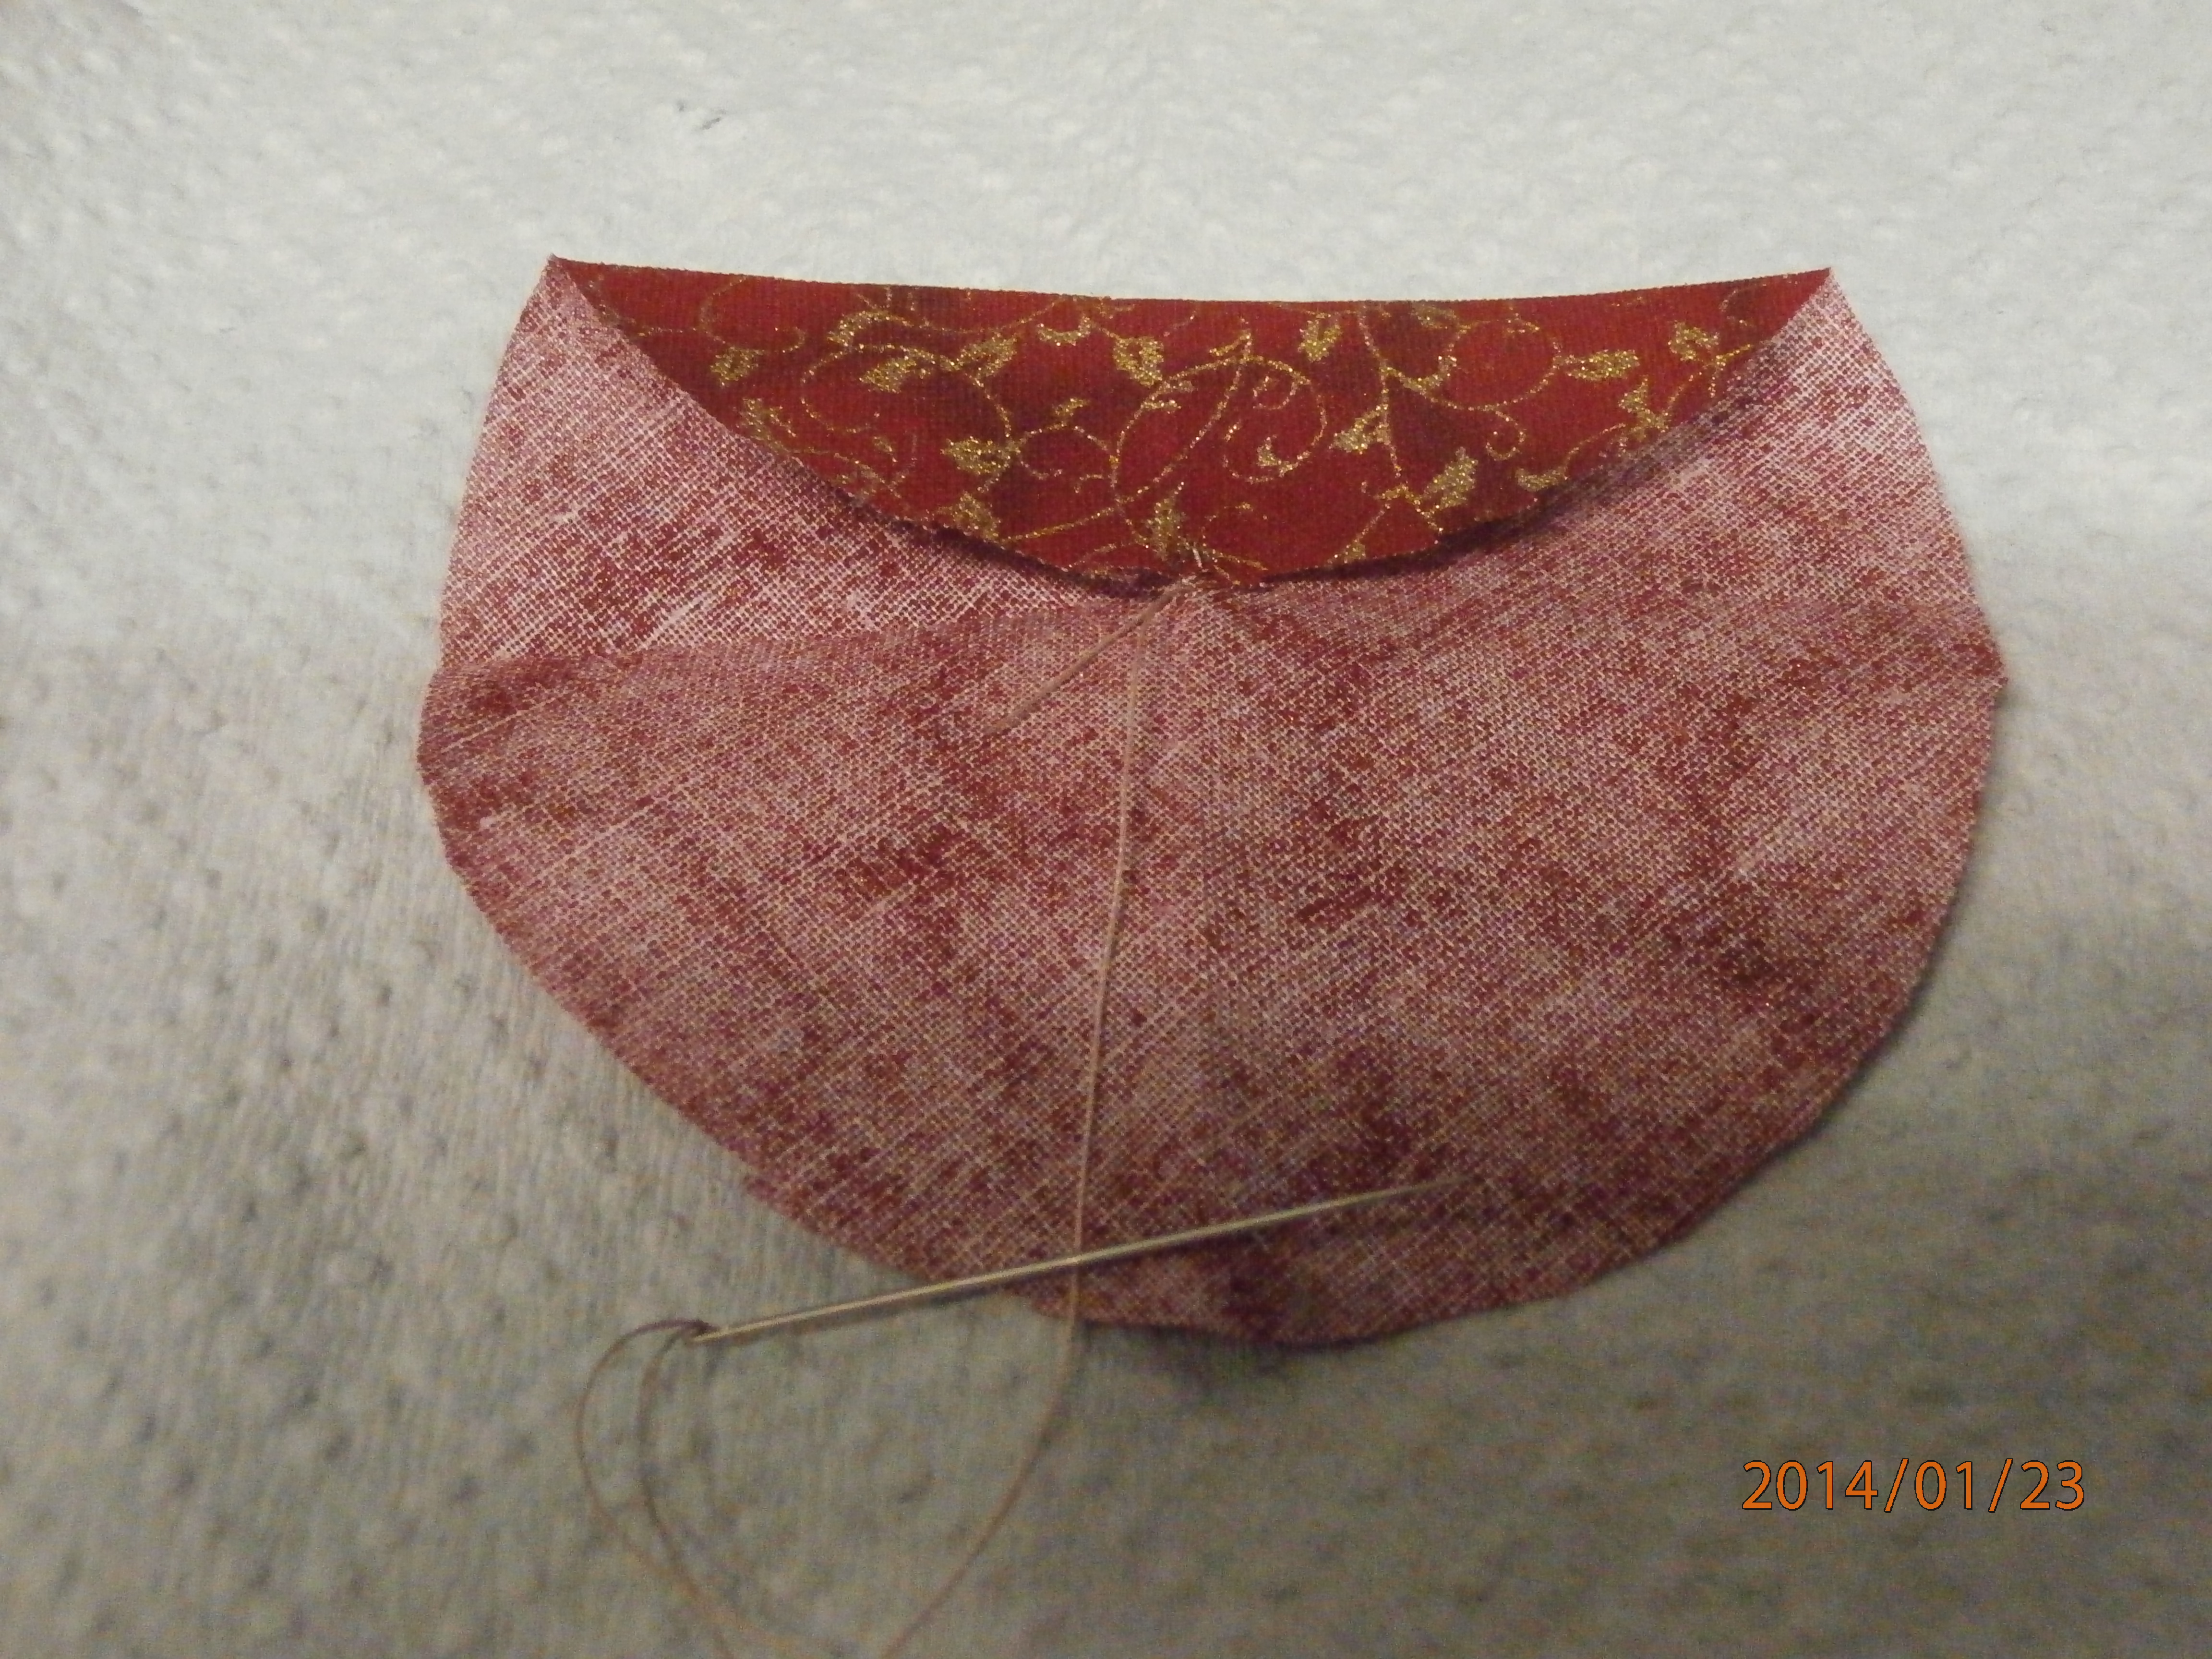
Once you have attached your thread in the centre, you don't need to be concerned about the folds you made.  The first step is to bring on side to the centre, attach with a stich and finger fold.  There are two folds, or ears created at each end of the fold.  I will be working clockwise, but it doesn't matter, so long as you keep going the same direction.
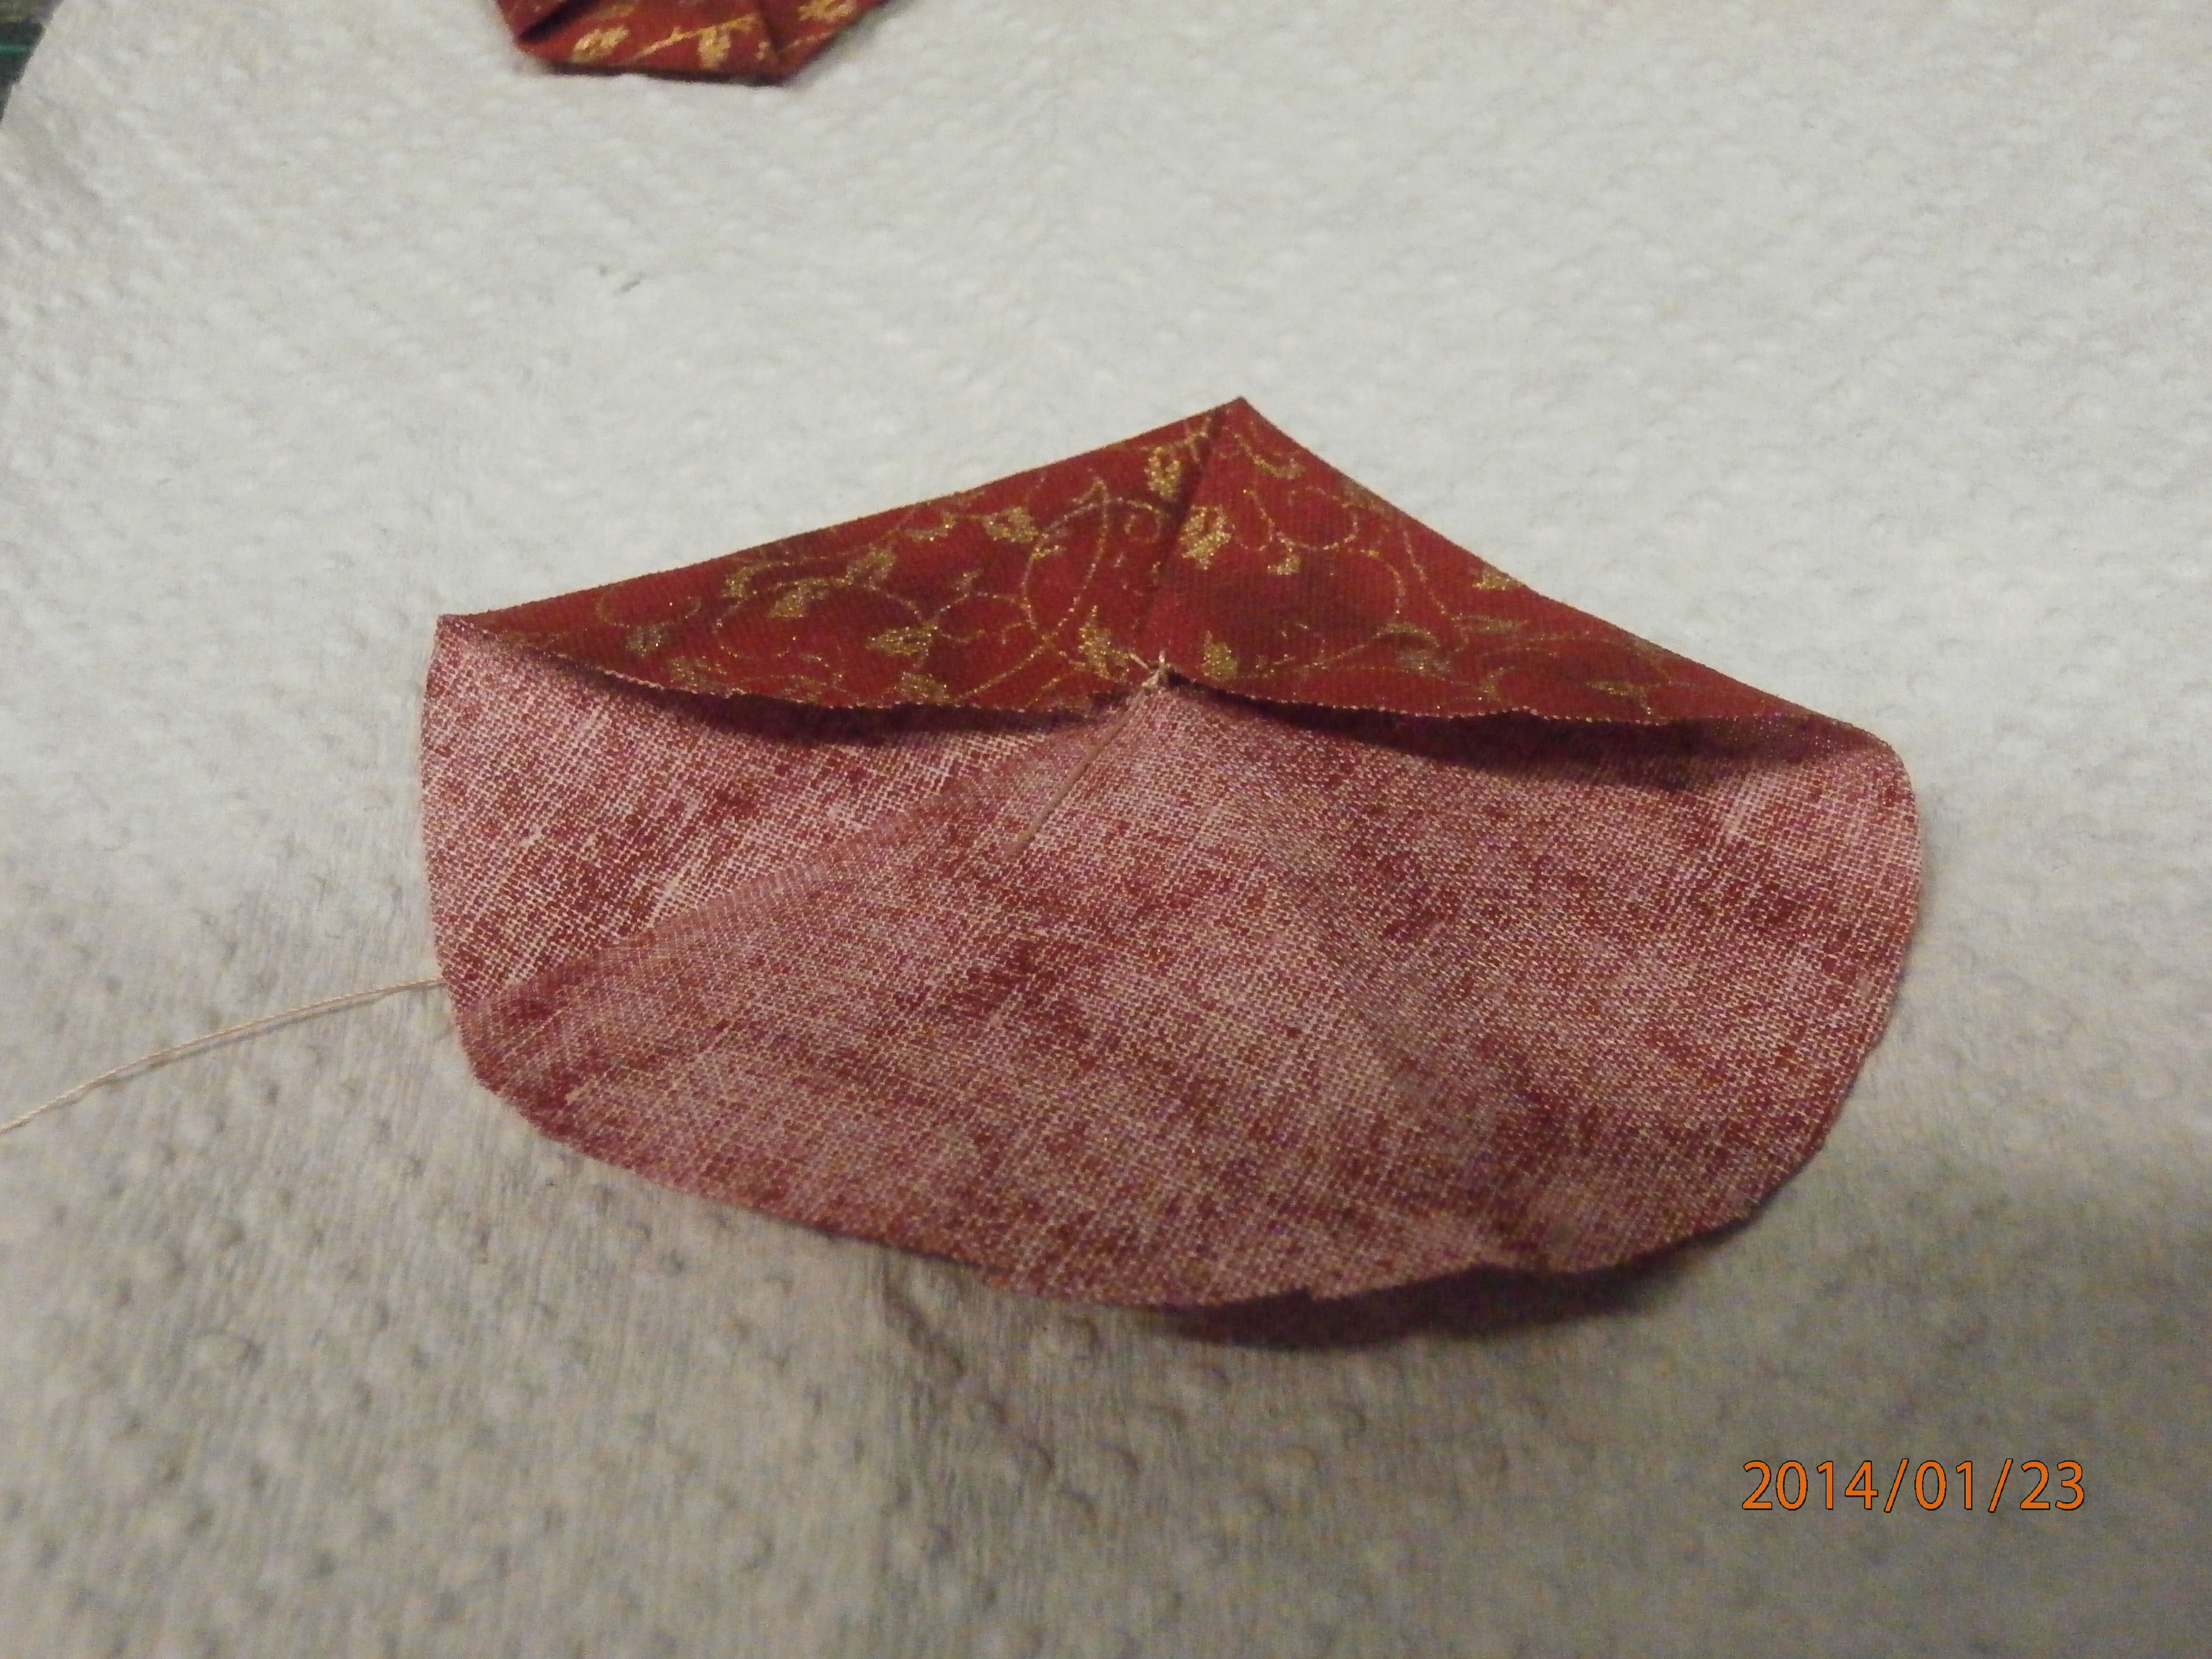
Here I have taken the right hand fold or ear to the centre and attached it with a stitch.  This has created a new fold or ear on the right.
As you can see I have taken the new fold to the centre and attached it, creating a new ear to the right.
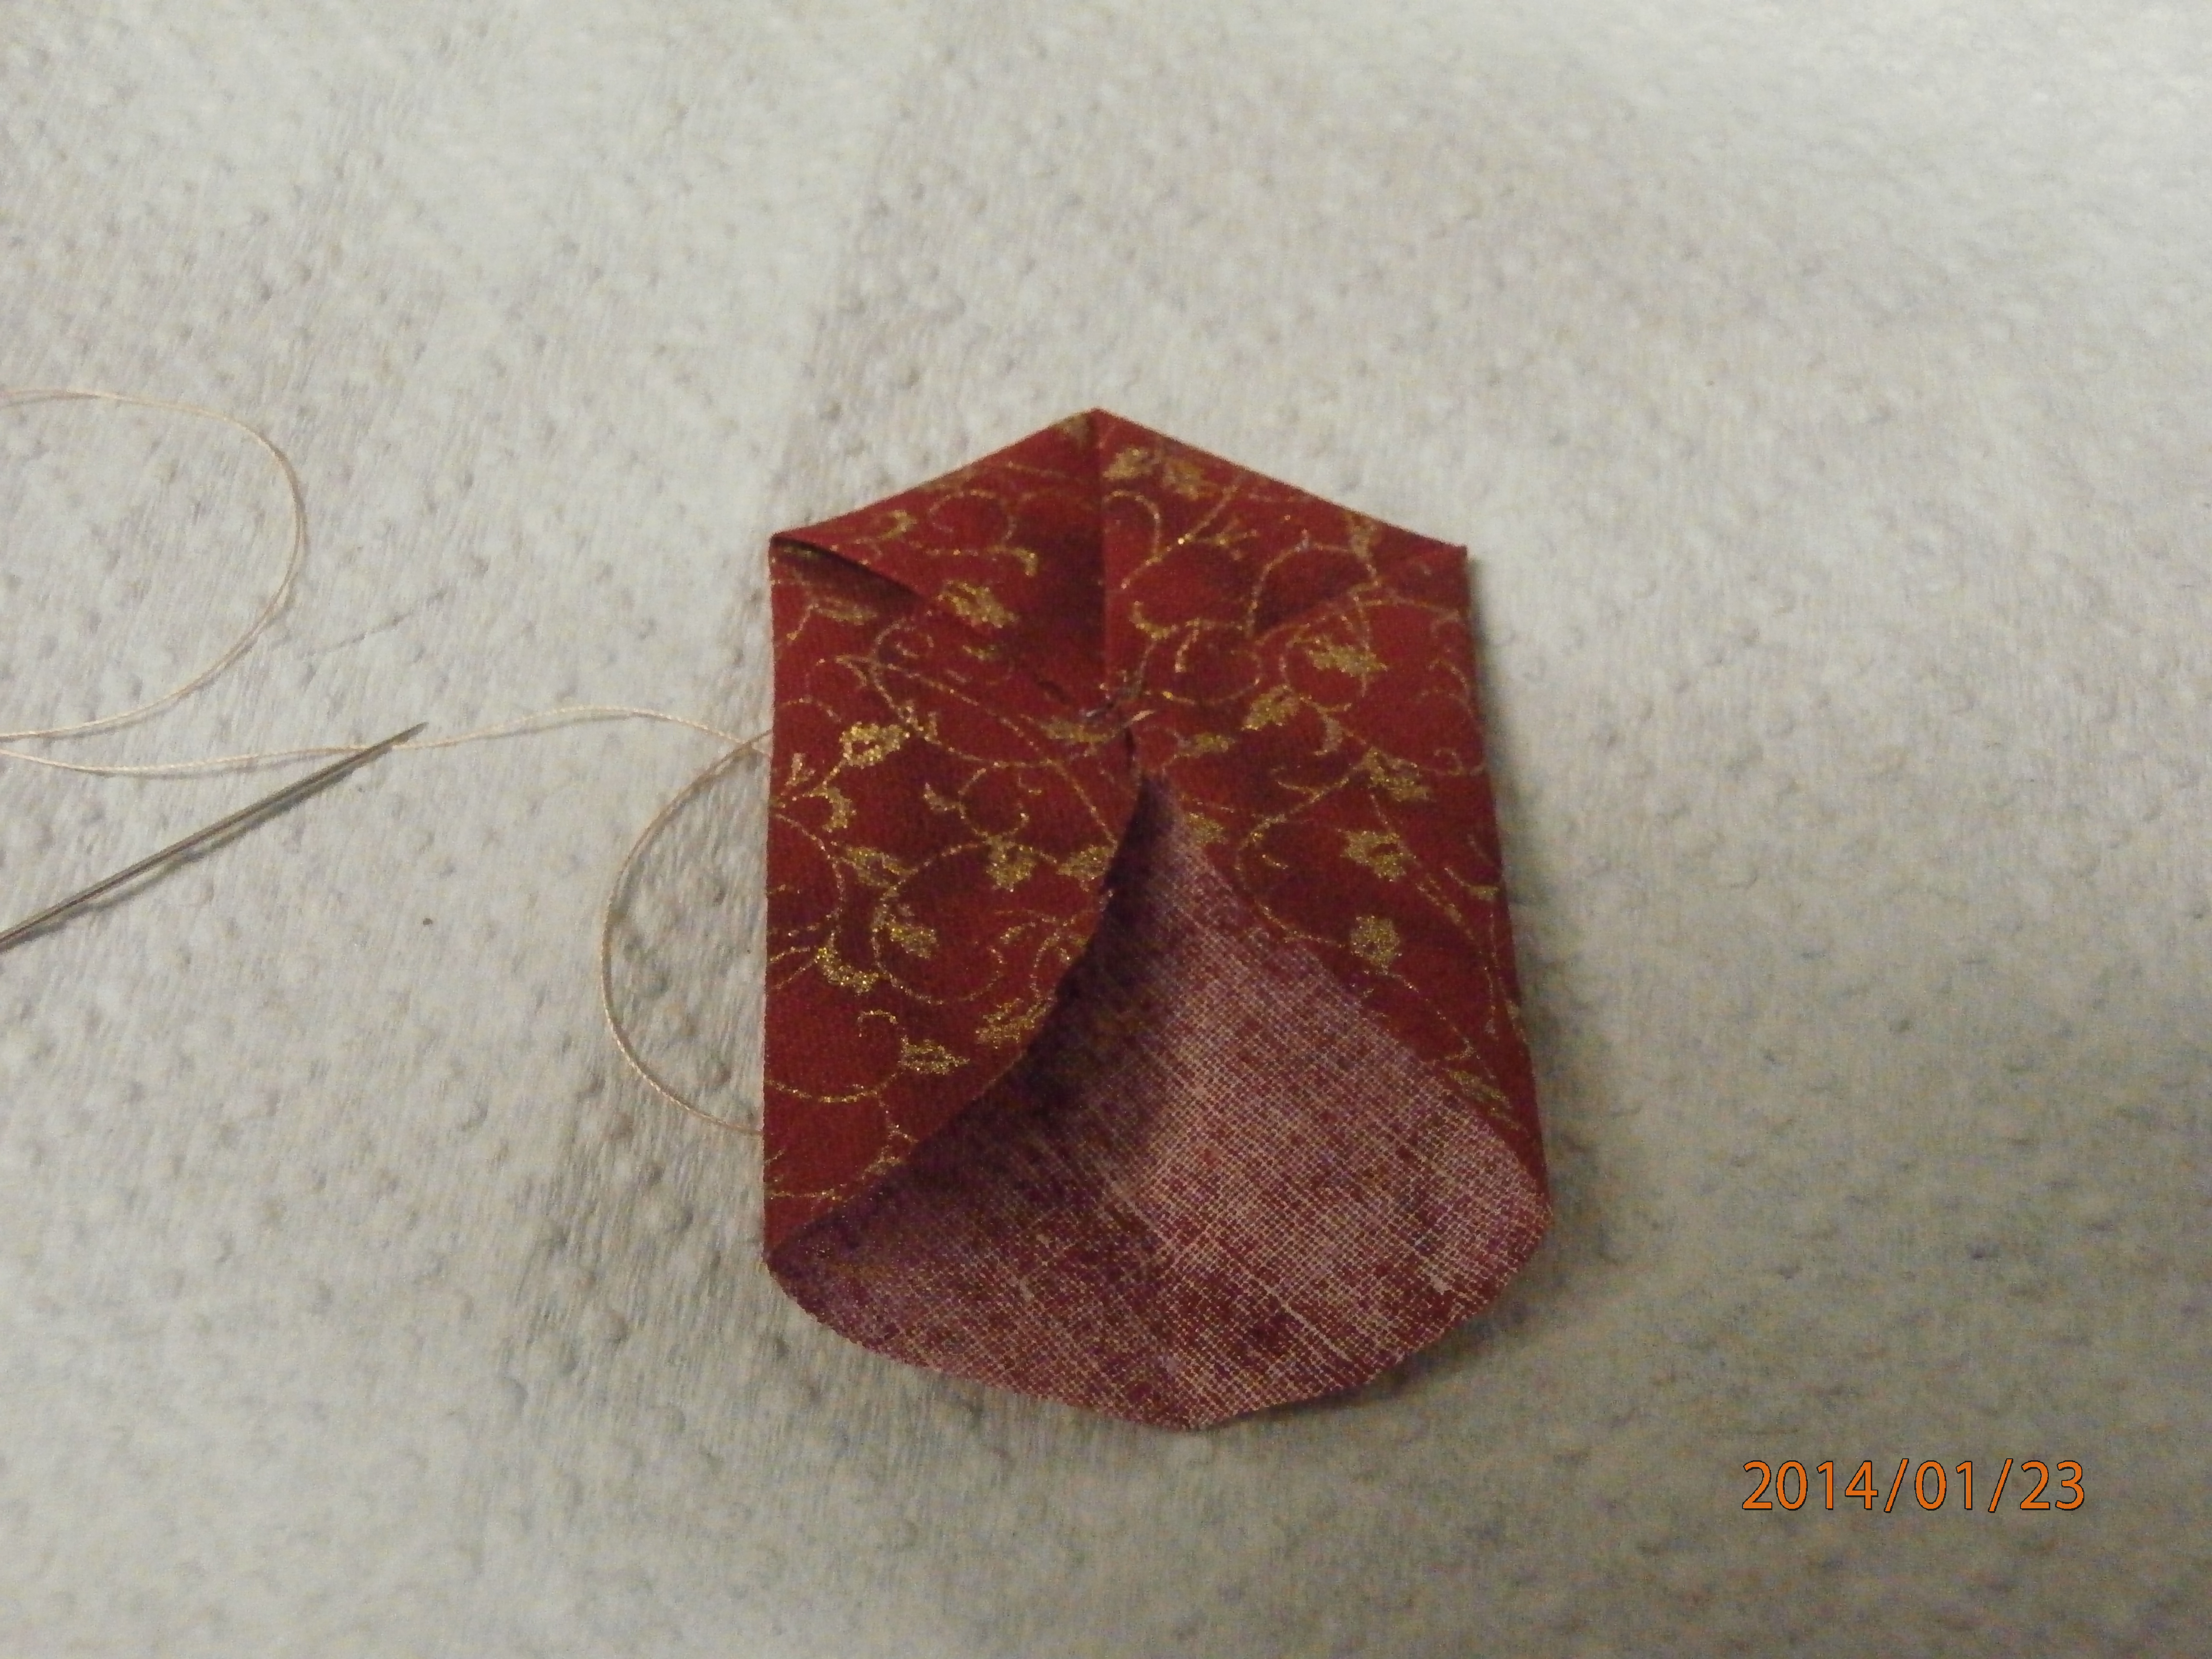
Here I have taken the next ear to the centre as before.  The important thing here is that the two sides left are parallel. If they aren't parallel or close to it, then you haven't been stitching into the exact centre and might need to do some adjusting.
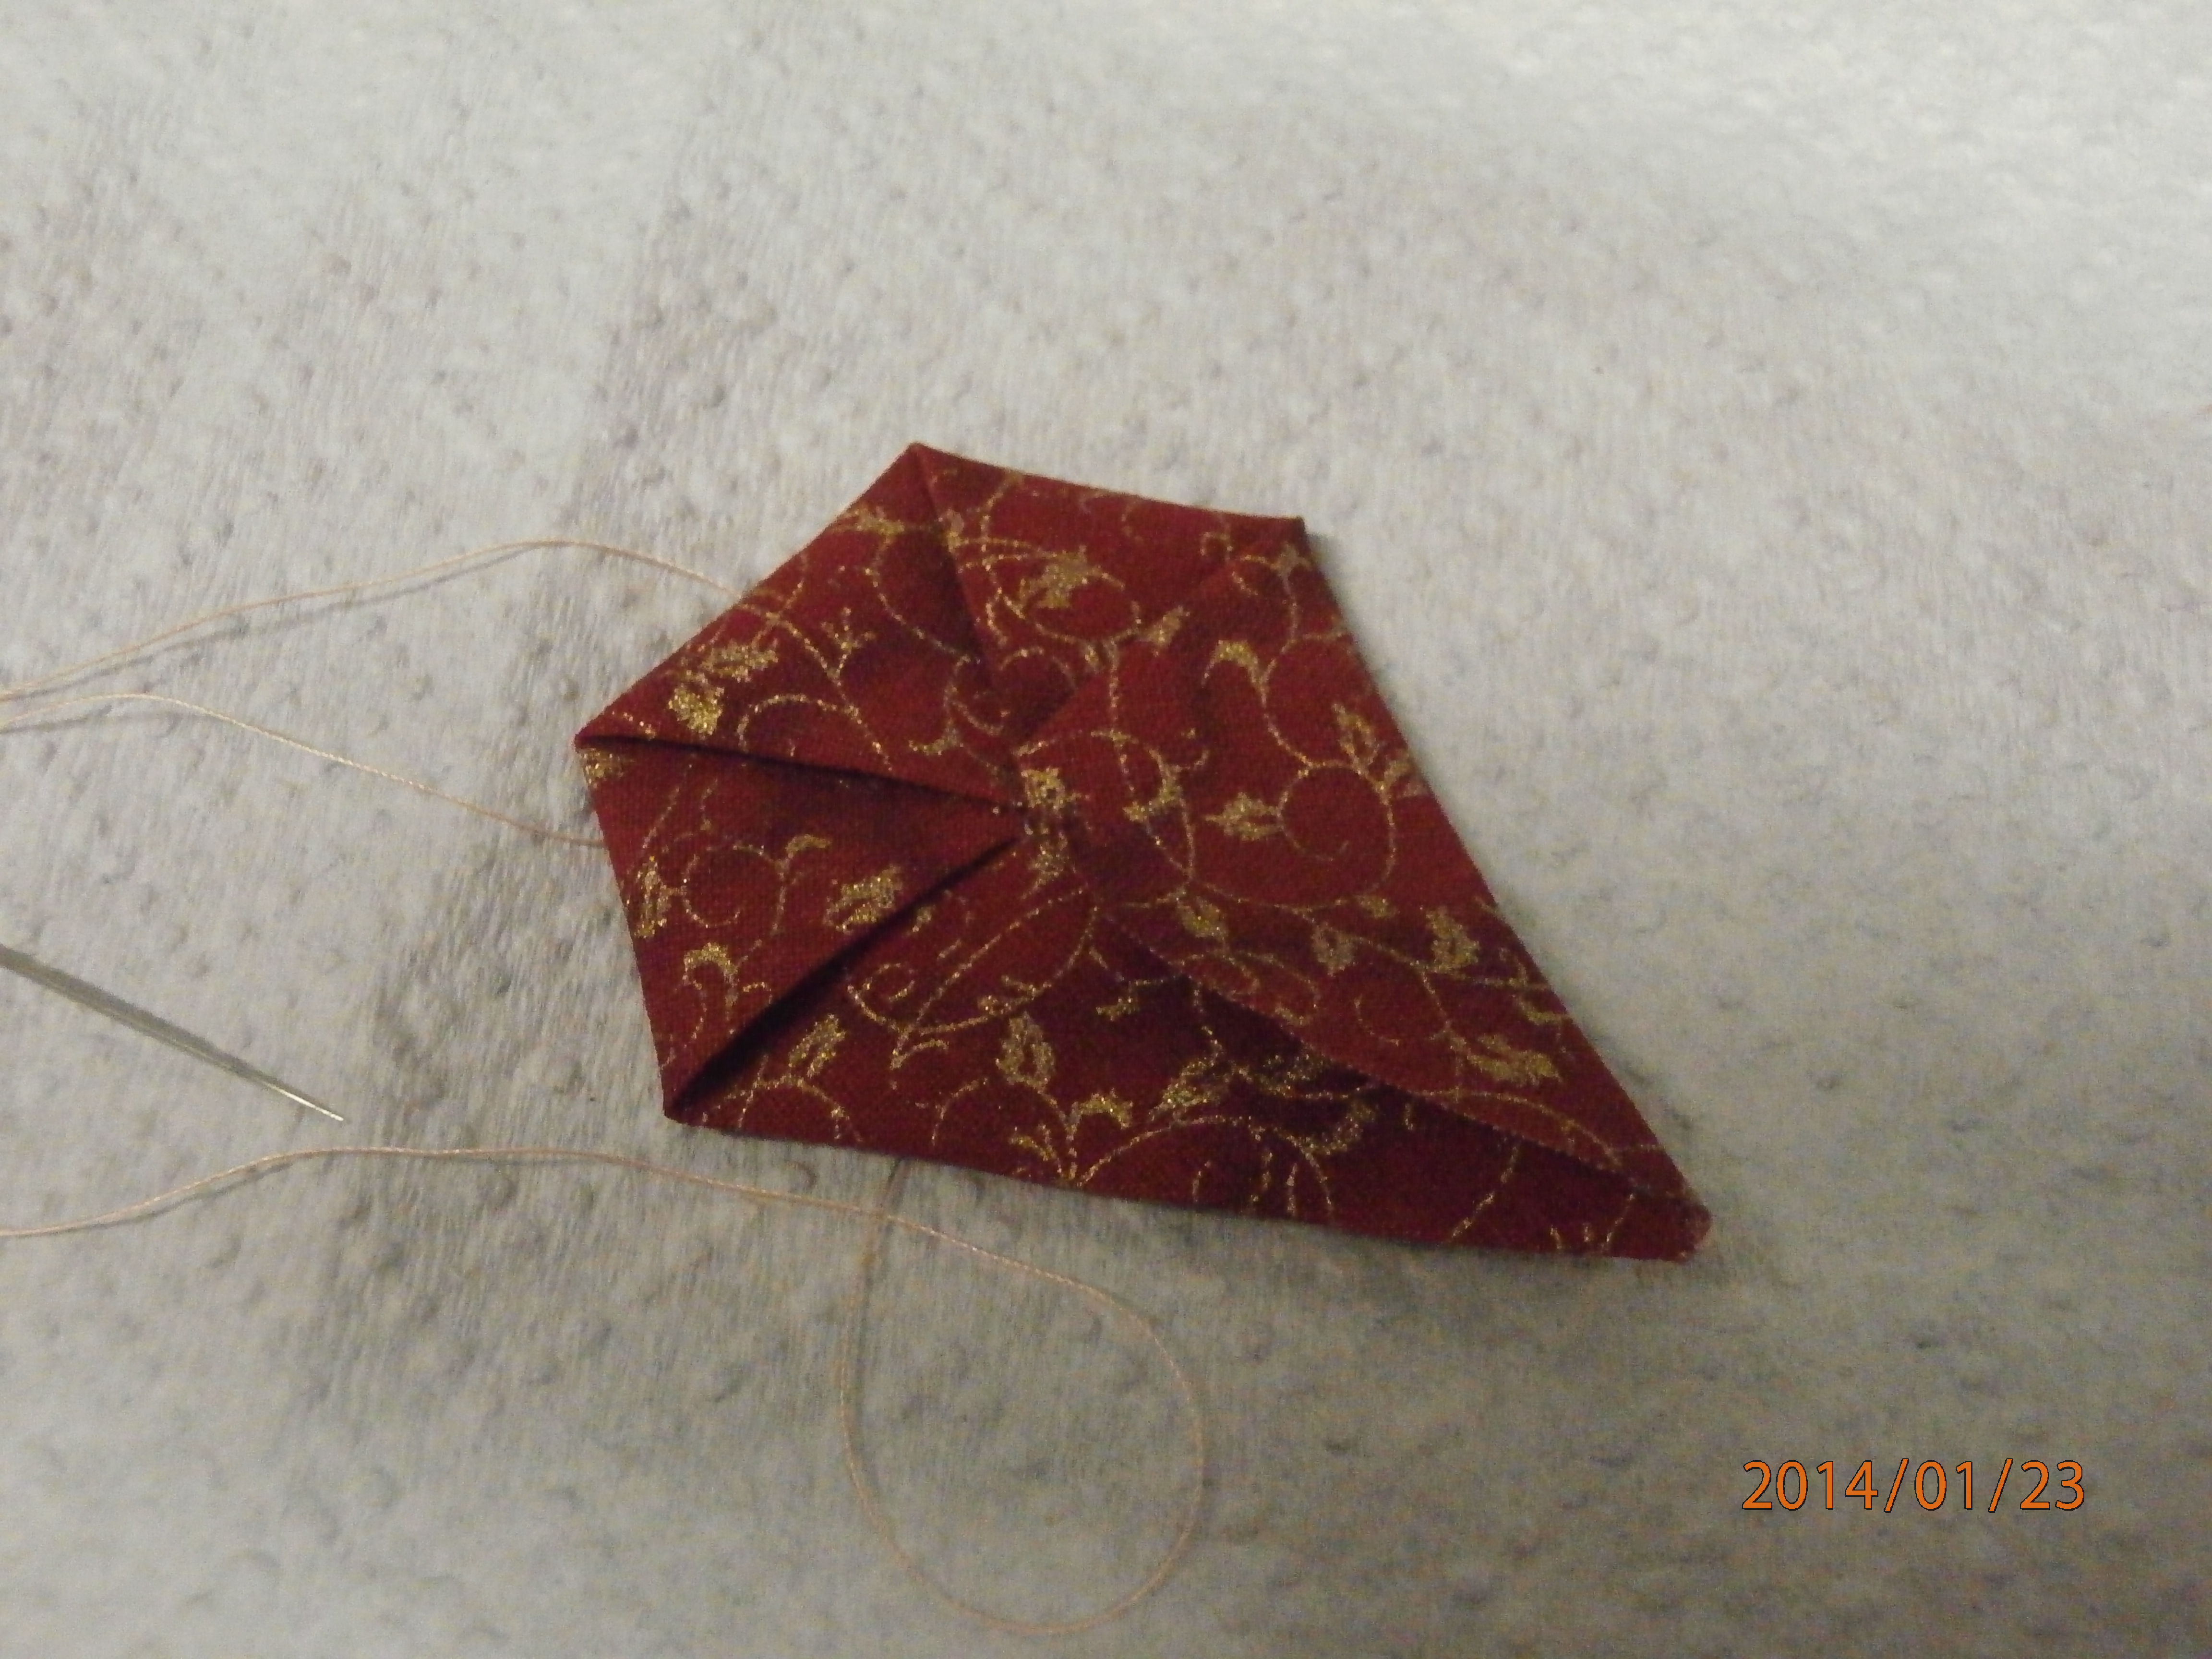
With the second to last fold you will get this shape.  What you are aiming for is a good point on this last ear.
And when you bring this last point to the centre you will have a two sided hexagon!  I have used different methods to hide my stitching on the folded side.  If you are putting them upside down, with the normal hexagon side, you don't really need to, so long as you used matching thread, but I like the folded part to be on top, so I have used sequins, beads, or french knots or even a button to hide the stitching.  Of course it is an opportunity for bling, and don't we all love that?


Happy creating!

Monday, November 5, 2012

A bit of folding

So where are we at with my Textile and mixed media sampler project (TAMMS)?  So far we have made a foundation,
some paper beads (embellishments),
and some dyed fabric (Surface design),
I have been thinking all week about Fabric manipulation and had a few ideas on what I might do (of course with no Idea in mind yet about what I might make, lol) and finally I decided on fabric folding.  I have recently been doing some fabric folding with my huge stash of charm squares.  Spurred on by a recent design matters episode called twisted squares, (which is available to watch if you are a member).  I also have in my UFO stack a pile of folded satin blocks which I made a few years ago and haven't got back to - as you do.
Some good references for fabric folding, which show ways to use similar folded blocks are

 Fantastic fabric folding by Rebecca Wat
A fresh twist on fabric folding by Rebecca Wat
Quiltagami by mary jo hiney
Folded fabric elegance by Rami Kim
Any basic origami book or site
Tea bag folding books and sites

I have always had a fascination for origami and when I saw folded fabric, well, I just had to do it.  I have actually done quite a bit, but it appears I have not blogged about it.
So to today's Fabric manipulation method.


here are the two folds I like to use most.  The one on the bottom left is a simple folded flower like a little hydrangea, the one on the right is a twisted square or chopkey square.  Once you get the idea, the twisted square can be made in any shape, just beginning with a different shape piece of fabric.  I founhd, when I was starting out, that it was helpful to make a few in paper first as it holds the folds better than fabric and helps you to get the folding right first.  The blob at the top is a pincushion I made with the hydrangeas, using five on top, five oun bottom and five around the middle.

Let's start with the twisted square first.
Start with a square charm, I am usung tiny 2.5 in squares.  Fold in half and crease one way then fold the other way and crease.  Open out.  Now you have the centre marked easily.
 Take one of the folds and fold it halfway to the parallel edge.  I have included a diagram which might make it easier.
Turn 90 degrees and do the same with the next fold.  fold all the folds in the same direction - ie clockwise or anti clockwise.
Continue until you have  folded all four of the initial creases.
Squash and twist the centre and it will form a square!
Press and remove the pins and you have a twisted square.
Above are four I have pieced together.  The folded edges create a nice seam allowance for piecing so that only the little dimensional square is visible.
The back is also quite interesting as it creates a four patch which is interlocked.

The hydrangea begins exacly the same way.
Create the crossing creases as with the twisted square but the next steps are different.
Fold each corner to the centre and crease.  I usually tack the tips in the centre with a few tiny stitches.
I also add a tiny bit of clear nail polish to the new outside corners to stop them fraying.
 I bring a knotted thread up through the centre, catch the centre of one of the edges and go back through the centre.  Repeat on the opposite side.
Next I do the same with to other two sides.  The first one creates a boat-like shape, then with the second, you can see the petals starting to form.
 I pull the corners of the petals to the centre one by one, catching them and flattening them.  I have included my index finger so you can see how small these are.  I suggest you start with a much larger square, lol.  The stitches and nail polish in the centre can be easily covered with a sequin or a few tiny beads.
As I said, these remind me of hydrangea flowers.  This is an ATC I made with them a while ago
Hope you enjoyed this post and have lots of ideas to use the little fabric manipulations.  Don't hesitate to post your ideas and creations here.

I will be away on family business until the end of the week,  so won't be able to post, but don't forget

Happy creating!


Tuesday, March 13, 2012

It's a bird, it's a plane...

It's an ATC.
I have has many prople asking me lately what an Artist Trading Card is and was it a new thing, so I thought it would help if I put up a link to the original ATC site in Switzerland, where the idea came from nearly twent years ago.
Now to Today's ATC, as i said.
It's a bird.....
It's a Plane.....
No, it's an ATC!
I do love origami and whenever I see a fold that I think I can alter a bit to make an ATC, I can't help myself, but must play with it untill it is done.
This one is made from cotton fabric with paper fused to the back, so it folds nicely.  If you look carefully in the first photograph you can see I have added so called 'clear' press studs under the folds to make it stay in ATC shape, but be able to be opened.
I found these tiny buttons at the stall at our show and had to have them, and they went well with this fabric, but I thought, or one of my friends thought that the red beads would just set it off, so I added them too.  The edge is blanket stitched in an orange thread.

A whole day in my studio tomorrow, so let's see if I actually get anything done!

Creativity is simply thinking outside the box!  Do it every day.

Tuesday, March 6, 2012

An ATC on a box

I am a bit of a paper folding fan and actually have a folded fabric quilt in my
ufos, so
Today's ATC is made from fabric papers and is blanket stitched around, then tied with a ribbon, because......
Yuo untie the ribbon......
And when you pull the two halves apart, it becomes a box with a treasure inside!
This is a side view of it open.
It is a modification of an idea I saw on you tube, but the fold involved has been around for hundreds of years in origami.


Thursday, February 23, 2012

Hydrangeas and some time - finally.

Today's ATC is back to the traditional fabric ATC format.
Well, I suppose what I call traditional.  Dark green batic cotton, cotton batting and backing, metallic hand stitching.  Origami Hydrangeas (That's what I call them because the remind me of the tiny little flowers in a hydrangea spray, sequins and beads.  Ribbon square bound edge.  This one I just made up as I went along, after tea.  I don't think you can see it in the photo, but the little origamis are very dimensional.

Now what was that about time?  I have been very busy with friends setting up a community art studio, where we will run workshops on fine art as well as popular crafts,  I have been organising our supplies and today, we had our first session with the painting group and we all really enjoyed it.  I have not really done any serious painting for a long time, but I did do some work in my sketchbook.  I hope we will cater for everyone, from totally petrified beginners, to the advanced, and all the different styles, from watercolour, oil and acrylic, to decorative painting and abstract, landscape, portrait etc if you get my drift.  We will also cater for children's and adult's craft work, for example life drawing,  making cartoons, woodwork, dream catchers, altered books, cards and scrapbooking as well as beading.

Wow!  I hope we don't do all of that too soon, or I'll have no time to blog, lol
So back to the time.  I now have a full five days free to work on a million projects, most of which need to be finished by mid march, some a little sooner, like the Flowerdale art and craft show, on the second weekend of March and some slightly later(like a few days, lol), like my Tangled Textiles challenge which is the 15th.

so, hopefully, I will have lots to show you over the next few weeks.
I appreciate all your messages and love to be able to share with you.

Be Creative