Saturday, May 31, 2014

Birds on a branch

This morning I worked into one of my monoprinted fabrics.
I was a very simple monoprint of branches (which I forgot to photograph before I started - sorry)
I decided to do some raw edge applique
You can see in the above photo, the pinky fabric at the top is the monoprint, and I have layeres some sheer chiffon over it then free machined some birds onto the white branches of the monoprint.
Here I have cut away around some of the birds, The white bird is a template I made to trace around for the stitching.
Here you can see the monoprint that was underneath after I cut around the birds.
Next I placed a piece of green chiffon over to stitch some leaves.
I stitched a lot of leaves.
I did a bit of cutting....................
And then a lot more.  And now I am presently hand stitching the background.  That will take me a fair while.

Happy Creating!

Thursday, May 29, 2014

A mixed bag

I do try to blog most days, but this week has been a turbulent one in our household and the internet has been a bit iffy, so sorry for that.
Today's post is just a bit of miscellany from my studio.
Firstly, remember that felt I was embroidering all over with the embroidery machine?
Well, I finished it.  And then.....
I cut it all up!  If you remember, I said I was going to make a bag.  Well, it is all cut into the pattern pieces for the bag, and I will show it to you when it's done, since it is not my design.
And here is a collage page I did in one of my journals.  The butterfly is 3D.  It contains painted papers, some of the stickers I made the other day, gelli prints and bits and pieces from my collage box.  I was very pleased with how it came out, since I just started sticking whatever was to hand.
On another note, recently, I watched a Mary Beth Shaw webinar and she mentioned that she often uses water based matte house paint as a bottom layer in her journals, so I thought I would try it out as we have a ton of it.
Even though this says white, it was actually egg shell blue
This was my first sample page, where I tried out different media on it.  Clockwise, from top left, watercolour from my palette, inktense blocks, watercolour pencils, a black paint marker, A yellow waterbased marker, a red faber castell marker, a gel pen, pink acrylic in a dabber bottle, acrylic with a make up sponge, and lastly acrylic with a brush.
They all did rather well on it I must say, and it dries very fast, leaving a great matte surface.  So, another thing to recycle that would otherwise have to be disposed of.  It covers better than gesso and is more matte!
So, i now have a lot of pages already painted and dried, going through the final test, which is whether the pages will stick together.  However, if they do, I will just give them a light sand, which is what I do with painted pages when they stick.

So that is my mixed bag for today!

Happy Creating!

Monday, May 26, 2014

No bandwidth

I meant to post  yesterday, but as often happens on the weekend, there was not enough internet to go around in our little town, so I couldn't upload any photos.
But here are a few backgrounds and bits I did in my journals whilst the embroidery machine was whizzing away.
These are all sticker sheets I painted whilst I was working on the pages.  I have done this before, with large pieces, but I was reminded of it after watching a Mary Beth Shaw Webinar
This was a stamp of a dragonfly I made and tested out in my journal
This page used the stamp with some silver paint and the coloured dragonflies were cut from the stickers
After I cut out the dragonflies, I used the scraps to makes some strange looking plants on this page.


Nothing is ever wasted here!

Happy Creating!

Saturday, May 24, 2014

A noisy day.

I have had he embroidery machine stitching away beside me most of the day as I am embroidering quite a large piece of felt for a special bag I want to make.
Here is the machine sewing away.  This was earlier today and this was only the second section.
Here we are after about six sections.  As you can see I still have a long way to go to fill the fabric - Perhaps another day's worth?
Whilst the machine Has been going, I have been getting in a little quilting practice.
This is one of my practice quilts, of which I have several.  This one is an old cheater fabric piece I was given.  Waste not want not.  This fabric is absolutely revolting, however it is great for practicing on as it has lots of different block patterns.  I also don't waste batting on these.  For this one, I am using a recycled mattress protector, which is basically poly batting.
I have also been doing a little painting in between the beeps from the machine, but haven't taken any photos, perhaps tomorrow.

Happy Creating!

Friday, May 23, 2014

Butterflies

I really enjoyed the painting I did on fabric recently, so I thought I'd do some more.  I saw some butterflies yesterday and thought, well let's do one then.
I used a photocopy of a dover picture to start me off and free motioned the outlines through the paper onto one of my collages.
I didn't think to take photos until I was nearly finished picking the paper away.  This is a technique that I have shown before, but really, I just sew the main lines of a picture through a paper laid over the fabric, basically tracing with a sewing machine.  You can see above there are still bits of the photocopy on the left wing, and when the paper is picked out (which is quite easy so long as you only stitch the main lines) you only have your stitched lines.  Some of the picked out paper is at the top right.
Here are just the lines of stitching left.  I used a piece of voile over the collage, so the surface of the butterfly would be even for painting.
Here, you can see I am painting the black areas with acrylic paint.  Don't worry, the paint and brush are sitting on some clear perspex, not on my work!
I have finished all the black here and it is a bit messy, but all my mistakes will soon be covered up.
Here, I have taken it back to the sewing machine and covered the black with stitching.
I painted it black, so I didn't have to do so much stitching to cover it.
then I went and painted all the white patches (Which are actually white in real life) with some metallic paints.
Finally, I cut away the voile and I also went and added a bit more stitch, too, but I don't seem to have a picture and since it took me over an hour to upload these because the internet is playing up (as it always does when it rains), you will have to wait until I finish the hand stitching on the background for that.
Serendipity also, that today's design matters TV video (need to subscribe to watch, but really worth it) was also on butterflies, so I also did one of these in my sketchbook!
Hope you enjoyed the butterflies!

Happy Creating!

Thursday, May 22, 2014

Some doodling

I found it very hard to get started this morning and one of the things I have done to solve this problem, is that earlier in the year, I made a number of fabric collages (about a hundred), so when I have no idea what to do, I can just grab one and play with it.
This morning I chose a monoprint on some curtain voile, which has been sitting in my pile for a while.
The monoprint was very simple, just green, with leaves drawn with a palette knife.  (And as per usual for me I had forgotten to photograph it before I started)
The first thing I did was use some green thread to scribble the zig zags inside the leaves.  Then I got some orange and drew loops in the background.  I felt that the zig zags did not show up well, so I painted them with a turquoise metallic lumiere paint.
It is a bit quirky, but I will make it up into something, a wallet or a couple of credit card cases, perhaps.  It is about 8 inches square.  Any ideas?


Happy Creating!

Wednesday, May 21, 2014

Hello dear, what did you do today?

Today was my weekly art class.  It is a very small class, so I usually have plenty of time to do something myself, so today, I did this
I was playing with a palette knife rather than a brush, which is something I love to do as there is tons of texture as a result.
My composition was not good, as I have placed the focal point in the centre, but I suppose I could cut a bit off the alter it.  anyway, it was just playing. The photo is not good due to the shine of the paint, but it's nearly dark here so no natural light.  It might perhaps look better on it's side?
This is acrylic, and would probably look better and have more texture in oil, but with the temperatures plummeting and winter nearly here, it would take weeks to dry enough between layers, so maybe in the spring.

Happy Creating!

Tuesday, May 20, 2014

T for transparent tuesday

I nearly forgot T for Tuesday over at Elizabeth's blog.
In fact, my rather elegant cup of tea here is after a hard day at the sewing machine!
I was working with transparent chiffons to make a vignette landscape (vignette, just means not edged or fading out at the edges)
It was an idea I thought of yesterday whilst driving down the mountain.
This is what I got done today.  I am quite pleased with it, although I went overboard with the stitching in a few places.  If you click on it it should enlarge.  The flowers are called Wahlenbergia or Australian Bluebell and I thought they suited the landscape.
This is noly a sample for a larger piece, but I learned something - don't use white felt!  No matter how clean your hands are, it tends to get grubby.  I think next time I will try canvas, because it can be wiped clean and mounted on stretcher bars.
Anyway, that was my day.

Happy creating!

Monday, May 19, 2014

The workshop

oops, I meant to post this yesterday and forgot.
The bag workshop went really well
I only had five students, as a few no showers, but that was plenty, really
Here they are, all hard at work.  They all did quite different things.  And here are their results
Not all quite finished, but looking pretty good!
They were all quite happy with their creations, and so they should!

Happy creating!

Friday, May 16, 2014

A simple bag

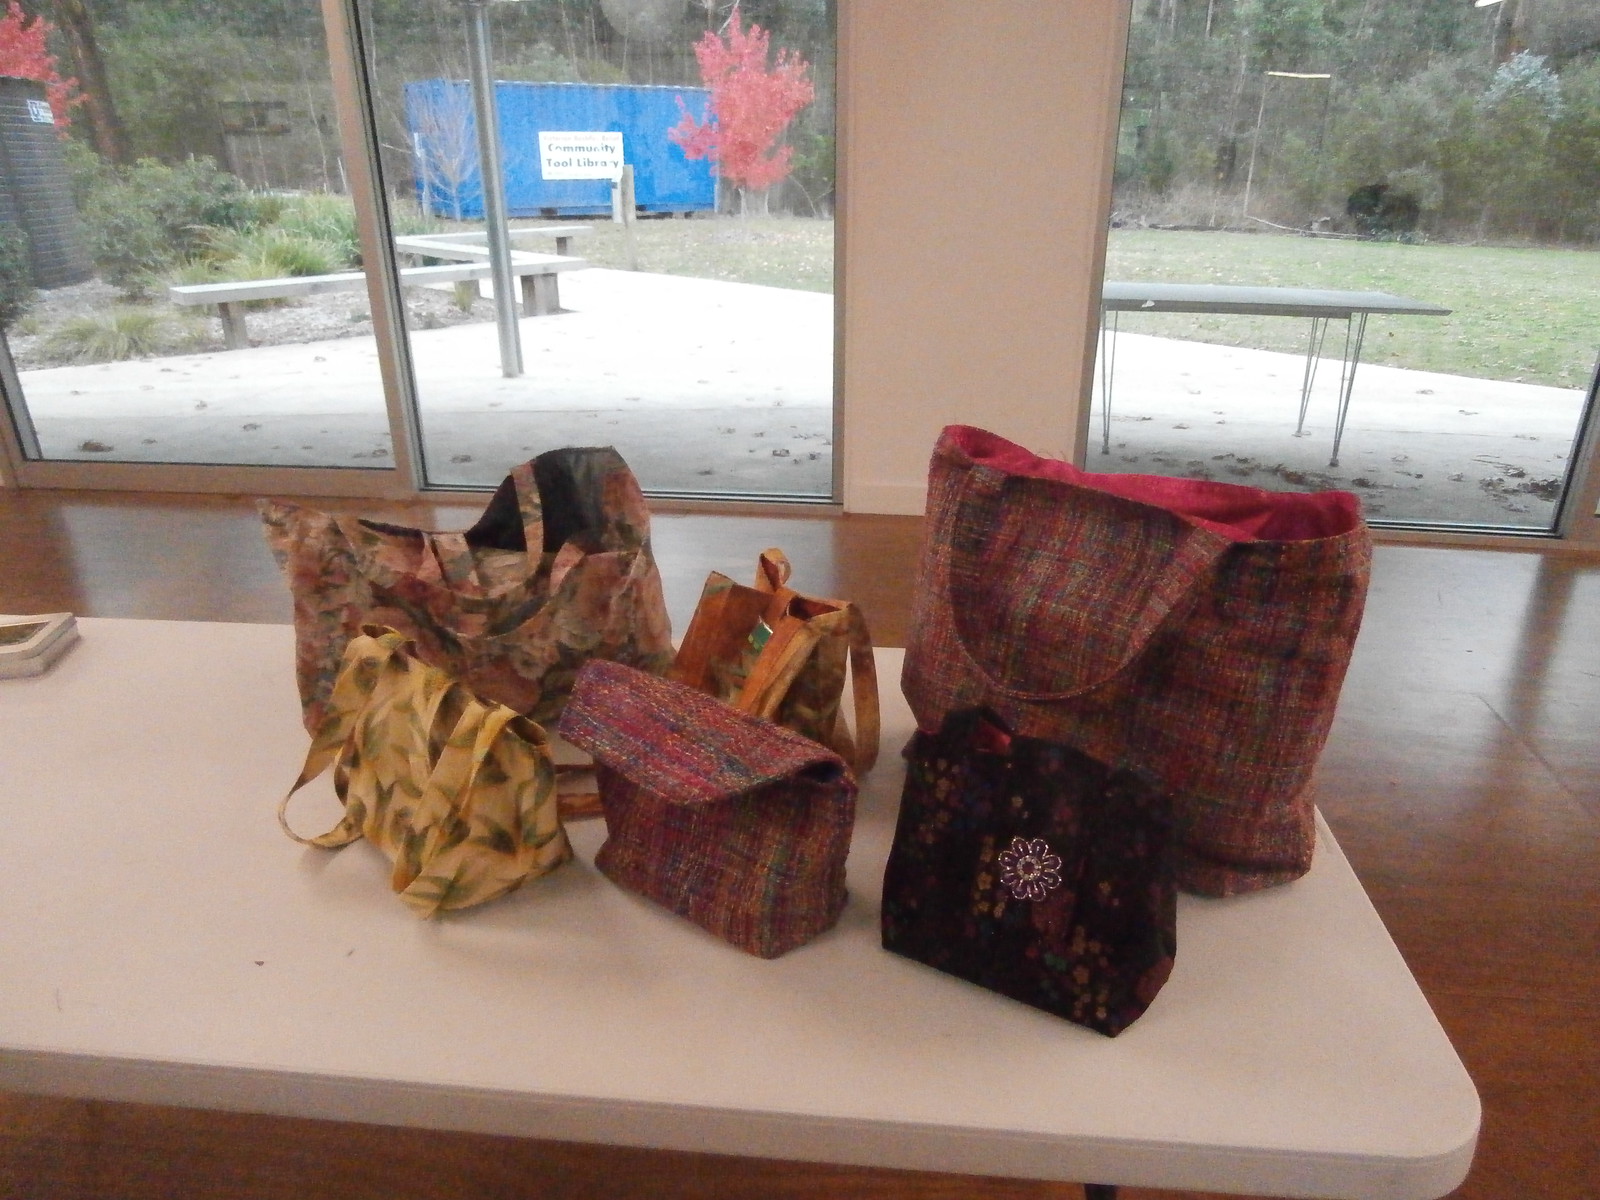
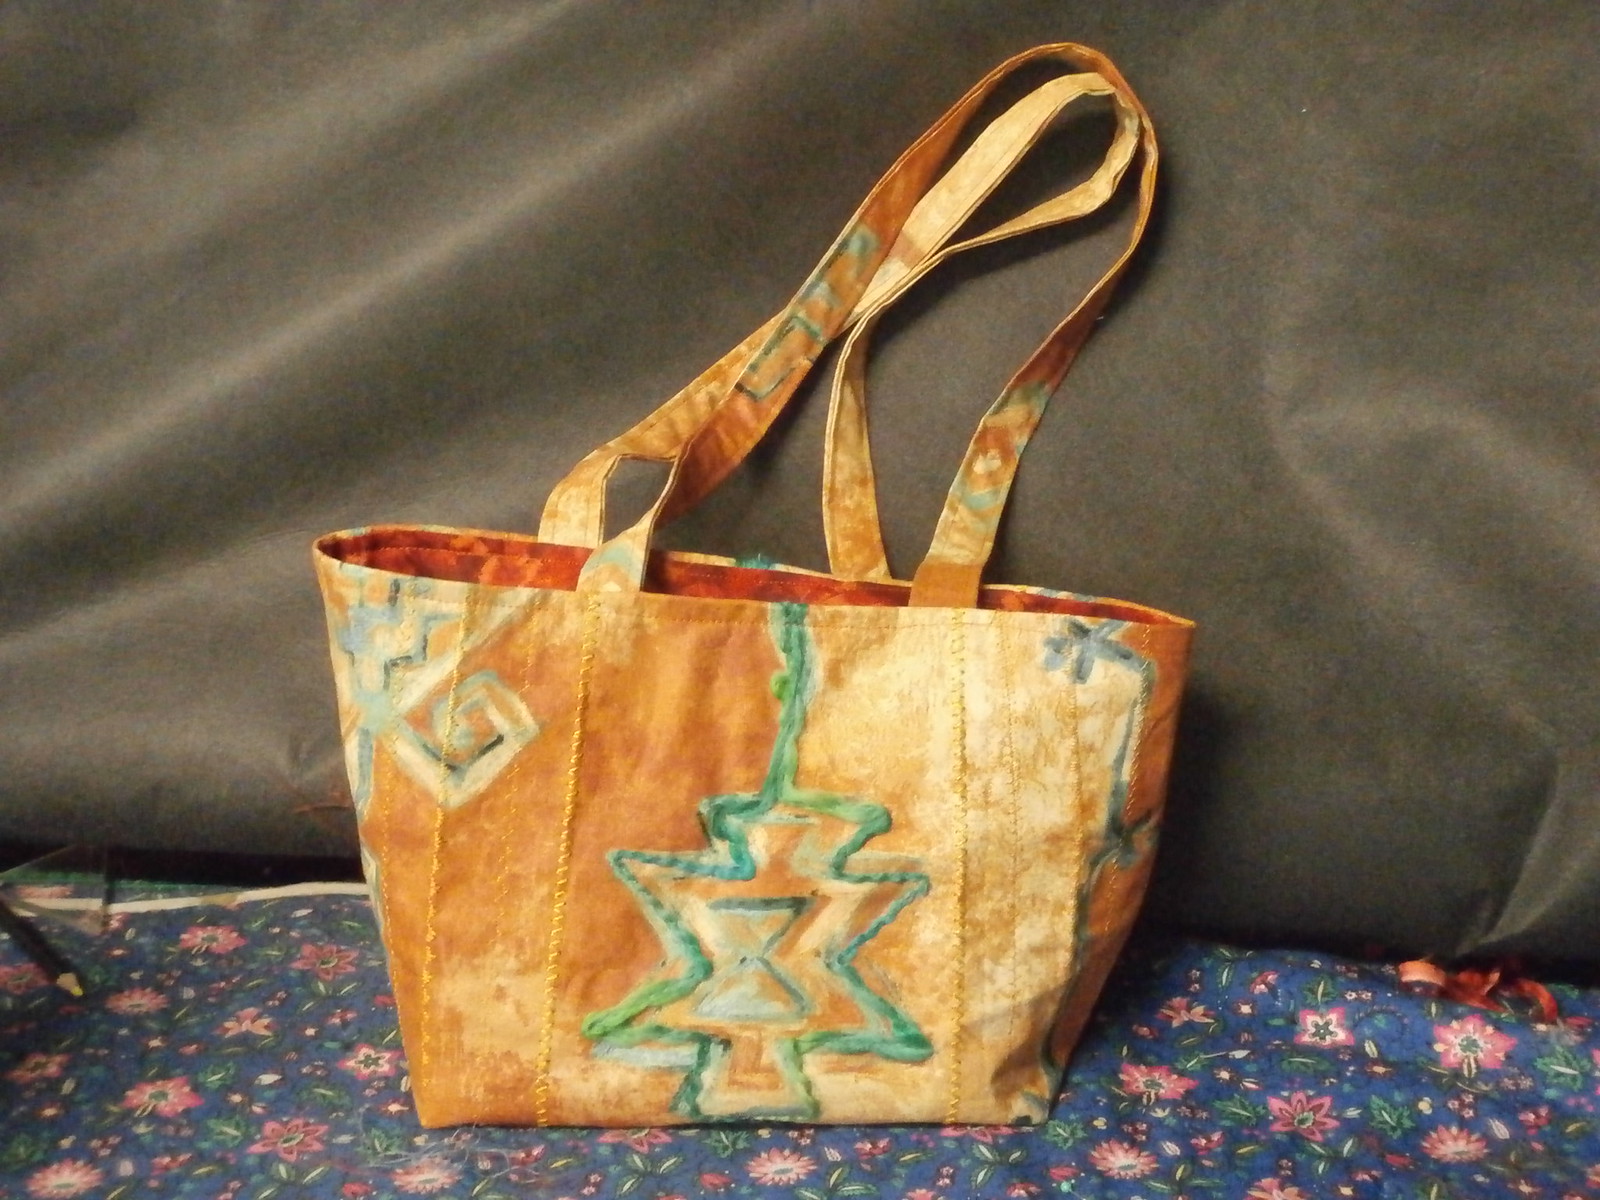
A few months ago, I posted about a little bag I made and intended to post a tutorial.  Well, months later, tomorrow I am teaching a workshop on it and have been writing notes, so here is the tutorial.

Easy Bag construction
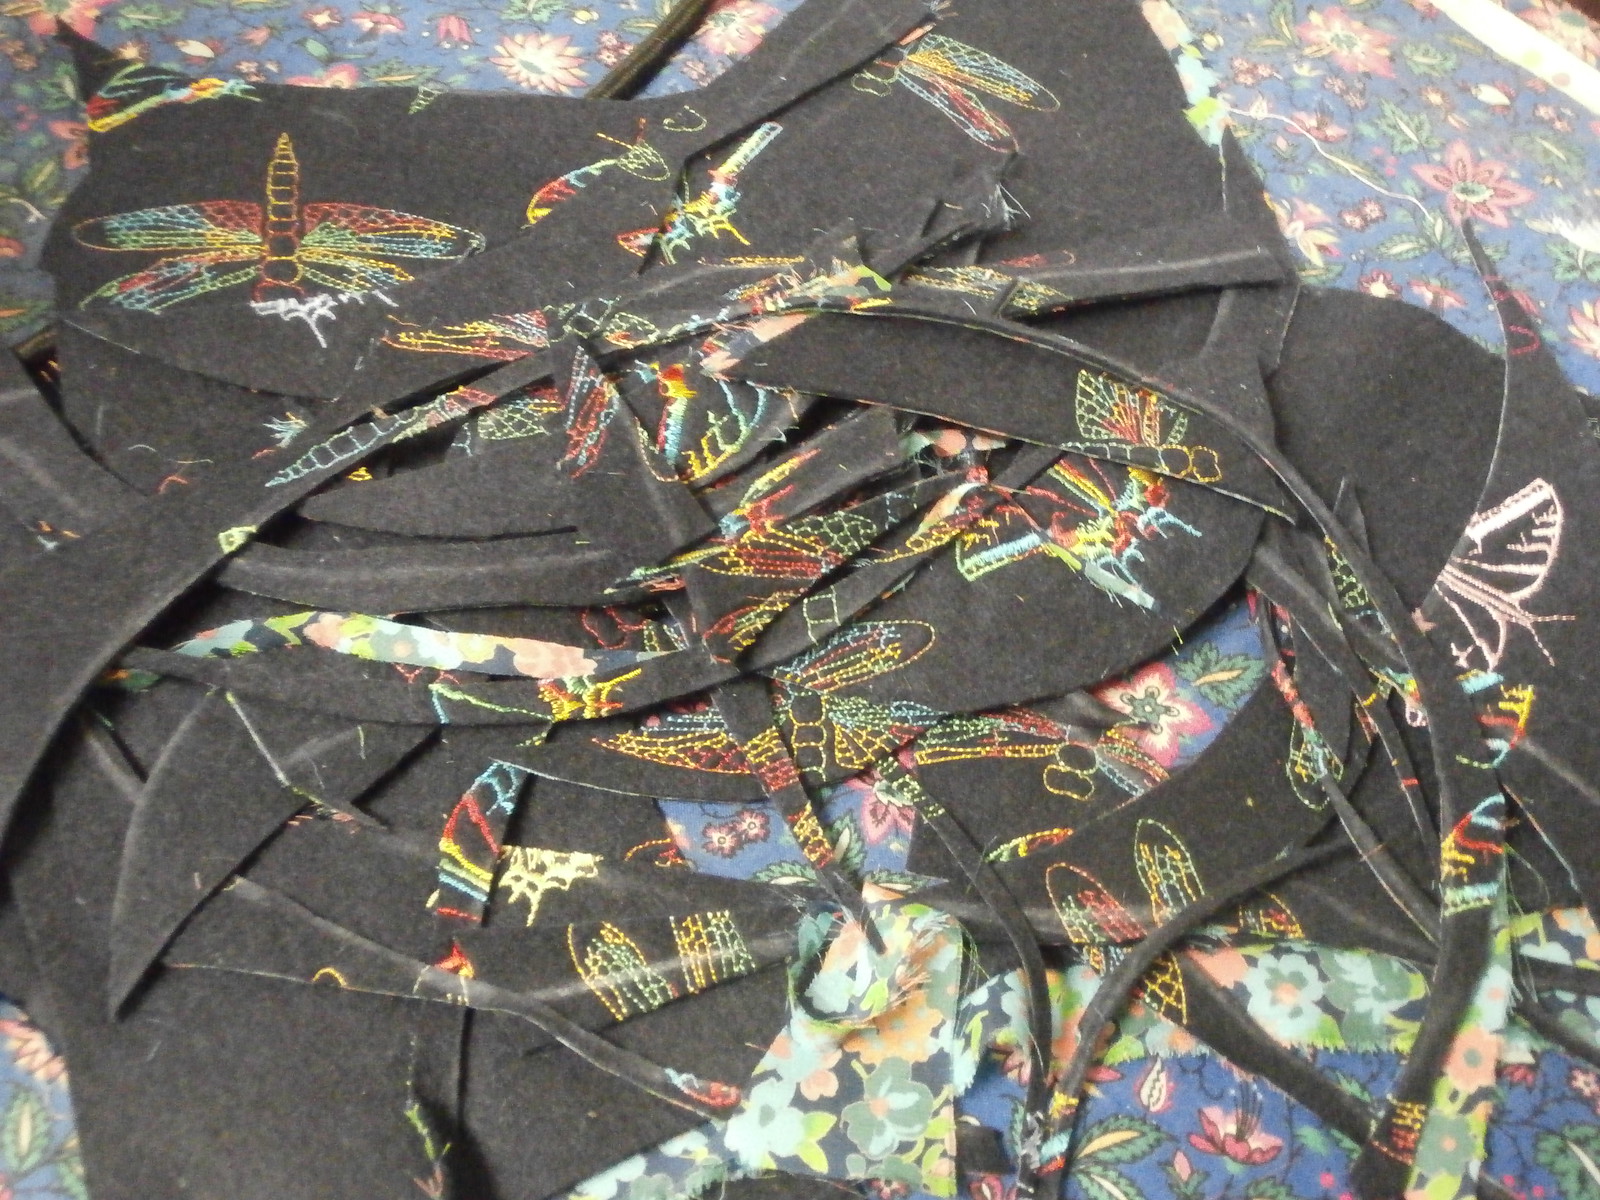
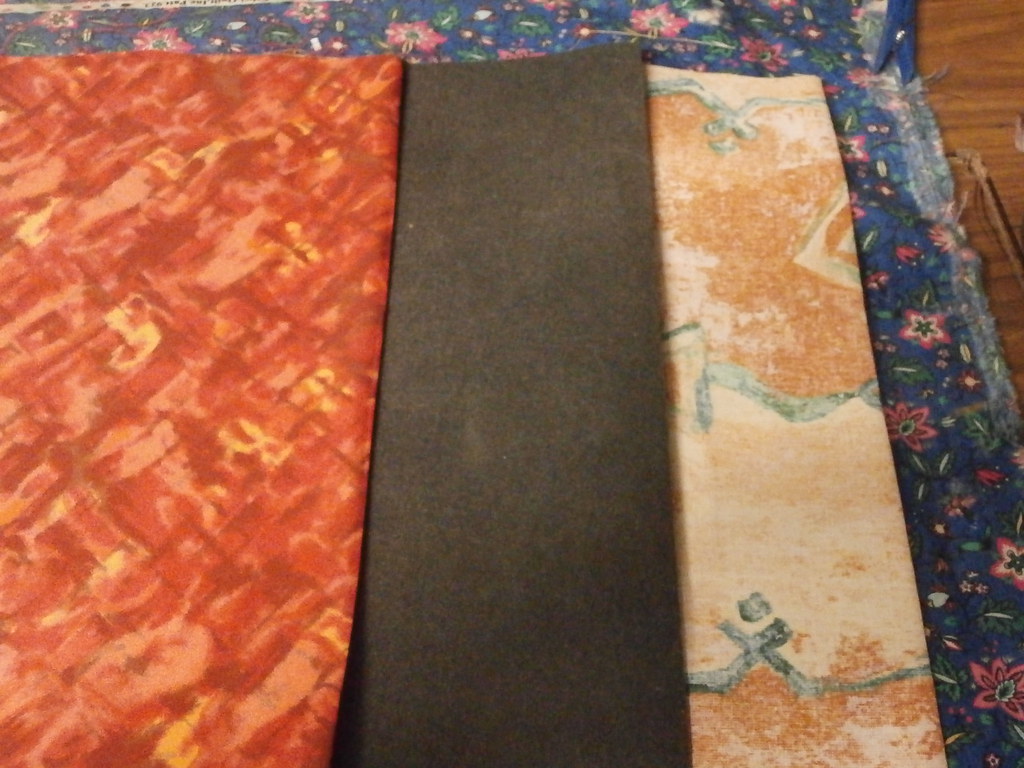

Main Bag fabrics

Decide on the size bag you want
Basically, the base size for my bag is 25 (height) x 16 (width) inches.  This is a good size to start and as you get experienced at the technique, you can change it to suit.
If you want a taller bag, add to the height, conversely if you want a wider bag, add to the width.  Getting your shape and size will come with practice and, you can also change the proportions slightly during the shaping process
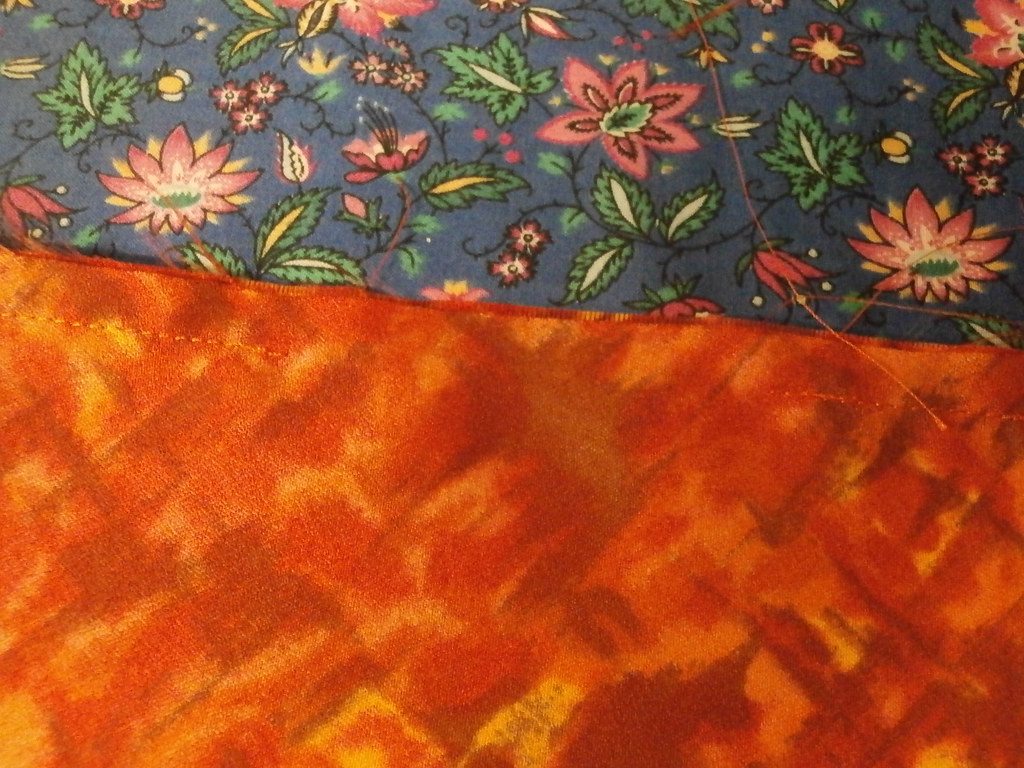
In the picture above, there are three pieces which are cut to the size you have decided on.

  • A lining.  I use a light fabric like satin, but for easier handling, a simple cotton will work.  It is sometimes a problem to use black, simply because, you might find it hard to find things in your bag later.  This is a personal preference.
  • Interfacing.  I generally use a heavy interfacing for most fabrics, as it gives a sturdier result.
  • Outer fabric is a personal choice.  Choose what you like, as it will be with you for a while!
Some other alternatives are to use quilted  or embroidered fabric, which might not want any stabilizer.
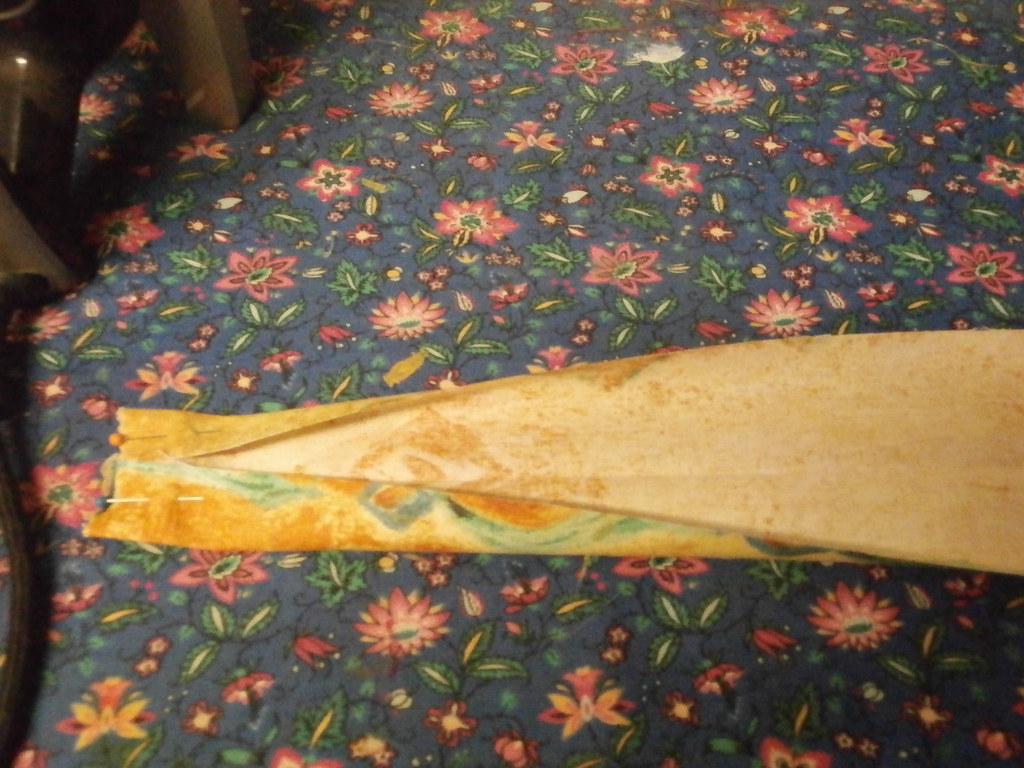
Handle construction
The handle lengths are dependent upon the wearer, but for a long handle, about 32 inches is standard. For short handles 8 to ten inches is suitable, but you can change it to suit yourself.
1  2
3  4
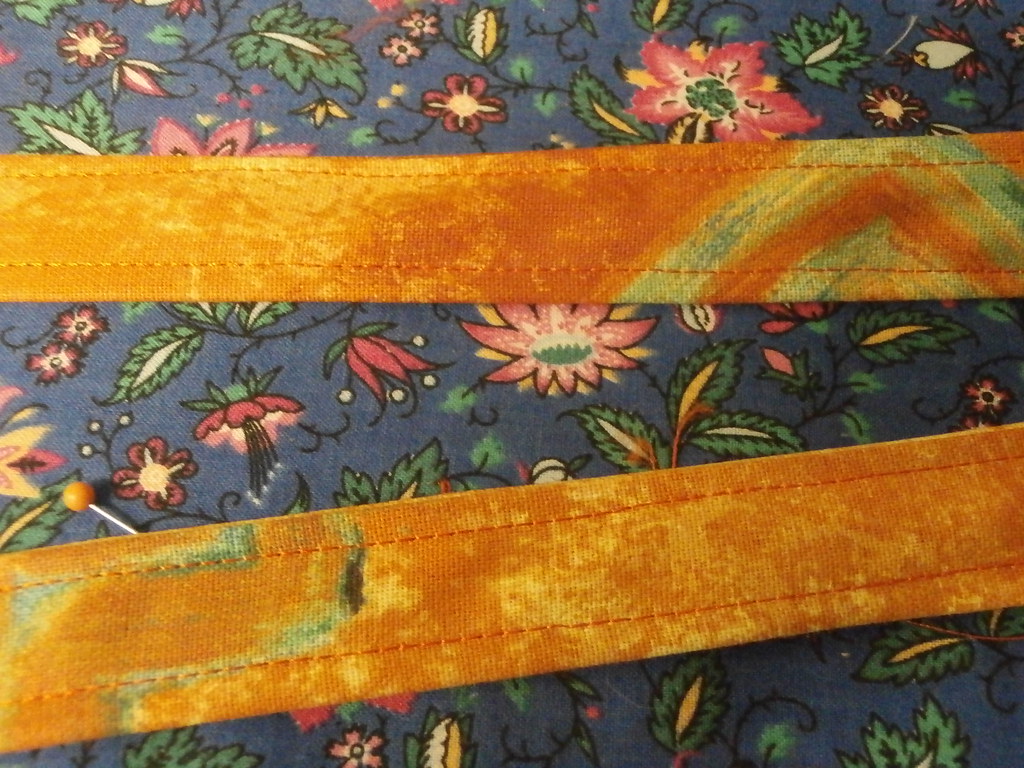
Following steps 1 to 4 above
  1. Cut two 4 inch wide strips of your chosen length.  If you wish to use interfacing or batting to made them thicker, cut 1 inch wide strips of the same length (not shown)
  2. Fold and press the strips in half and open out.  If you are adding batting or interfacing, add it at this stage and place to one side of the centre fold.
  3. Fold each side of the strip into the centre and press.  Use pins if you need to.
  4. Finally fold in half so the raw edges are in the middle.
Depending on your bag, you can either topstitch each edge of the handle, or use decorative stitches to match the bag.

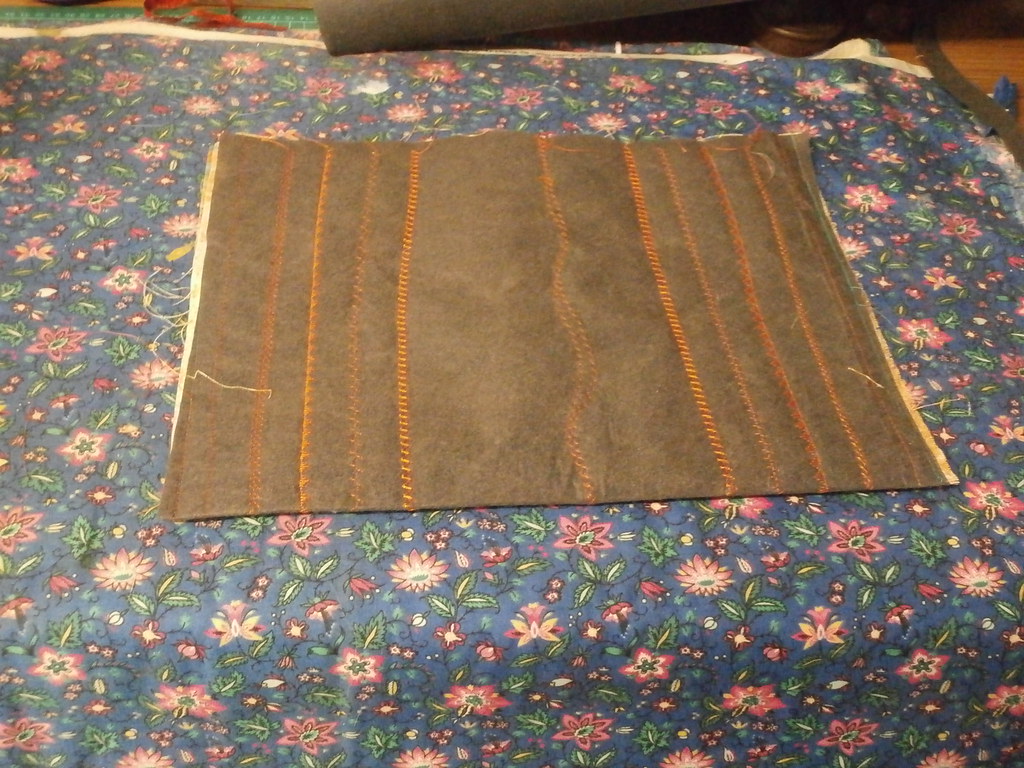
Constructing and shaping the outer bag

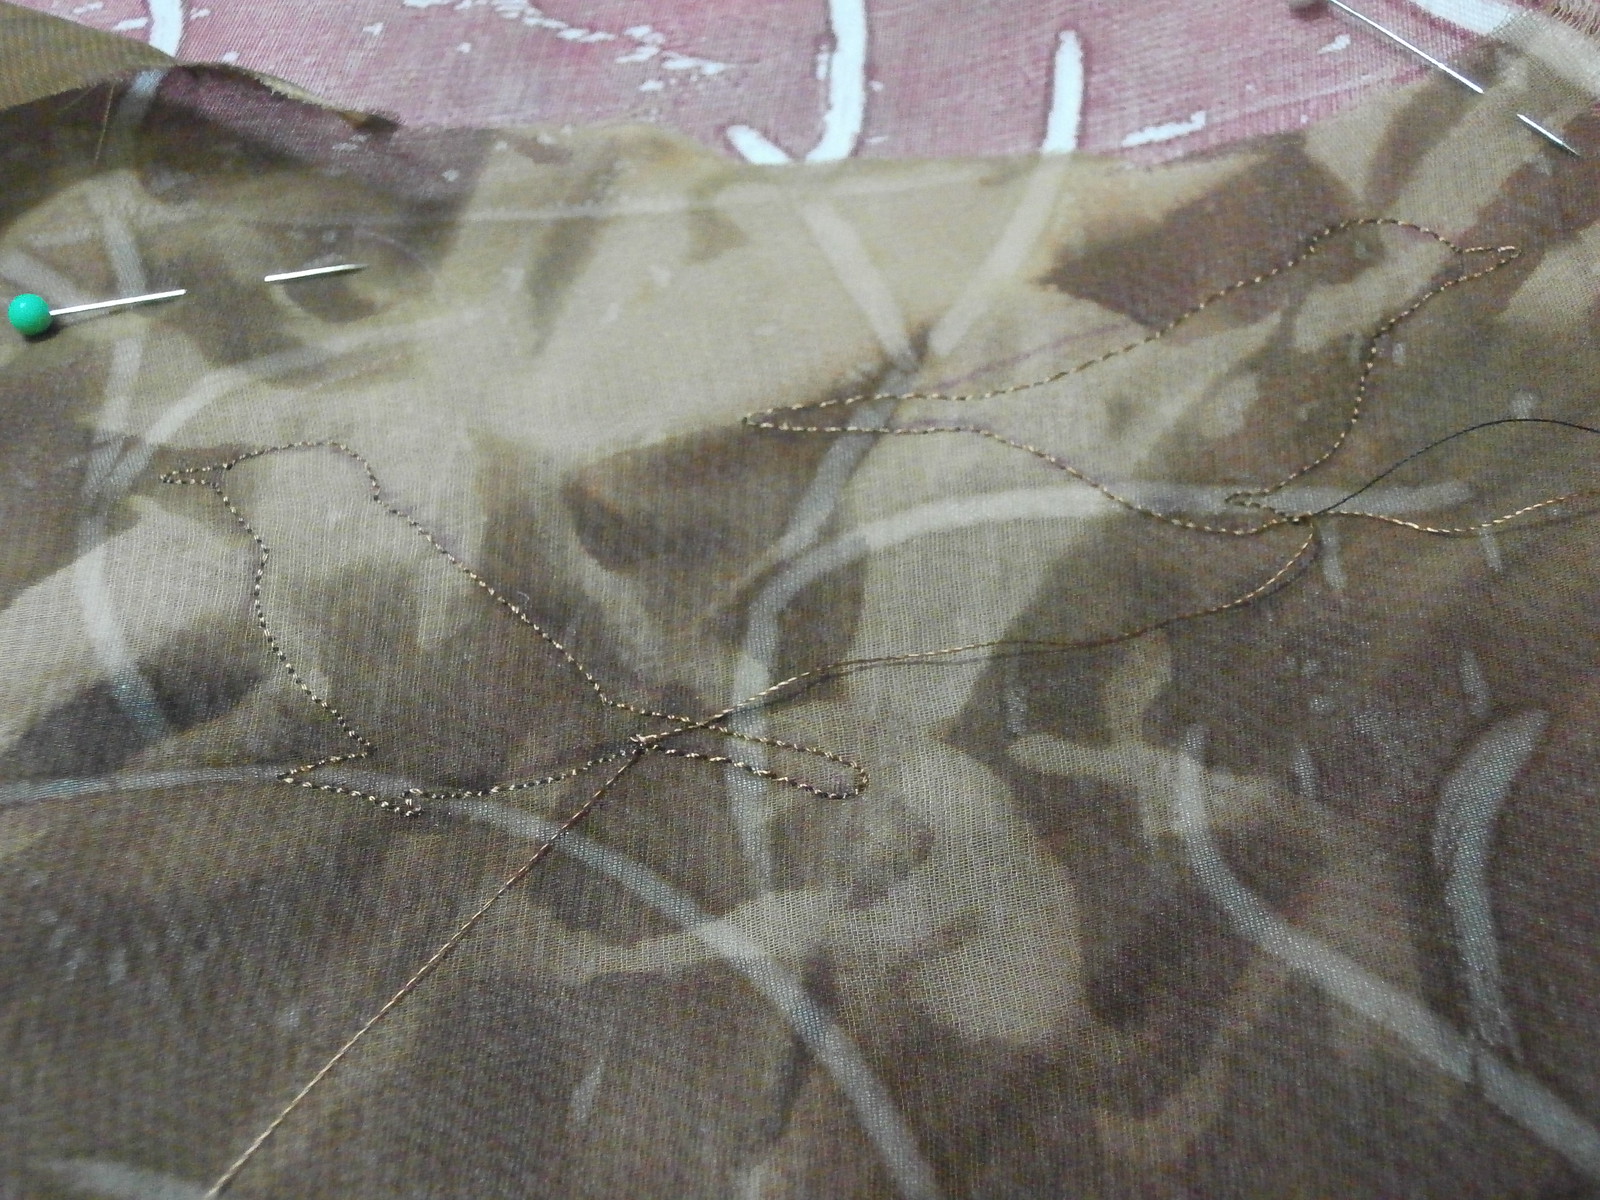
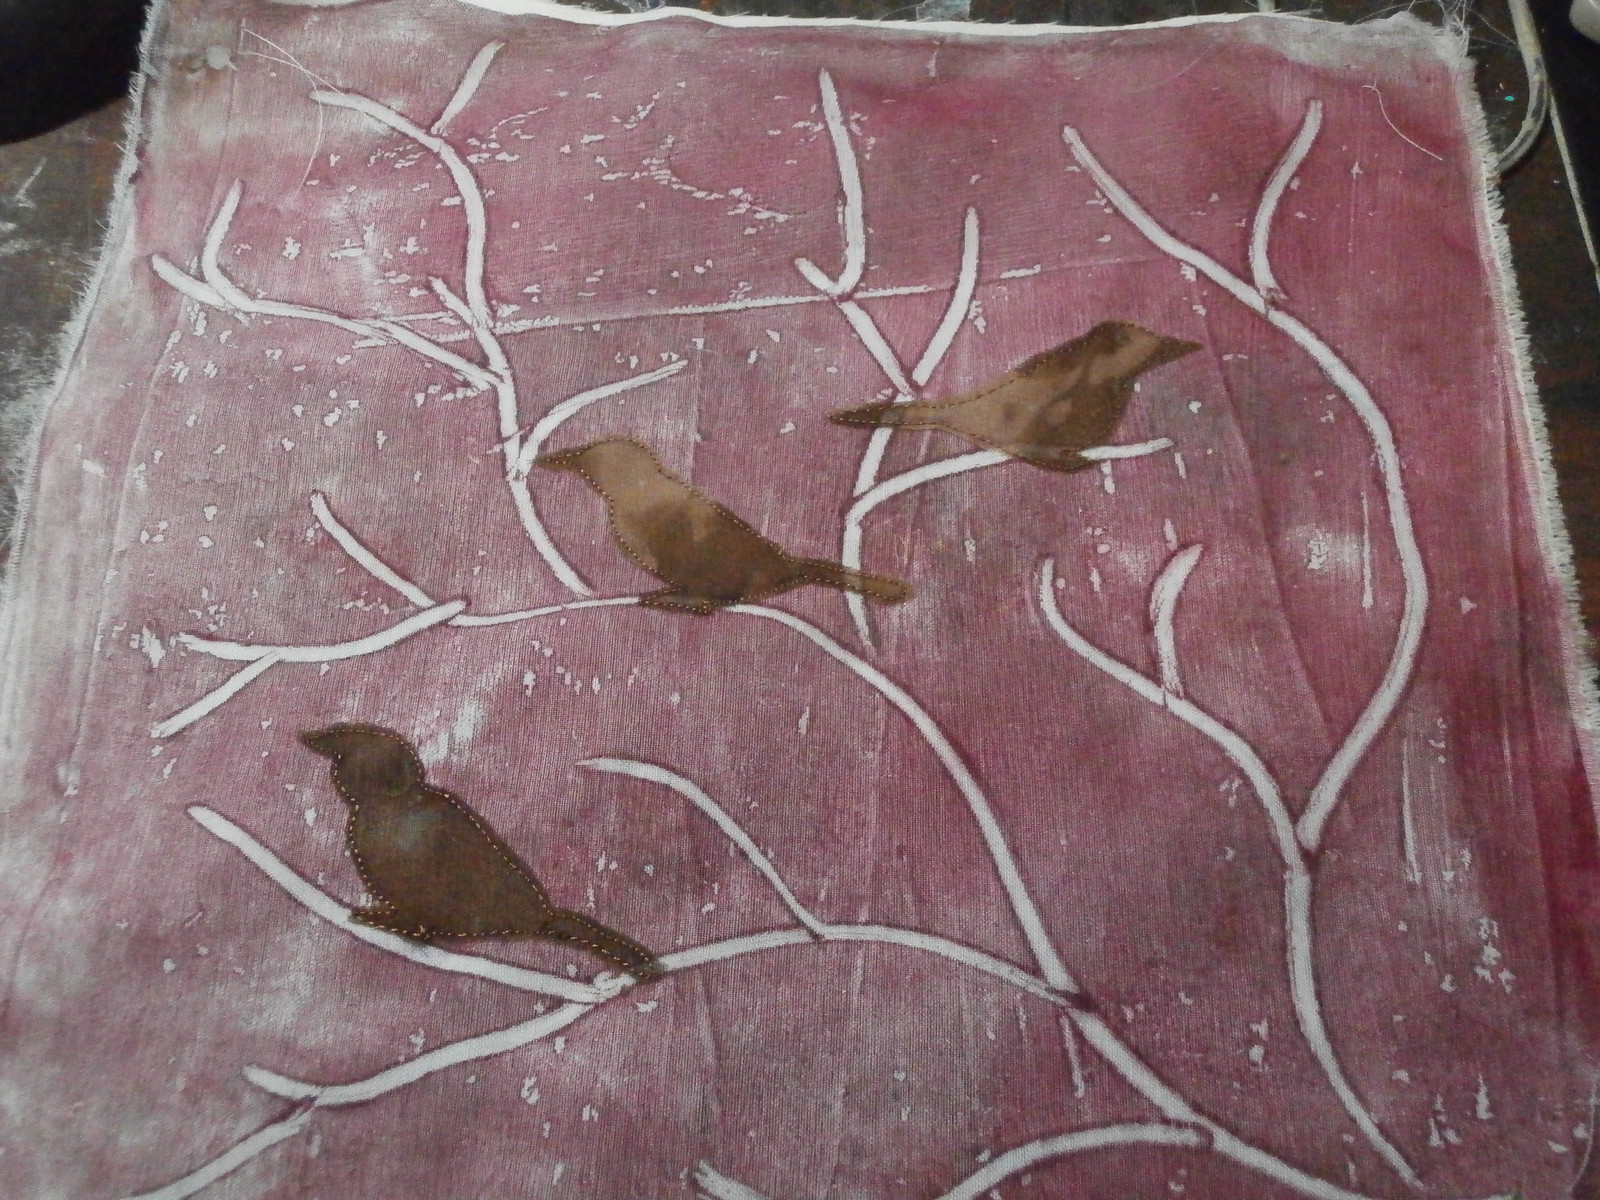
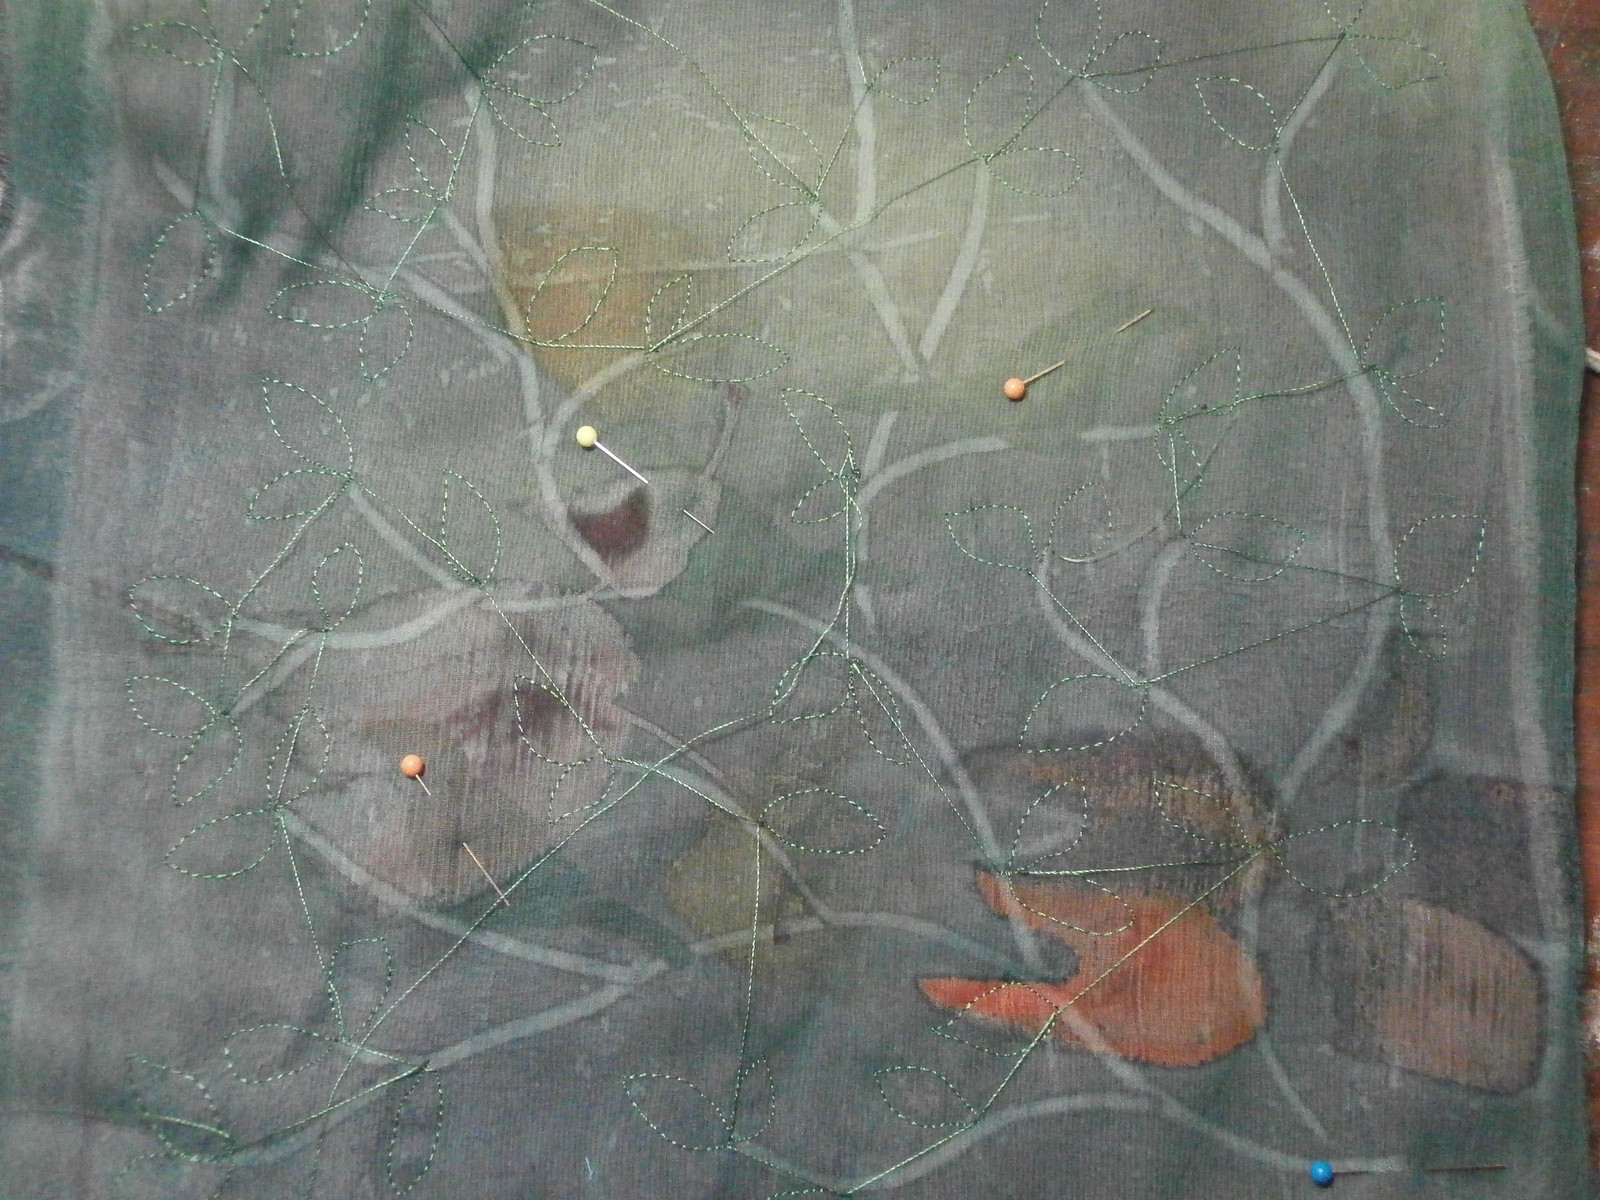
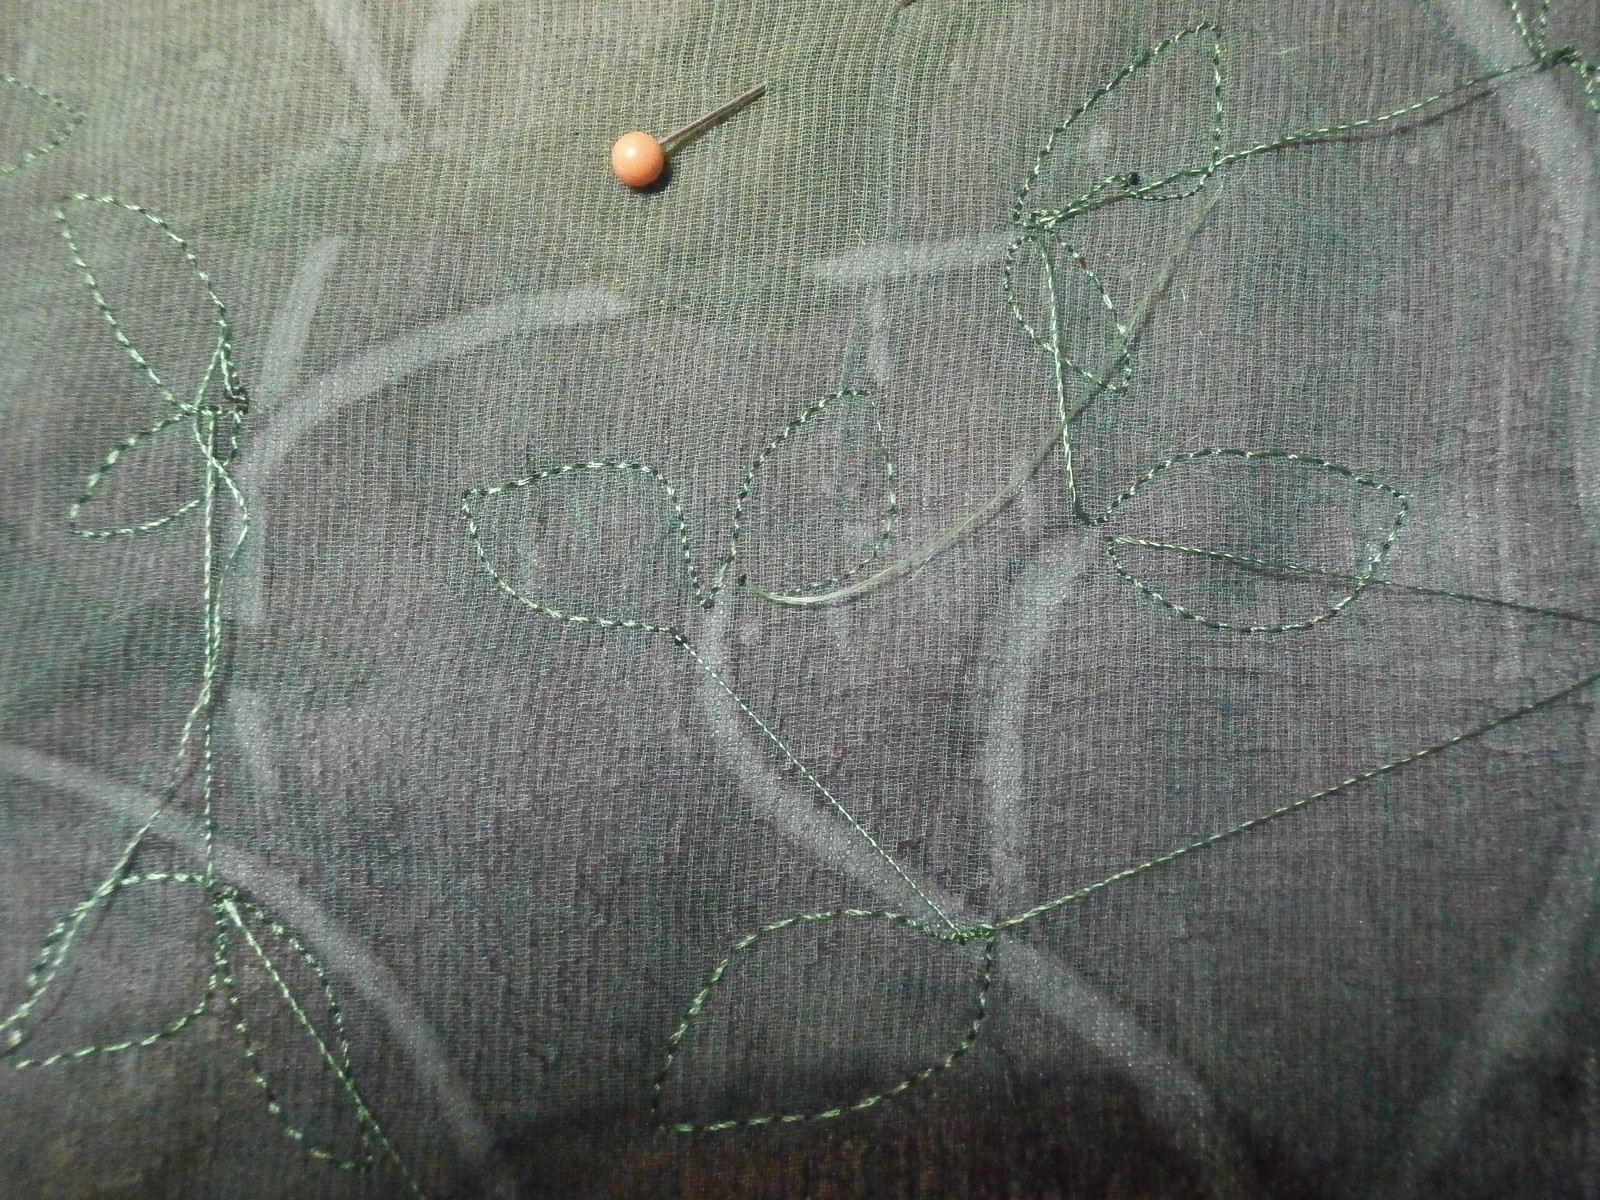
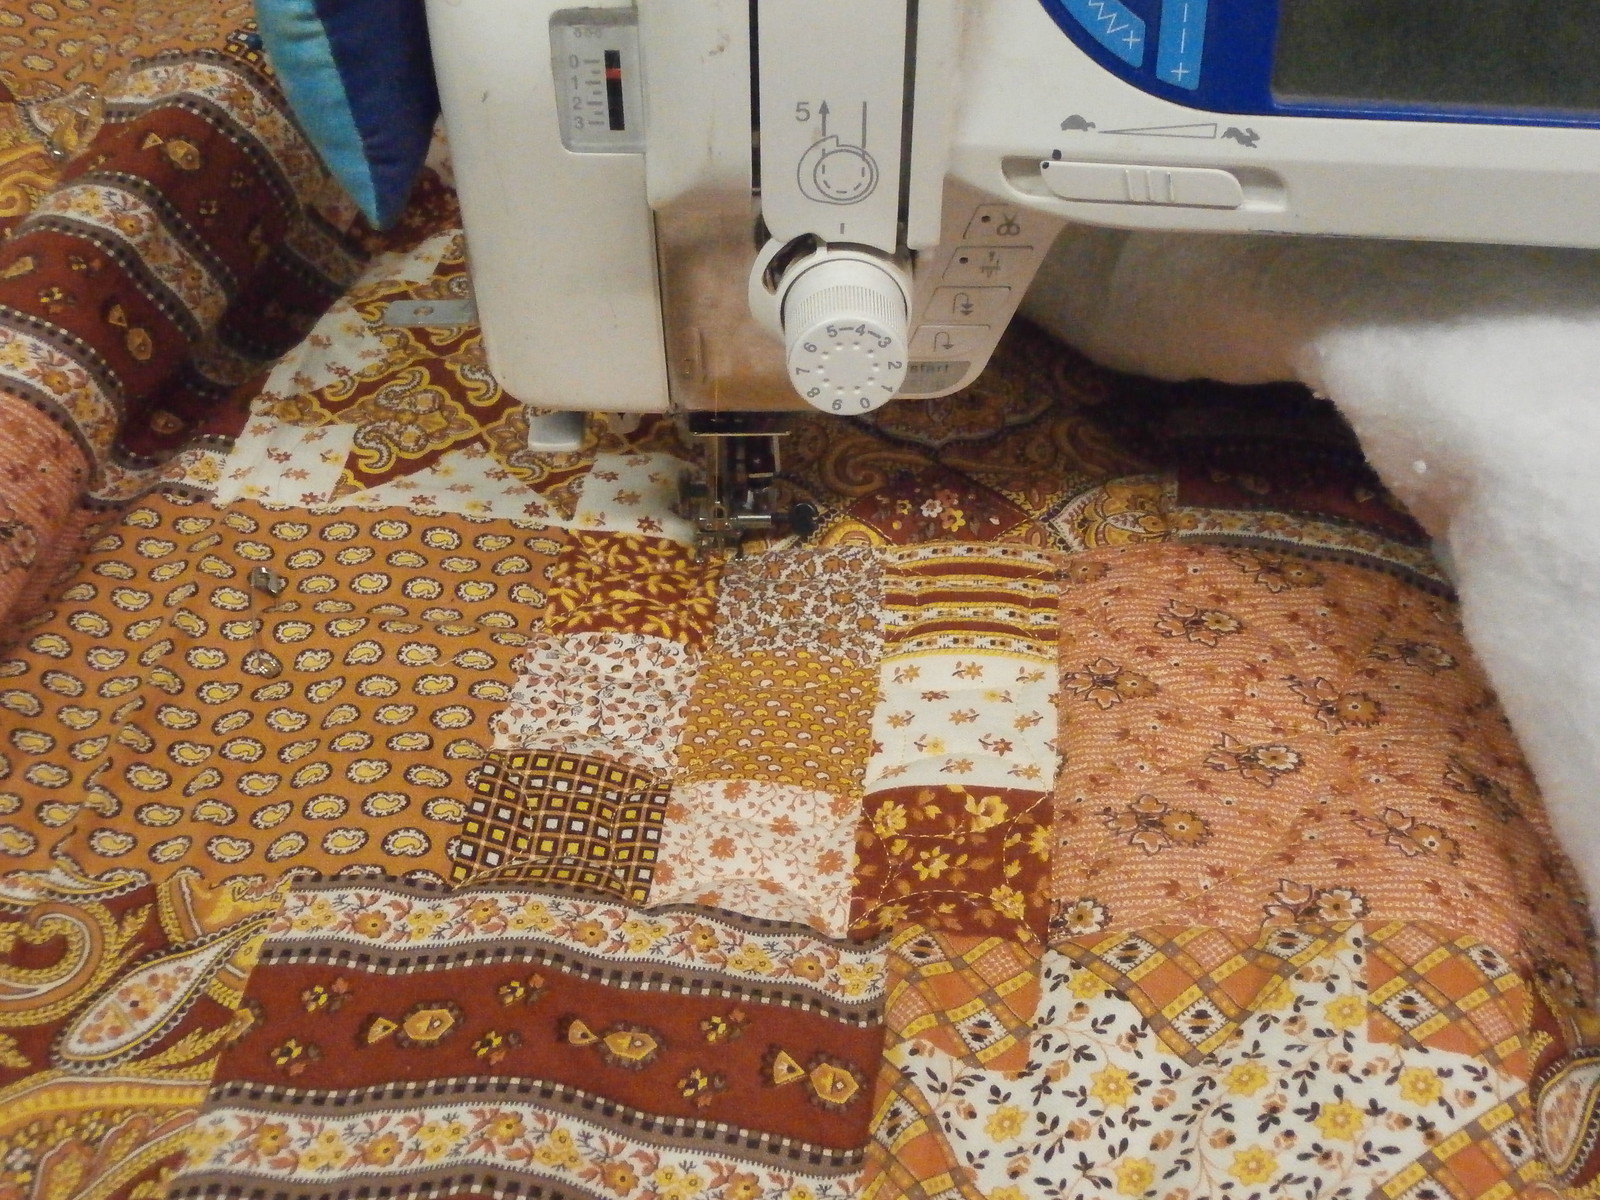
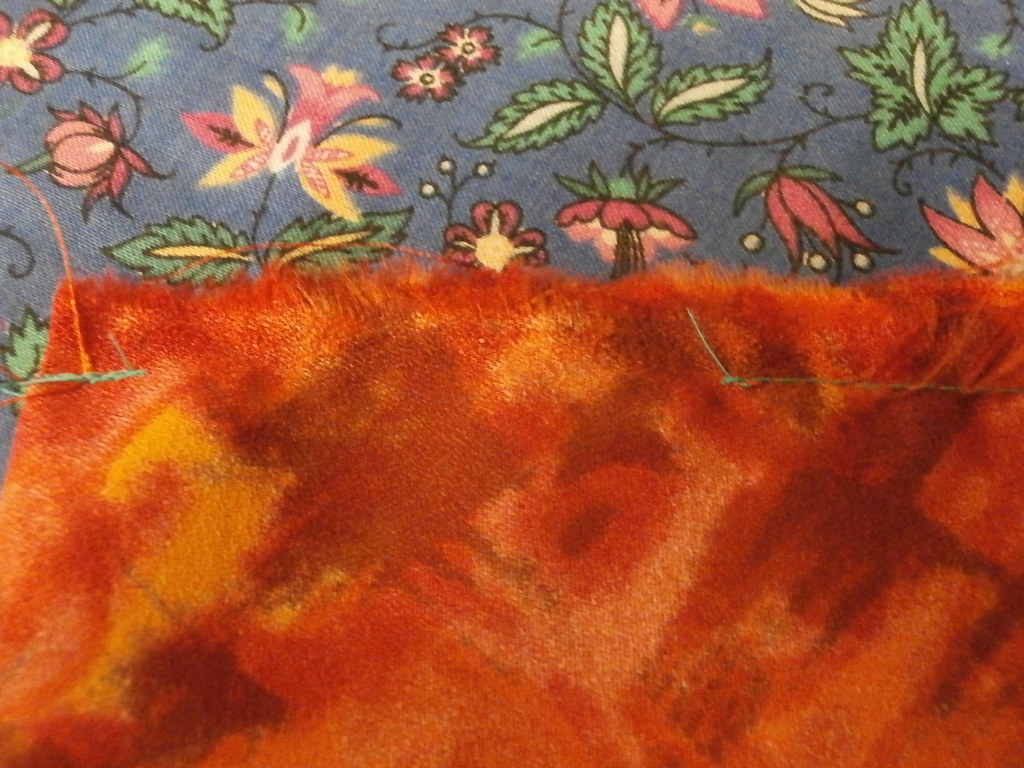
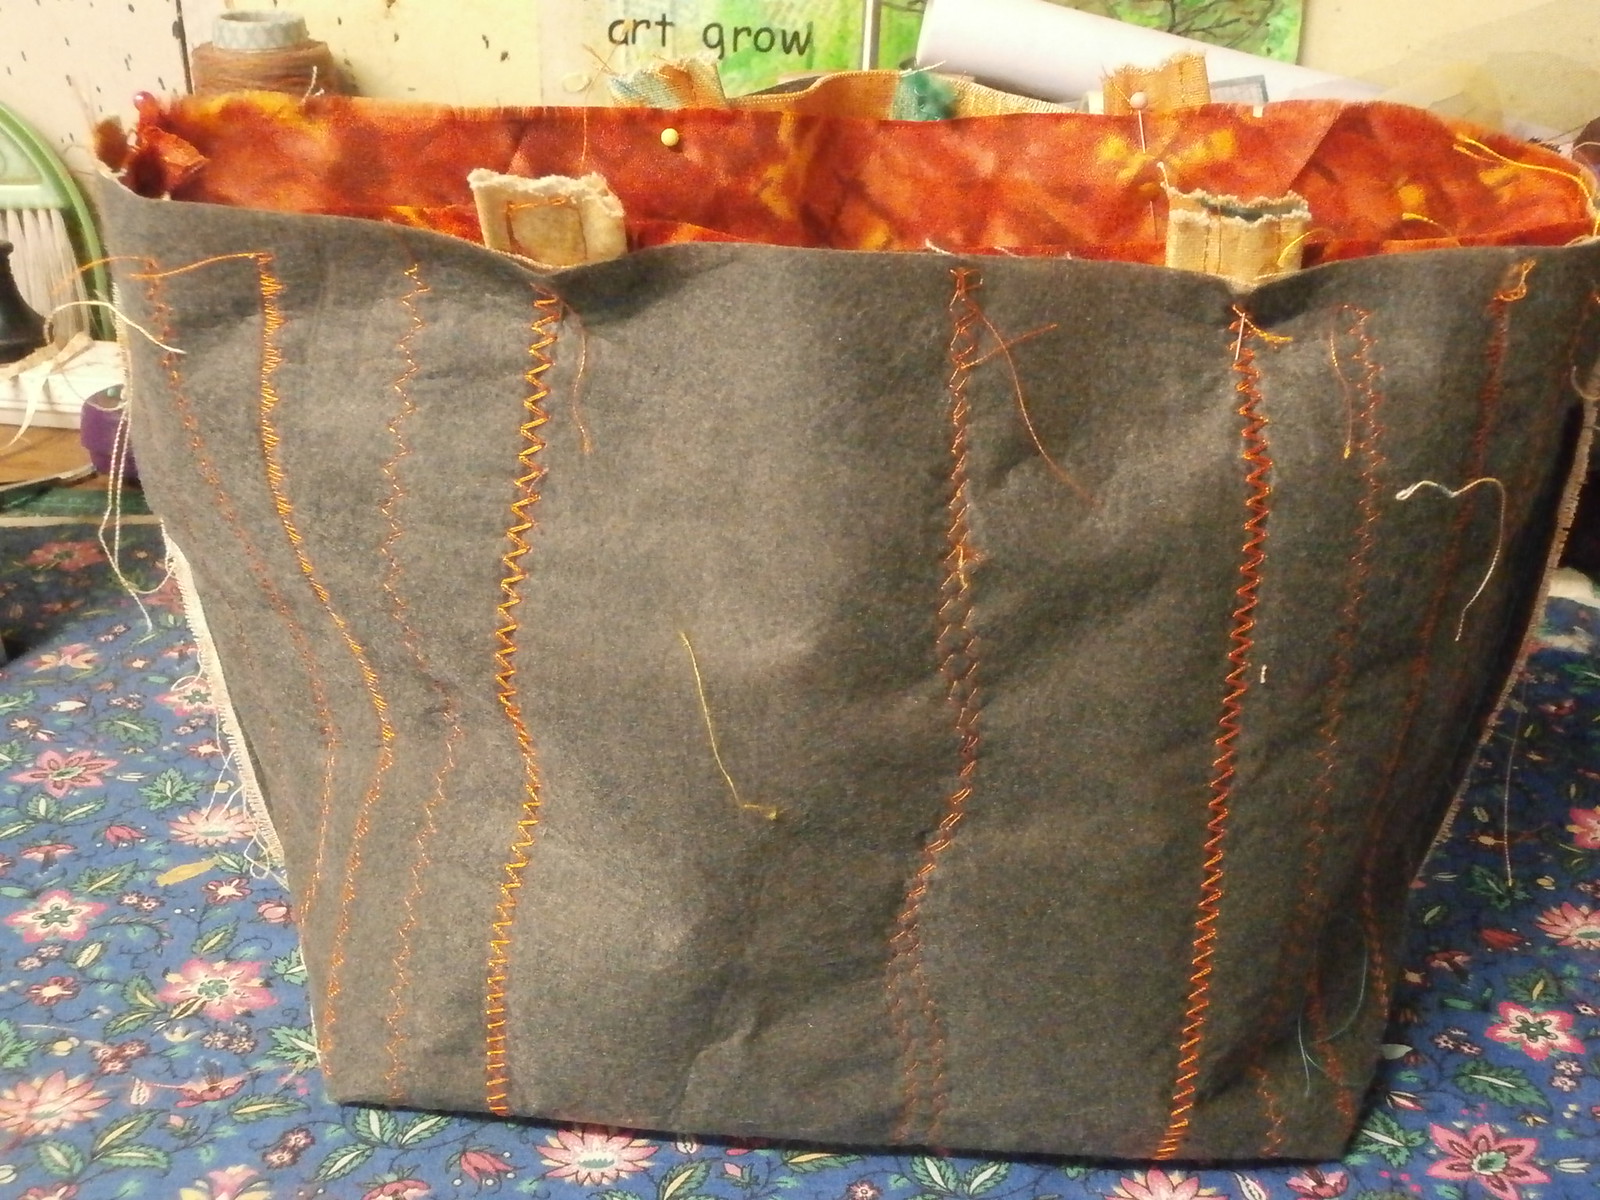
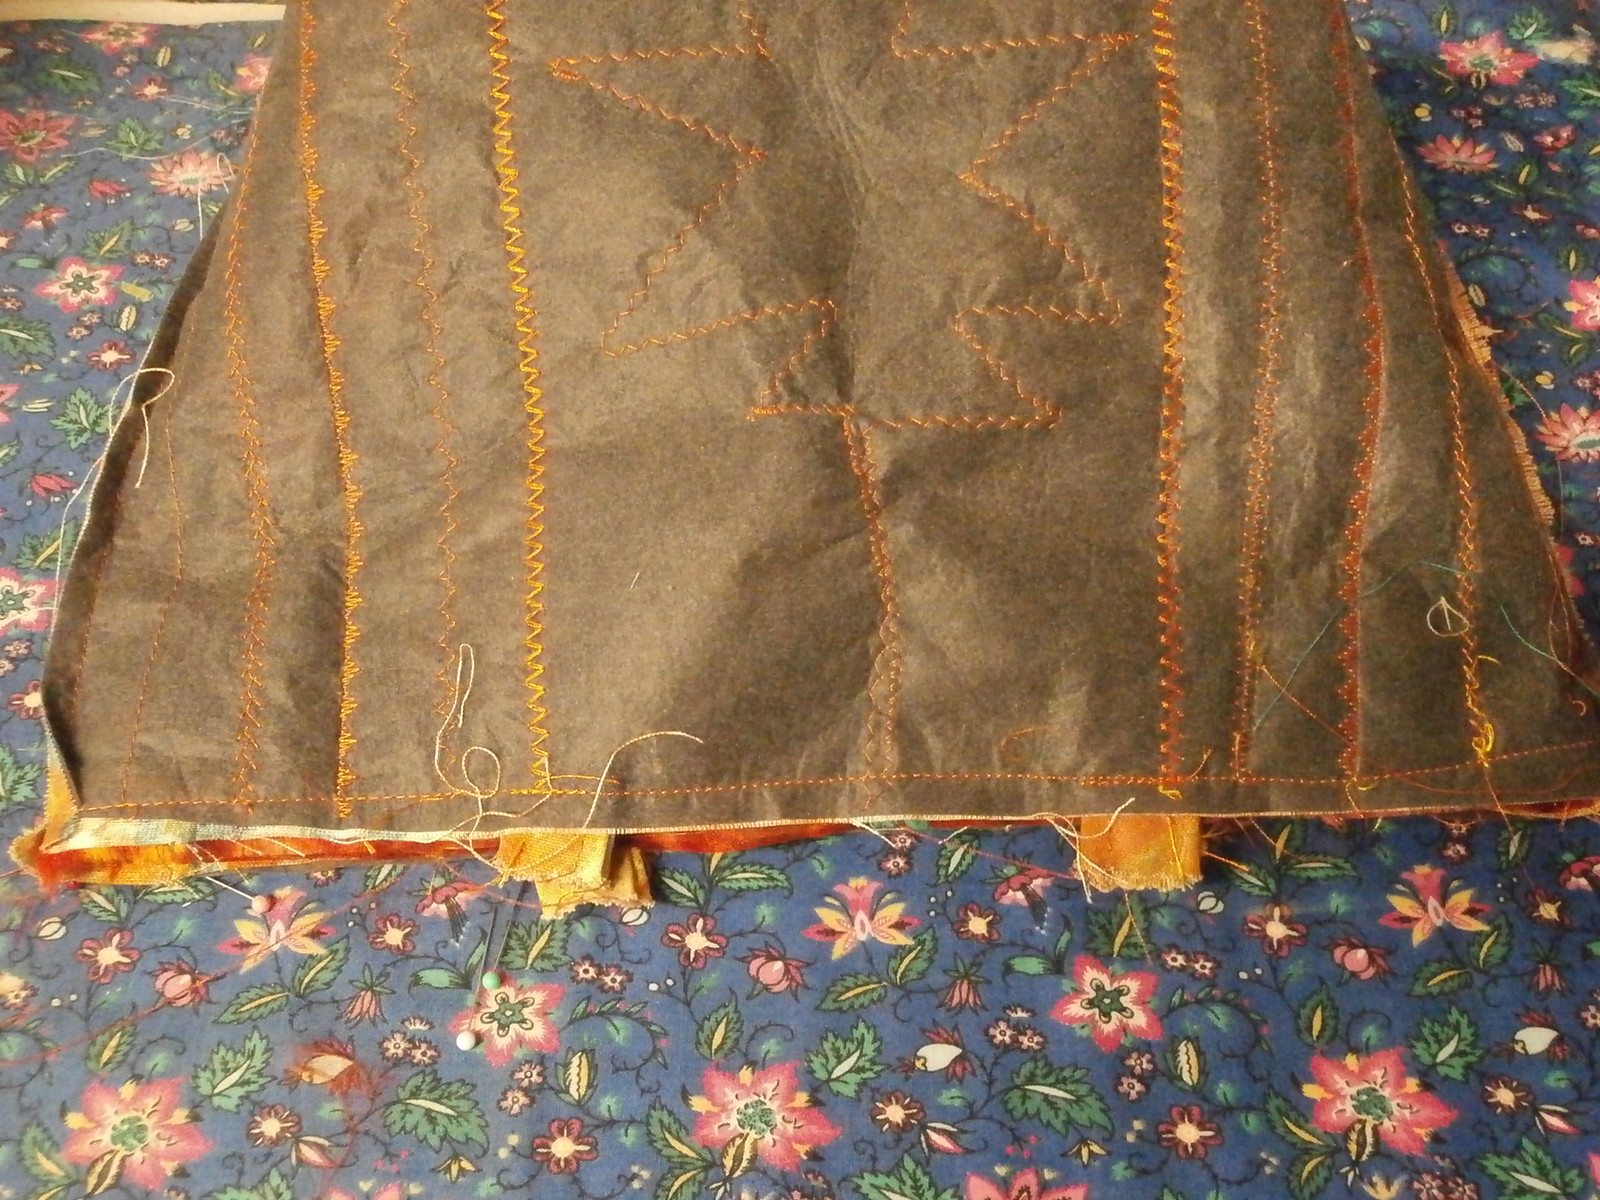
The fabric needs to be attached to the interfacing to create a quite sturdy fabric.  This can be done using some decorative stitching, foundation or crazy piecing (if you are using several fabrics) oreven hand stitching and/or beading (however with hand work, keep the stitching an inch or so from the edge so that the threads are not cut during trimming)
You can fuse the fabric to the facing, but the fusing will come away with time and use, so for a sturdier bag, all over stitching is advised.
Once you have the hang of the method, you will be able to stitch up 'blanks' or rectangles of fabric and interfacing using any technique you like to make bags from (I will post separately about this)
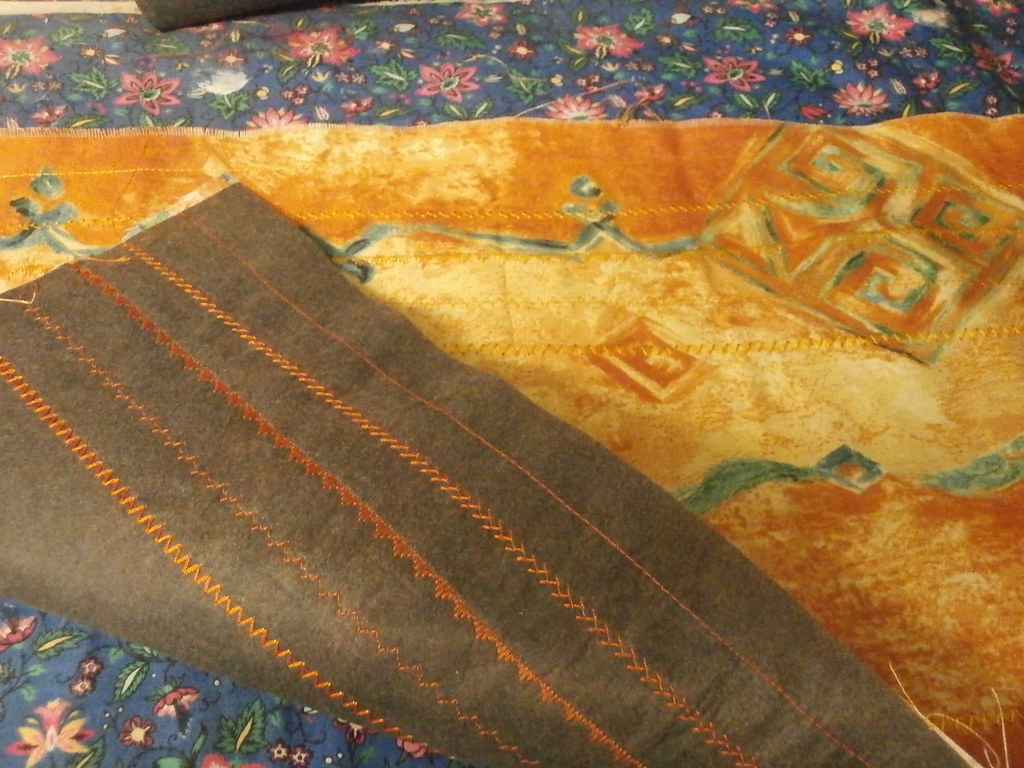
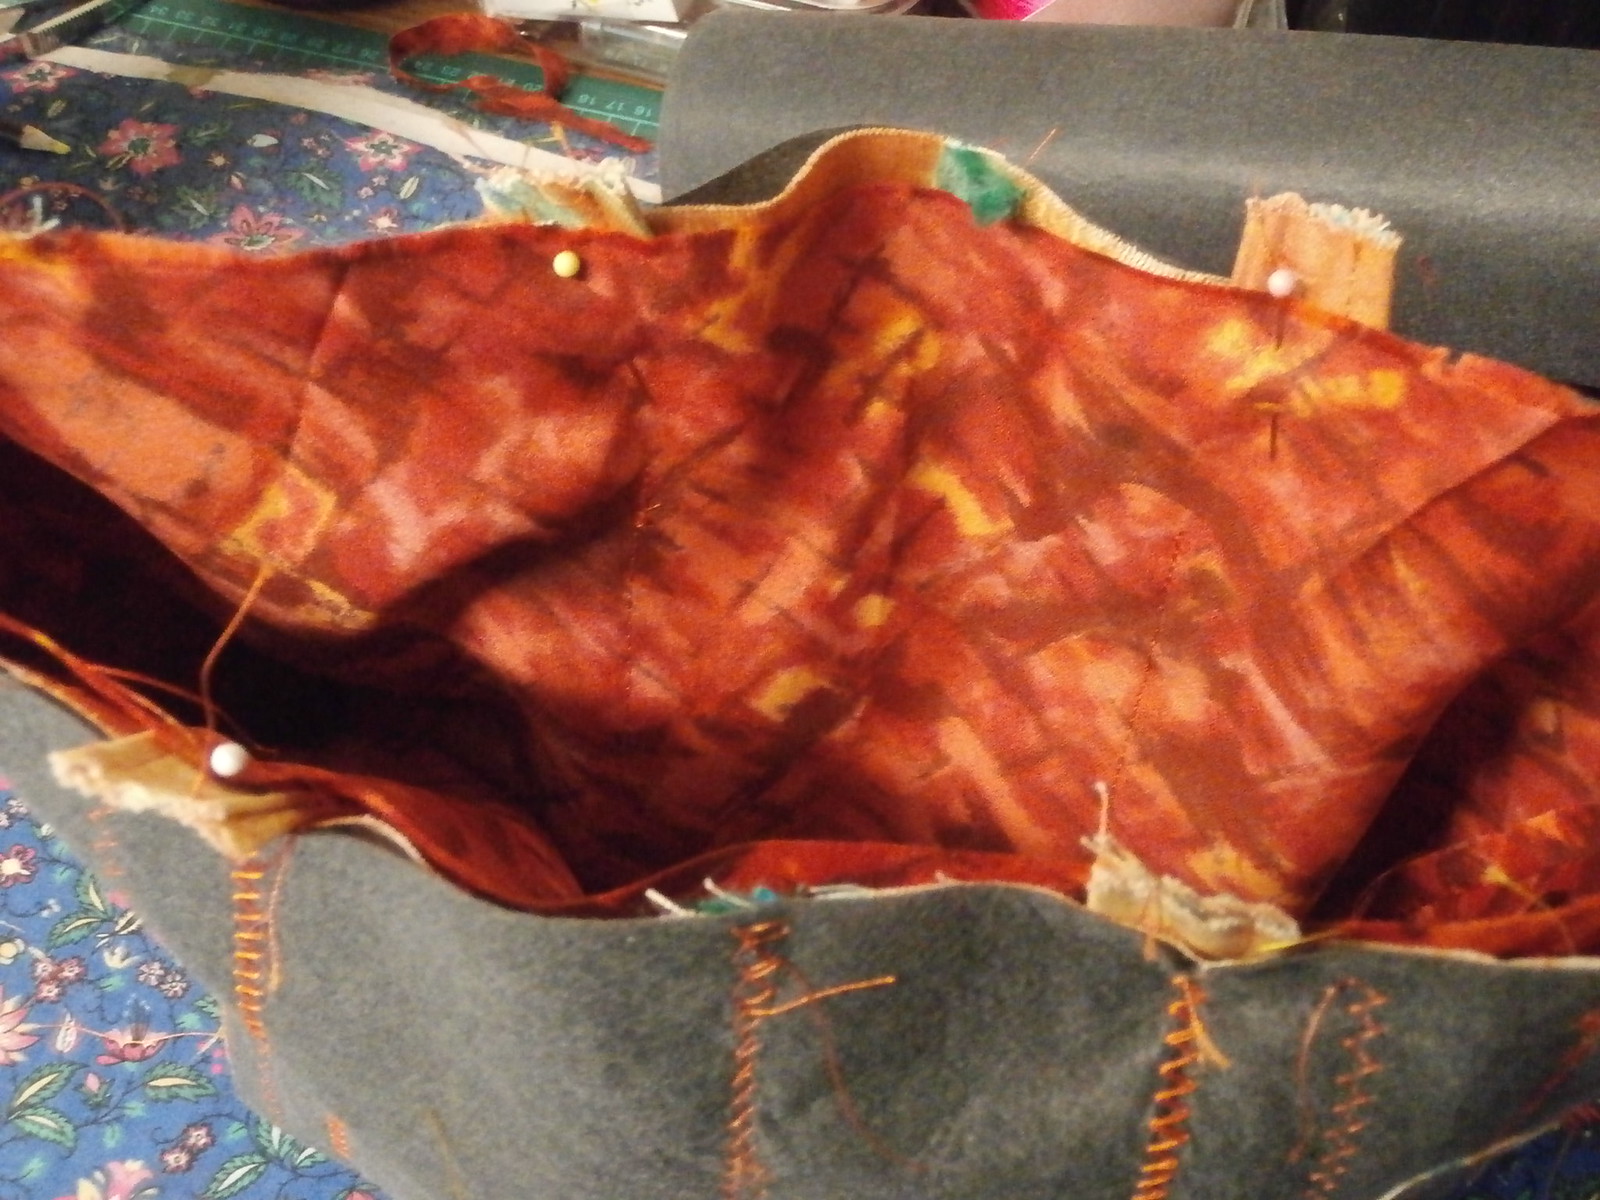
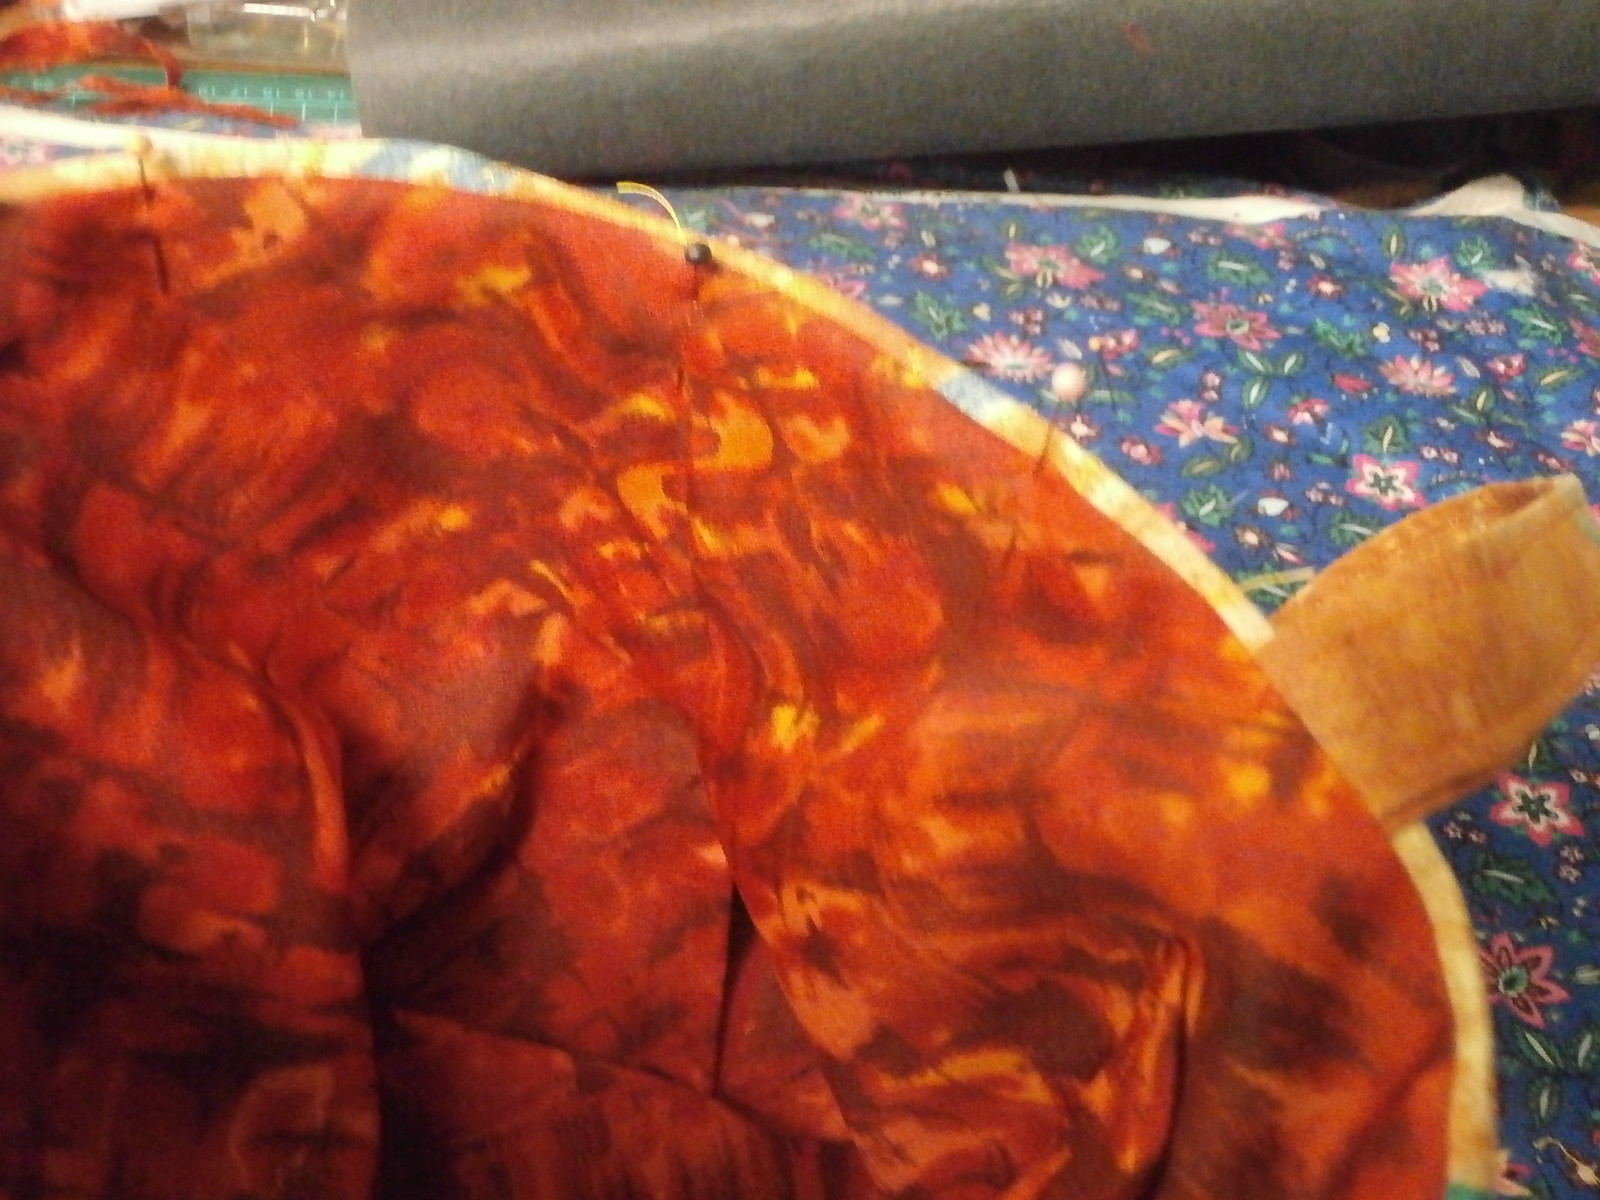
Fold the main outer bag piece in half along the width.  Sew a 1/2 inch seam along each side.
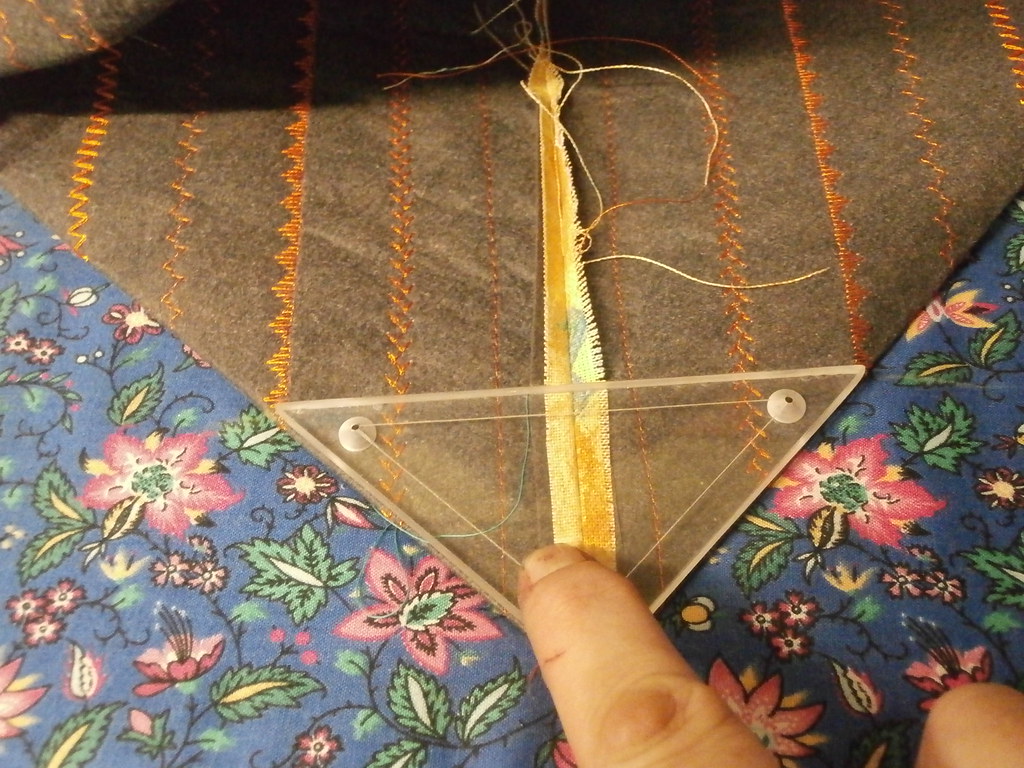
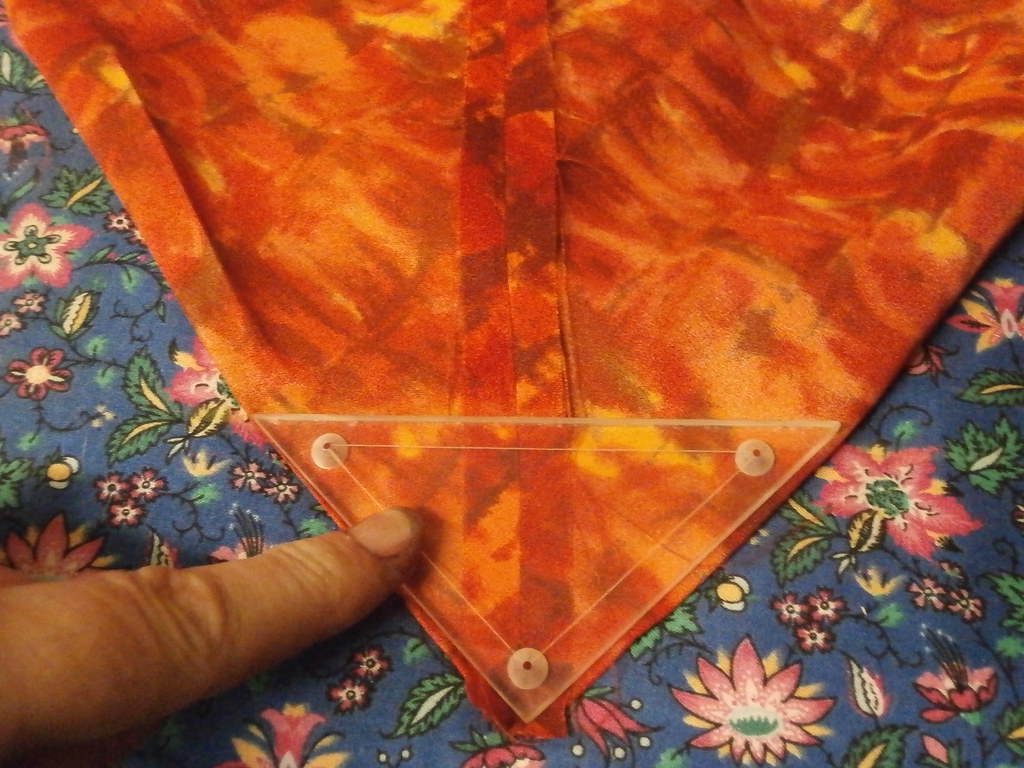
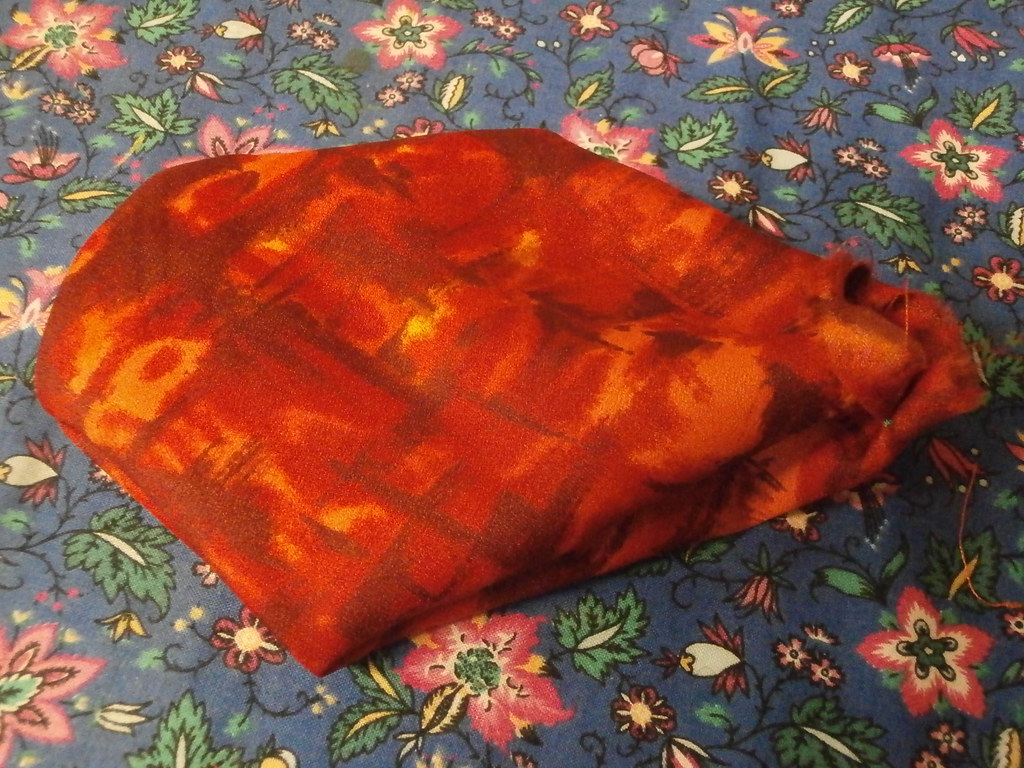
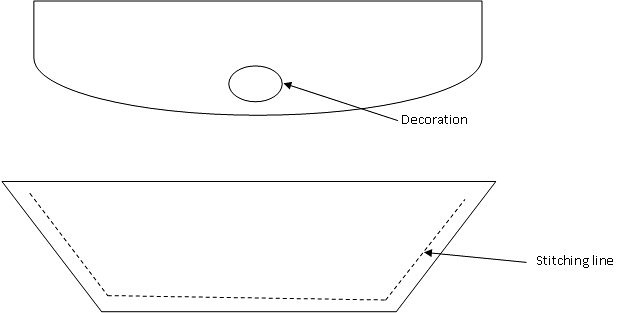
Turn the piece inside out and fold the bottom of the side seam back against the base of the bag See first photo, above.  You can see that the seam splits the triangle formed in half.  I use a triangle template to mark the stitching line.
Stitch along the line, reinforcing at the start and end for stability and repeat on the other side.
When the bag is turned right side out, it will stand up easily on it's new base.
You can trim the triangles, but leaving them in gives the base more heft.

Support the base of the bag (optional)

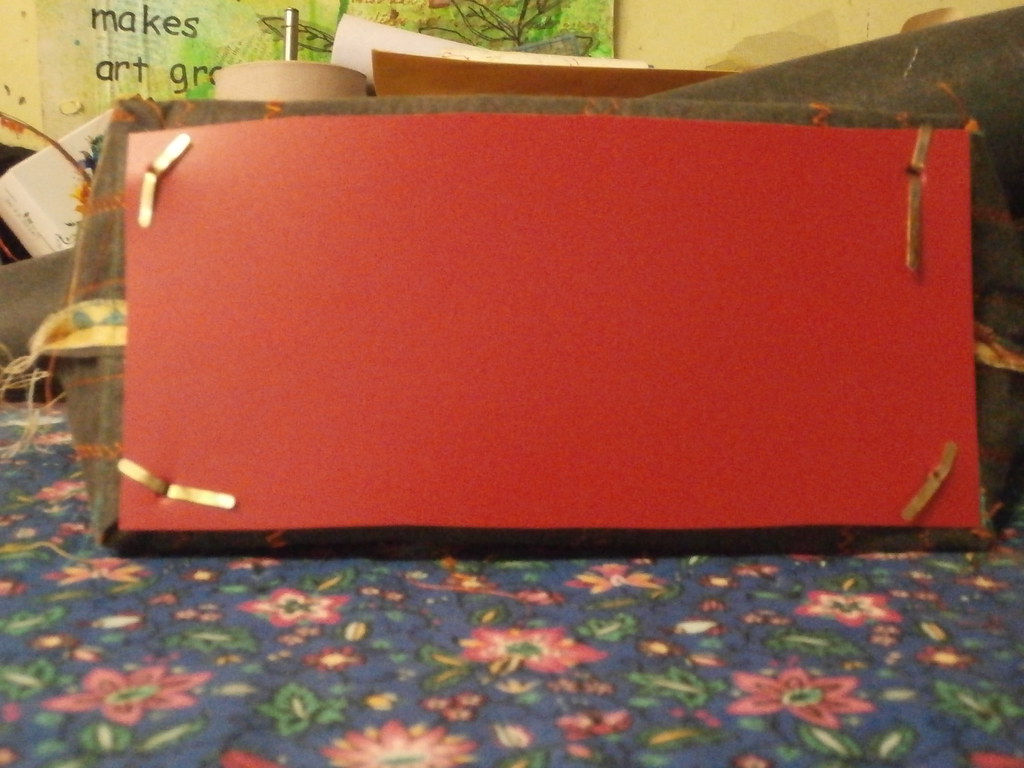
To add support to the base.  Cut a piece of thin plastic (I use plastic covers from plastic pocket books) the same size as the base of the bag.
The easiest way to attach the bag is with some glue on the folded in triangles inside the bag, but I like to use large brads to make little feet to protect the base fabric.  I make small holes in the plastic and the base fabric and push the brad legs through, opening the legs on the top of the plastic inside the bag.  You can add a little bit of tape over the legs, to stop them wearing on the lining if you want.
You can also sew buttons through the base and the plastic in the same way.

Construct the lining

This is exactly the same as the main bag construction (leaving an opening for later)
1  2
  1. Sew up the edges of the lining (right sides together)
  2. Leave an opening on one side for turning the bag out later
Construct duck bills for the base in the same way as for the outer bag.

Construct a pocket
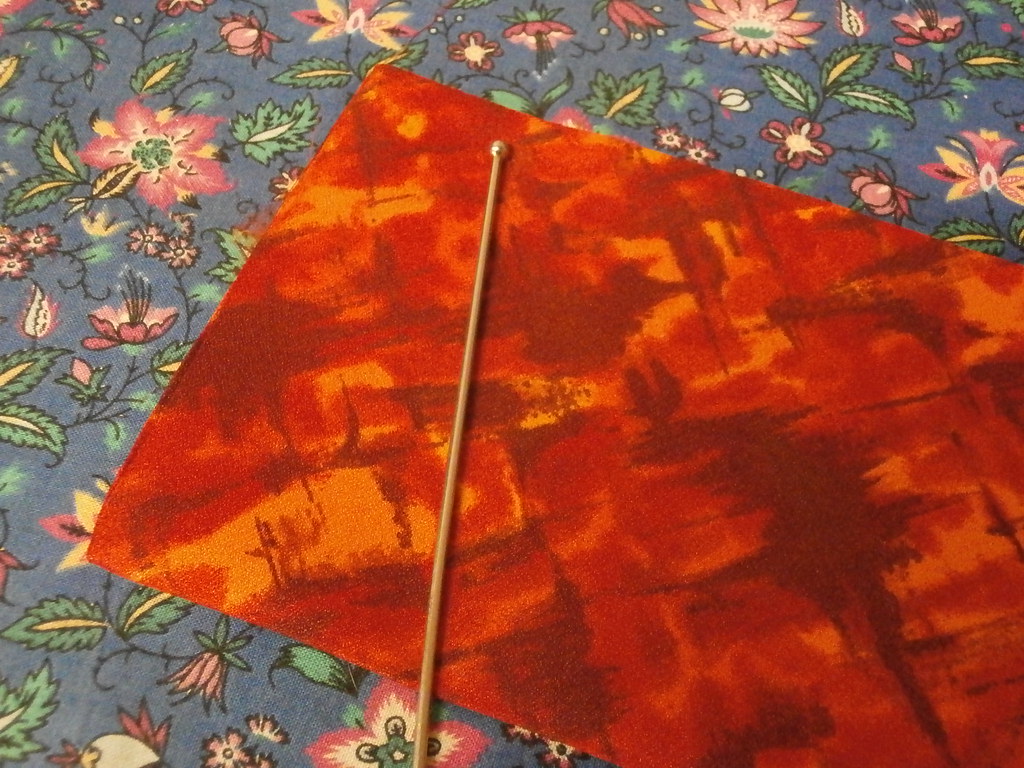
Decide on the size pocket you want.  Cut a piece of fabric twice as large or two pieces of the size, both need to have seam allowance added.
With the pocket pieces right sides facing, stitch together around the perimeter, leaving a 2-3 inch opening
Reinforce the beginning and end of the stitching around the opening by backstitching.
Turn the pocket out and use a turning tool if you wish, to push the seams and corners out.  Press and press the opening in at the same time.  You will catch it down when you stitch it in place.
Sew the pocket to the inside/right side of your lining piece.  Work out the placement using the lining and outer as a model.

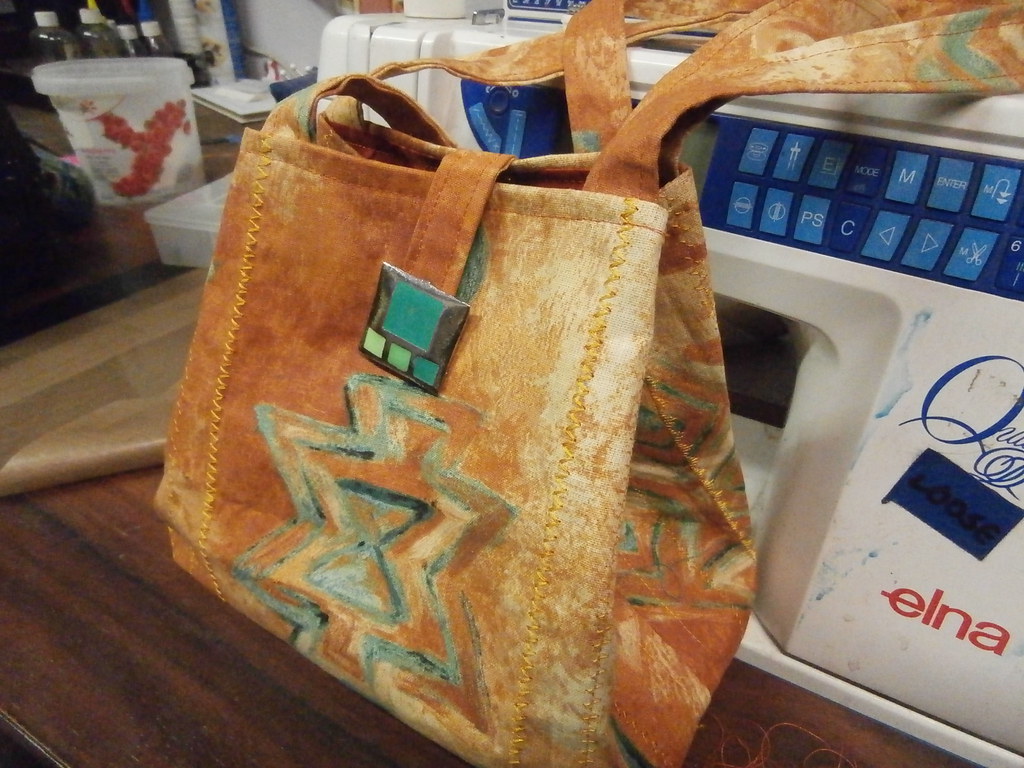
Constructing a tab or flap
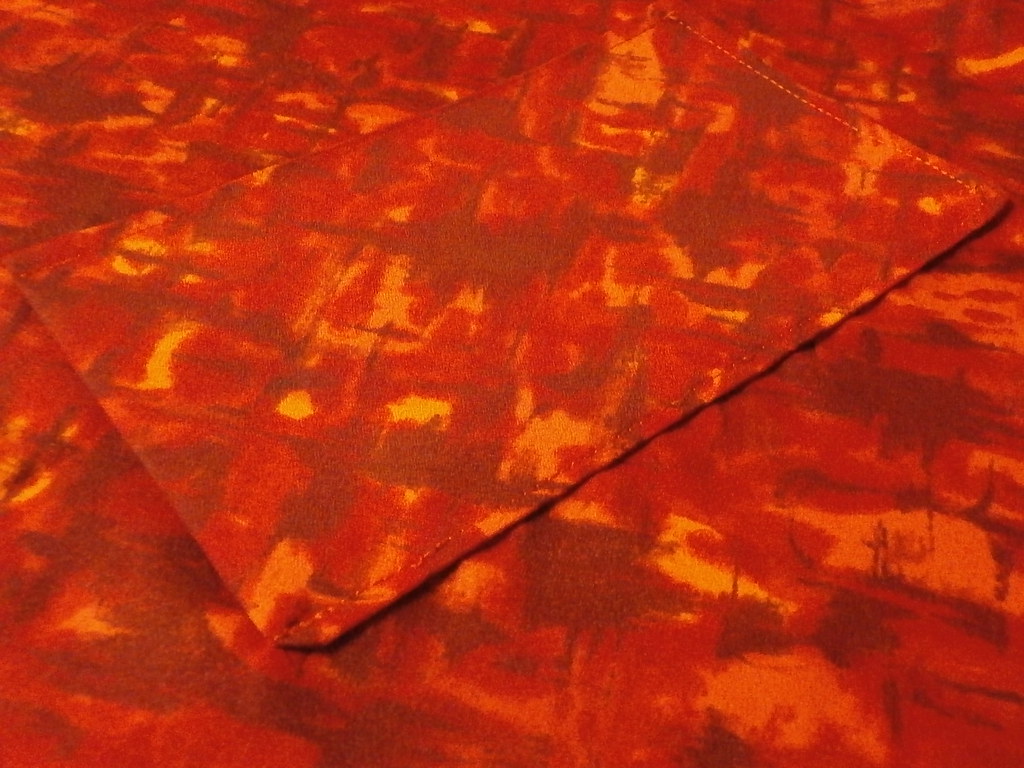
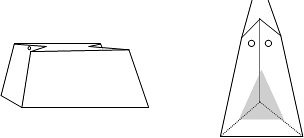
You may wish to add a tab or flap to the top of your bag.  Decide on a size or shape you like
Or, you could construct a flap, which folds over most of the top of the bag.
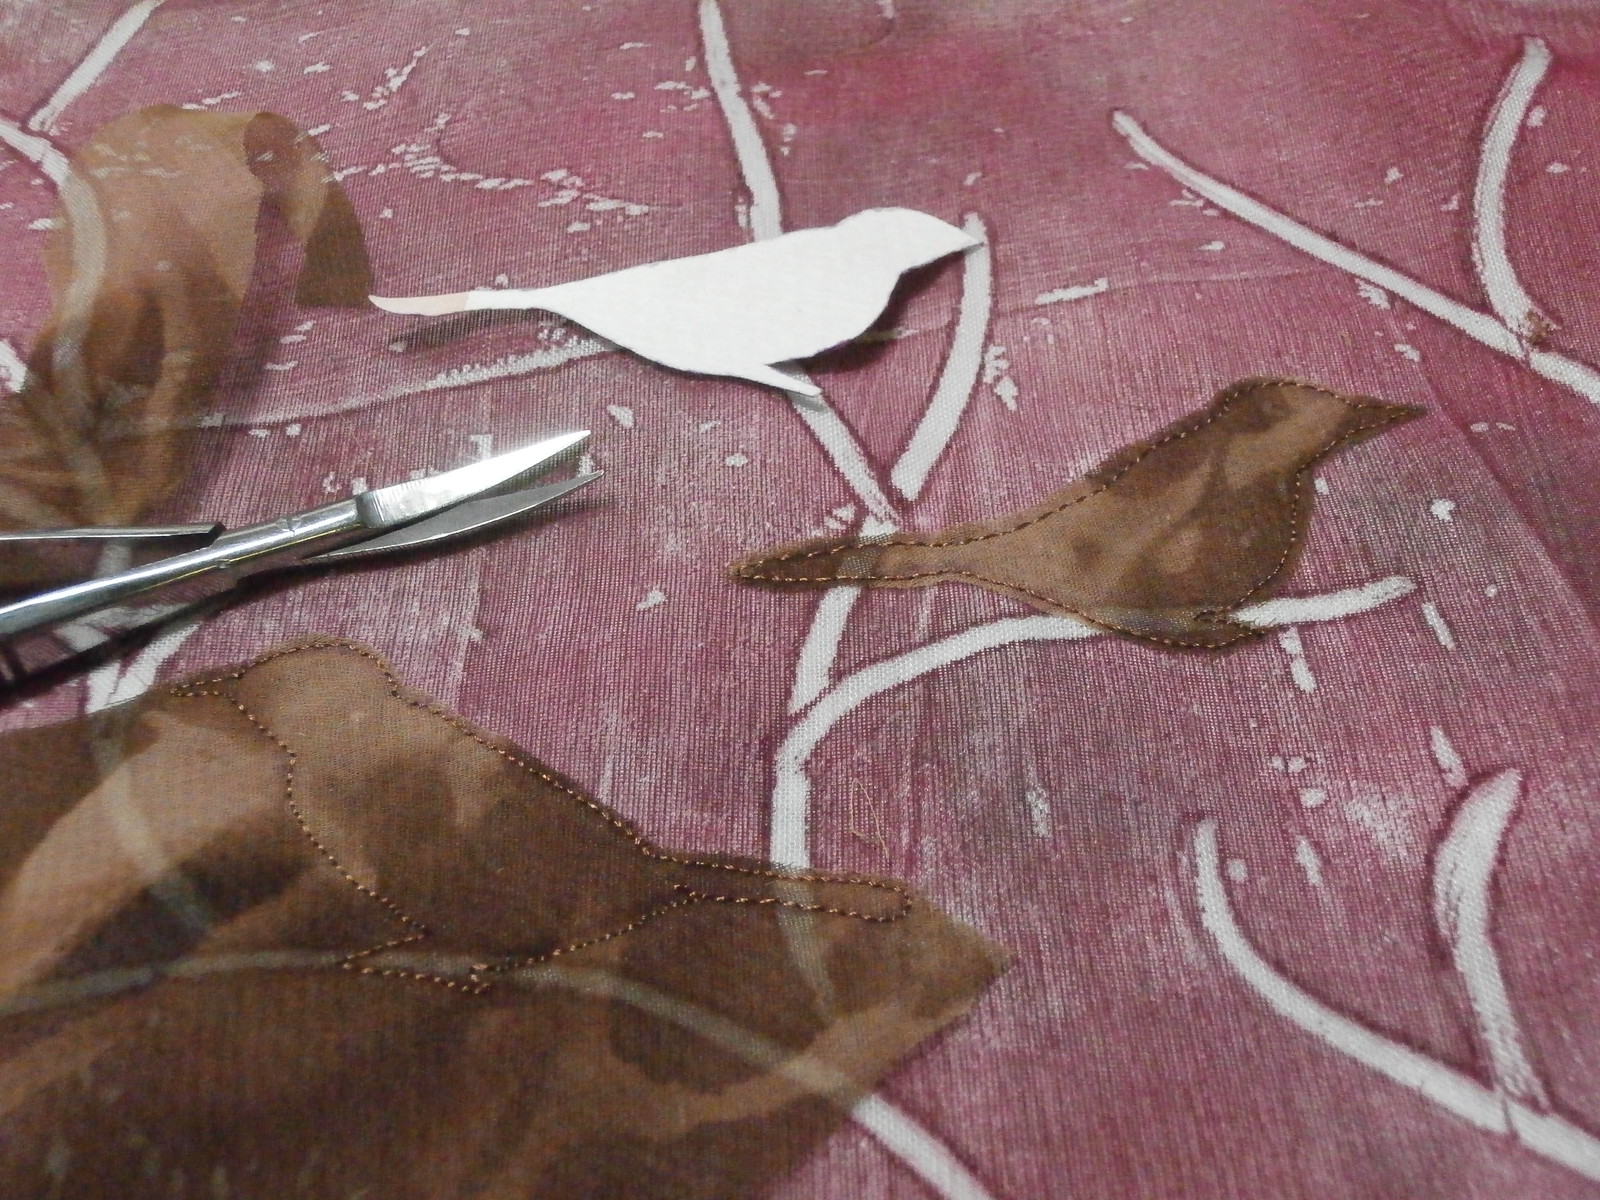
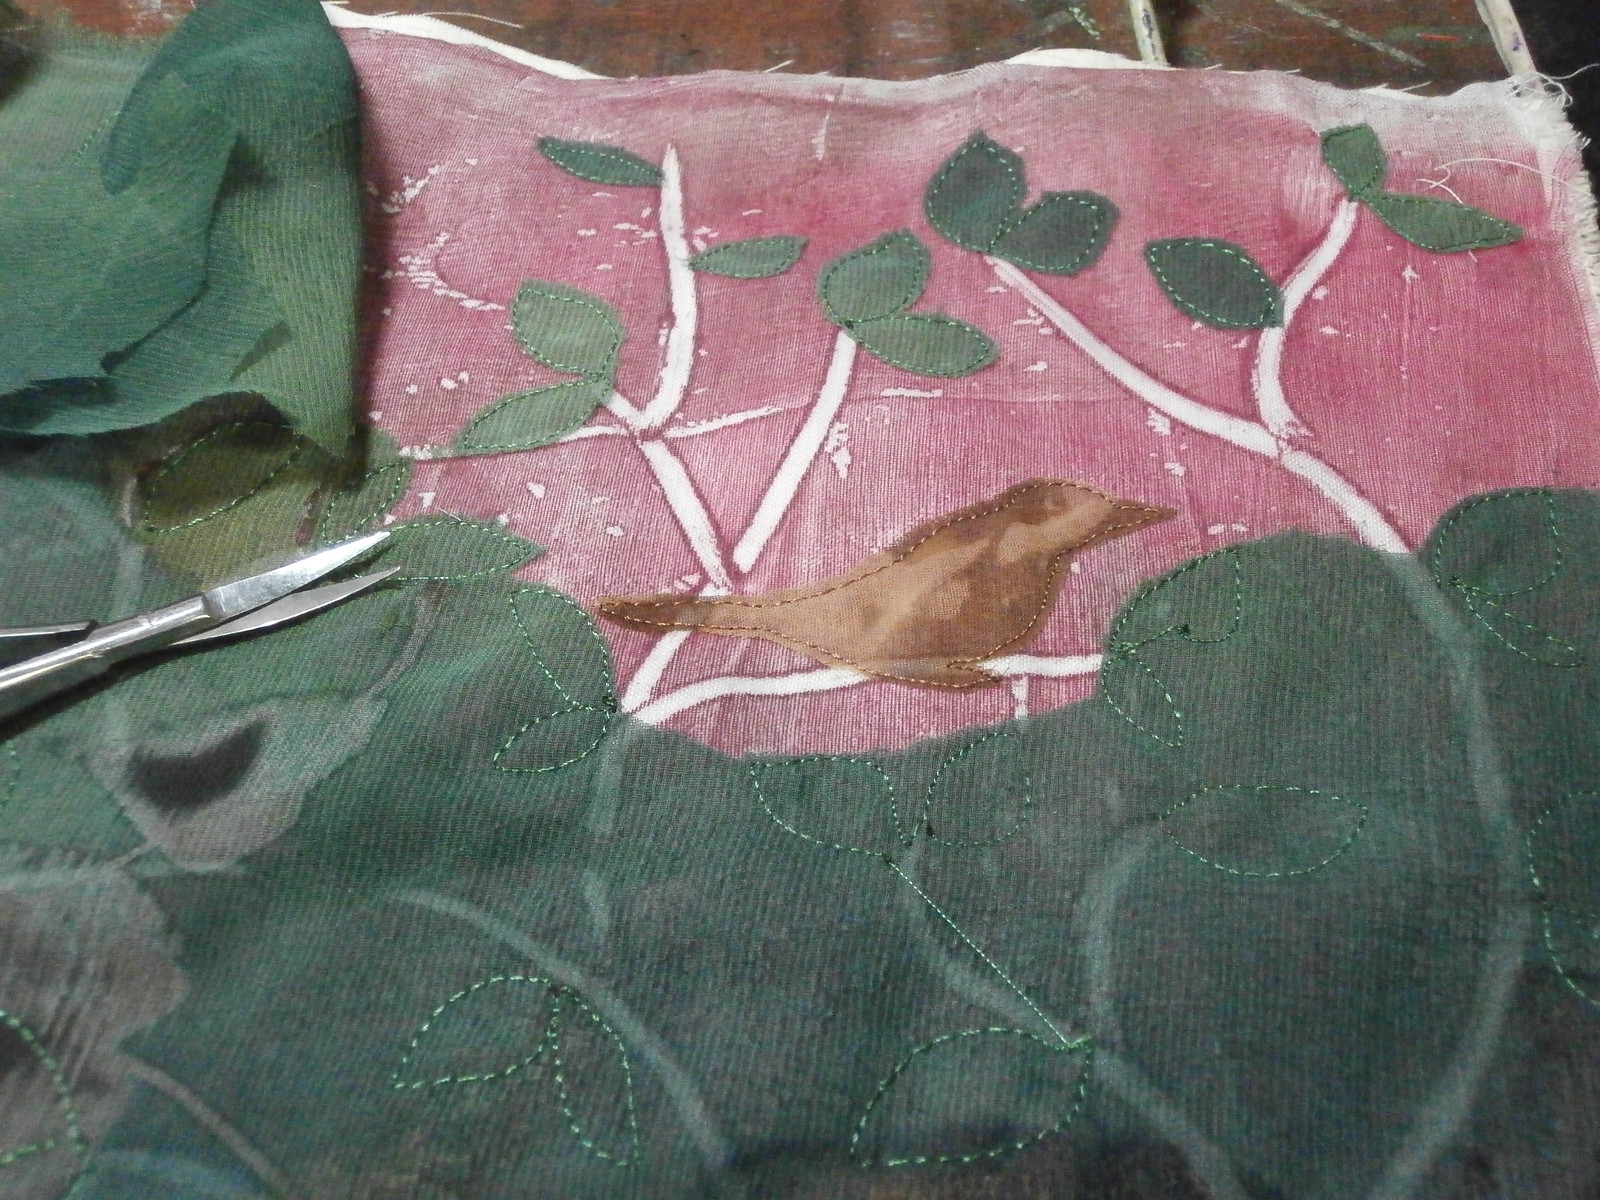
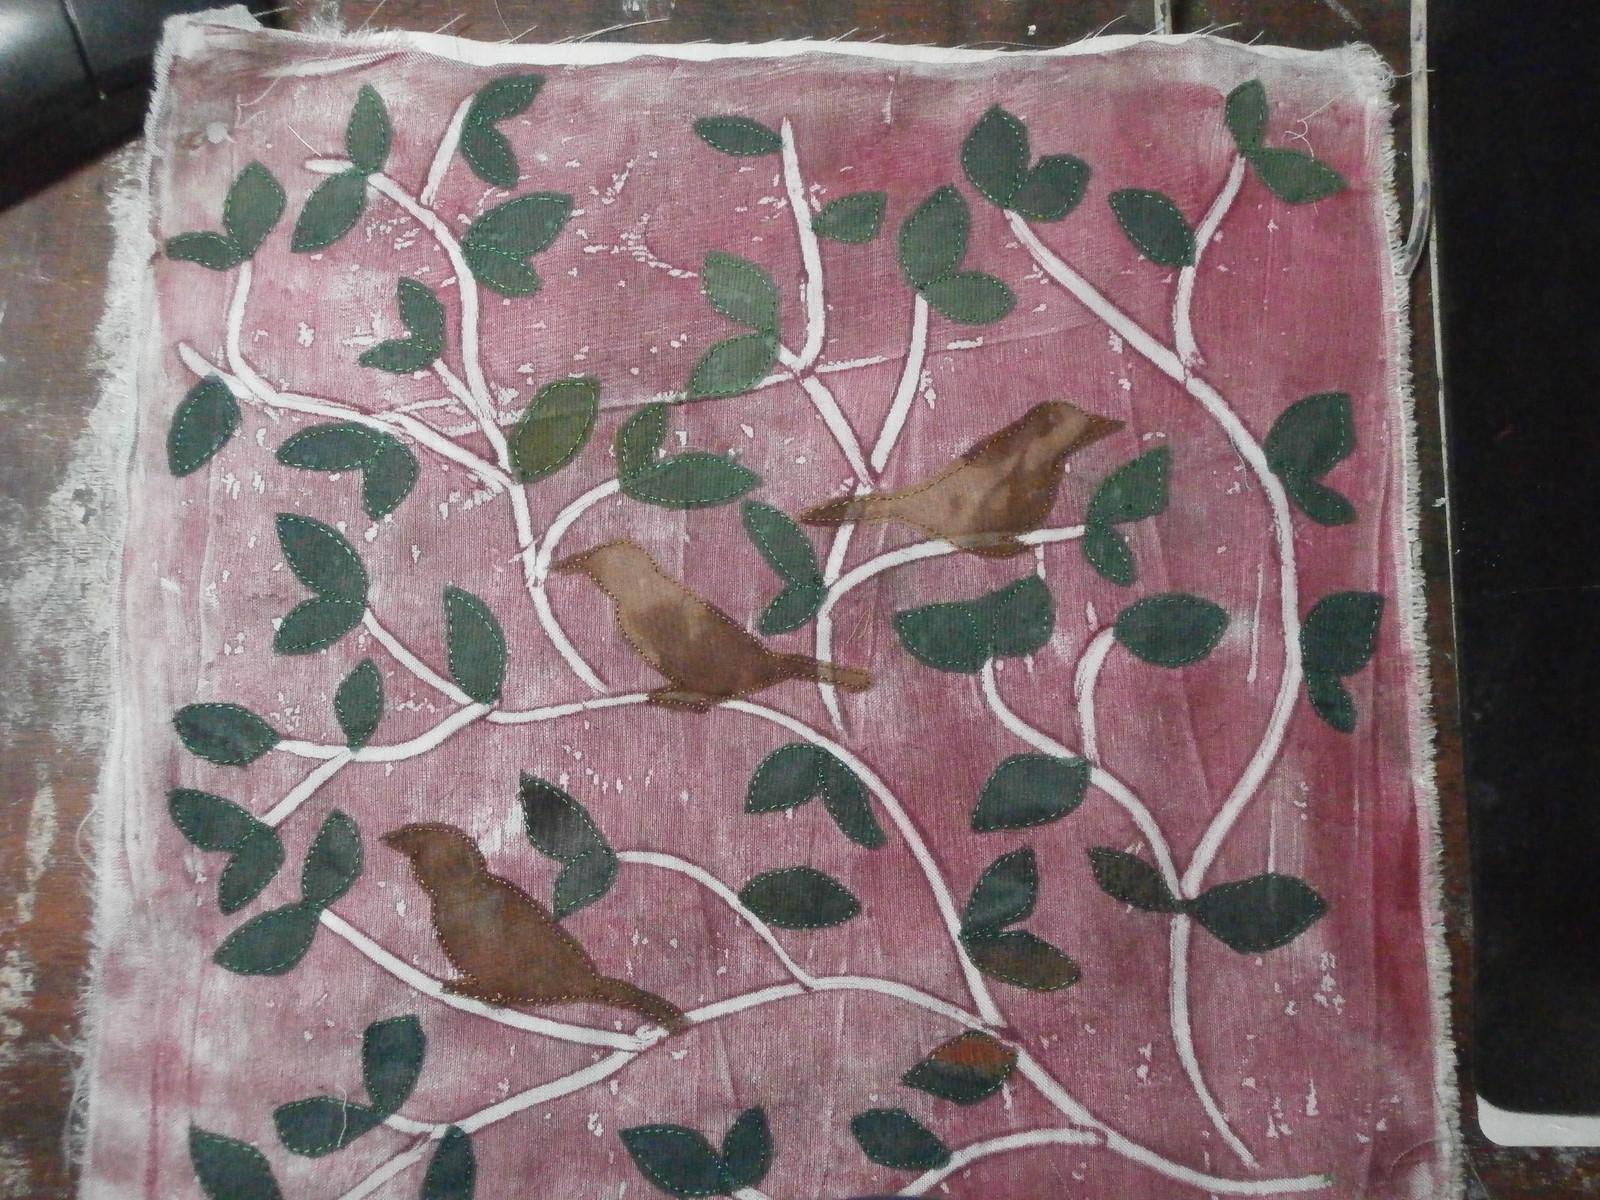
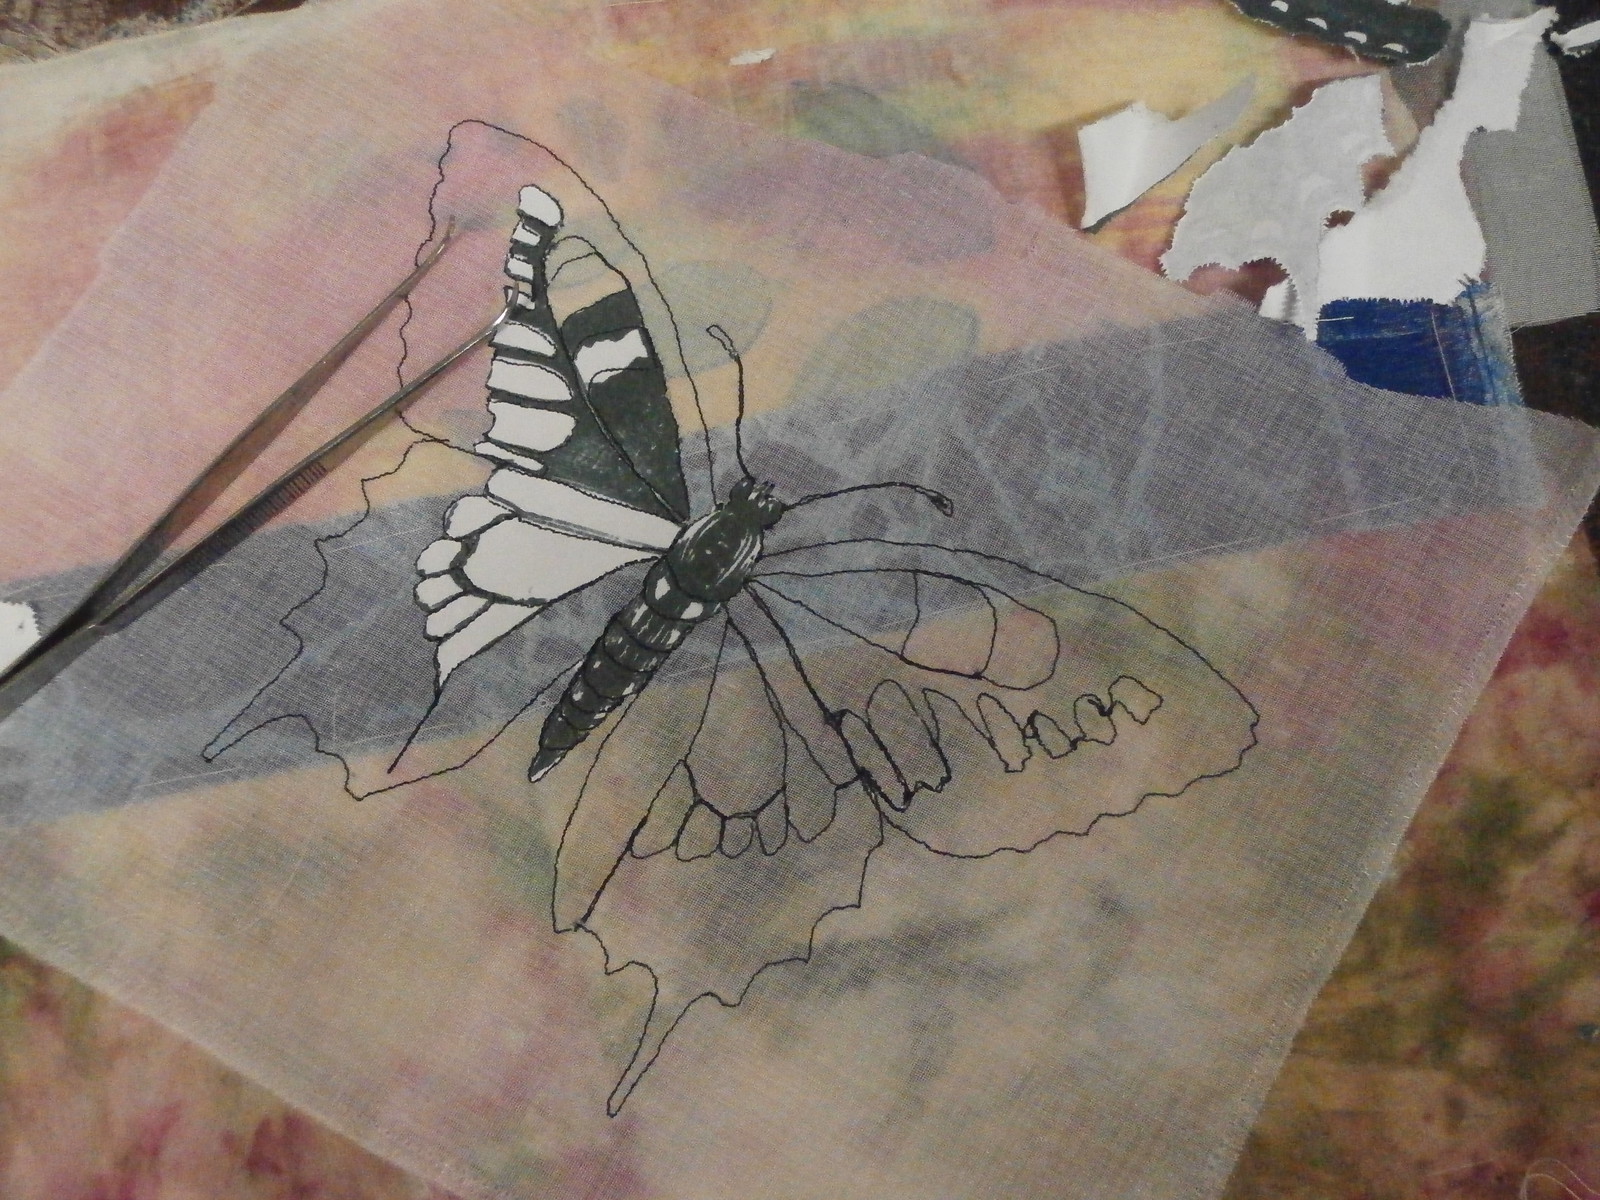
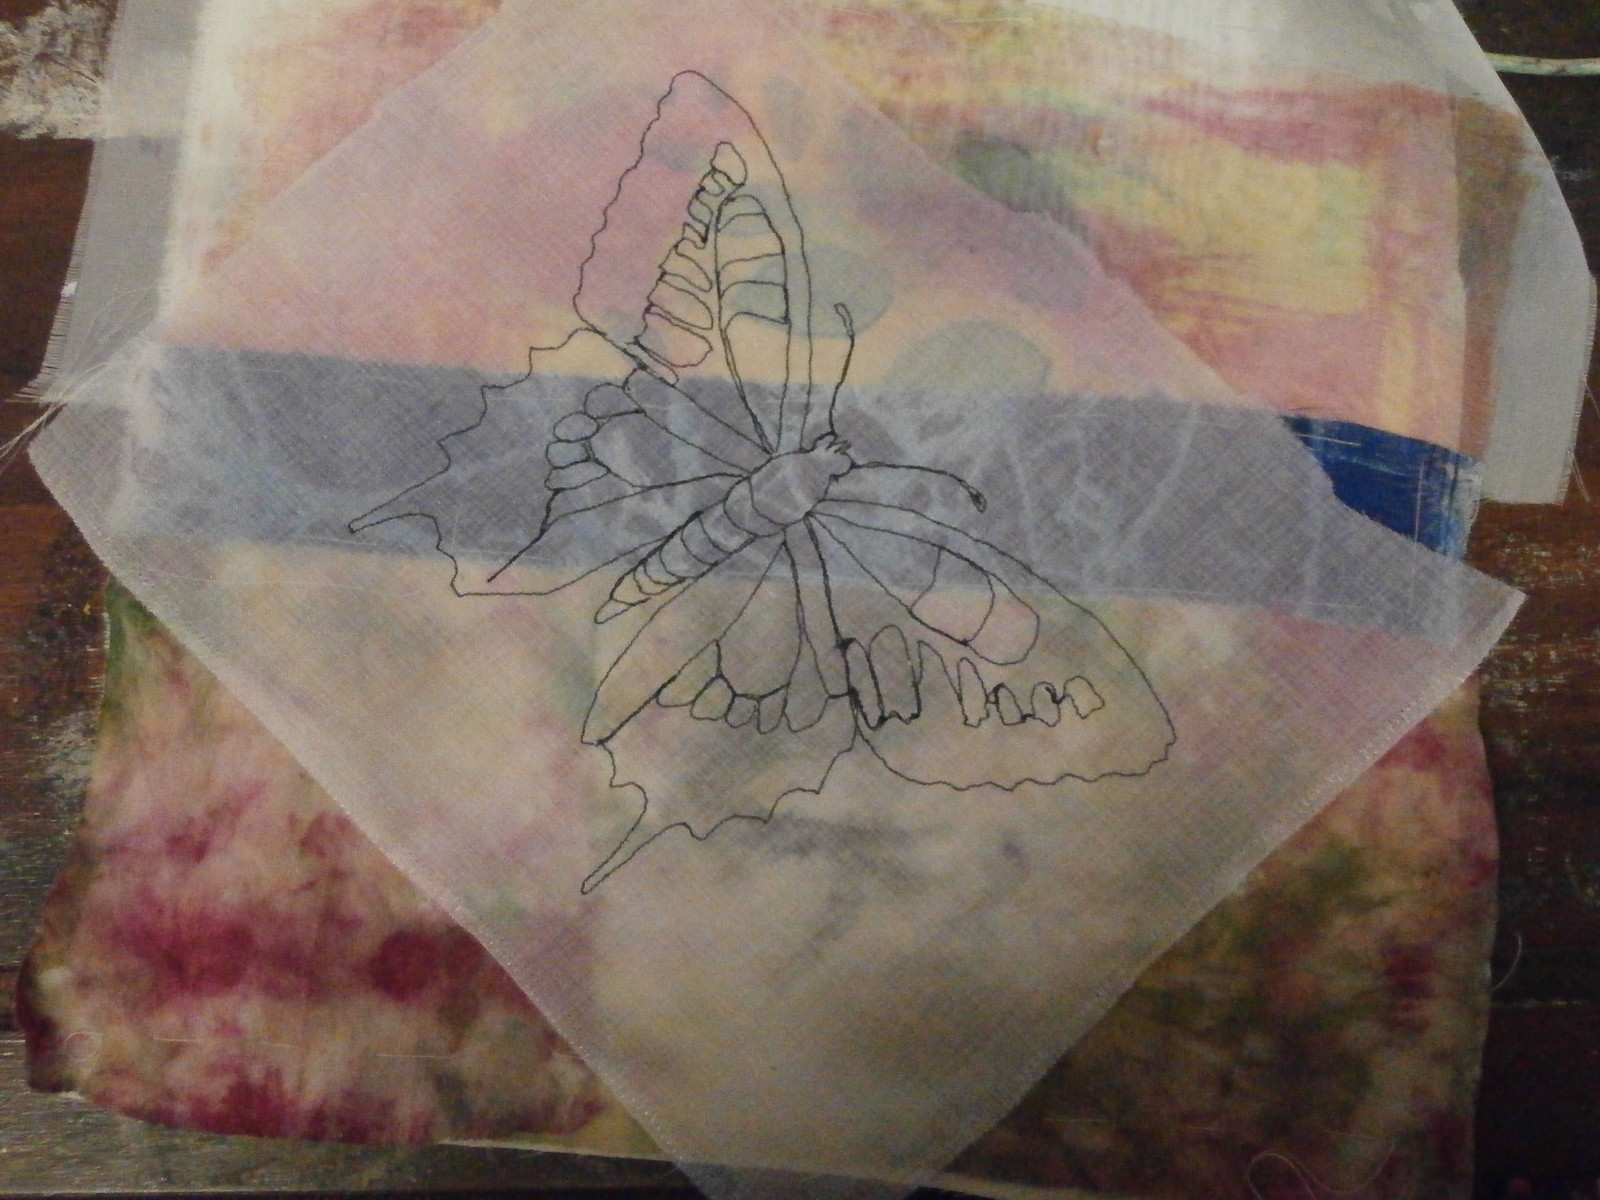
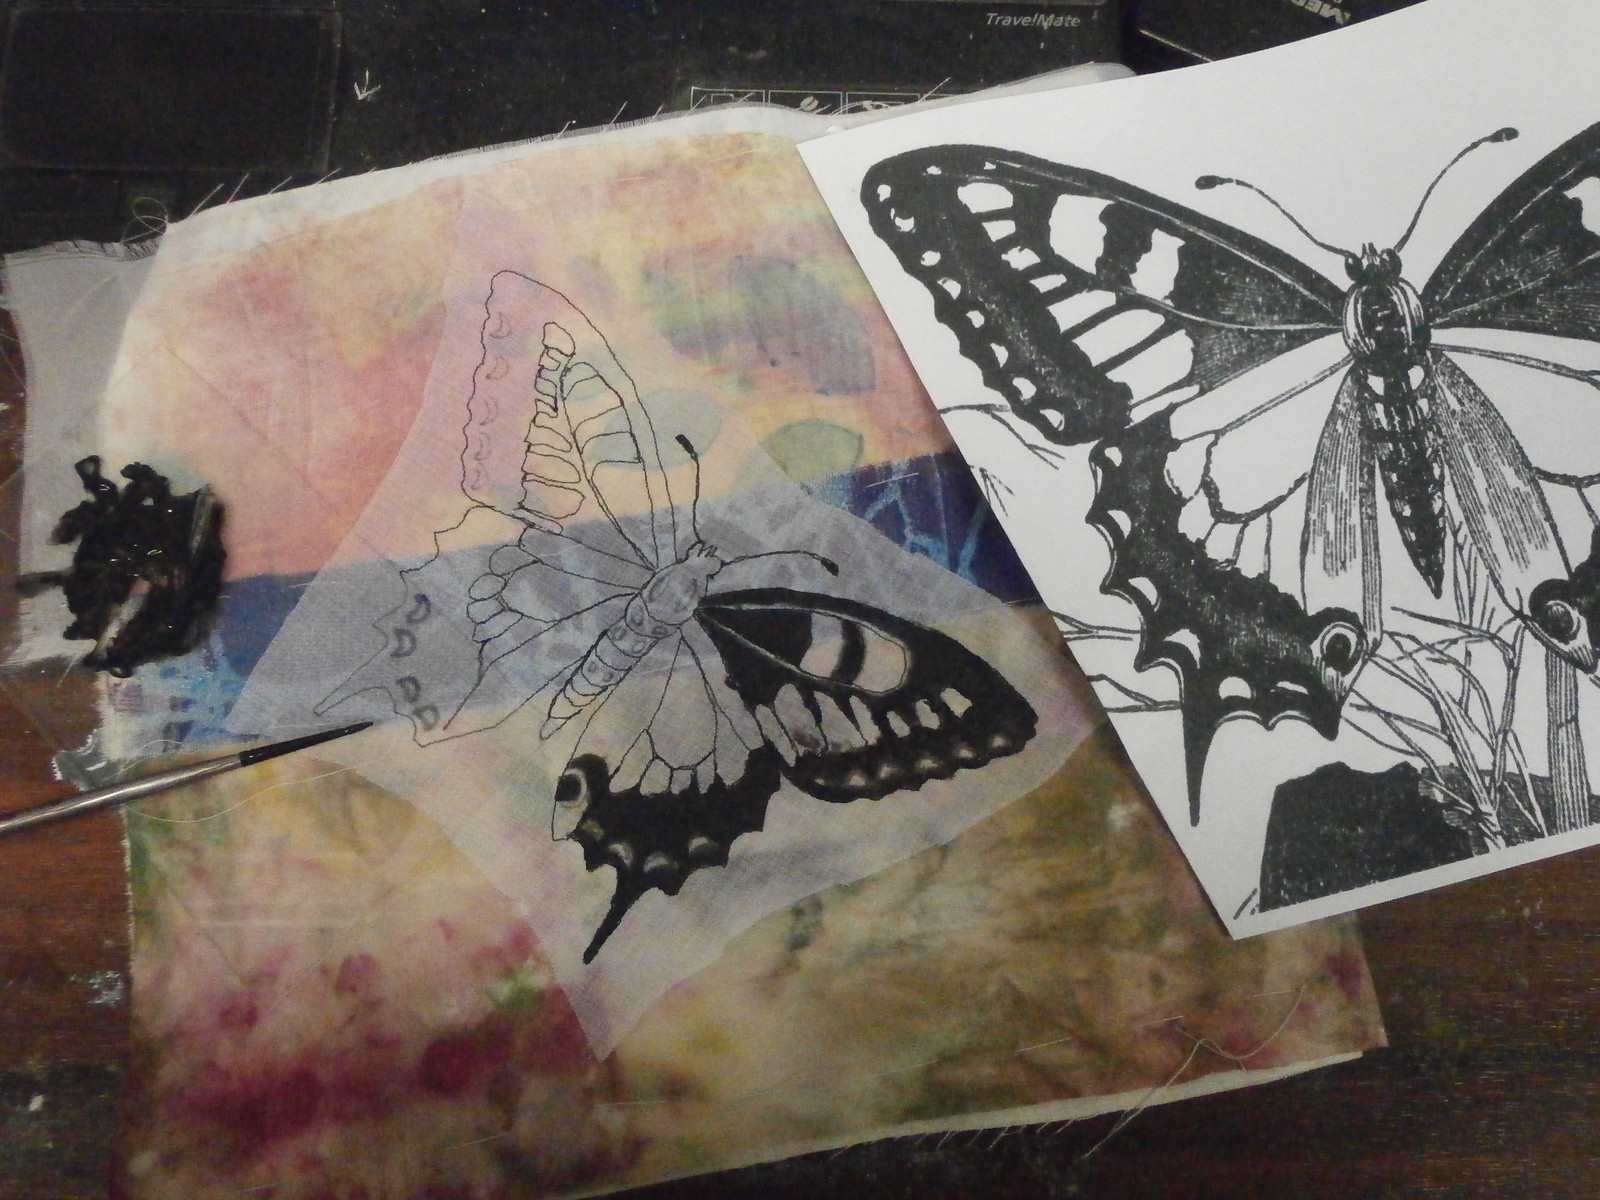
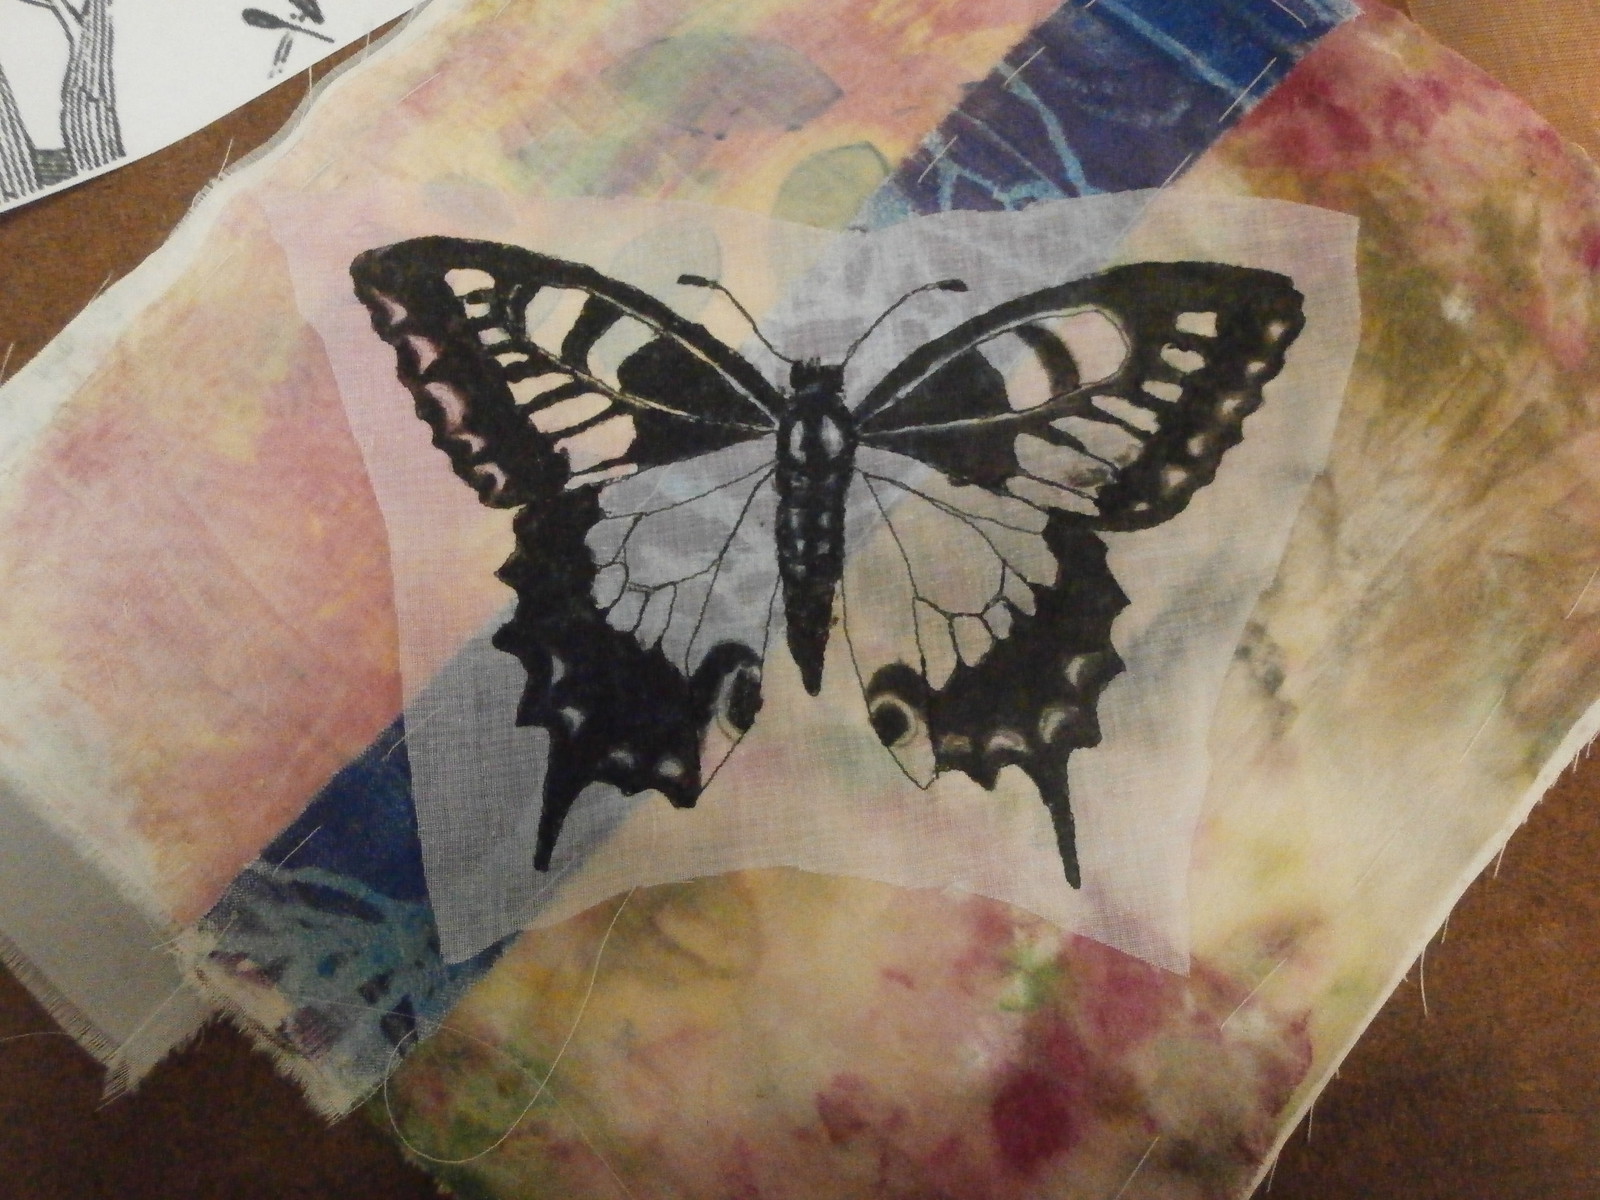
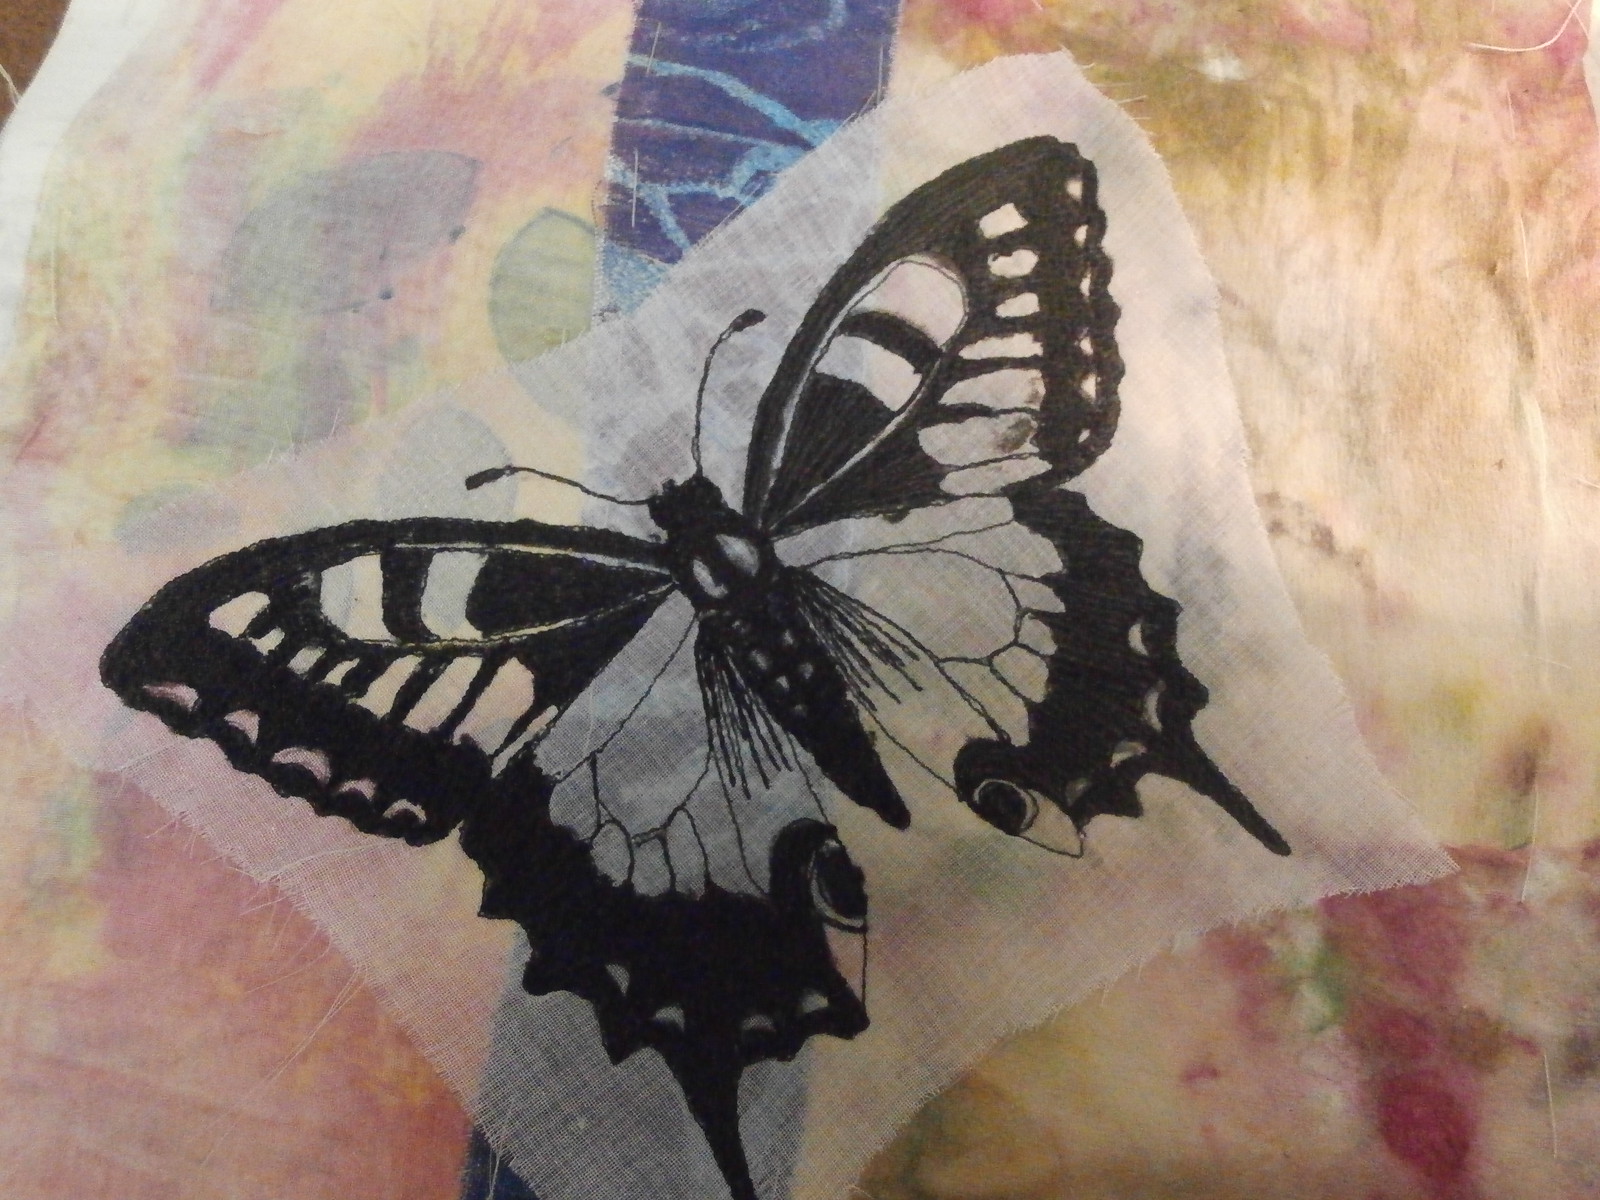
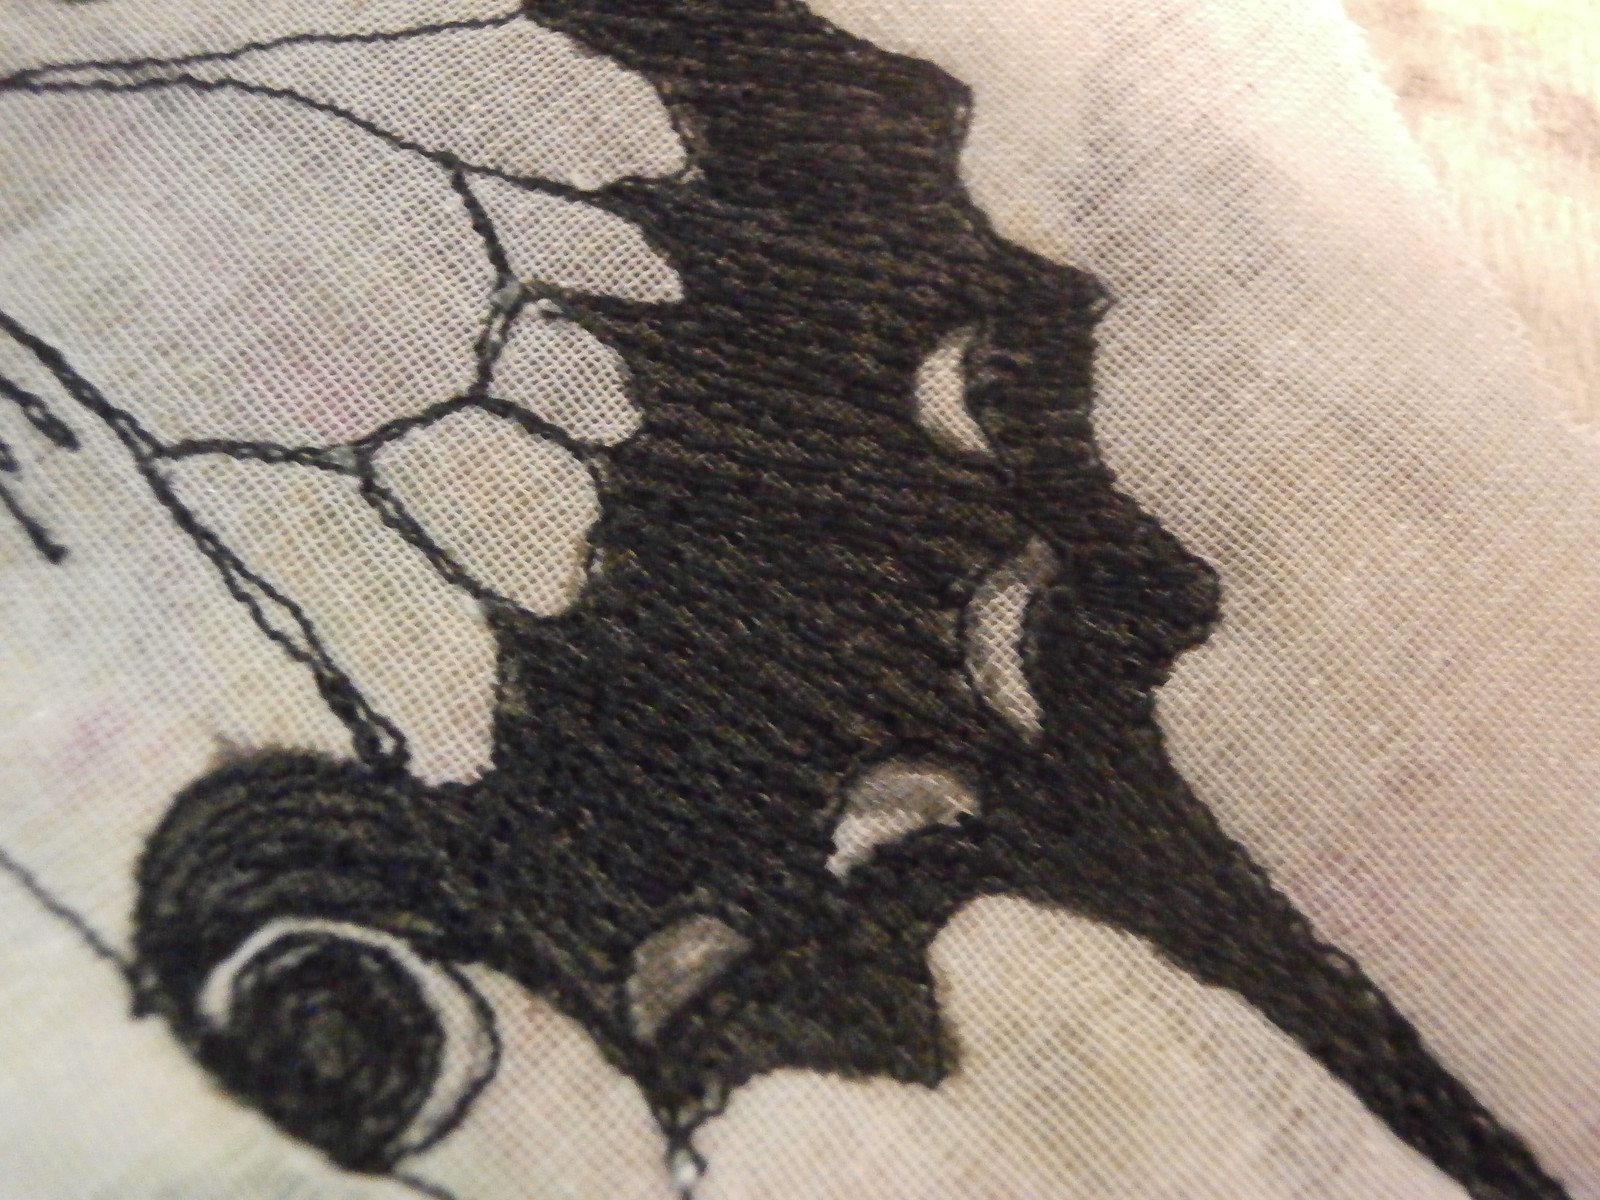
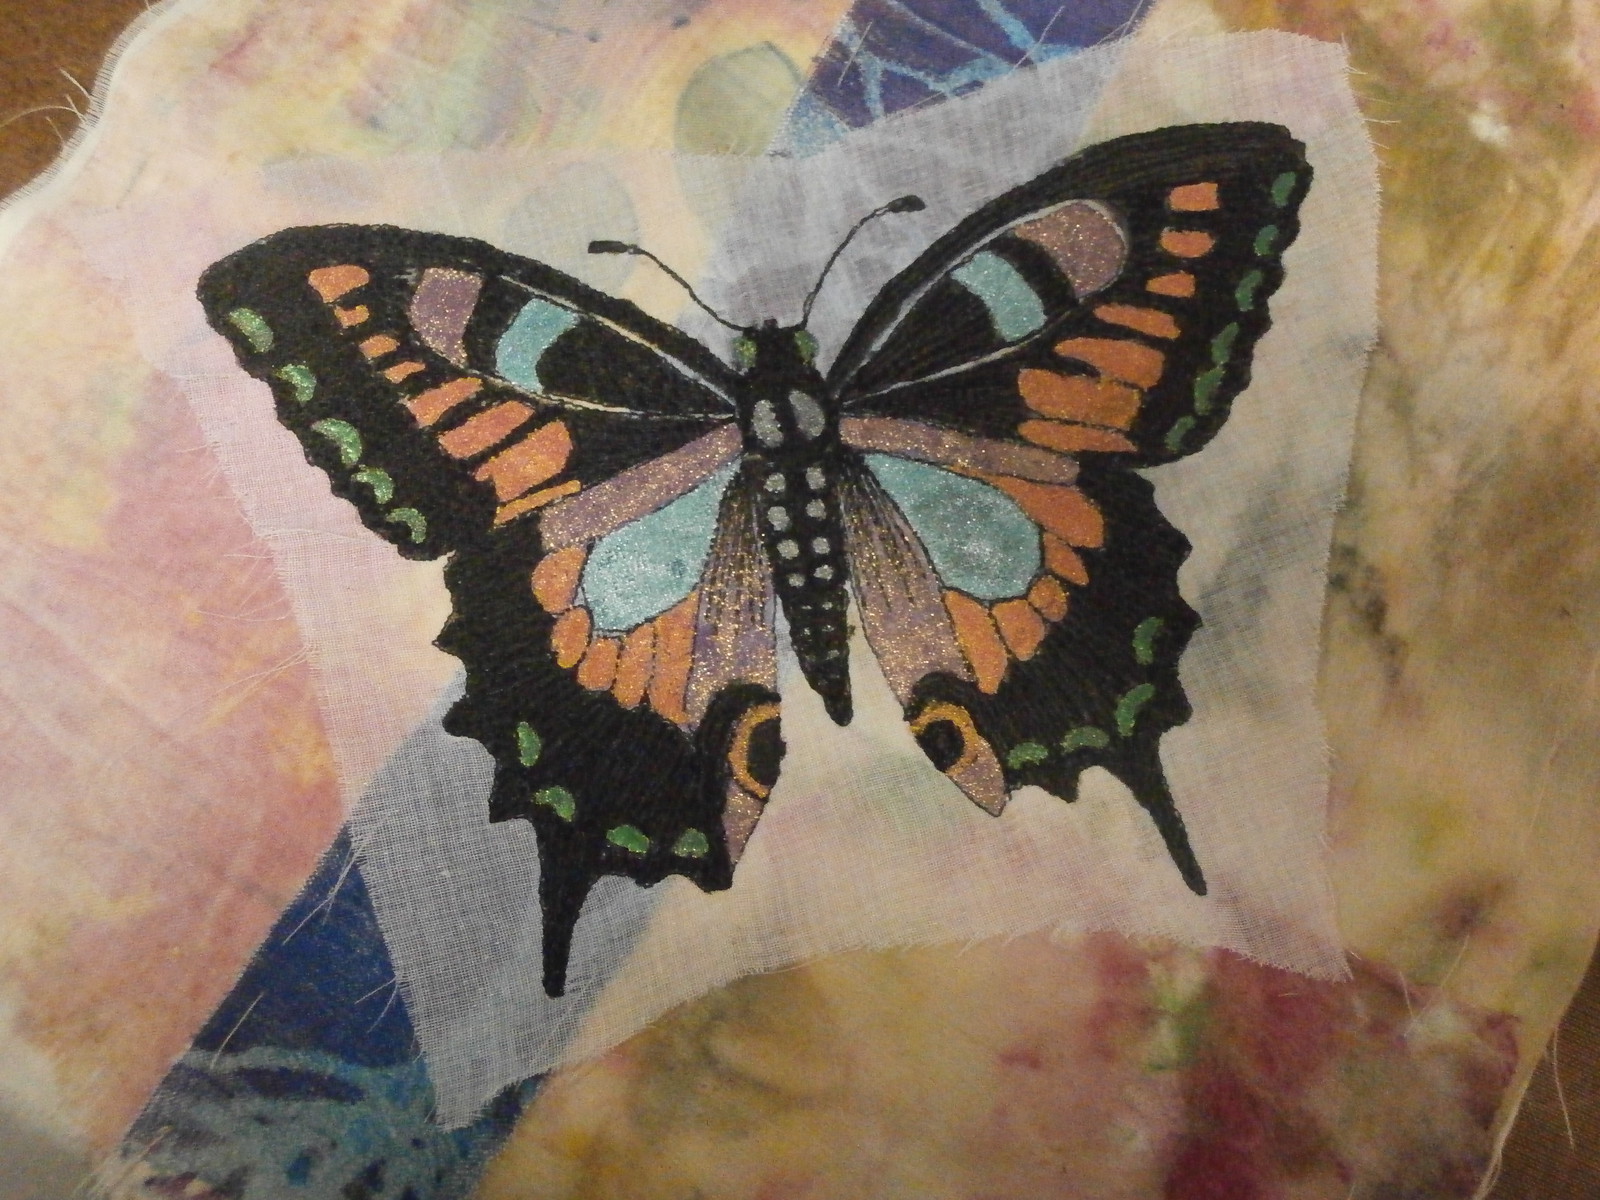
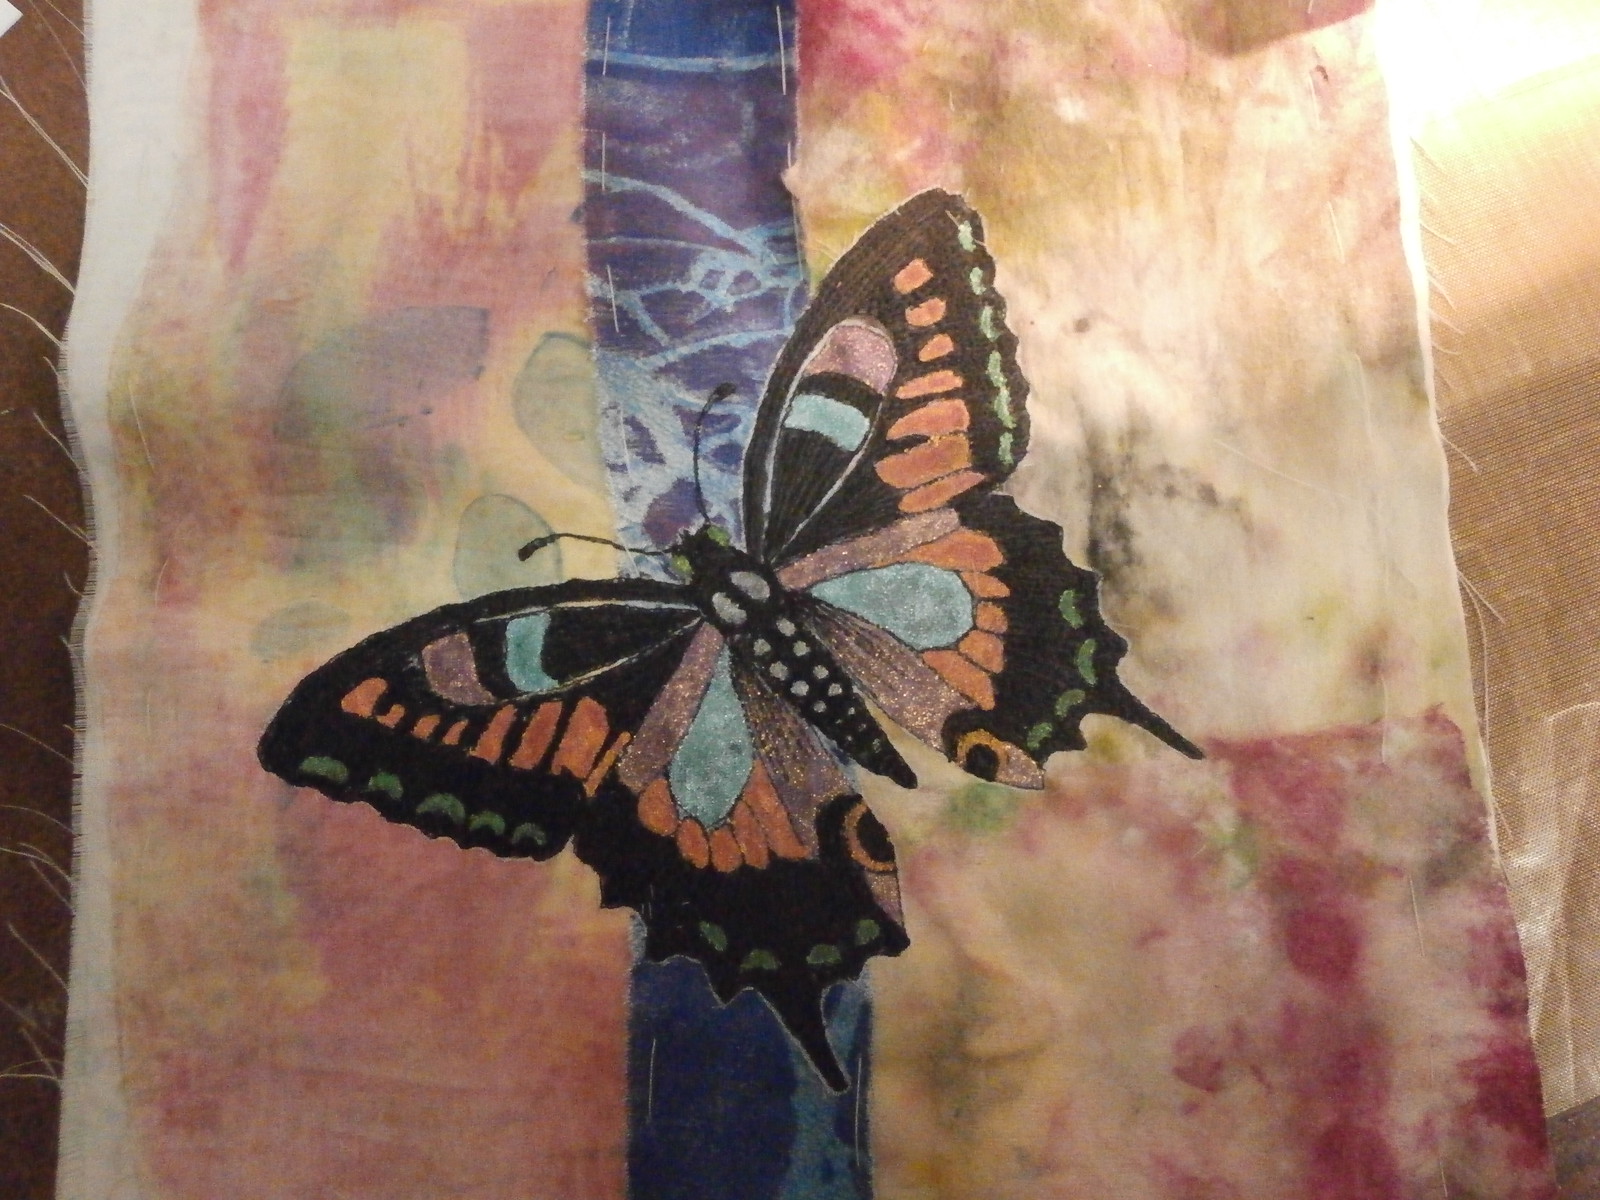
The tab or flap is constructed in the same way as the pocket, however, the top seam is not stitched (see above) and this is where you turn it out.  If you are stitching a decorative element onto the tab or flap, stitching it on before doing the seams and turning will hide the back of your stitching.

Putting the bag together

At this stage, you will need
  • The outer bag, inside out
  • the lining, right side out
  • the tab or flap
  • handles
First, pin the handles to the inside of the main bag, with the loops inside.  Do the same with the  tab or flap.
Then place the lining inside and line it up with the raw edge of the main bag.
Pin, replacing the tab and handle pins as you go.
Stitch the top seam, reinforcing the handles and tab by backstitching.
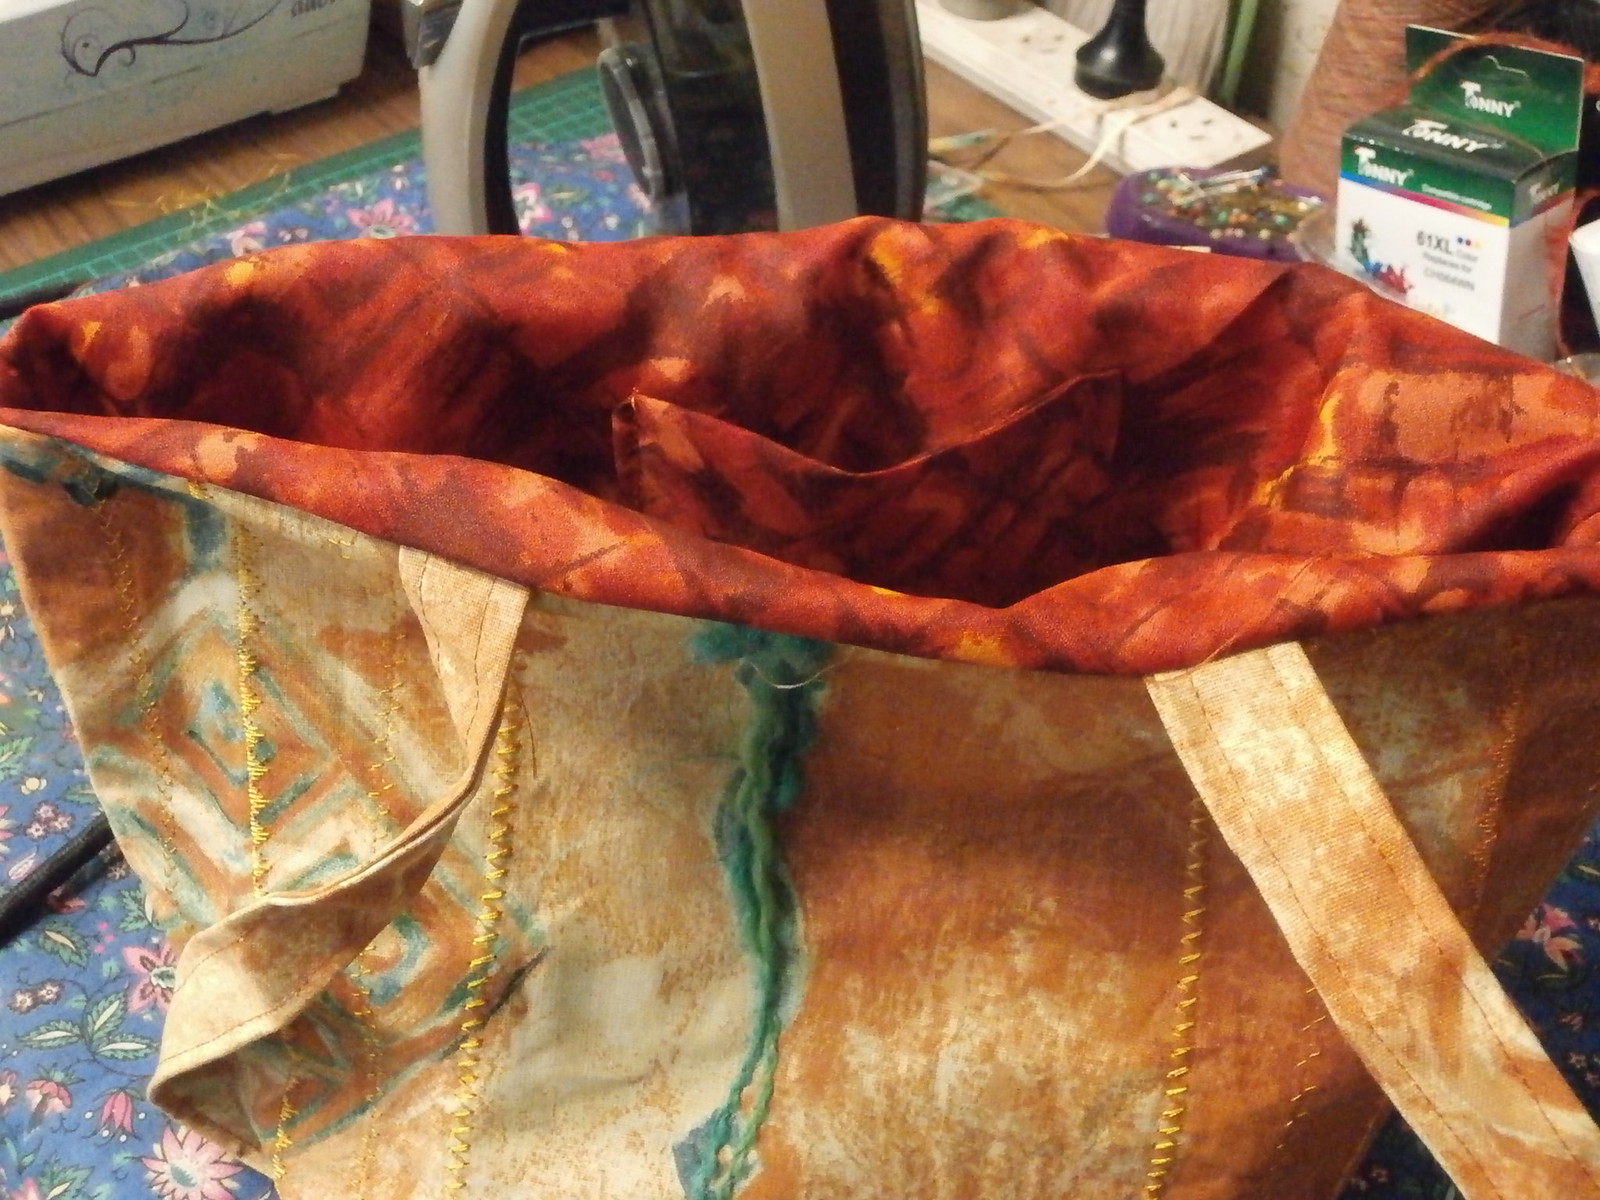
You can now pull the lining out of the bag and turn the whole thing inside out using the opening in the lining you left earlier.

Once you have turned the bag right side out, push the lining back into the bag
Press the top seam and topstitch.
Add press studs to the tab or flap and the front of the bag

To make the bag cinched at the top

Work out how much you want the bag to cinch, by folding the top seam at the sides until you like how it looks. Mark where you need to add the press studs to hold it in place.
The press studs will go on the sides of the bag at the top.


Enjoy your bag!

This has been an overly long post!  I will try and remember to take pictures of student work tomorrow to share with you.

Happy Creating!